How to Git – A WordPress Local Development Guide for Beginners
With remote work gaining popularity, Git has become the only solution because it allows a number of developers to work on the same page without hampering or losing anyone’s version. That’s why development with Git is fast-paced and independent. Developers can add one little block of code at a time and it helps a team to track how their project has progressed over time. Another advantage of Git is that using the proper command you can get back to the previous version so you don’t have to worry about a wrong push.
Git works with command lines which you have to write and execute in the terminal. Thus, Command lines are specific text lines that are typed and executed in terminal or command prompt without using a mouse. To be able to handle and also understand Git, may seem tough for the beginners. So, this Git tutorial is for those who are new and want to start working with Git local development.
How to Git – Getting Started
Let’s look at how to install and configure Git. This tutorial is prepared for Windows users only. But the Git commands used are same. You can also use it in your MacOS terminal after installation.
At first, you need to install Git on your computer. Download and install it.
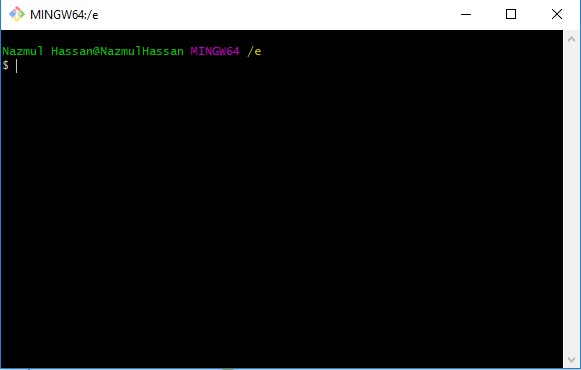
After installing Git properly, you need to configure it. In order to configure it, you need to run the terminal in the same directory where you have installed Git. While installing, you will have the choice to choose between Git Bash and Git GUI. Go to the directory of Git and right click to choose Git Bash or Git GUI. You will have an open terminal. like this: http://prntscr.com/gozv6k
Configuration and Authentication
Now you have to configure it, so start writing the following commands:
git config --global user.name "YOUR_USERNAME"
Replace “YOUR USERNAME” with the username of your choice and verify it. Use the below command for this purpose:
git config --global user.name
Next, add your email, in the same way, using the following command:
git config --global user.email "your_email_address@example.com"
Just like username, replace the “your_email_address@example.com” with your email id.
This information is necessary to ensure the safety of your repository and to verify your actions. Next, you need to verify your email id. Run the command below in your terminal.
git config --global user.email
All done. Let’s start working with Git!
Using Git for Local Development
Let’s assume that you have a repository in your GitHub account. You may want to work on a project with your friends, that is already on GitHub. To start working with GitHub, you need to create an account in GitHub and can create a new repository. Then you can start working with your chosen repository. There are some common terms associated with Git. Getting a clear idea about those terms is the most basic requirement of using Git properly.
Fork & Clone
Say you want to fork a popular WordPress Frontend Posting plugin, WP User Frontend. First go to this link: https://github.com/weDevsOfficial/wp-user-frontend and hit fork on the right side of the page.
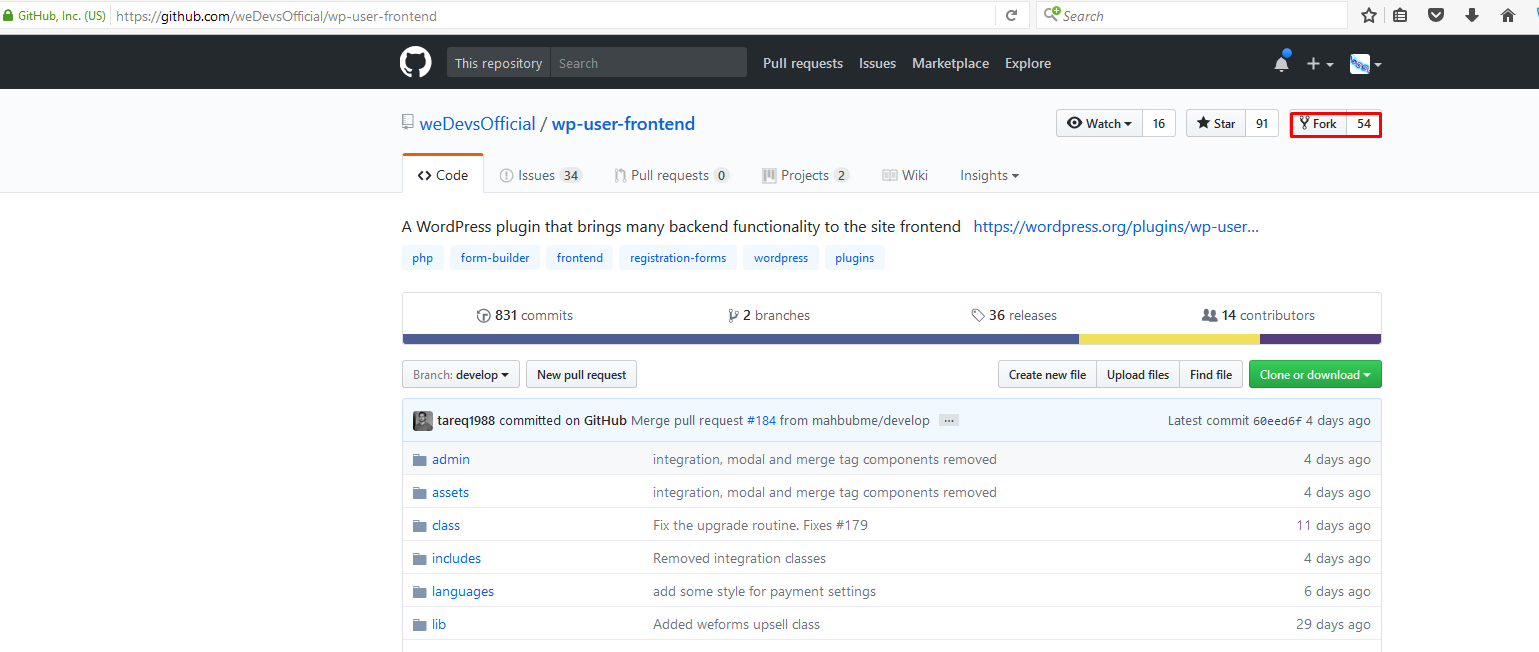
Fork means creating a copy of your chosen repository in your profile. Now you need to clone the forked repository (in this case, the plugin) in your local machine. In this case, the repository is in – xampp → htdocs → your site name → wp-content → plugin.
Before you clone any repository, copy the link.
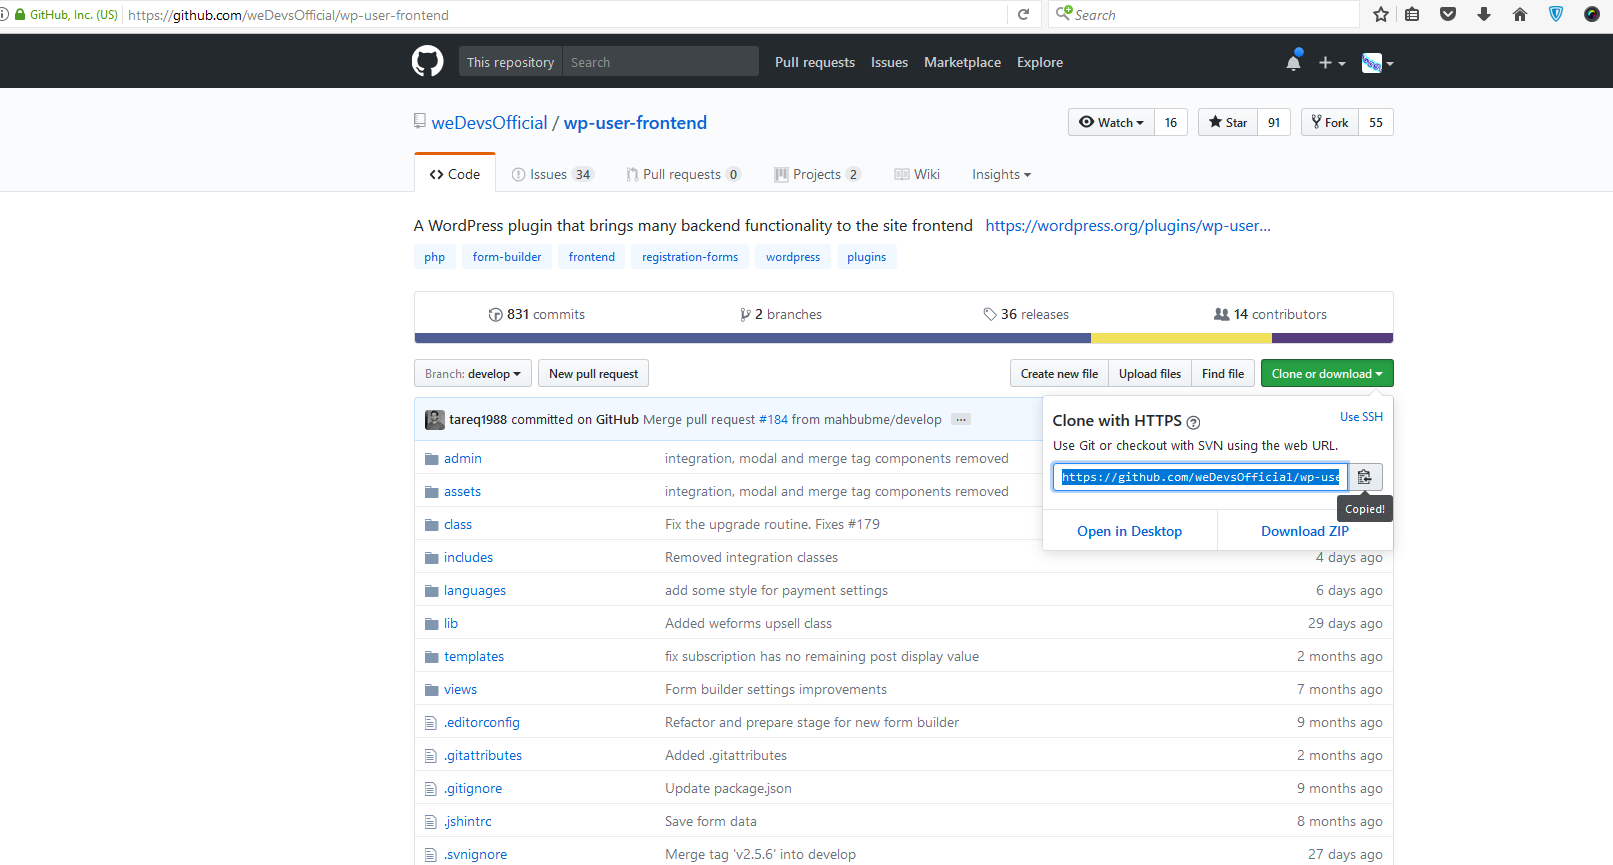
Now, start writing the command to clone into your terminal:
git clone [copied link]
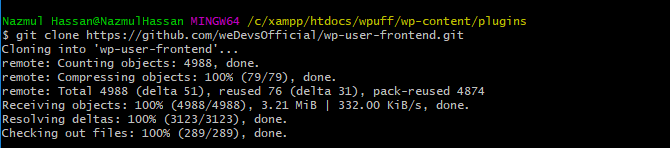
Replace [copied link] with the link that you have copied from GitHub. You can also clone a project from bitbucket, the procedure is the same.
Renaming the Repository
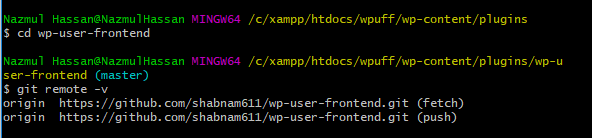
After cloning the forked repository, we need to see the name of the repositories.
Run the commands :
cd wp-user-frontend
To see the name of the forked repository, run this Git command:
git remote -v
Next, you can name the repository from where you forked the project. Execute the following Git commands:
git remote add upstream https://github.com/weDevsOfficial/wp-user-frontend.git [you can skip this step, it's just another way to differentiate two repositories.]
git remote -v
The link in the Git command above is the link to the site from where you have forked the project. It means you are naming your repository into “origin” and the site from where you forked it, into “upstream”.
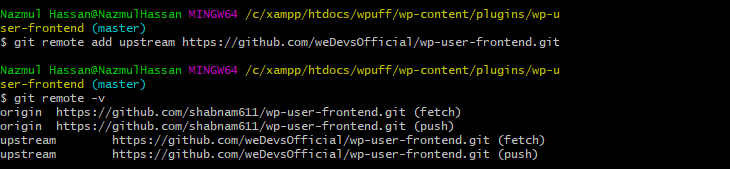
You can also keep the actual repository named origin like it is done here, so the screenshot would be:

Branch
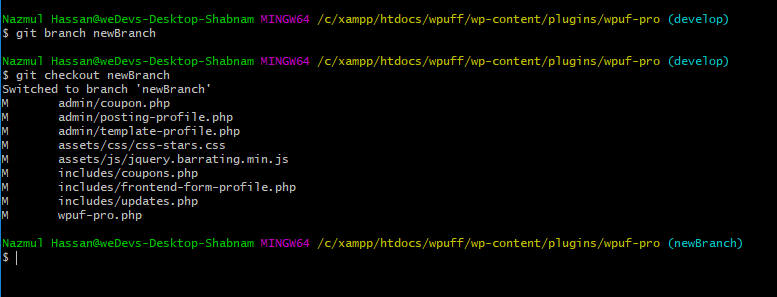
The name says it all. It creates a branch from a repository, which is a copy of the actual repository. Here you can add your code, test them and can finally add with the main version. Branch works a lot like fork. Open terminal (Git bash) to where the repository is and create the branch by writing these Git command lines :
git branch [branch name]
git checkout [branch name]
After you run these Git commands on your terminal, you will be switched to your newly created branch.
Say you want to go back to your initial branch, which was “develop”, so you have to write the following Git command :
git checkout develop
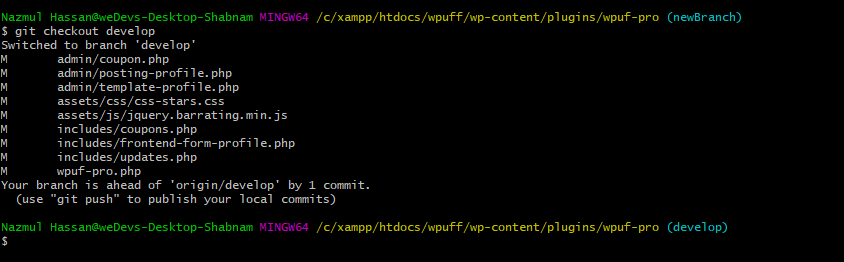
This way you can switch into any branch you want.
Commit
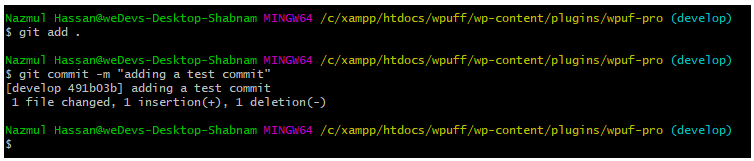
Think of the scenario that, you have done some work and suddenly realize you have not updated your repository with the latest one. So, you think you need to update that. But, what about the code you have written? You must save them before updating it. So, run these Git commands below to save your precious work:
git add .
git commit -m “pulling the latest”
The text inside “” is considered a comment. Writing a meaningful comment is important because when something goes wrong, this comment can help you find out which commit messed it all up and you can get back to that troublesome commit to fix it. It’s wise to run these couple of Git commands every time you write some code. It works as save. The screenshot is:
Pull
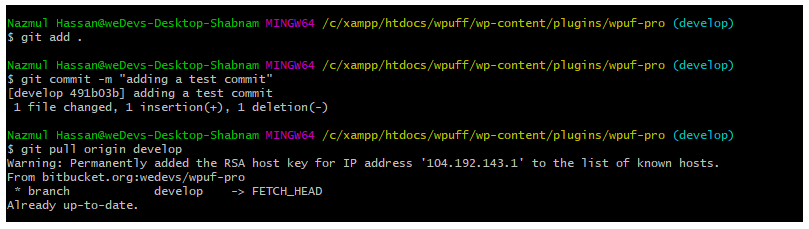
Say someone has added some code to the repository from where you have forked after you forked it. Now you need to update your version, that was named “origin”, in order to start working in it. So you need to run the following Git commands:
git add .
git commit -m “pulling the latest”
git pull origin develop
Pulling means merging your code with the latest version of the actual repository in your branch. It’s a good practice to commit before pulling. This way you don’t have to worry about any unsaved block of code. Also, Git doesn’t allow to push any new code without updating it. It is a default system of git to avoid repetition of same code. If you are working in your forked repository, then remember to pull from the actual repository. In the last commit upstream is used because you may want to pull from the actual repository, which was named “upstream”. Here I have kept the actual repository name “origin”. So, the screenshot is:
Push
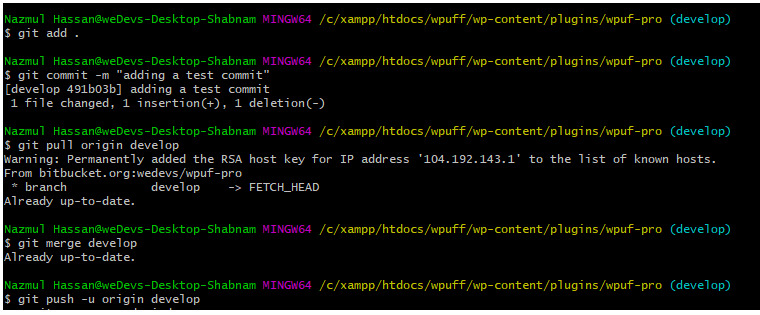
After you have done everything correctly and now it’s time to push the code, first commit the code. Say your code is in develop branch.
git add .
git commit -m “comment of which part of code you are going to push”
git merge develop [merging the pulled version with your version]
git push -u origin develop [pushing your code into develop branch, change it to master, if necessary]
Assuming that there happens to be no merge conflict.
Here is the screenshot:
Merge Conflict
Sometime Git gets confused about who’s code it should keep. This incident is a merge conflict. So, when more than one developer writes code on the same page, they may write the same code in two different ways or in two different places. It’s important to sort out which code block is the most appropriate and remove the others. This merge conflict problem needs to be solved and then you have to commit and push again.
Wrapping Up
These are few steps of how to use Git in your local repository. Basically, this post is for developers who are at beginner level or trying to learn Git for the first time. The above codes are also for basic local development, but developers use them frequently as well. Please share us your thoughts. It will help us to improve the blog and also share the knowledge to others.