Adding a vendor is the most crucial feature of the Dokan Mobile App. Vendors create the marketplace. From those marketplaces, the customers buy their products or services.
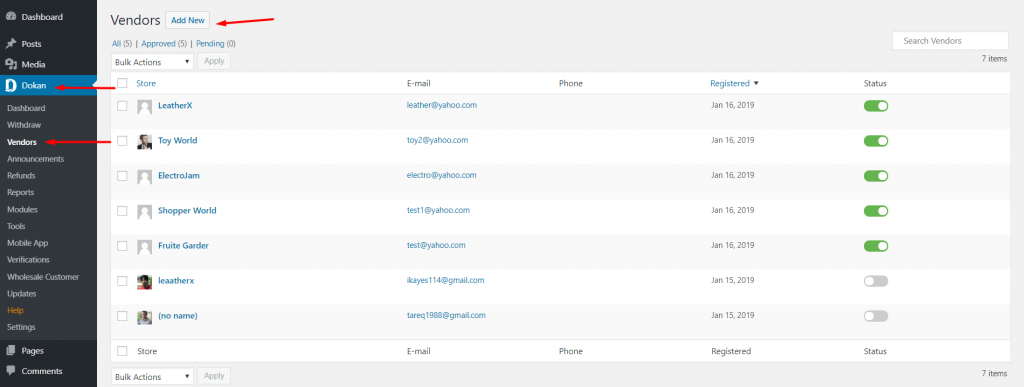
Adding a vendor is easy. Go to WP Admin Dashboard > Dokan > Vendors. Click on Add New.
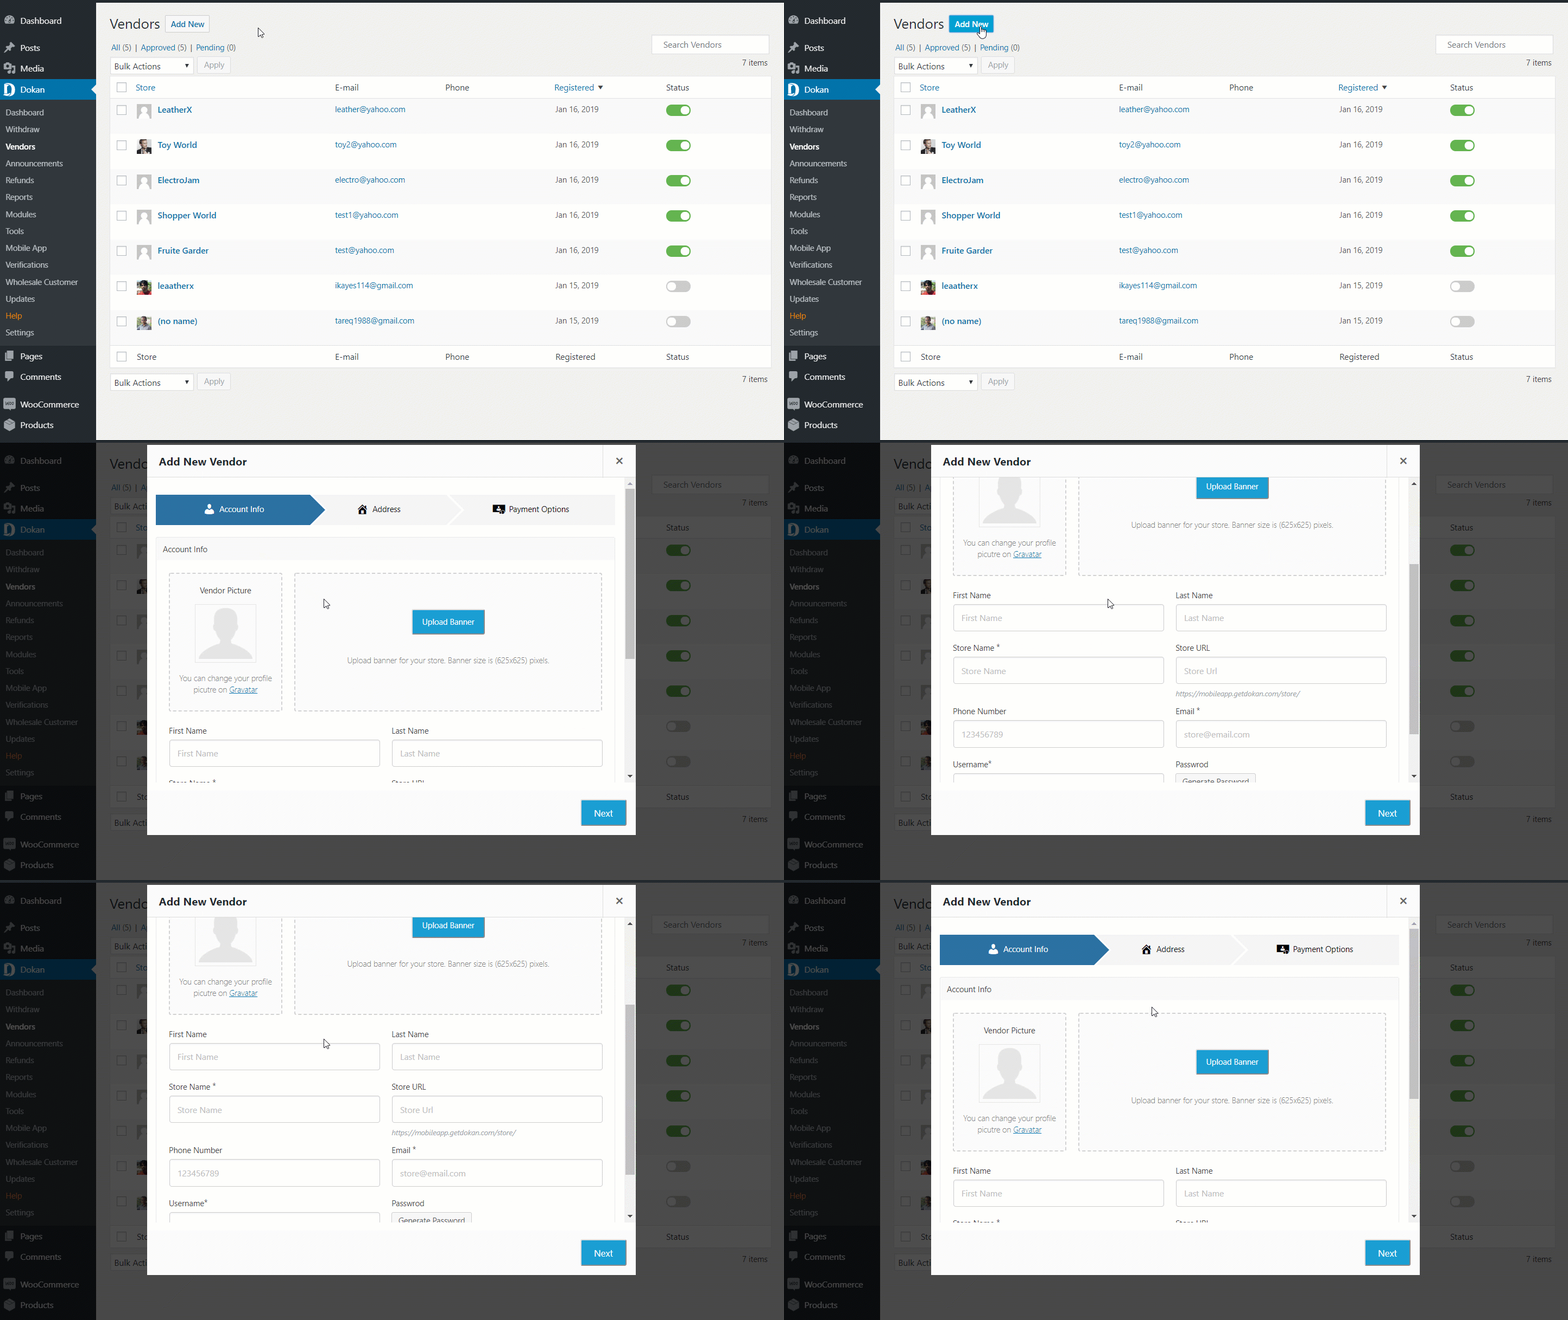
You will get a pop-up window where you will have to put the details of the vendor’s account info.
You can add the image of the vendor, add a banner of the store and many more.
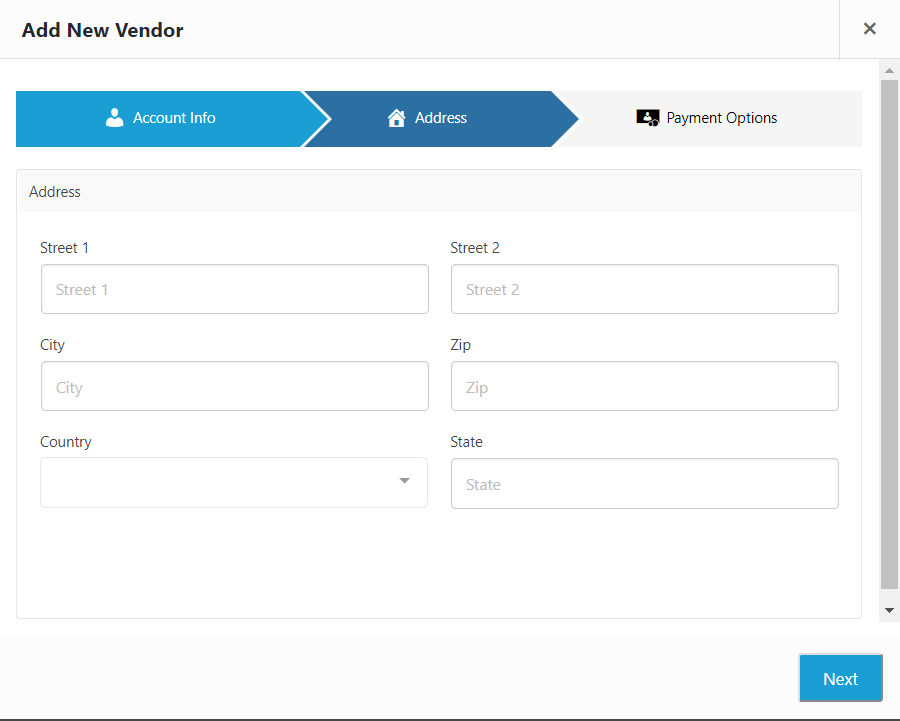
Next, you have to put the details of the address of the vendor.
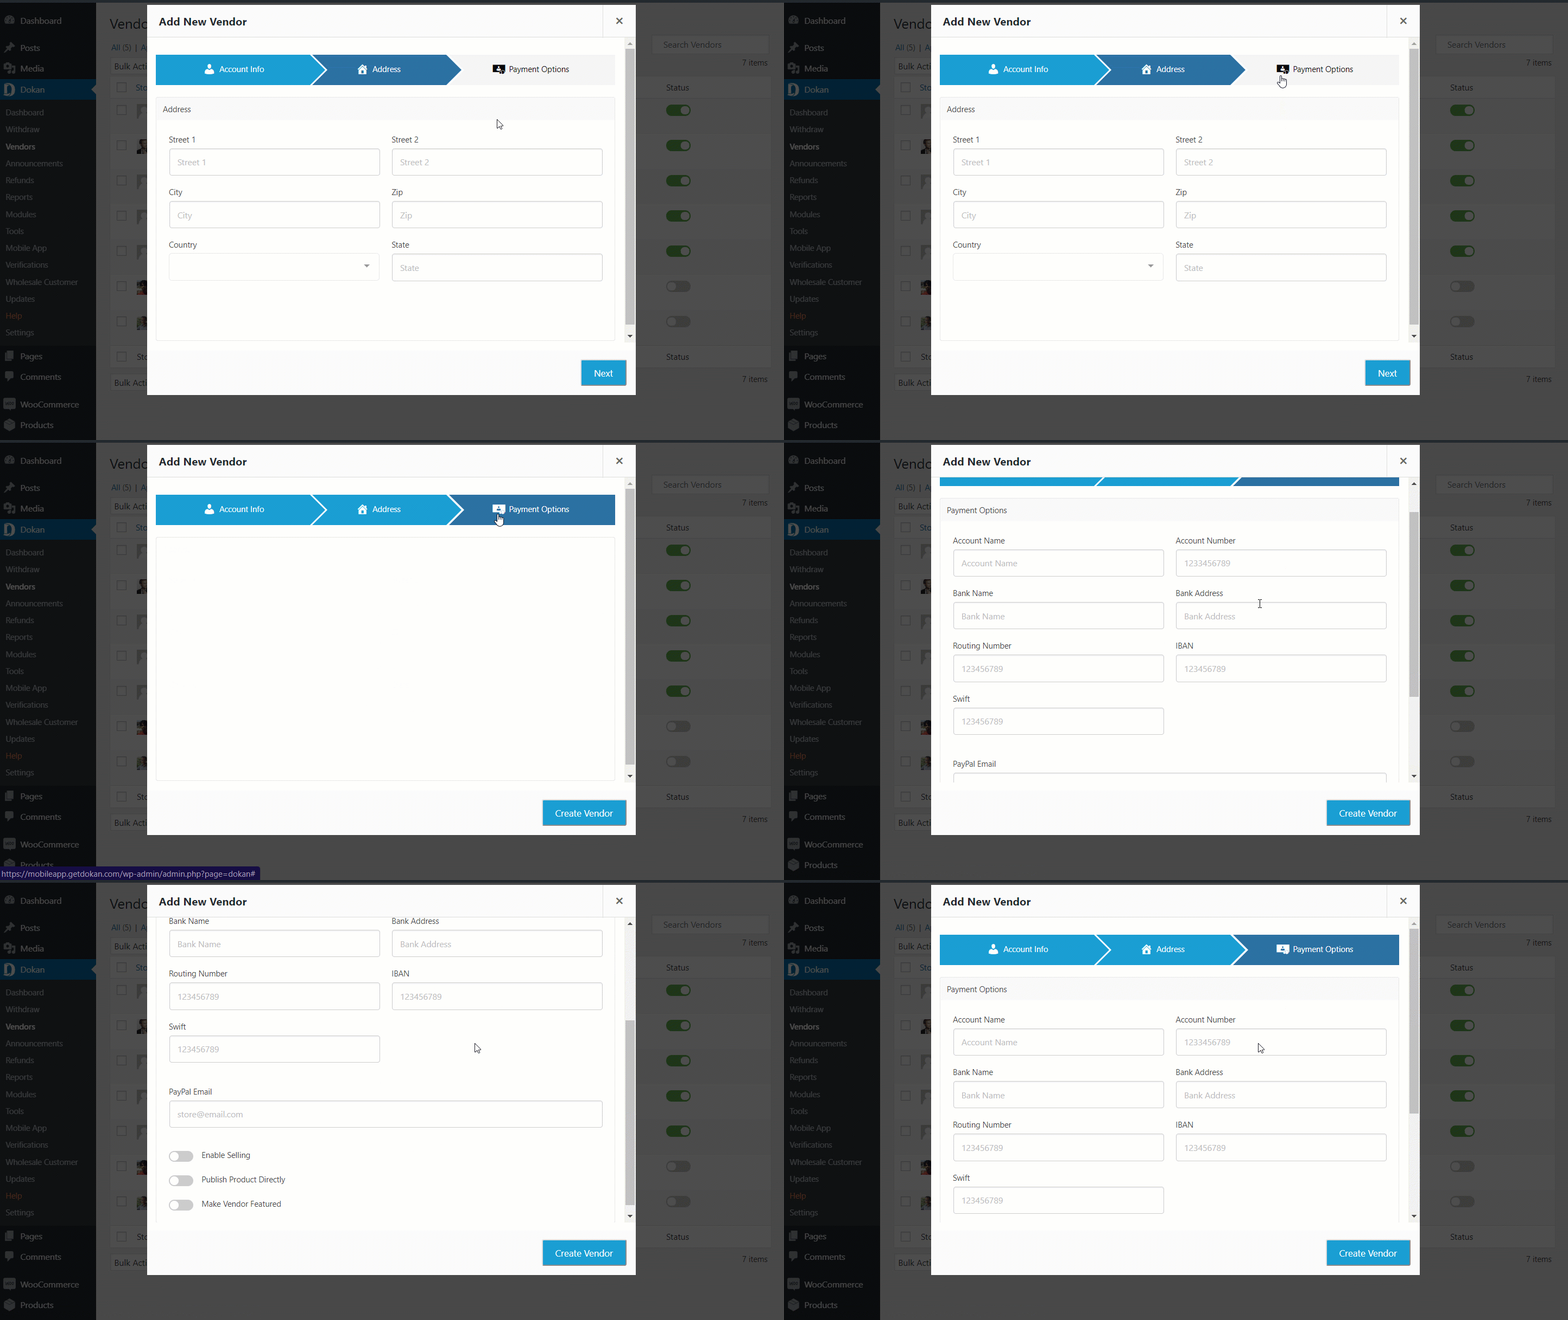
Lastly, put the payment details for the vendor. Here, you will get options to enable whether the vendor can sell, publish products directly and be a featured vendor. Hit Create Vendor to finish.
Mobile App View
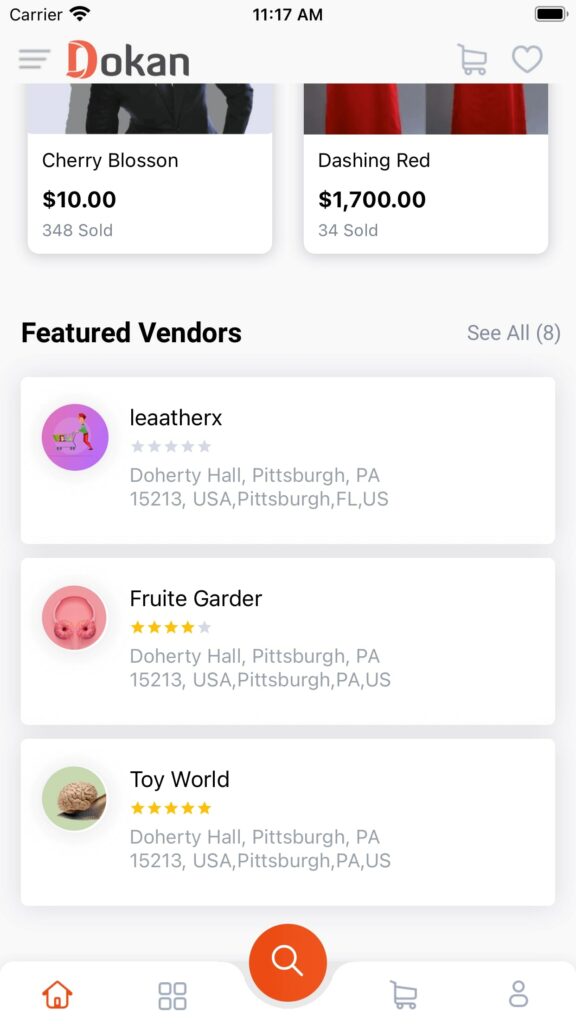
After creating the vendors, you can view them in the mobile app.
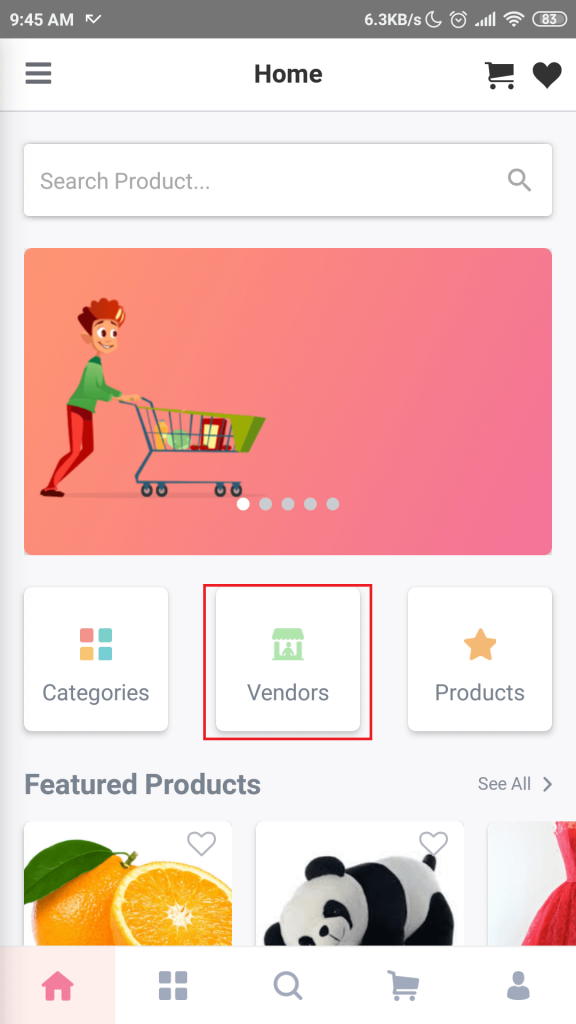
Log in to your Dokan Mobile App. Then, click on the Vendors button on the homepage of the app.
You can view the created vendors in that section.
That’s it for adding a vendor on the Dokan Mobile App.