When there is a lot of vendors in the marketplace, customers need some parameters to search for some specific vendors. Location can be a good parameter to find the vendors close to the customers.
Dokan Business package introduces the new module, Geolocation that allows customers to search for products and vendors by location.
Let’s see how to setup this module.
Admin Configuration
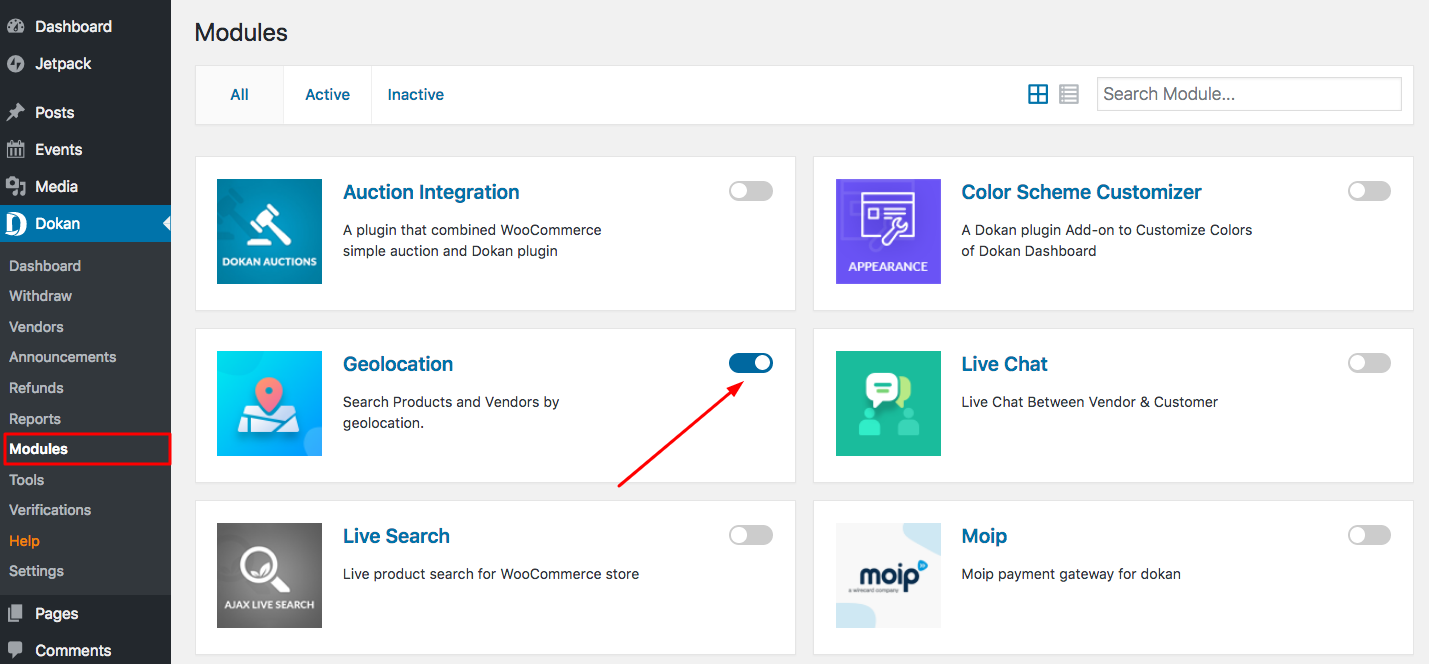
1. Turn on Geolocation from wp-admin→Dokan→Modules.
2. Go to Dokan→Settings→Appearance. Turn on the checkbox for Show Map on Store Page if not enabled.
3. Then enter the JavaScript Google Map API Key in the next field. Obtain the API Key in the manner given in the link.
You can also go for Mapbox. It is an alternative to Google Maps. The link to acquire access key is given. You can easily attain the access token and use Mapbox as your geolocation.
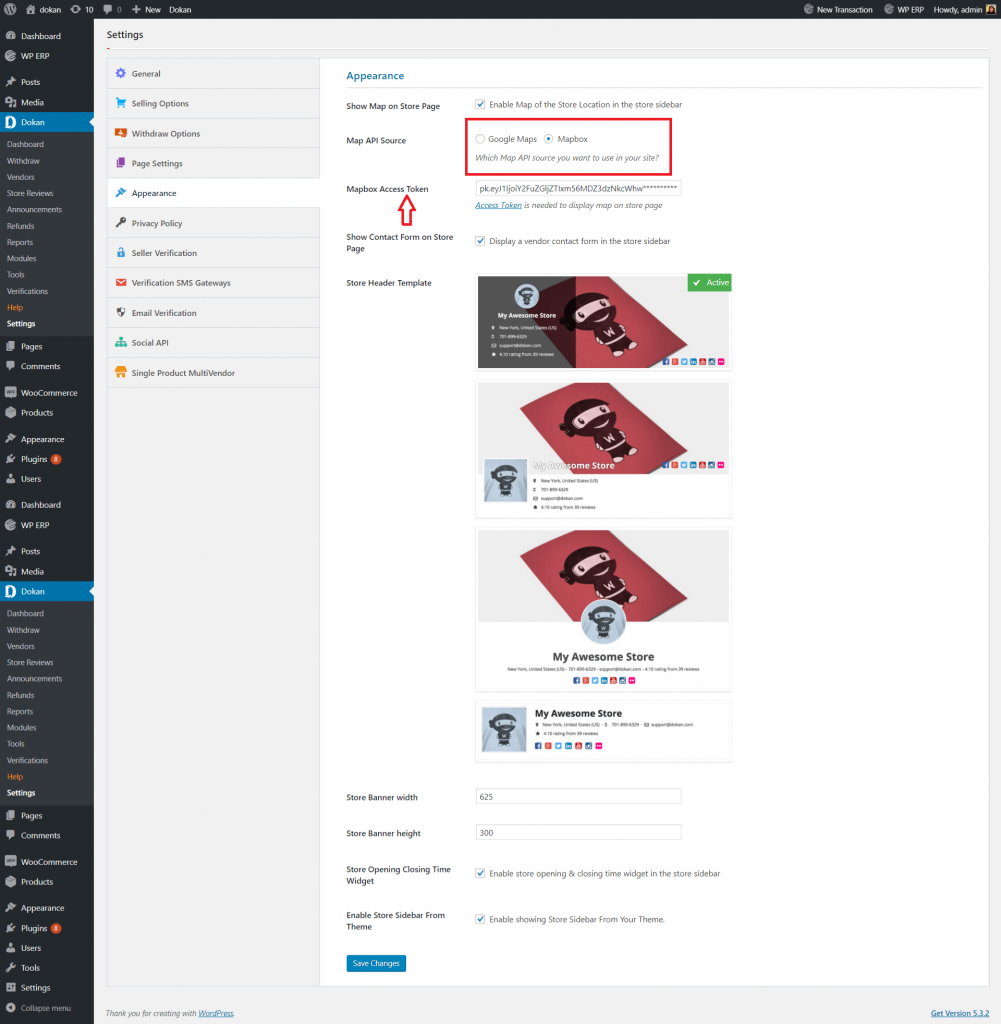
4. Click on Save Changes.
5. Go to Dokan→Settings→Geolocation. Here you can configure the position of the map as to where it would appear among these two storefront pages: Shop Page and Store List Page.
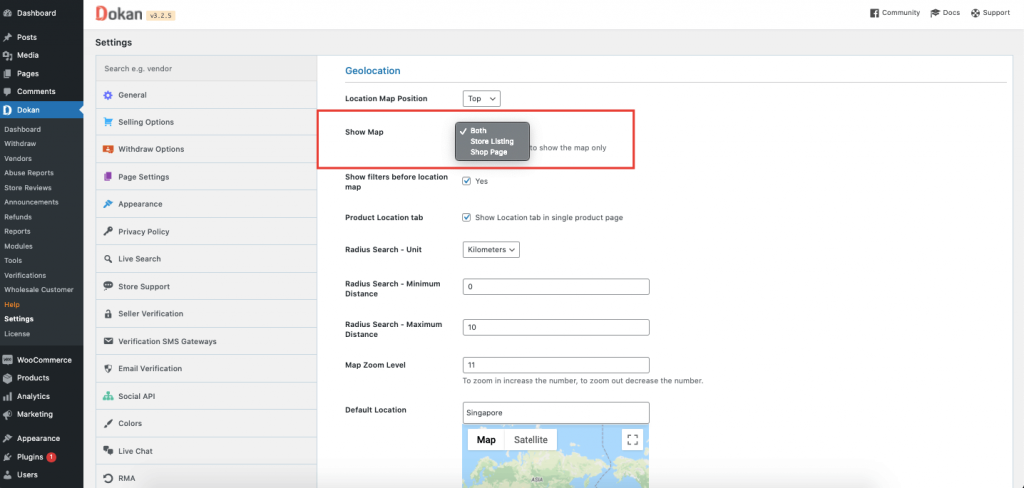
You can position the Map on Top, Left, and Right.
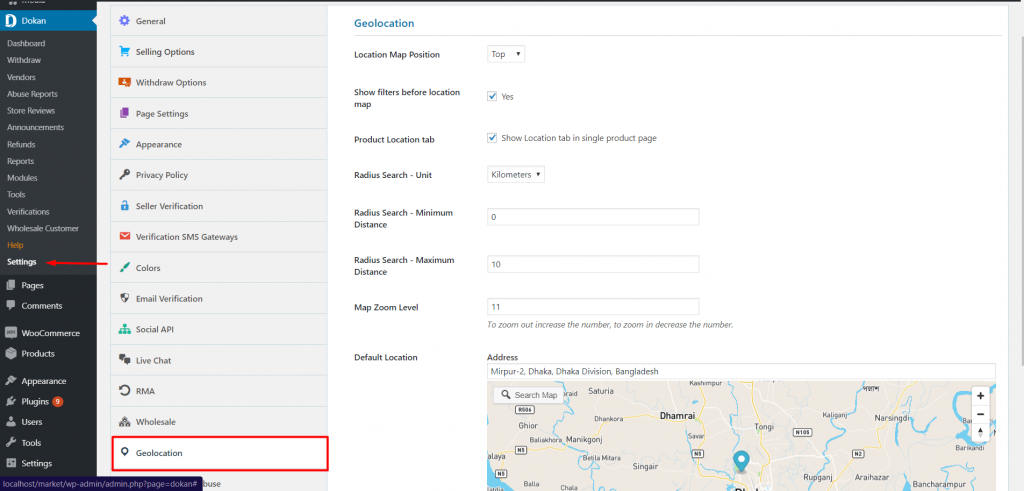
When you are setting location on Mapbox, you need to write the location precisely. Or you can write the location of the adjacent areas then drag the locator on to your location.
6. By default, filters will be enabled. Admins can disable it. Filters include searching for products, categories, and vendors by location.
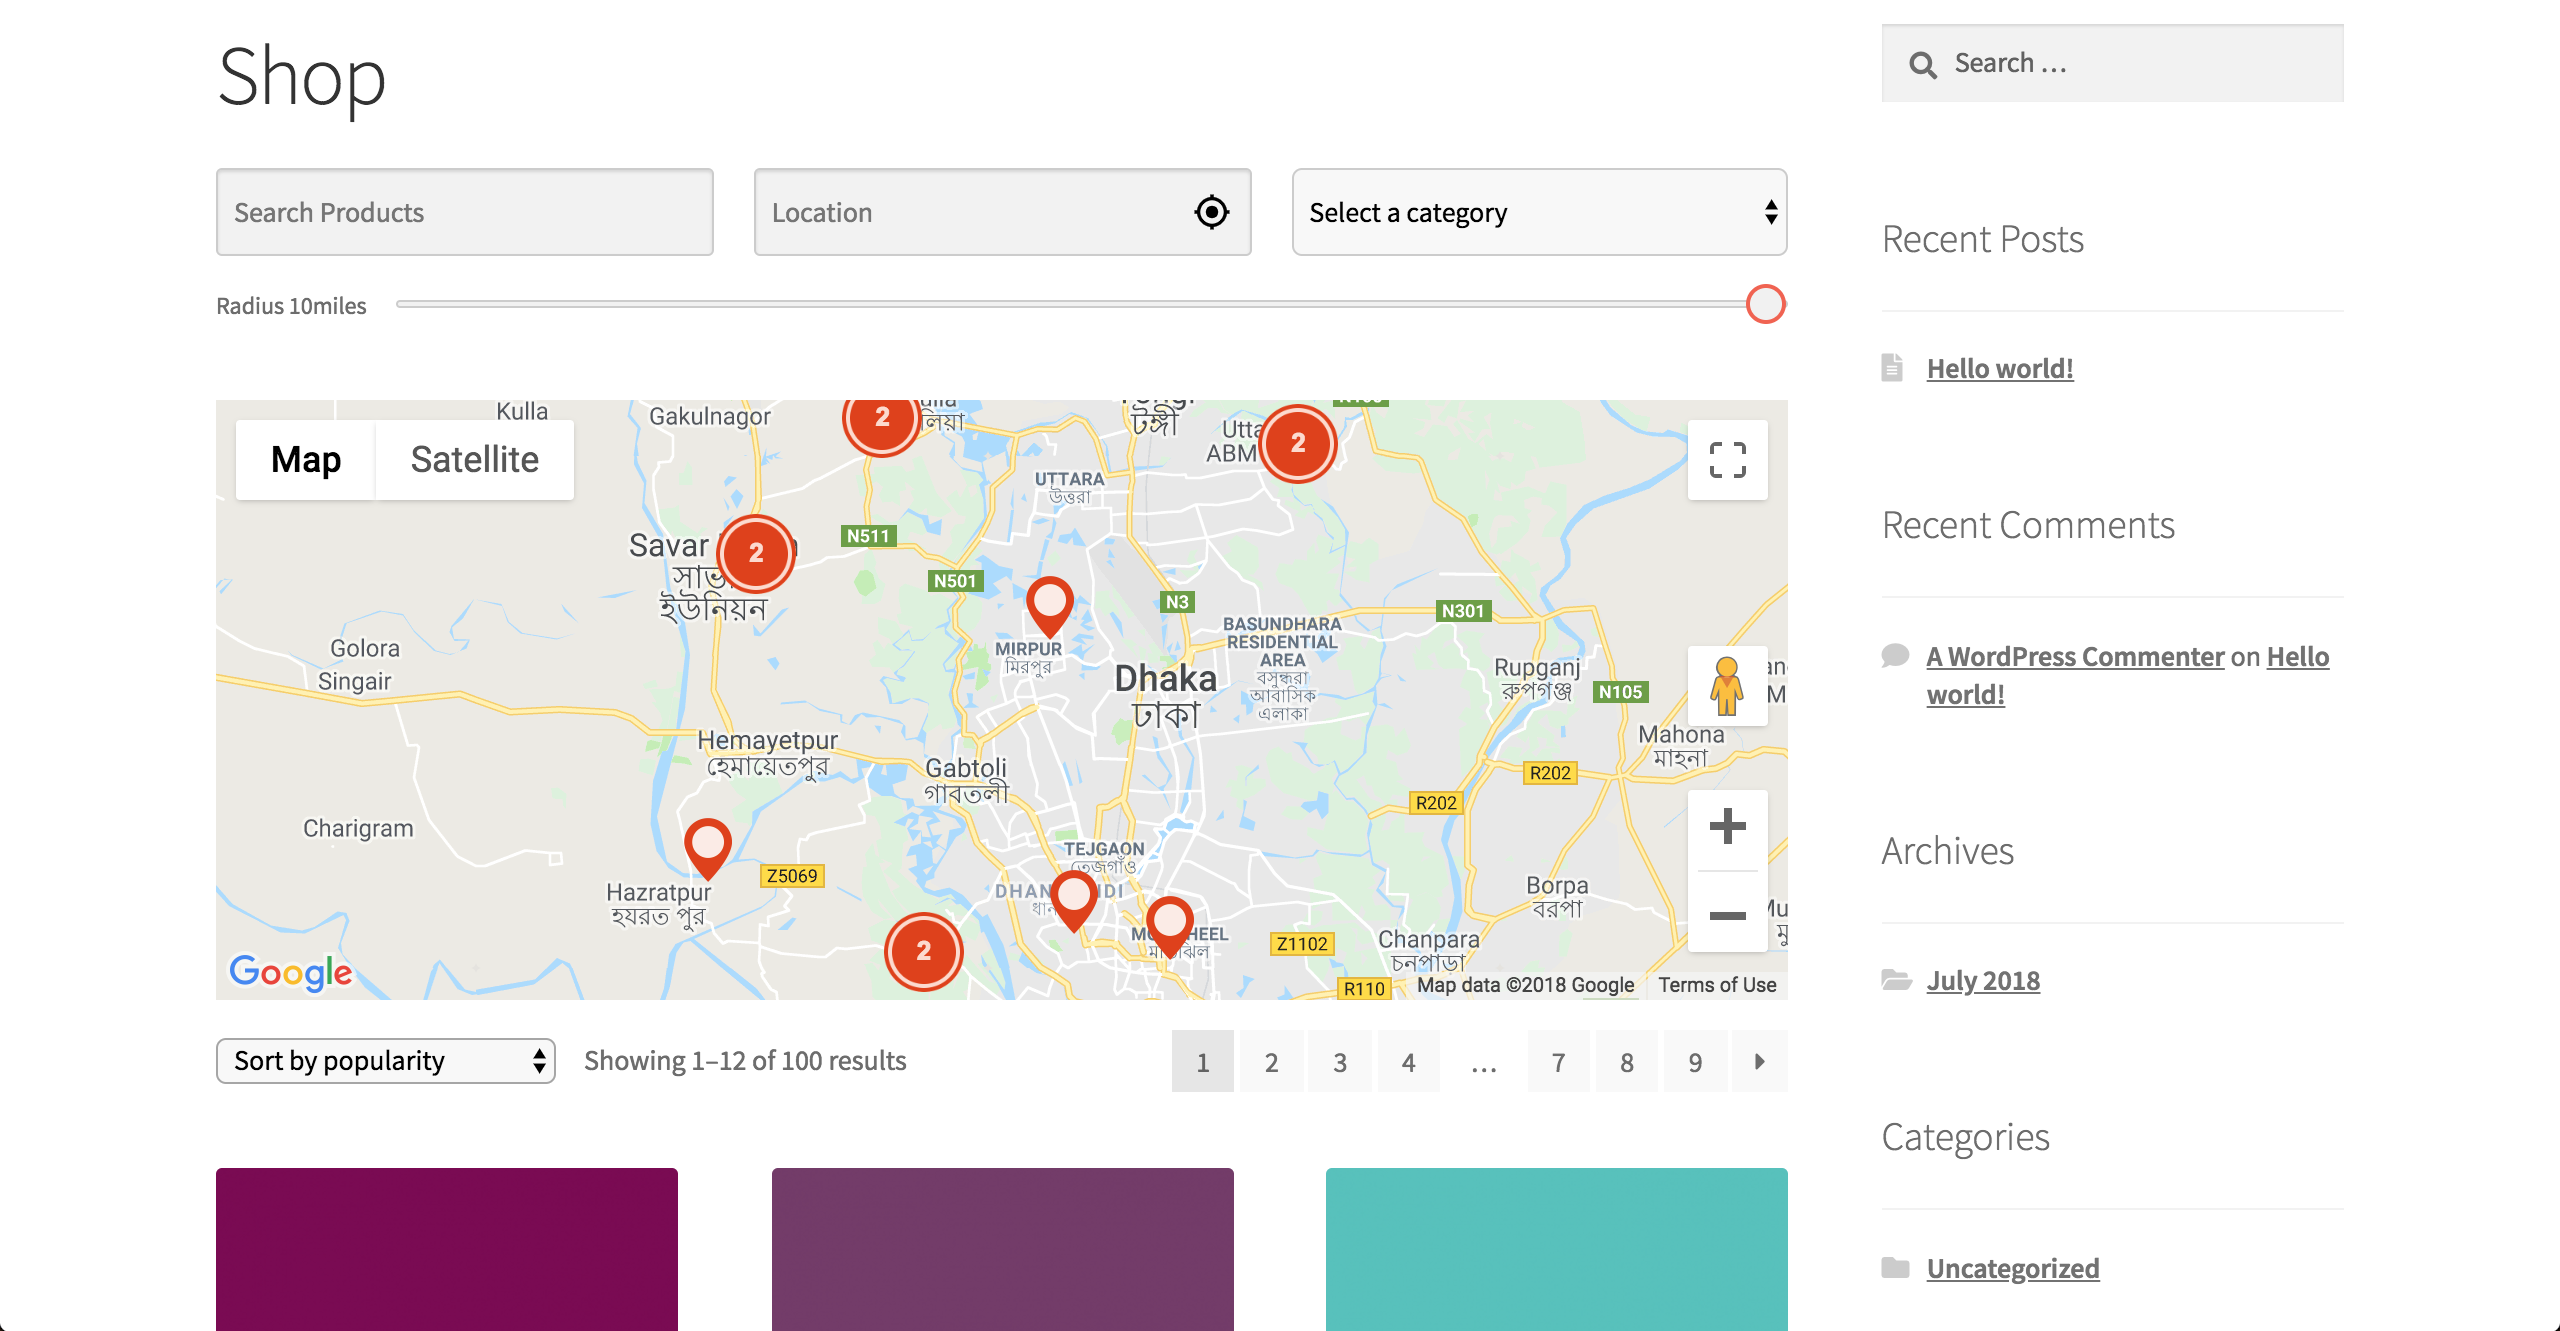
Shop page view with geolocation:
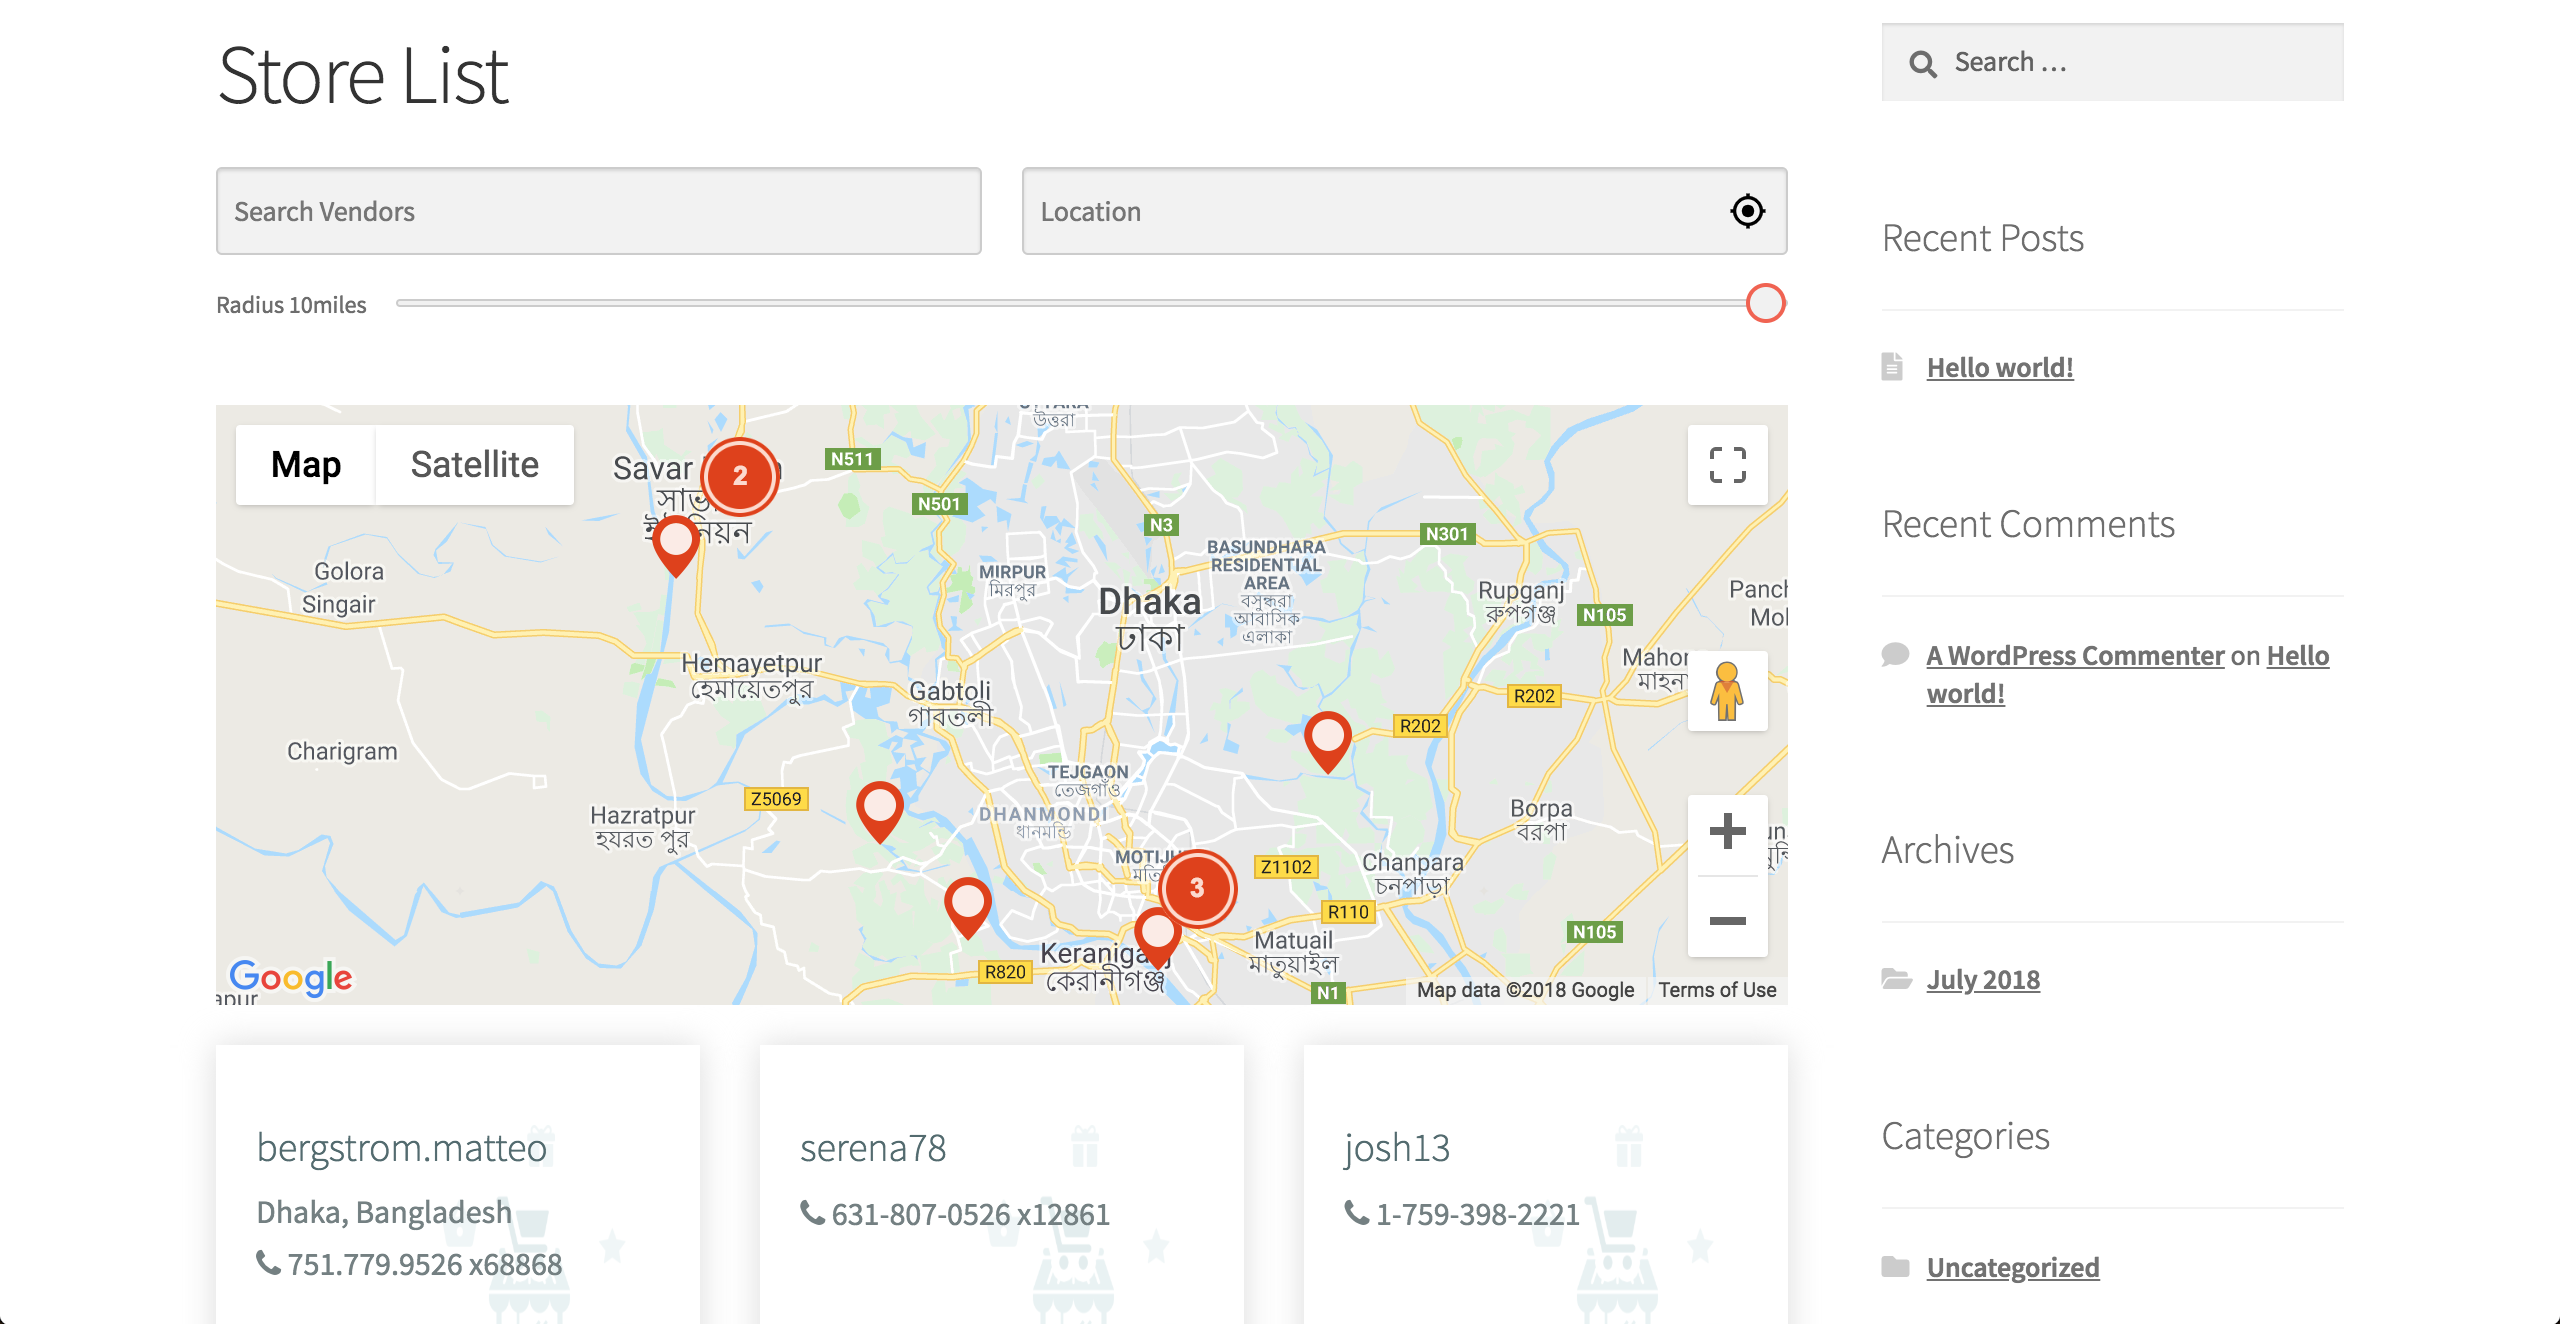
Store List view with geolocation:
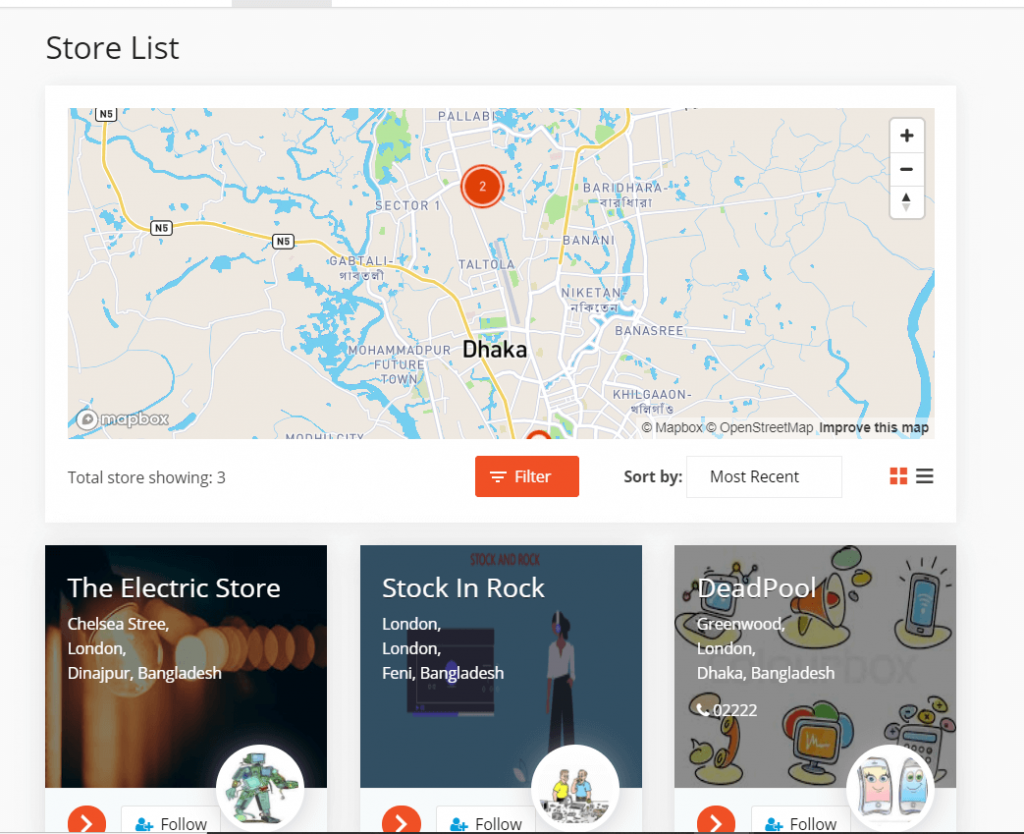
You can see all the stores location when you use Mapbox.
8. By default, maps in single product page will be enabled. Admins can disable it.
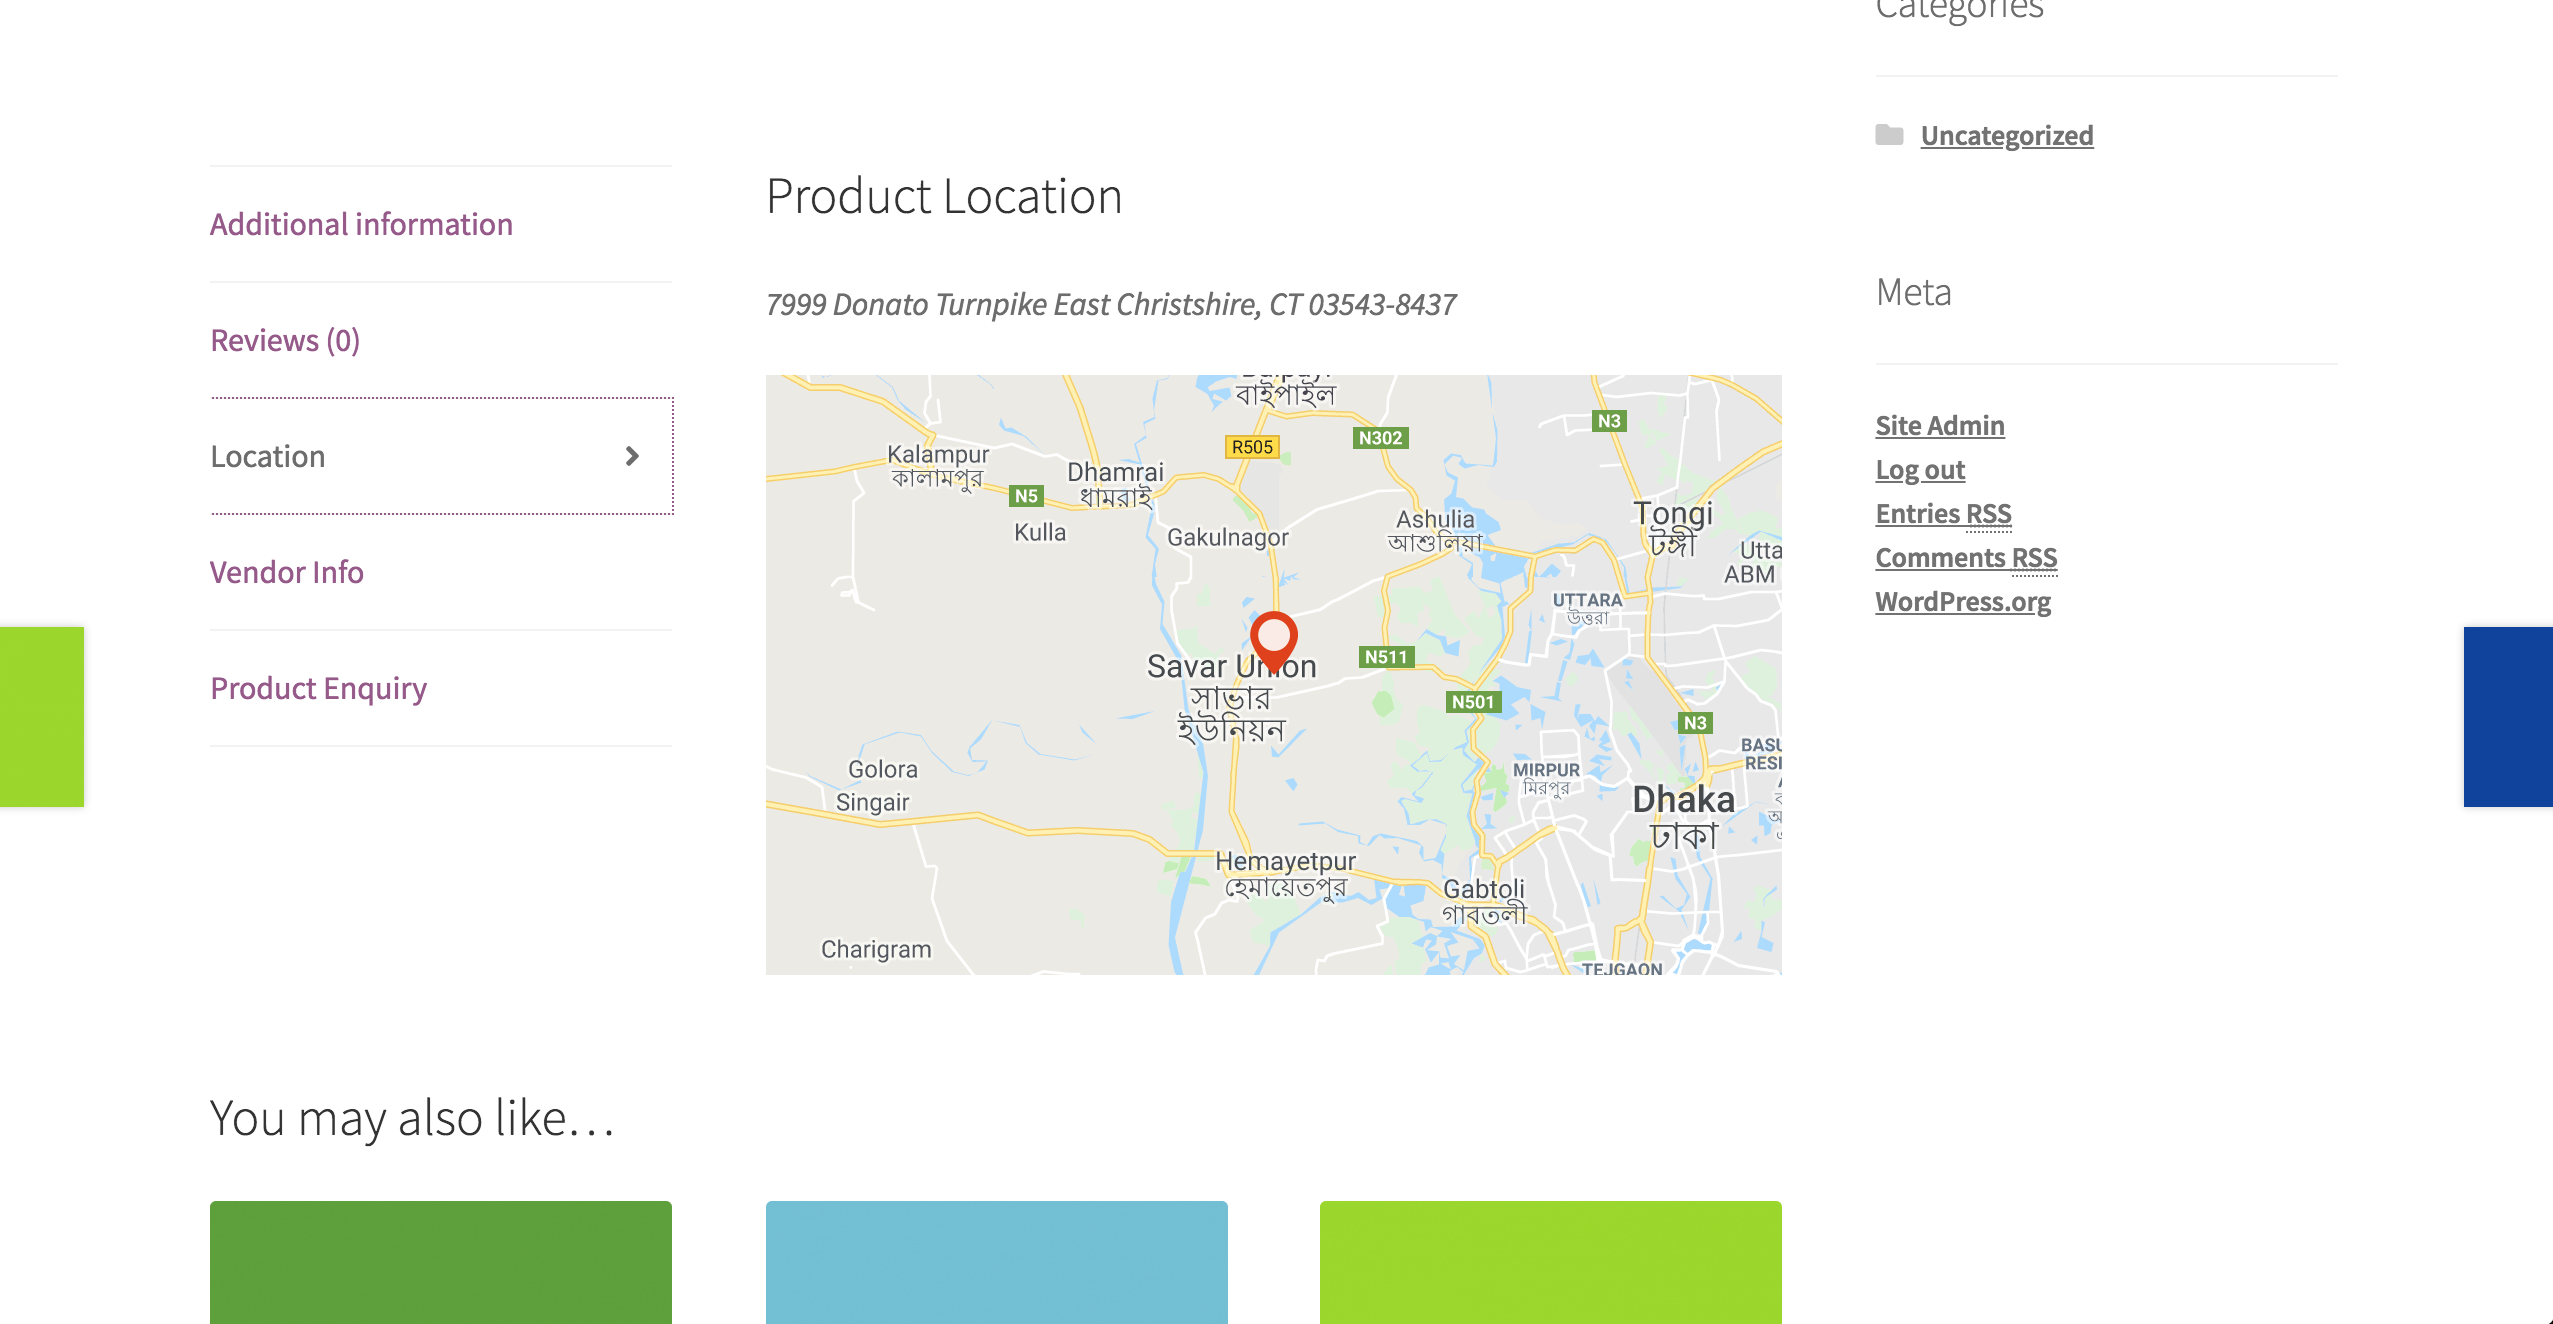
Single product page tab view with geolocation:
9. Select the Radius Search Unit as Kilometers or Miles from the drop-down.
10. Admins can also change the minimum and maximum Radius Search Distance using the numeric fields.
11. After configuring, click on Save Changes.
Show location on Sidebar
Admins can also show the geolocation feature on storefront using Dokan widgets. Though for this to work, the default setting for Location tab on single product page has to be disabled from wp-admin→Dokan→Settings→Geolocation.
1. Navigate to wp-admin→Appearance→Widgets.
2. Drag and drop Dokan: Product Location widget to Sidebar to show the map on the side of single product page.
3. You can also add the Dokan: Geolocation Filter Form to a page on your site by dragging and dropping the widget. Note: for this widget to render properly, you need to use a child theme.
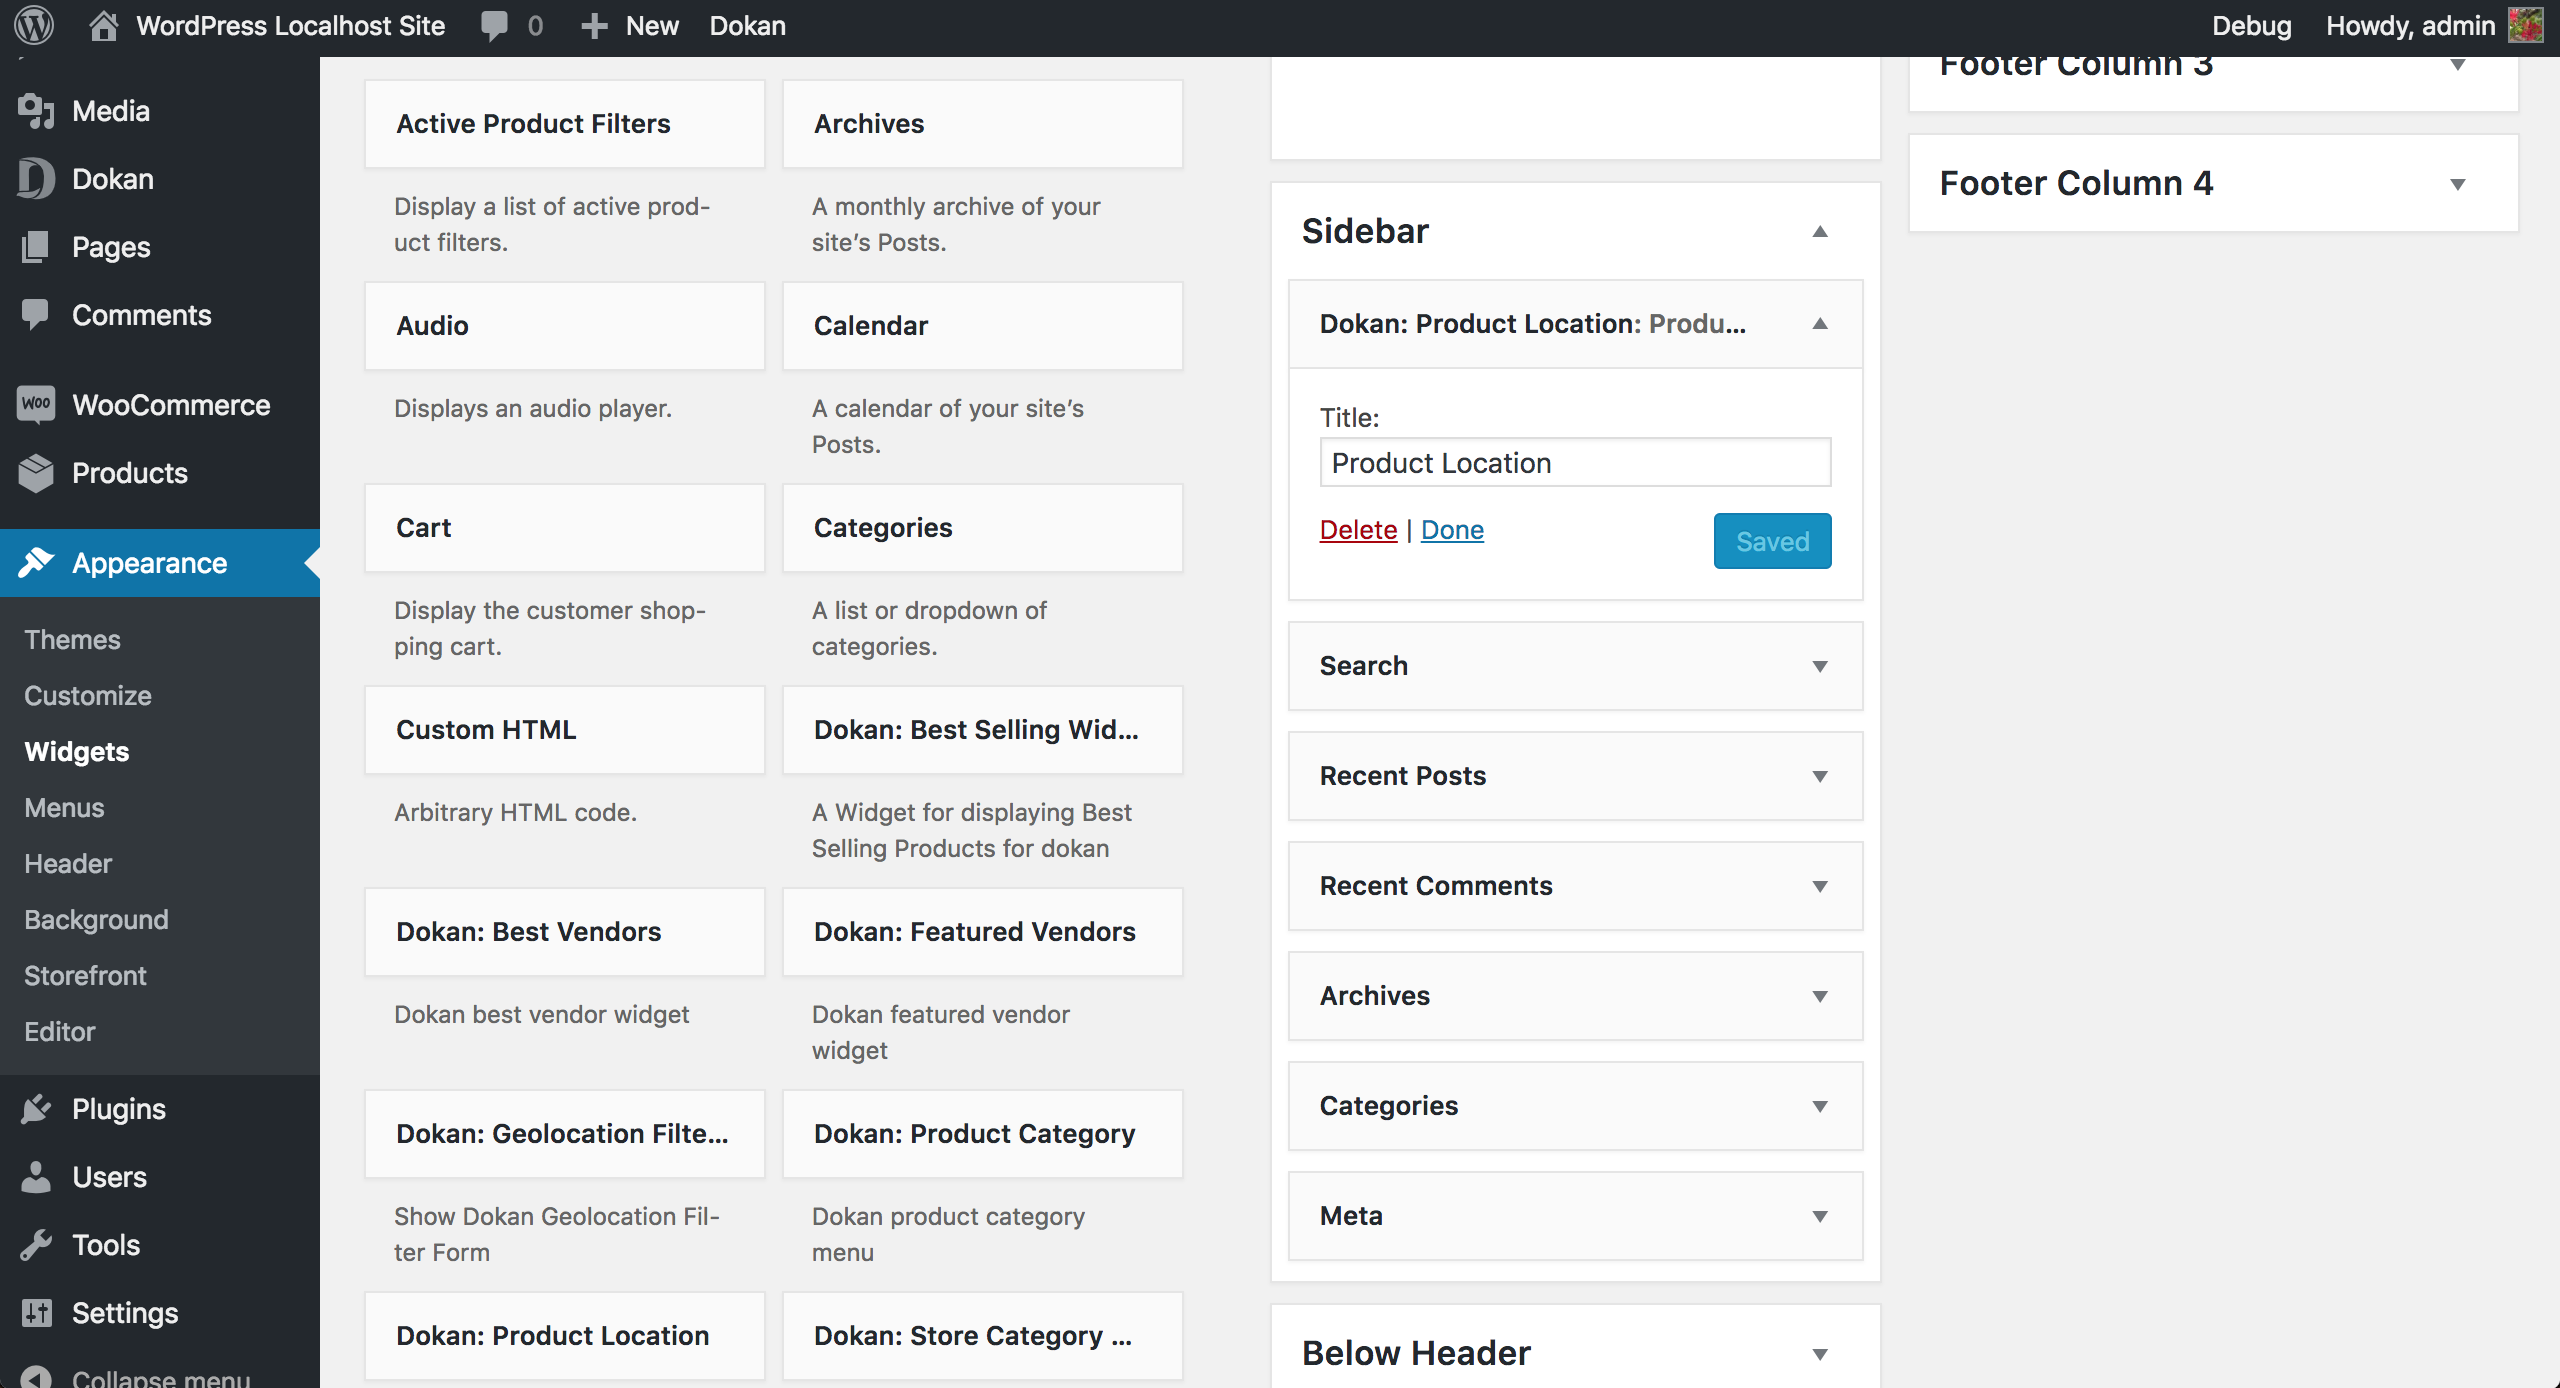
This is how it will appear on the product page when you use Product Location widget:
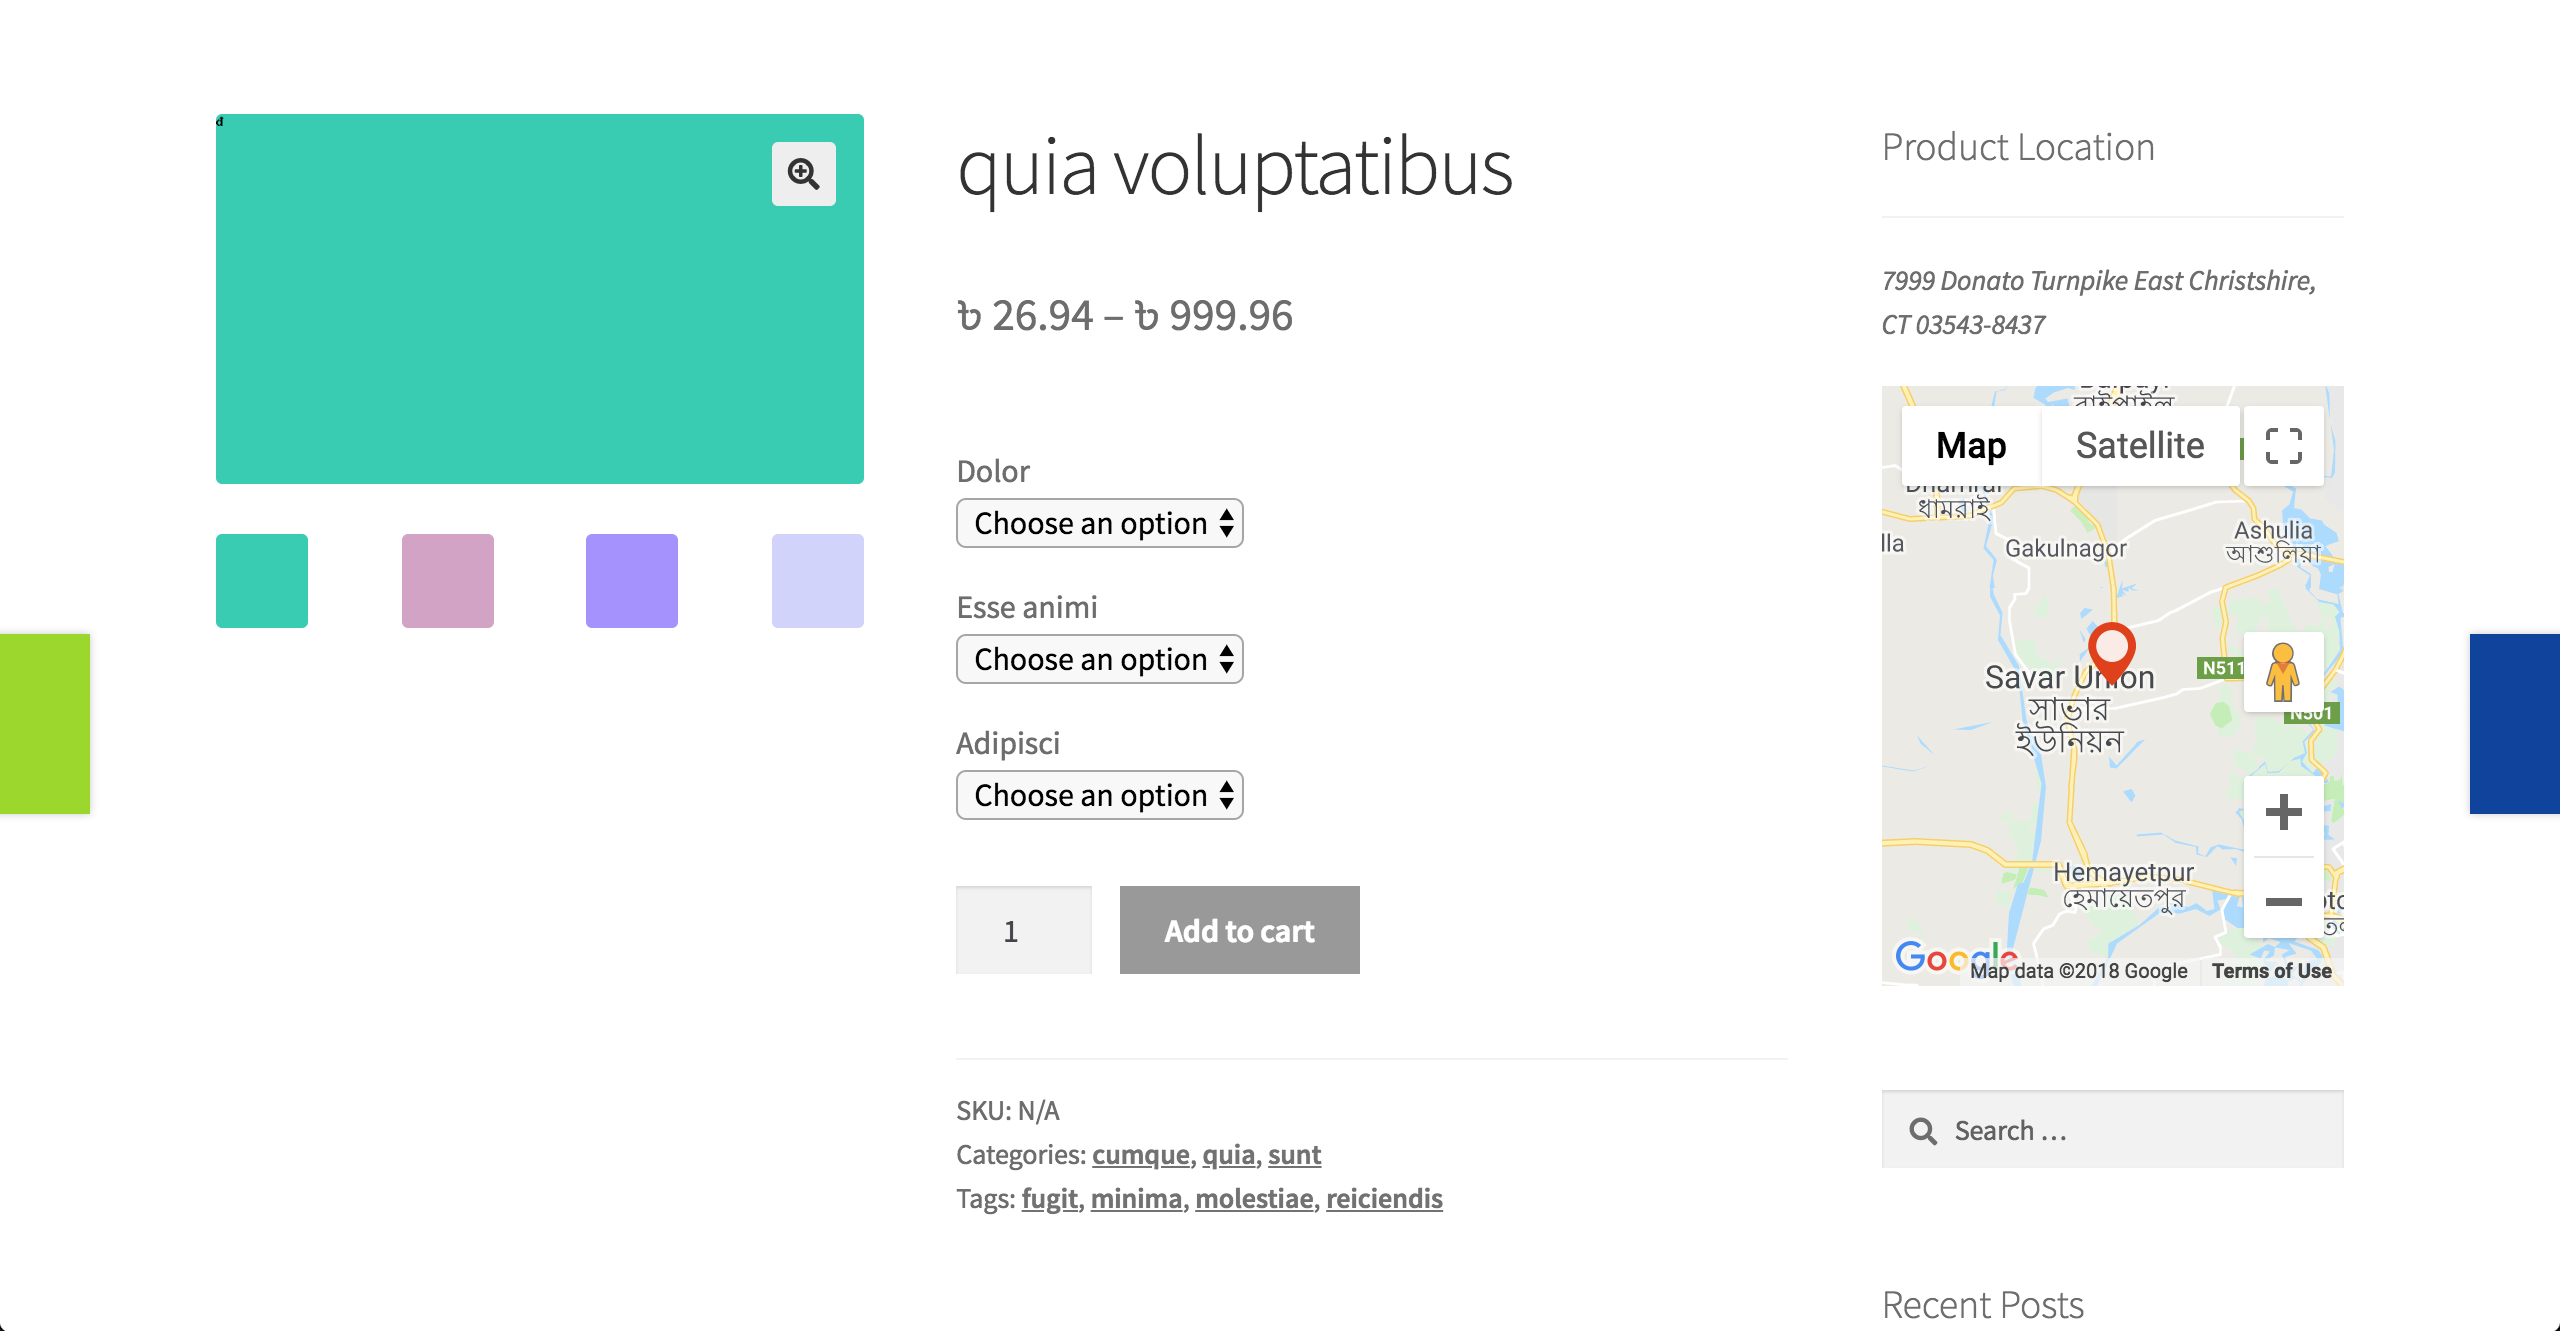
Widget view:
Show geolocation filters by shortcode
Alternatively, you can also render the geolocation filter form by shortcode.
- To do this, enter the shortcode [dokan-geolocation-filter-form] on your Edit Page section in the relevant place.
- Or you can also select Geolocation Filter Form from the Forms drop-down, as shown below.
- Then Save the update:
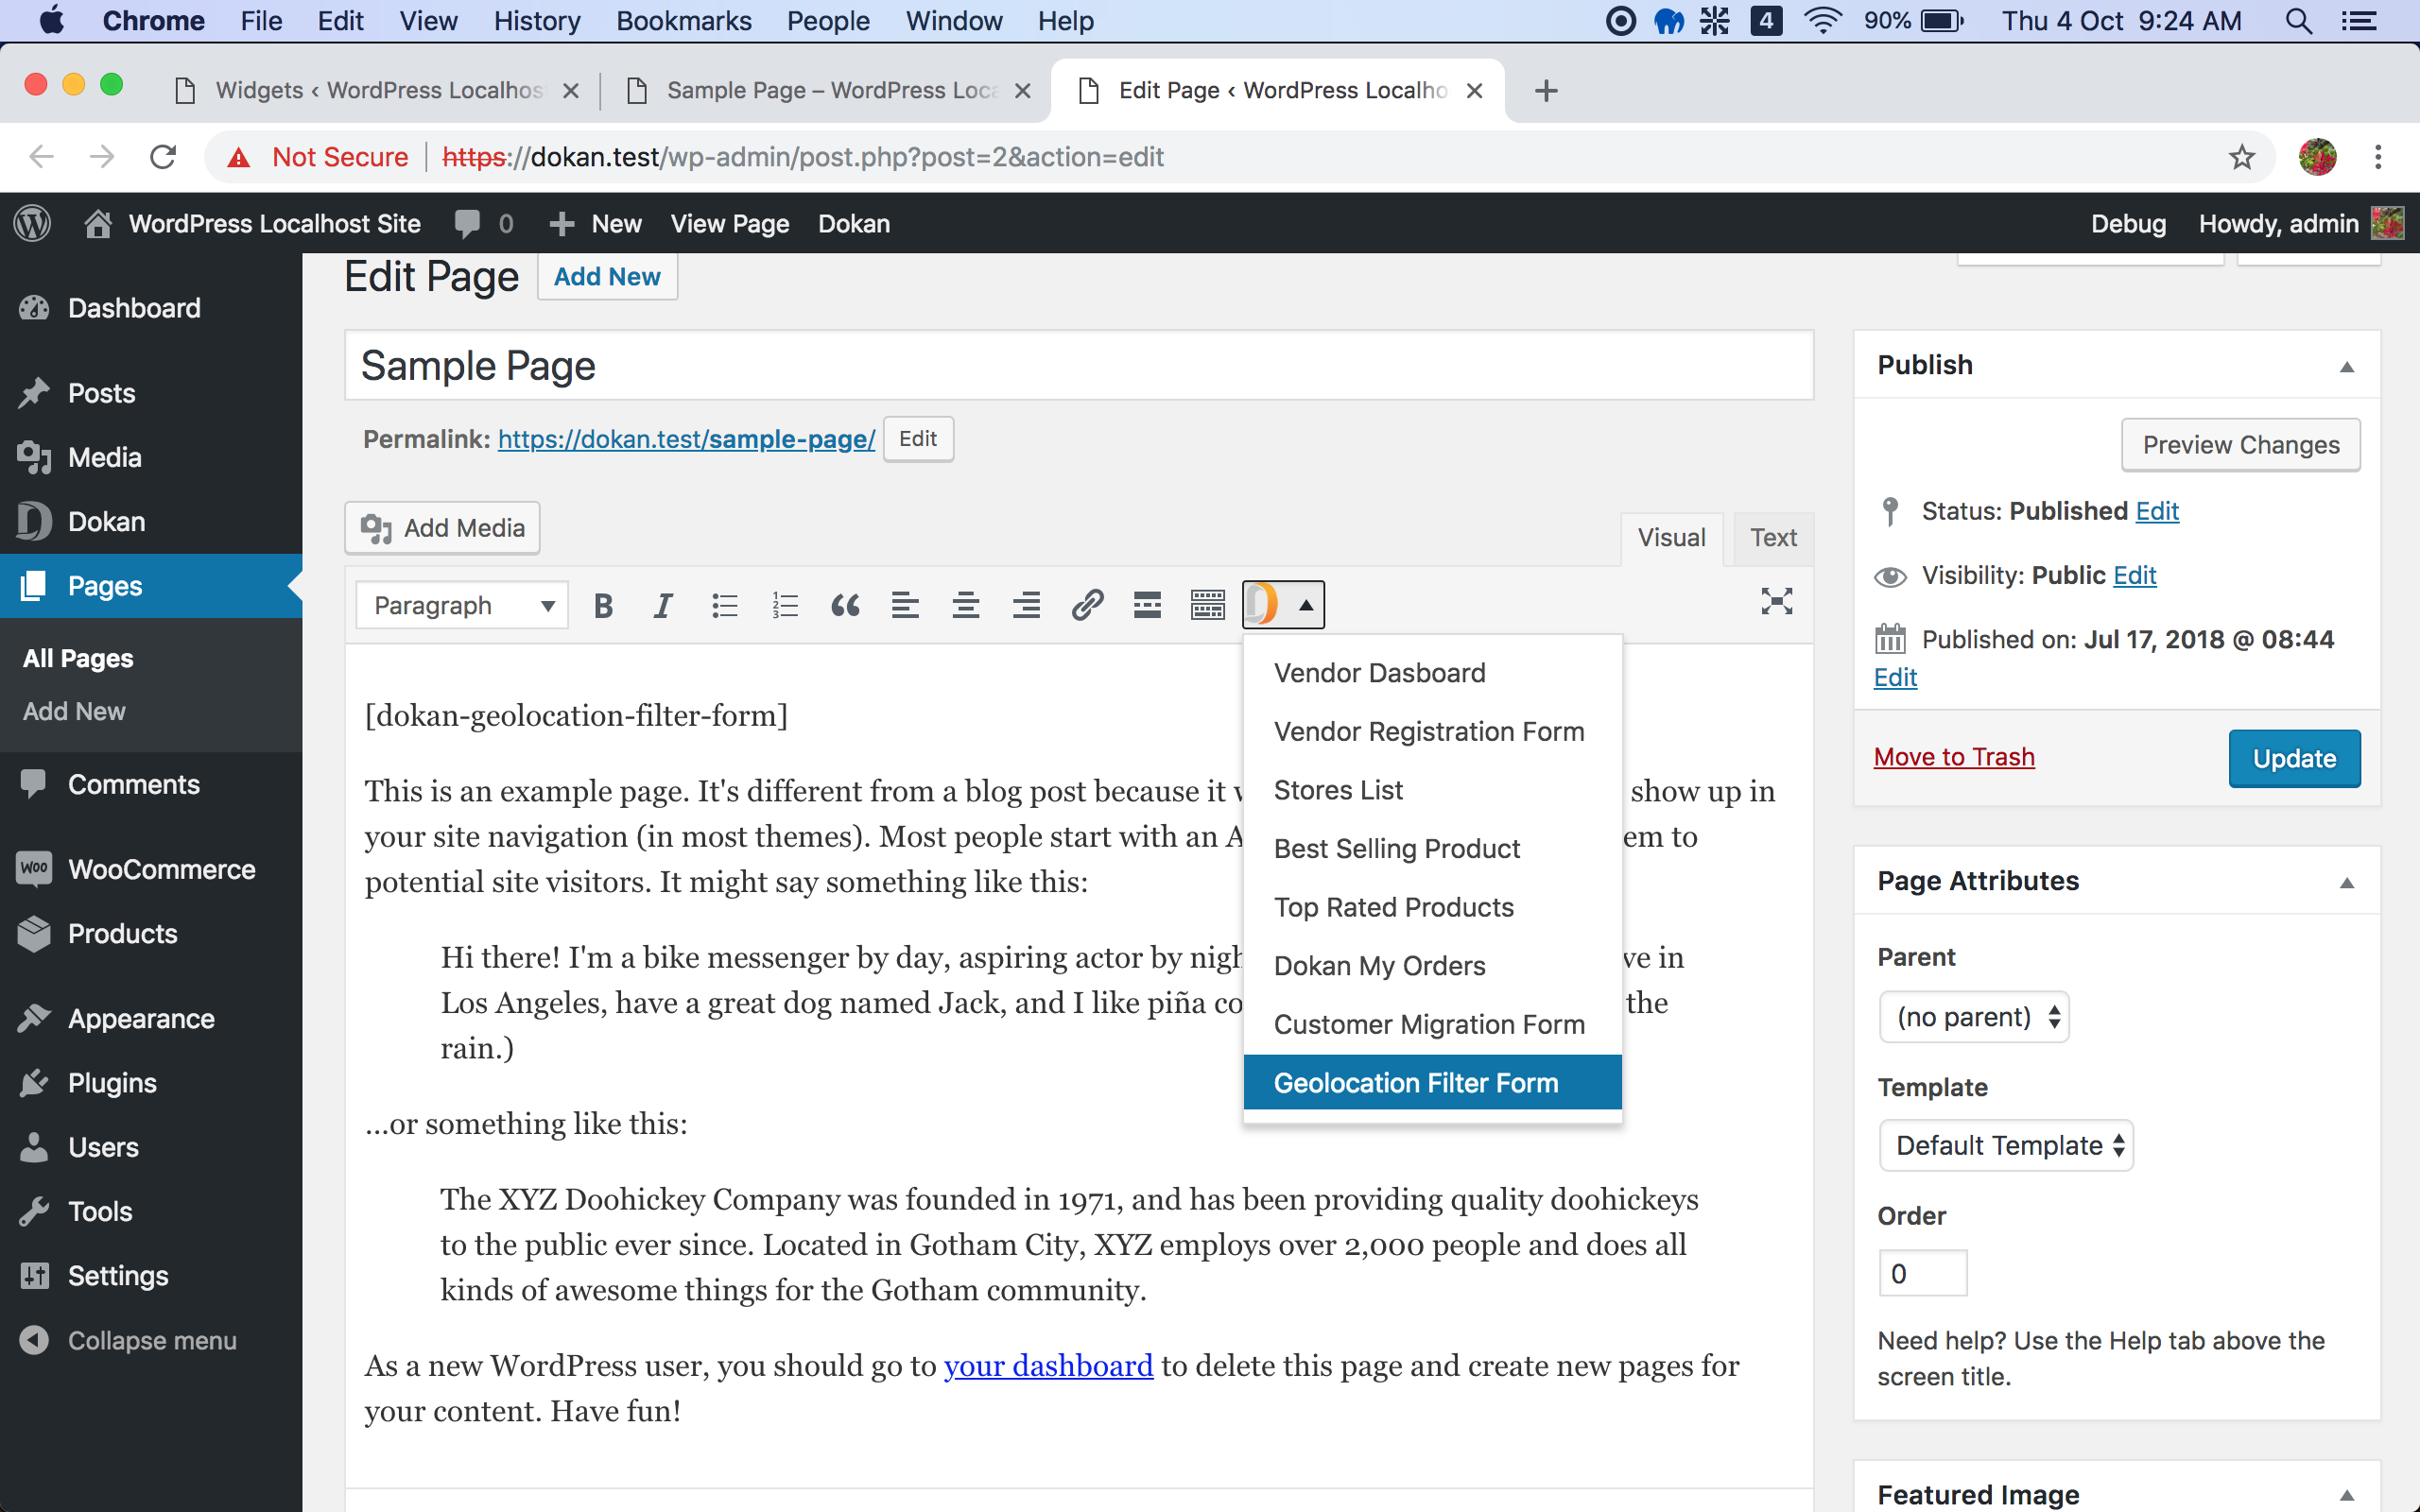
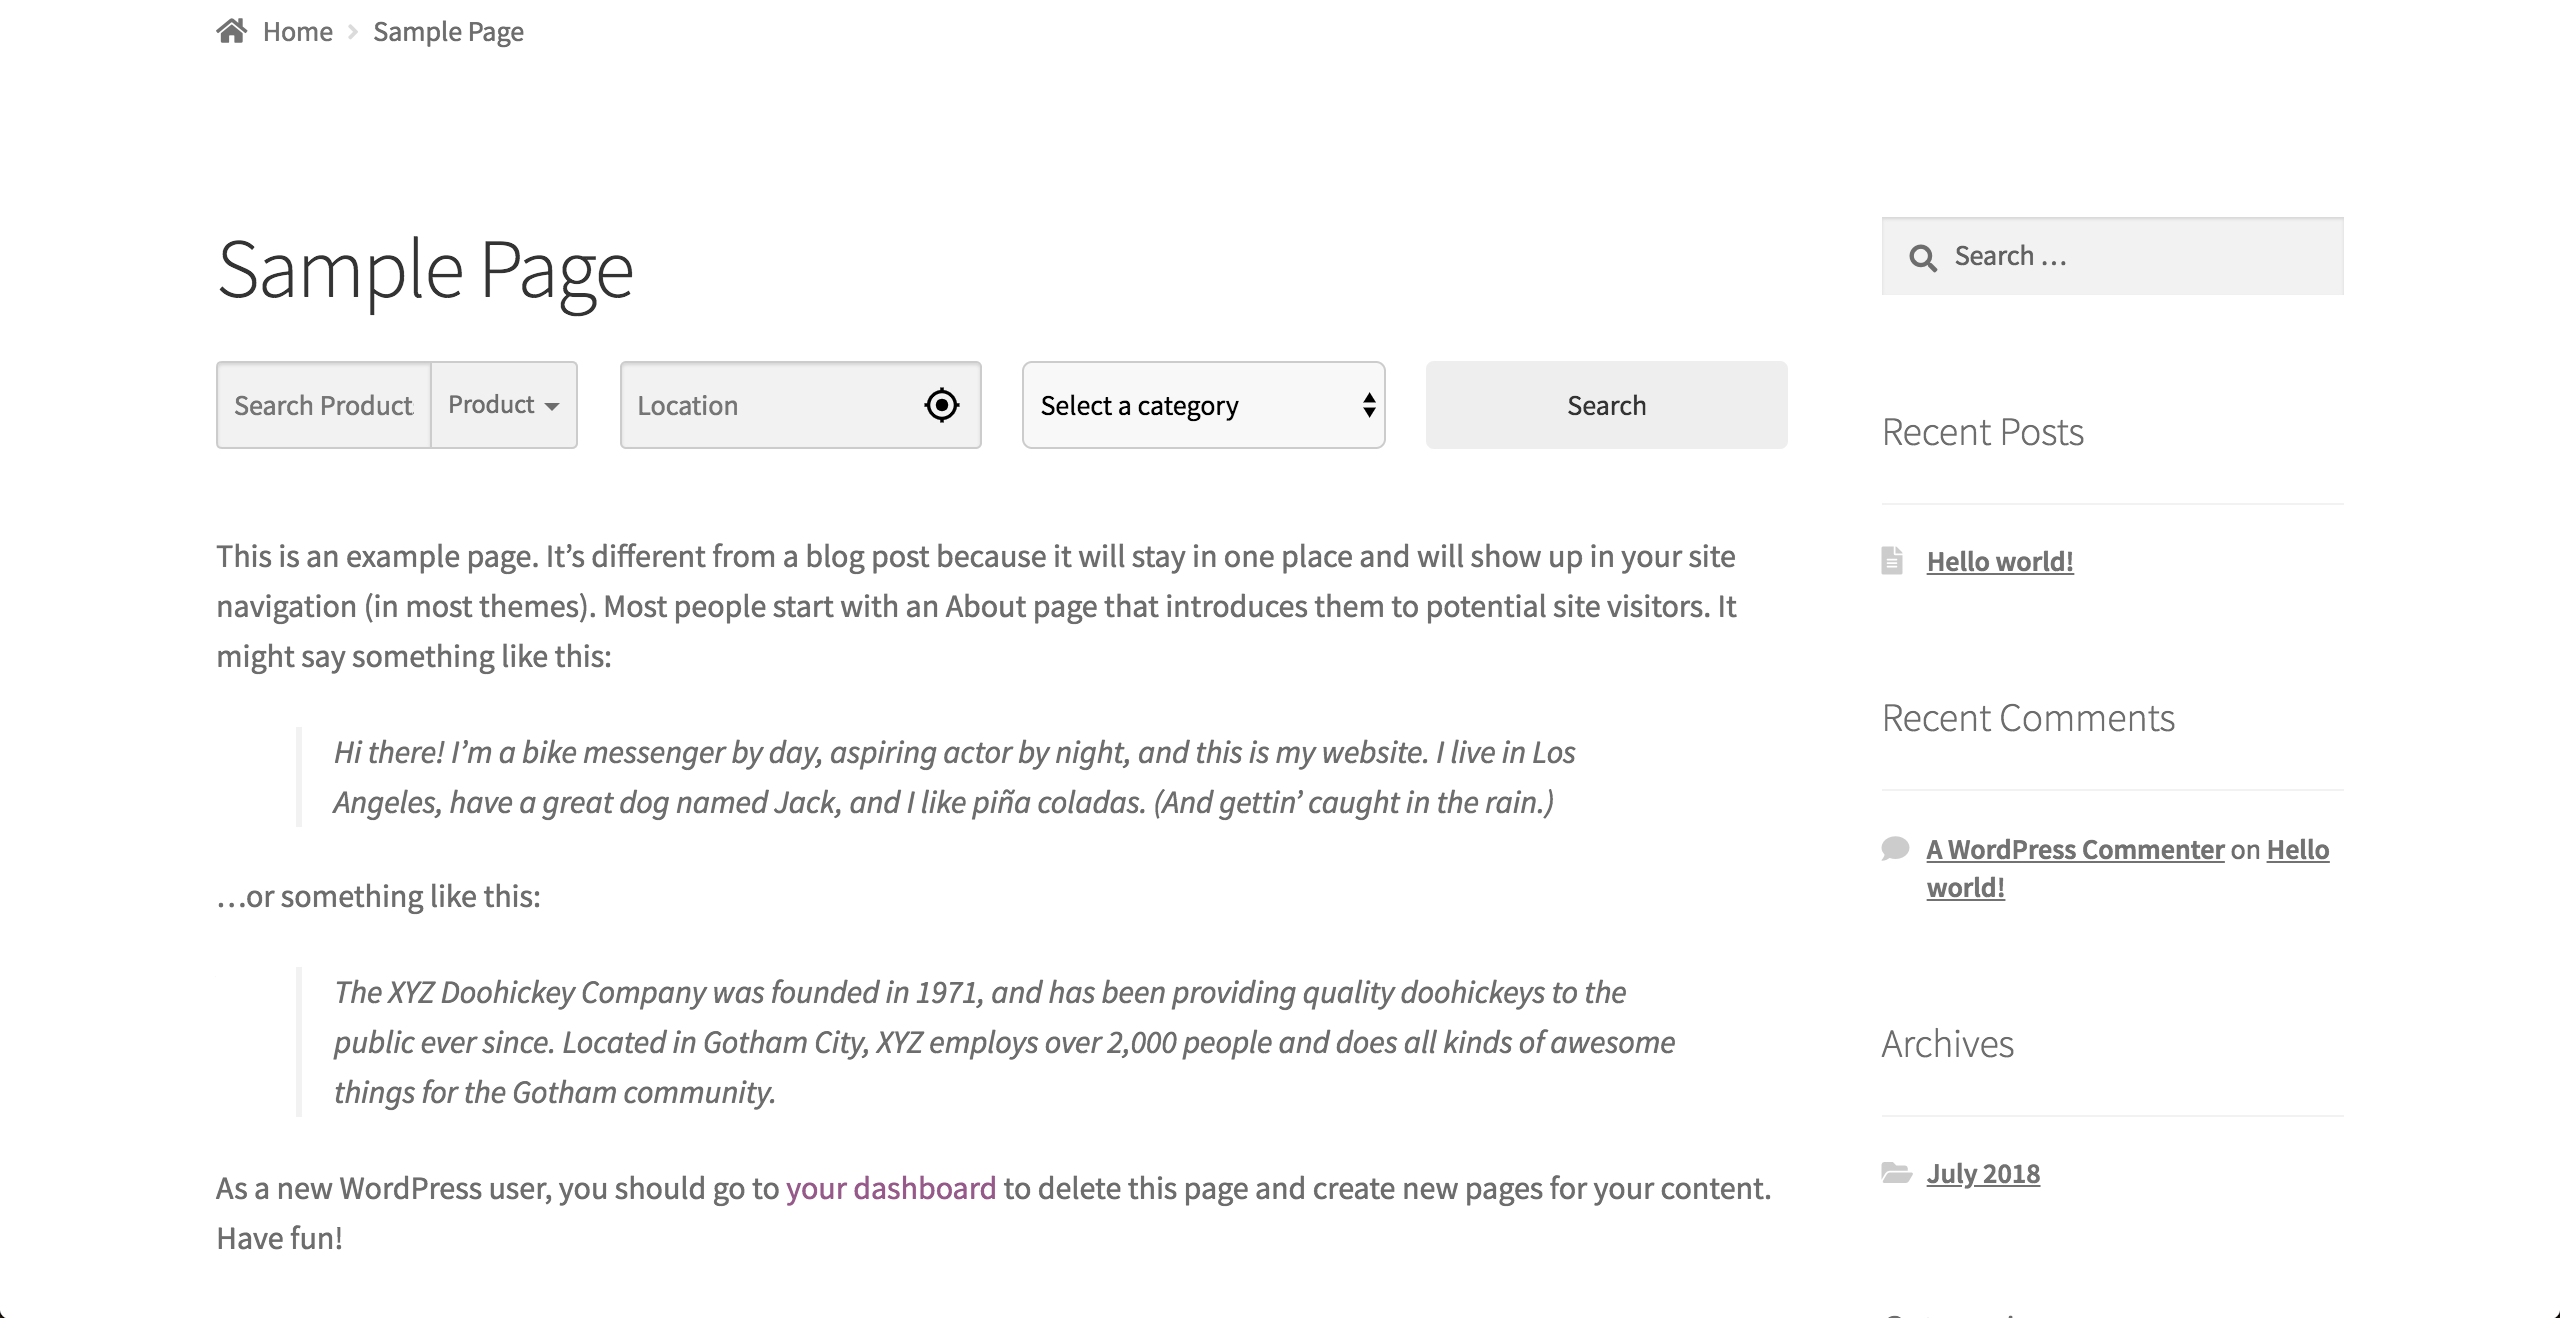
View from the front after using shortcode:
Vendor configuration
1. Vendors go to Vendor Dashboard→Settings→Store. Ensure that under Map you have entered your address. Click on Update Settings.
2. Vendors can set up location product-wise too. To do this go to Vendor Dashboard→Products.
3. Now click on Edit Product. Scroll down the page. Under Geolocation, uncheck Same as store location.
4. Then enter a new location for the product. Then click on Save Product.
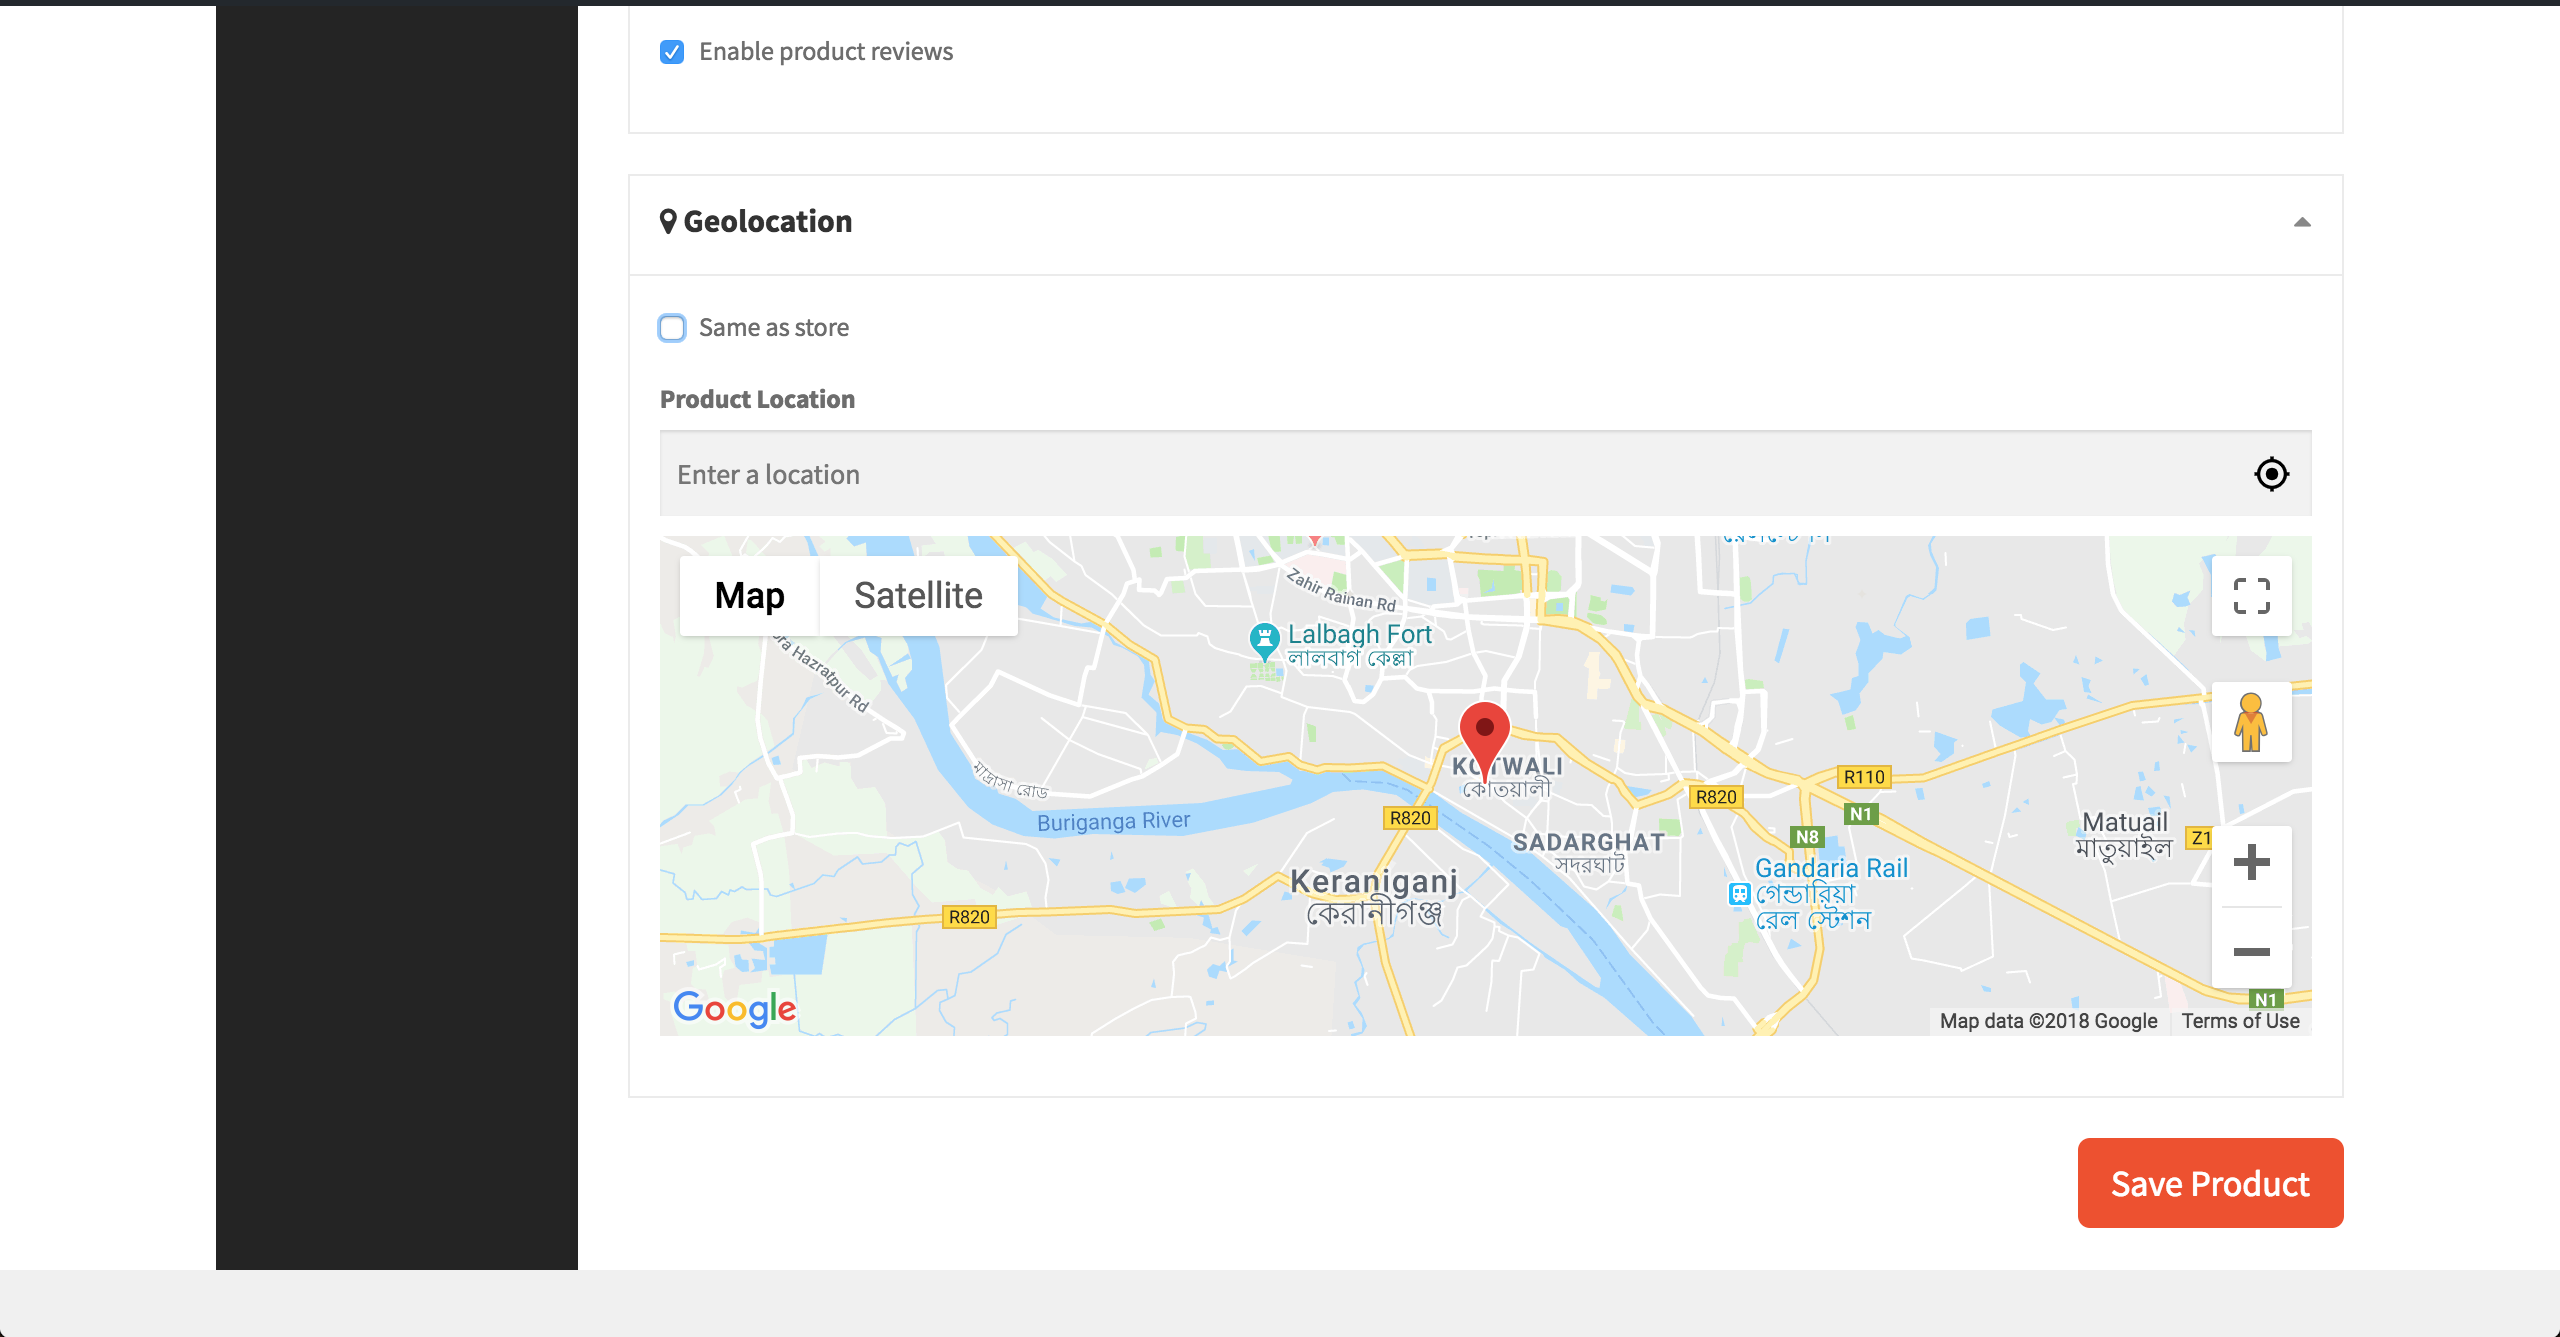
Now customers can search for this product by location from shop list page.
Other than that there are no other configurations for vendors.
How to Create The Mapbox Token
Creating a Mapbox token is pretty simple. All you need to do is follow these simple steps.
Step 1: Create your Mapbox account
You need to add a username, your email id and other important information to create a Mapbox account.
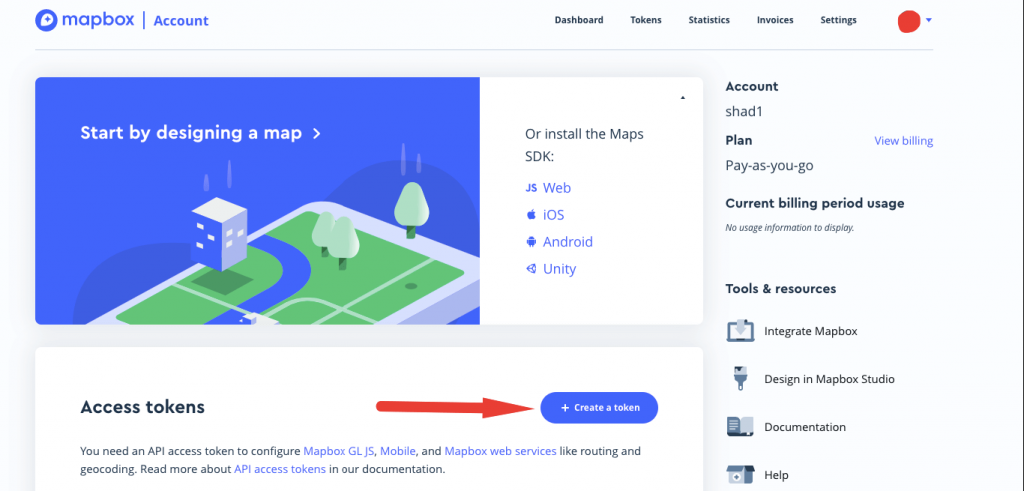
Step 2: Click on the Create Token button
After creating your Mapbox account, you need to log in to your account. There you will find the Create Token button. Click on it.
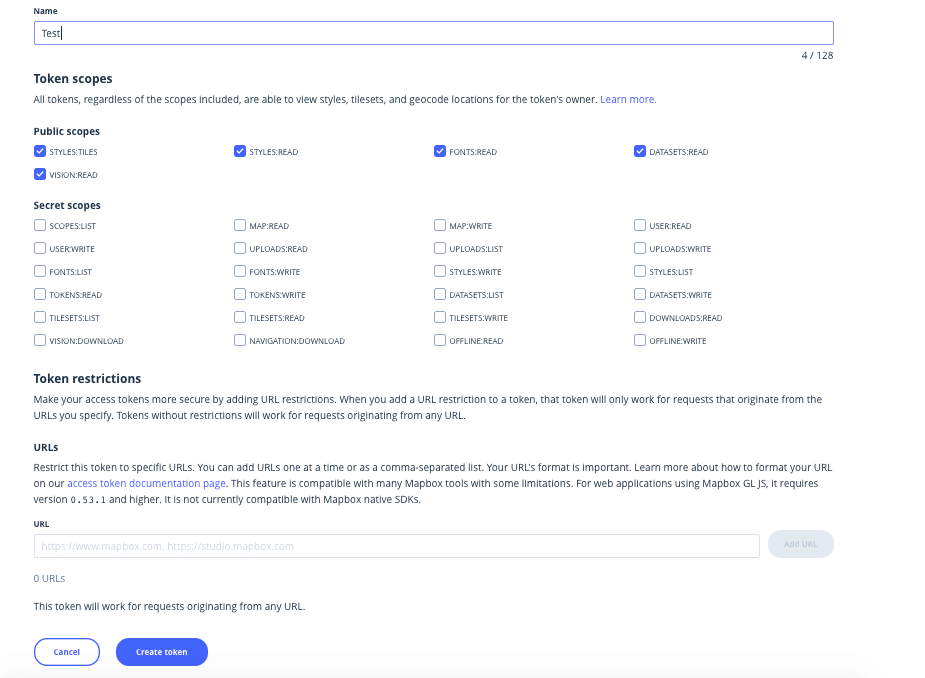
Step 3: Add the token name and submit
You need to add a token name to distinguish between various tokens as you may need to create different tokens. Then click on the Submit button.
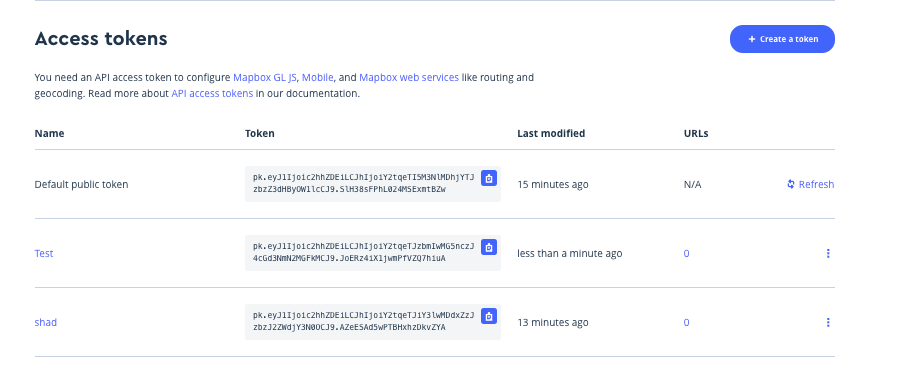
Step 4: Copy your Access Token
After submitting you will get your Access Token. Copy it from there and paste it on your Dokan Settings.
That’s it!
How to Create Google Map API
In order to collect the API key for Google Maps, log in to your Google developer account. Now click on the Create Credentials button and choose the API option from the drop-down menu. Give your API key a name and your API key will be created.
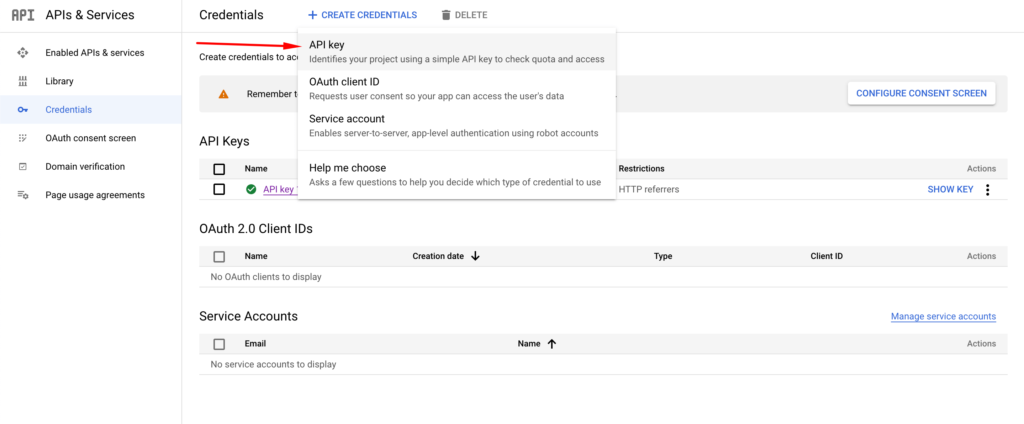
Now, you need to enable a few API’s. Click on the Library and type,
Directions API and enable it,
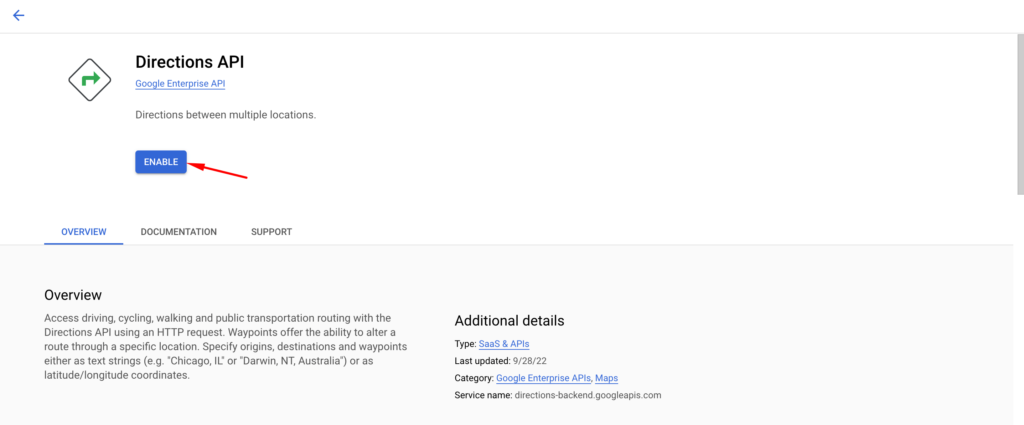
Geocoding API,
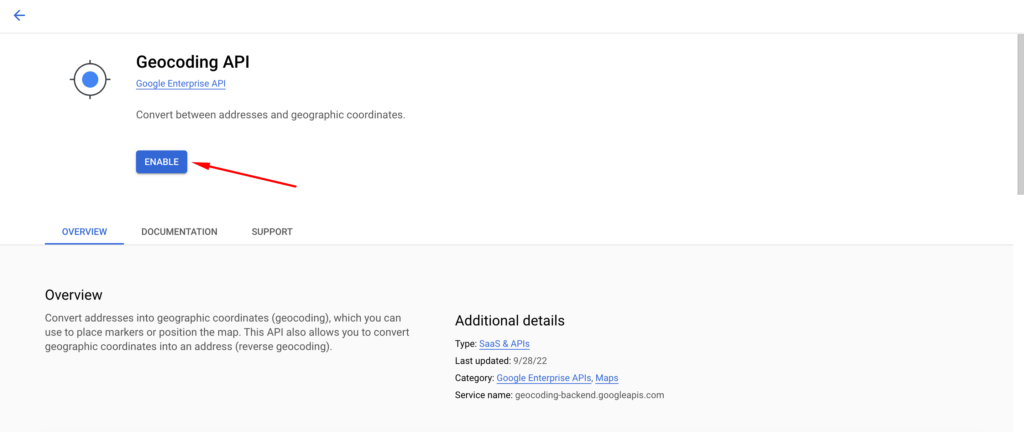
Places API,
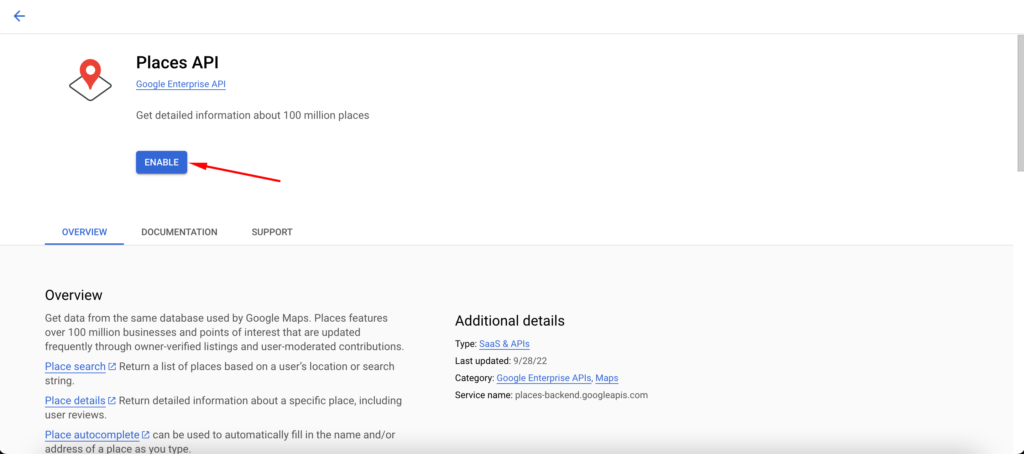
Maps Javascript API,
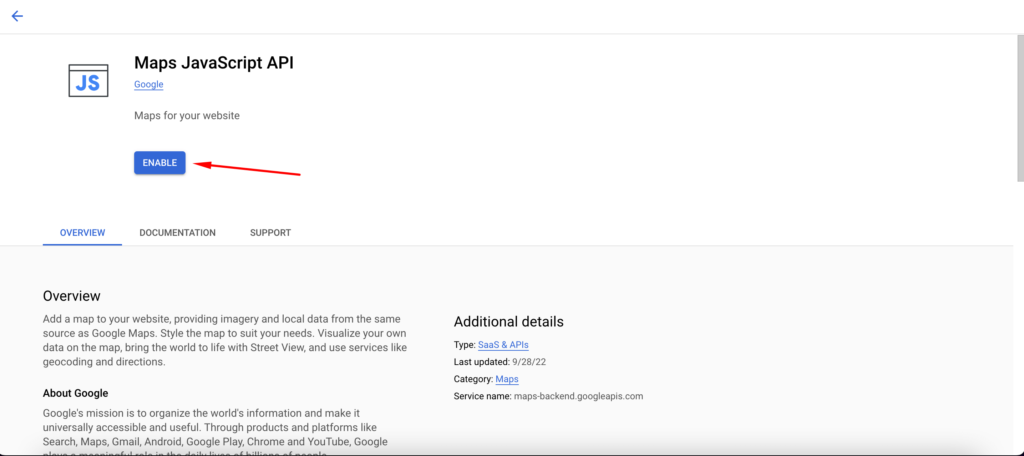
After enabling them, you need to restrict your API. For that, click on the Edit API option from the dropdown box,
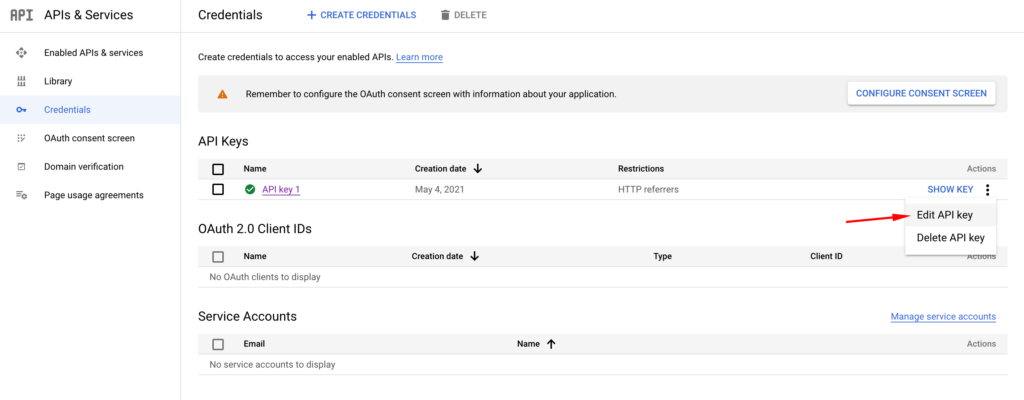
Now, choose HTTP referrers and add your web address. While adding your website address, use one with HTTP, with “*” and one with HTTPS.
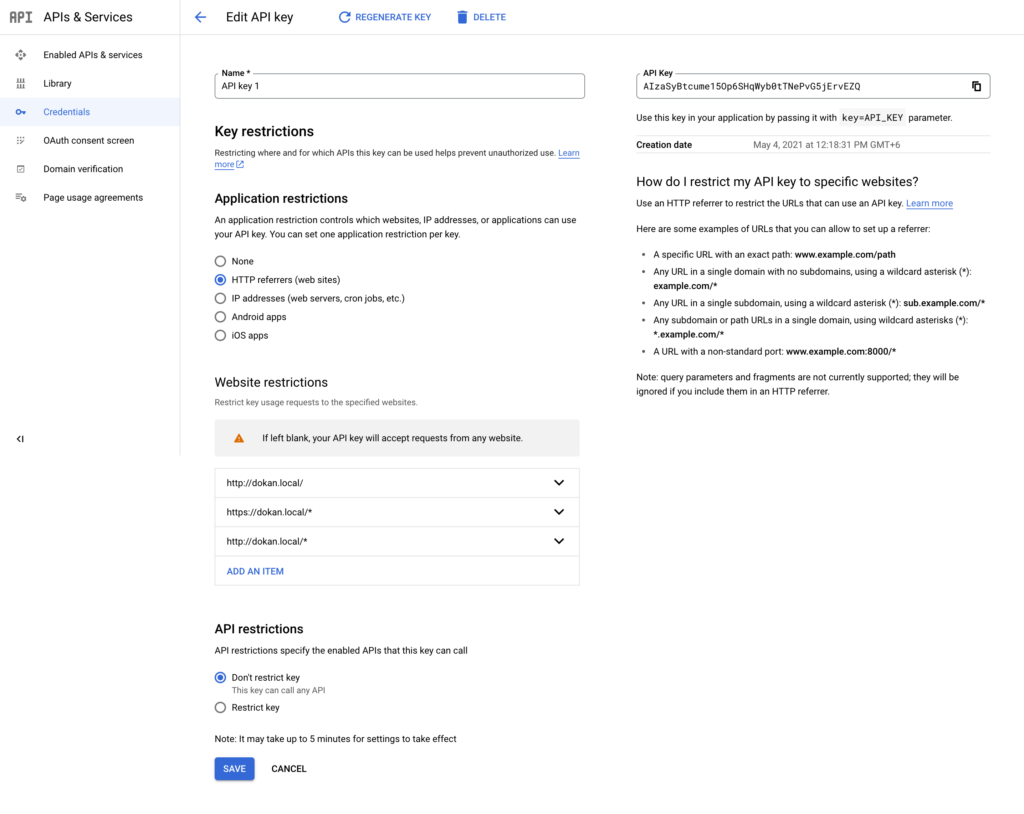
After that Save your API key and copy that API key to your Dokan Google Map settings.