
Using a checkbox grid for contact forms will let your users select multiple options to opt in at the same time when filling out a form on your website. The following tutorial will walk you through the process of setting one up, and even explore some of the advanced options you have available with weForms – the most advanced contact form builder on the market today.
To find the checkbox grid, navigate to WP Admin Dashboard → weForms → choose an existing form or Add Form from template.
Here we have chosen an existing form to edit.

After that, you need to scroll down the field section to find the Checkbox Grid.
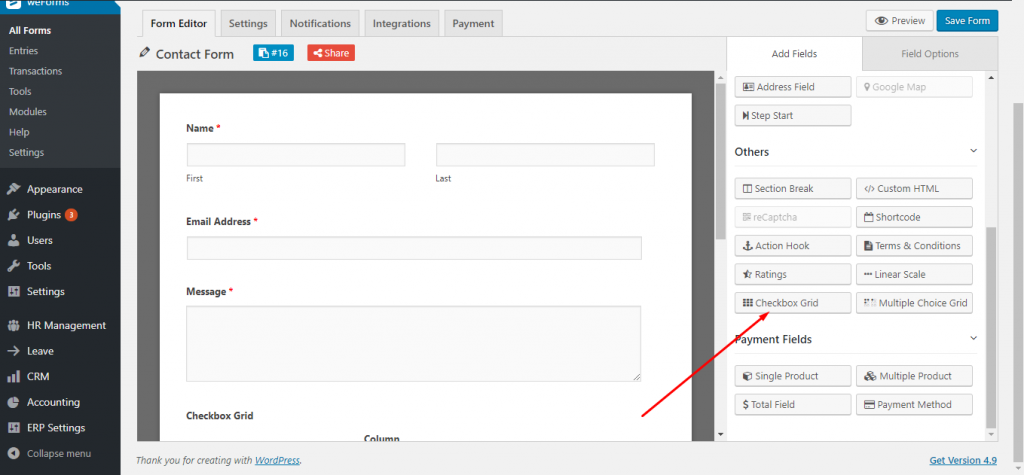
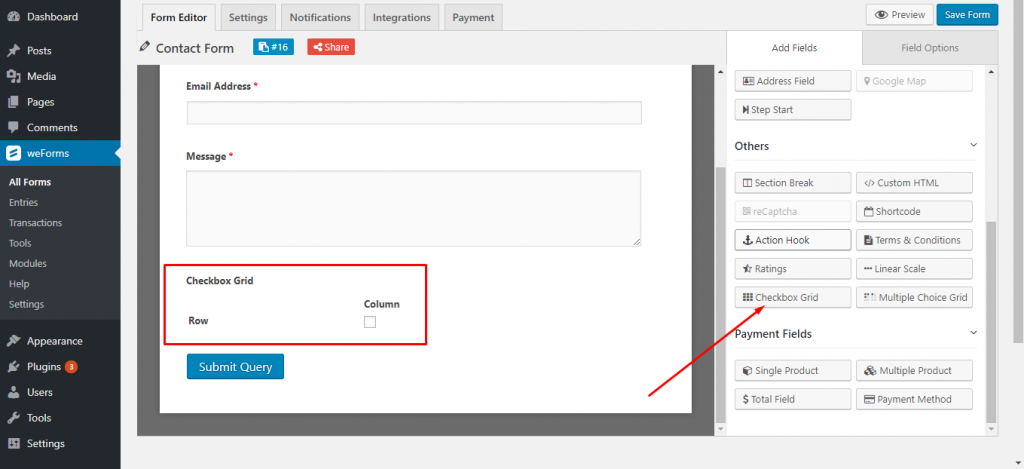
Next, click on the field or just drag and drop the field into the form and a Checkbox field will automatically be added to the form. Here is the backend view of the field:
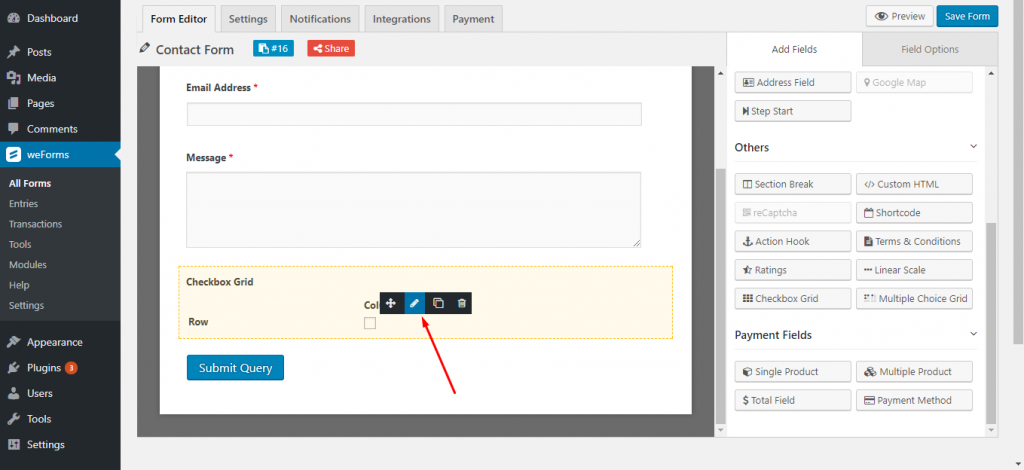
To edit this field, just hover your mouse over the Checkbox Grid field area and you will find an edit bar. Click on the edit symbol as indicated by a red arrow on the following screenshot:
Consequently, you will get field options to edit the field:
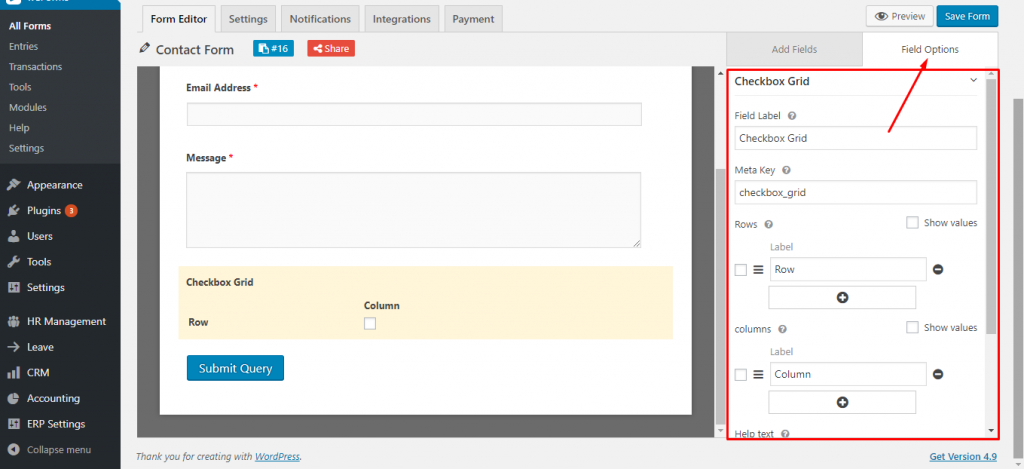
Field Label: With this option, you can change the field label text. Let’s change the label from “Checkbox Grid” to “Select your items”. The Meta key will also be changed accordingly.
Rows: Add rows to the field. A row will be being added to the field each time you click on the row options “+” sign.
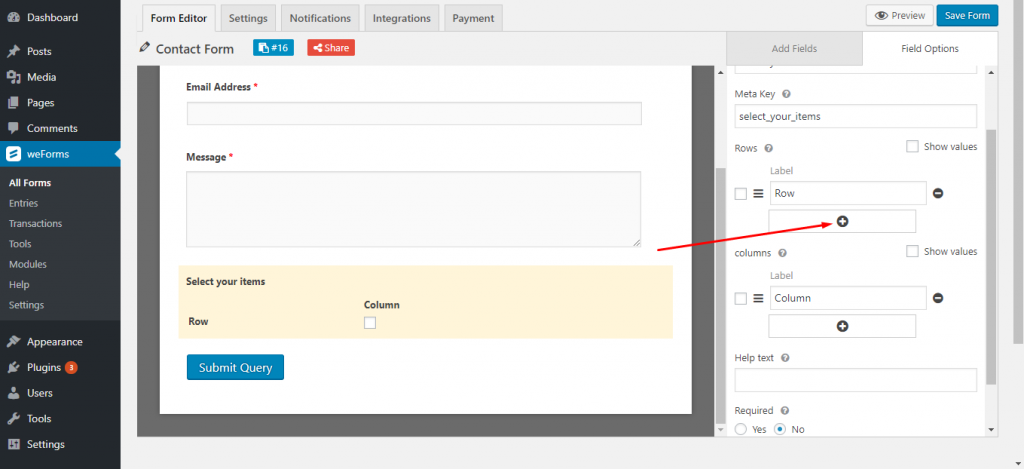
Let’s click on the “+” sign 3 times. After having clicked on the “+” sign three times, you will be able to notice that 4 rows have been added to the form. An additional row will always remain all along by default. Take a look at it:

You can edit the Row Labels, let’s edit the labels:
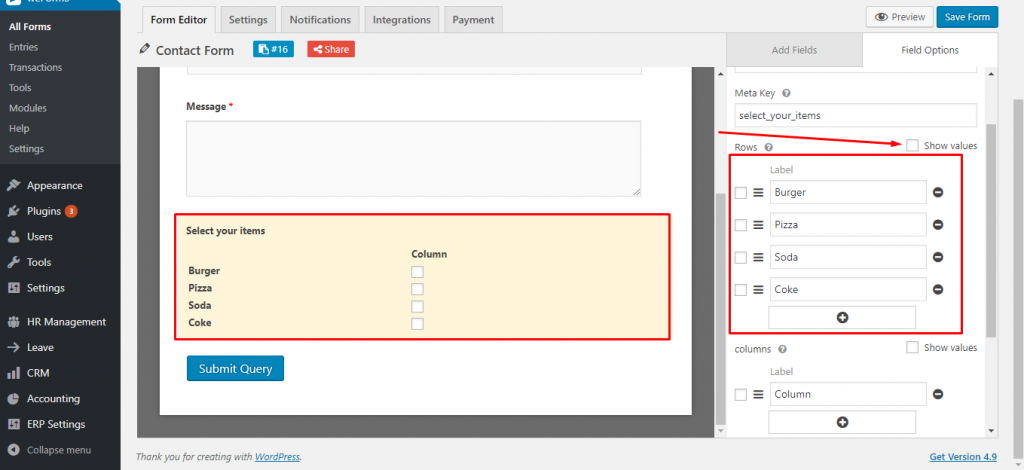
If you check the Show values option you will be able to see every row’s values. Generally, the values are auto-generated.
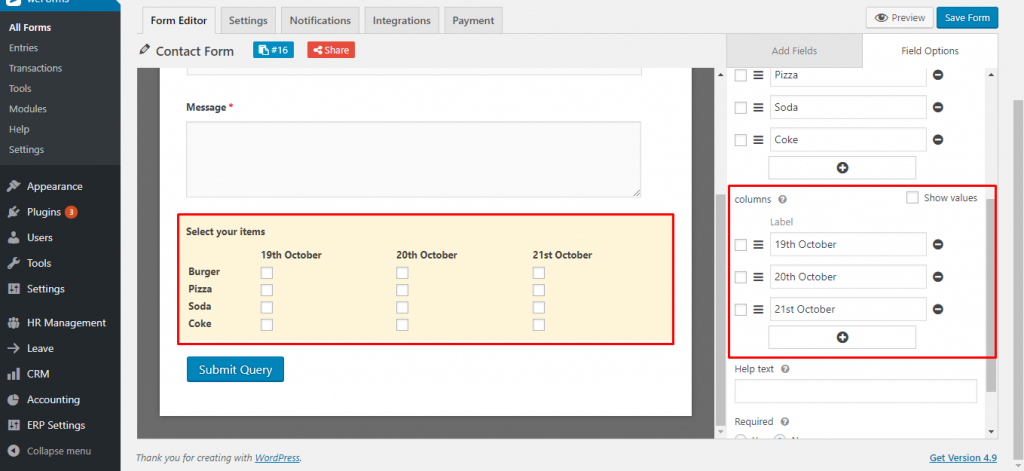
Columns:Rows and Columns are literally similar to each other. The difference is that Rows work horizontally whereas Columns works vertically. Like Rows, you can also edit columns and can see the values by checking the Show values option. Let’s add 2 more columns and edit them:
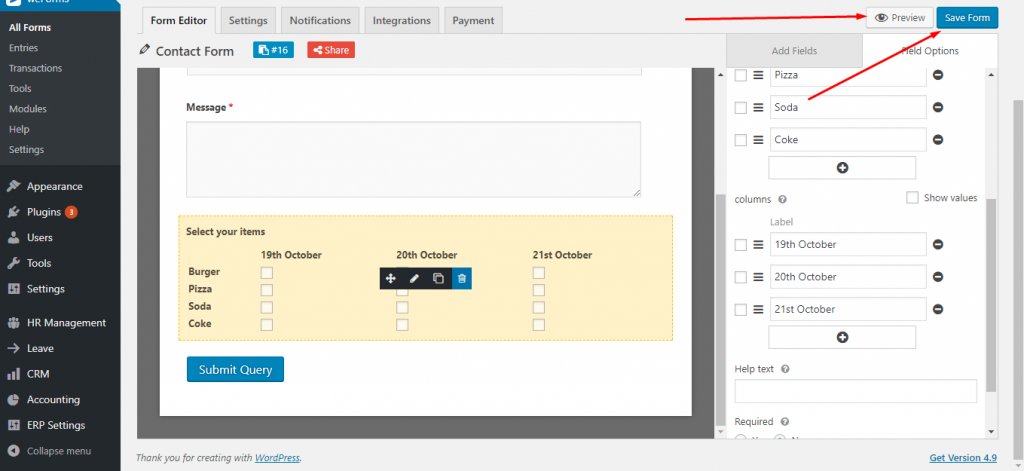
Save the form and hit the preview button:
Your users can select and submit more than one item at a time. Let’s select some items from the Checkbox Grid on the frontend view of the form:

Help Text:Help your visitors to understand the field by using a bunch of texts.

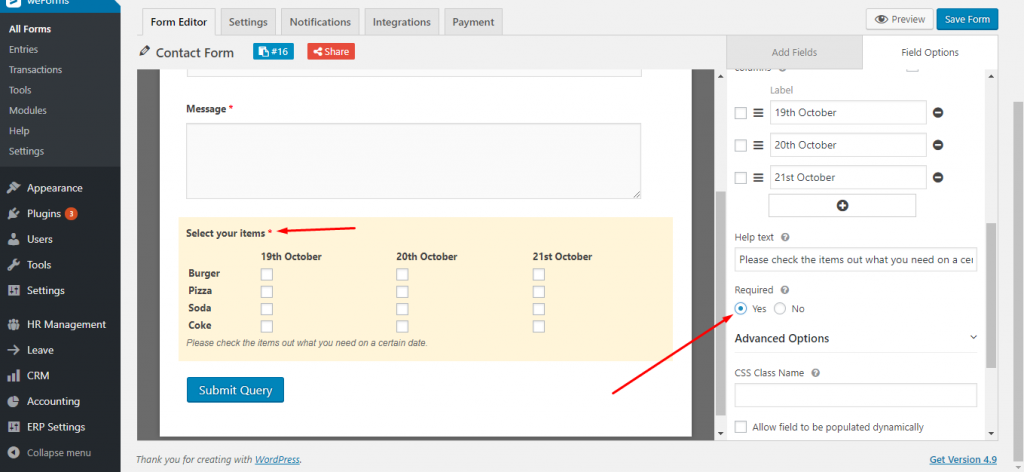
Required: If you check out “yes” then an asterisk(*) mark will appear beside the field. Meaning that your users must select something from the Checkbox Grid otherwise the form will not be submitted.
Advanced Options:
CSS Class Name: Provide a container class name for this field.
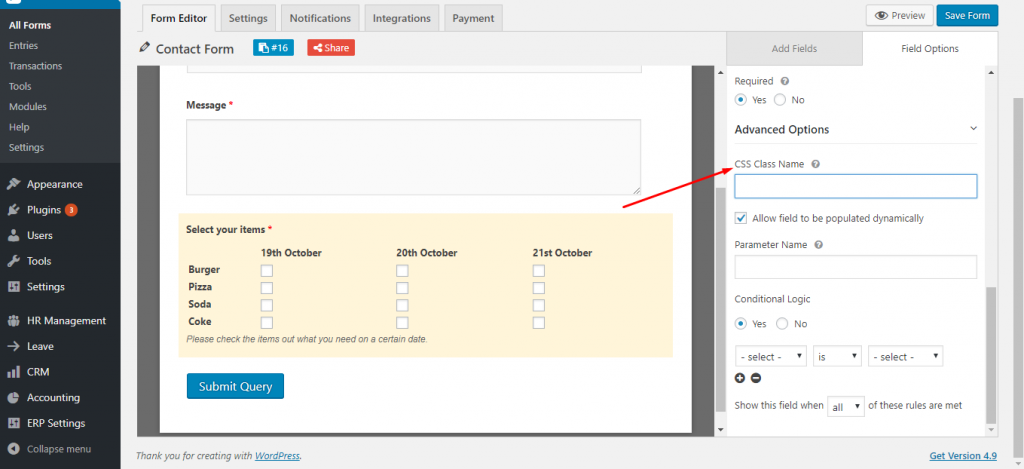
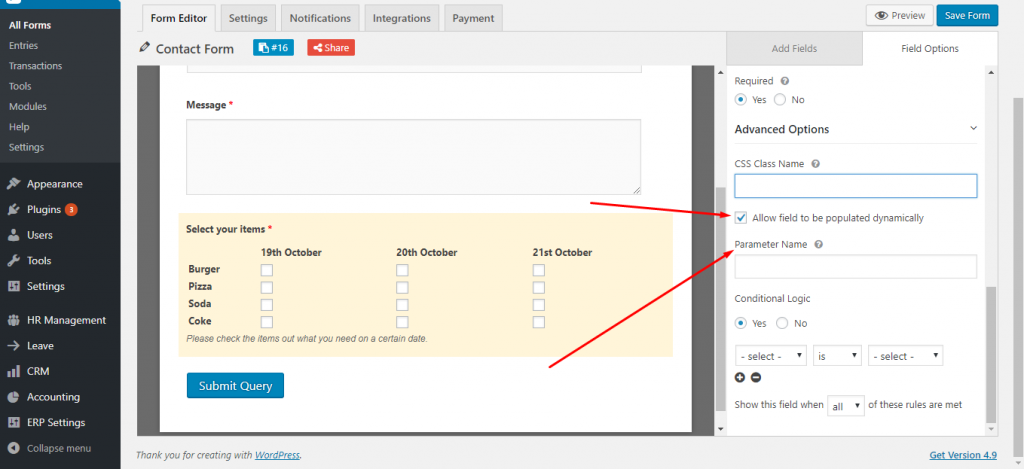
Allow Field to be populated dynamically: If you check this box then you have to provide a parameter name.
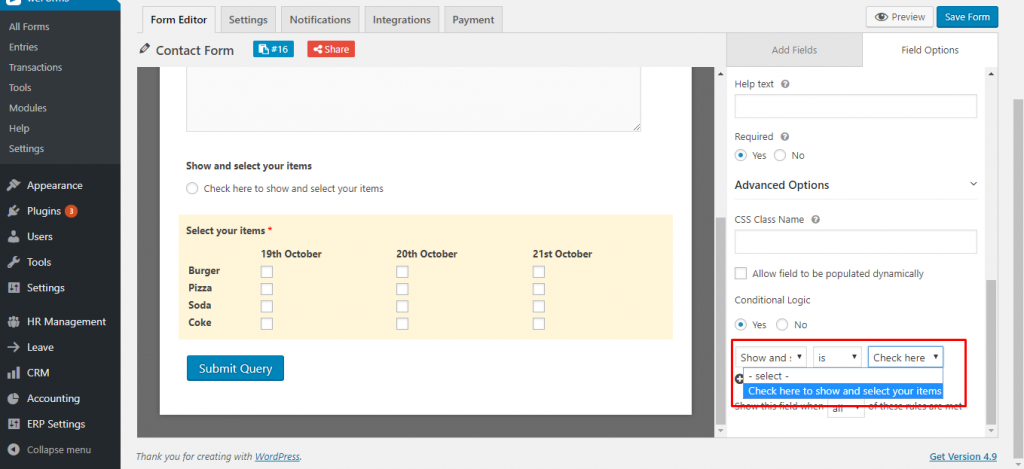
Conditional Logic: Conditional logic is useful for personalizing your contact form for your users. Assume that you want to show the aforementioned items only when your users click on a particular condition. Now, let’s create the condition.
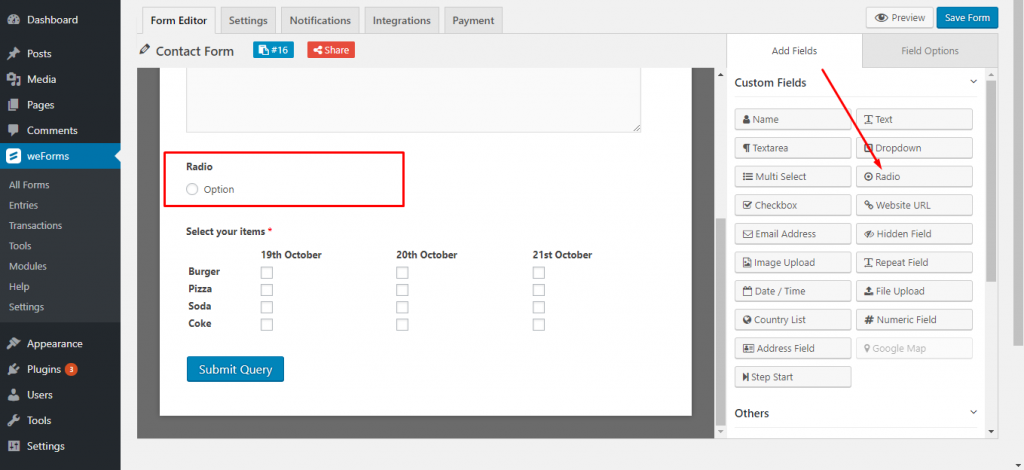
At first, you need to have a checkbox or radio button installed as a base in the form right before/after the field that you want to make dependent on the checkbox or radio button. In this example, let’s take a radio field. Learn how to take radio field from here.
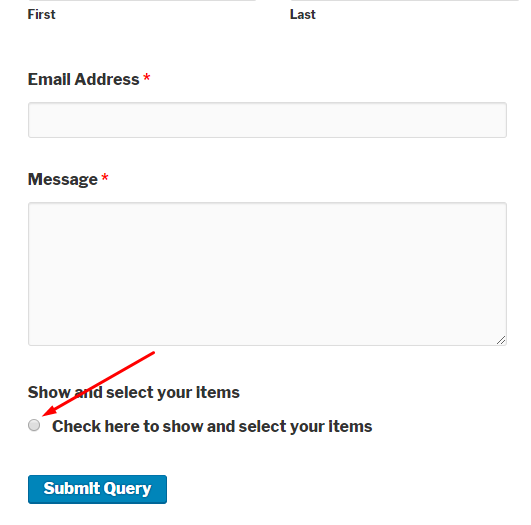
Change the radio button’s label to “Show and select your items” and “option” to “Check here to show and select your items”. Now, save the form. Next, bring your mouse to the Checkbox Grid area and hit the edit option so that you can set the conditional logic up.

Here, you will find the field options for Checkbox Grid. Now, from the Advanced Options, set the conditional logic to “yes”. Then, select “Show and select your items” and “Check here to show and select your items” from therein. Now, you are good to go!
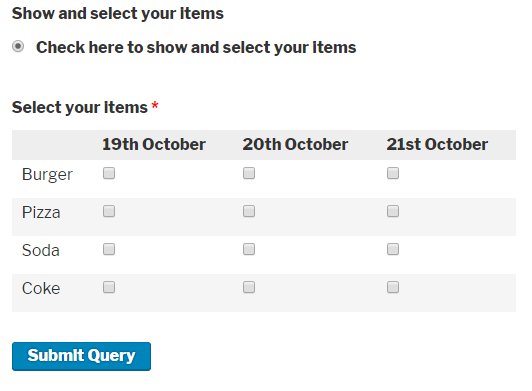
When you check out the “Check here to show and select your items” button only then will the Checkbox Grid appear on the screen. Let’s see the frontend view of the form to test how the conditional logic works:
If you check the radio button your users will be able to get the Checkbox Grid. Here is a screenshot:
Congratulations! You now know how to leverage check box grids for your WordPress contact forms. Next, you may want to learn more about using a country list for your forms or even adding a date and time picker.