How to Create Events Using WP User Frontend Pro
WP User Frontend is one of the unique frontend posting plugins out there for WordPress. It surprisingly helps you to manage everything from frontend including –
- Build Registration Forms
- Create User Profiles
- WooCommerce Product Forms
- Subscriptions
- Contact Forms
- Custom Post Types Support
Do you know- you can do even more with this amazing plugin?
In today's blog post, I am going to show you something really interesting! You will get to learn how to create amazing Event Forms using your very own WP User Frontend Pro and create events from Frontend. Let's find out how.
Basic Requirements for This Tutorial
In order to create event forms, you will need the following plugins.
The Events Calendar plugin allows you to create events rapidly. You can also save venues & organizers. It integrates with Google Maps and Google Calendar seamlessly. But the most important point we have look here is that- it supports events creation only from backend.
This is where WP User Frontend comes in. It allows you to create those events from the front end. You can also allow your users to create their own events as well using this trick.
The Post Meta Inspector helps you to identify and collect post meta keys of different fields. You will need the post meta of the events to form so that you can use them with WPUF.
Create Your Own Events from Frontend
At first, you will need to install and activate the required plugins on your WordPress website. After doing so, follow these steps for creating events successfully.
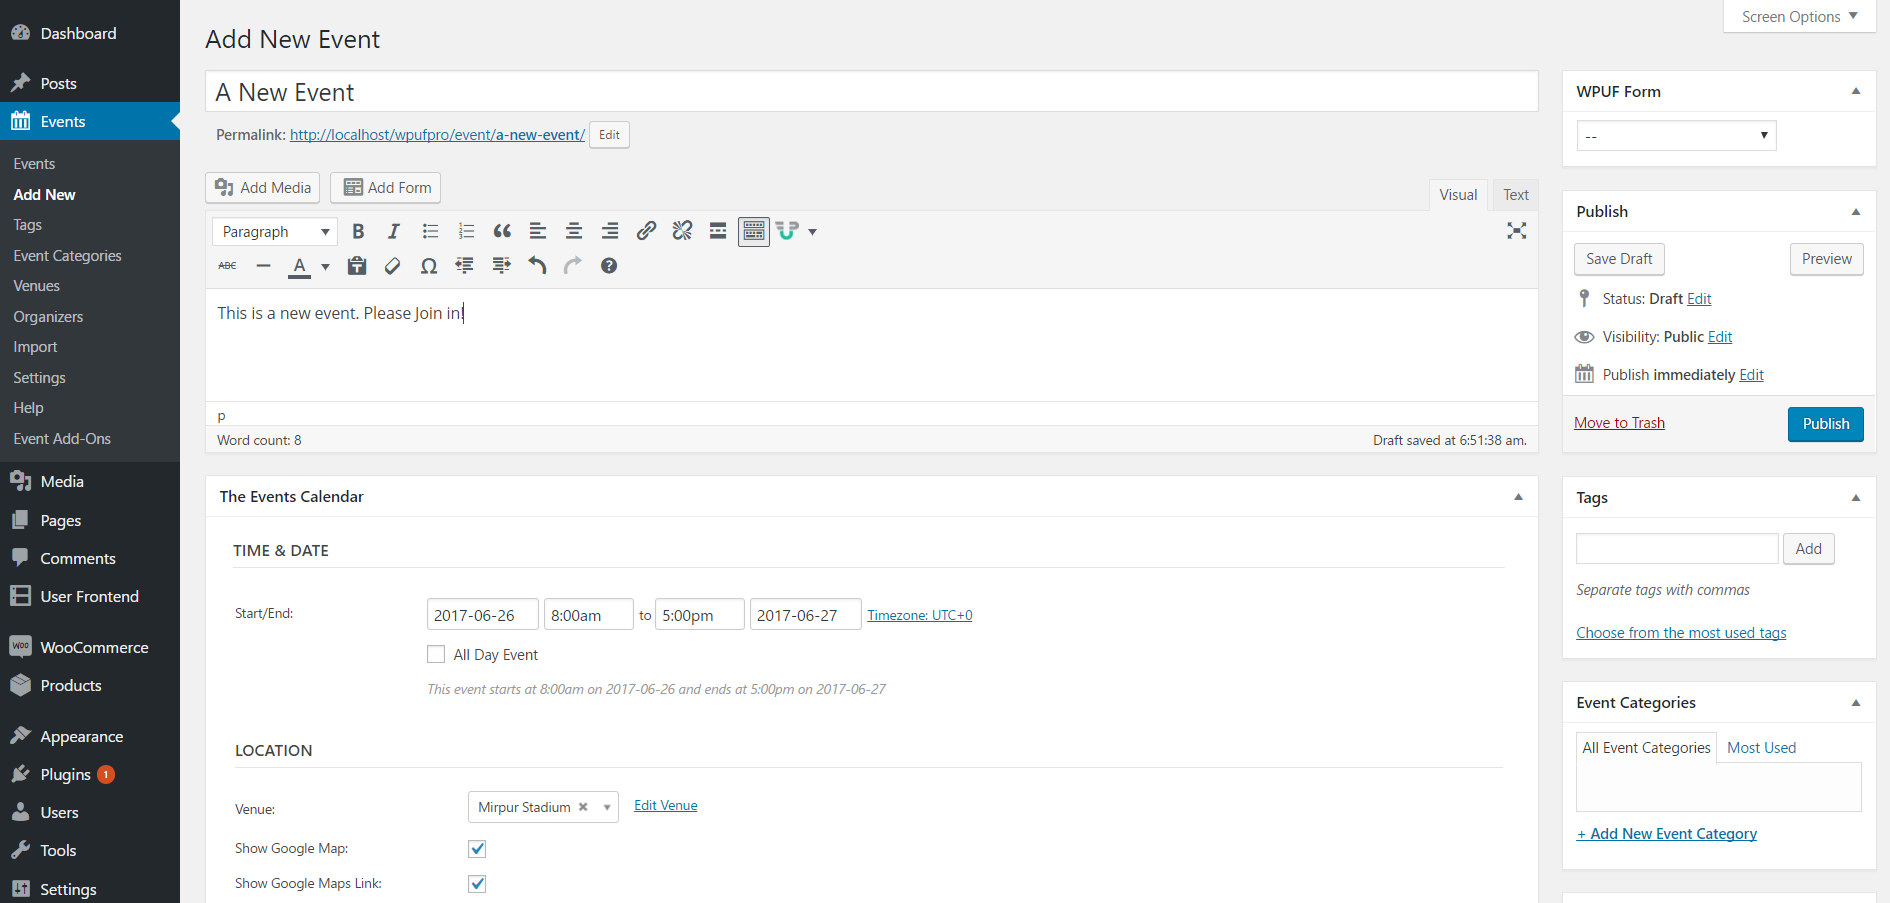
Add Event Using The Events Calendar
After installing and activate the events calendar, you will get a new menu on your dashboard titled ‘Events'. Navigate to – WordPress Dashboard → Events → Events → Add New.
Now, enter relevant information including event name, description, time & date, organizer, address, phone number, ticket price etc. and Publish the event.
Collect Post Meta Using Post Meta Inspector
After creating the event, you will be able to find and identify the post meta of the events fields. Scroll down to the bottom of the created event. You will view the available post meta key with the value you have inputted.
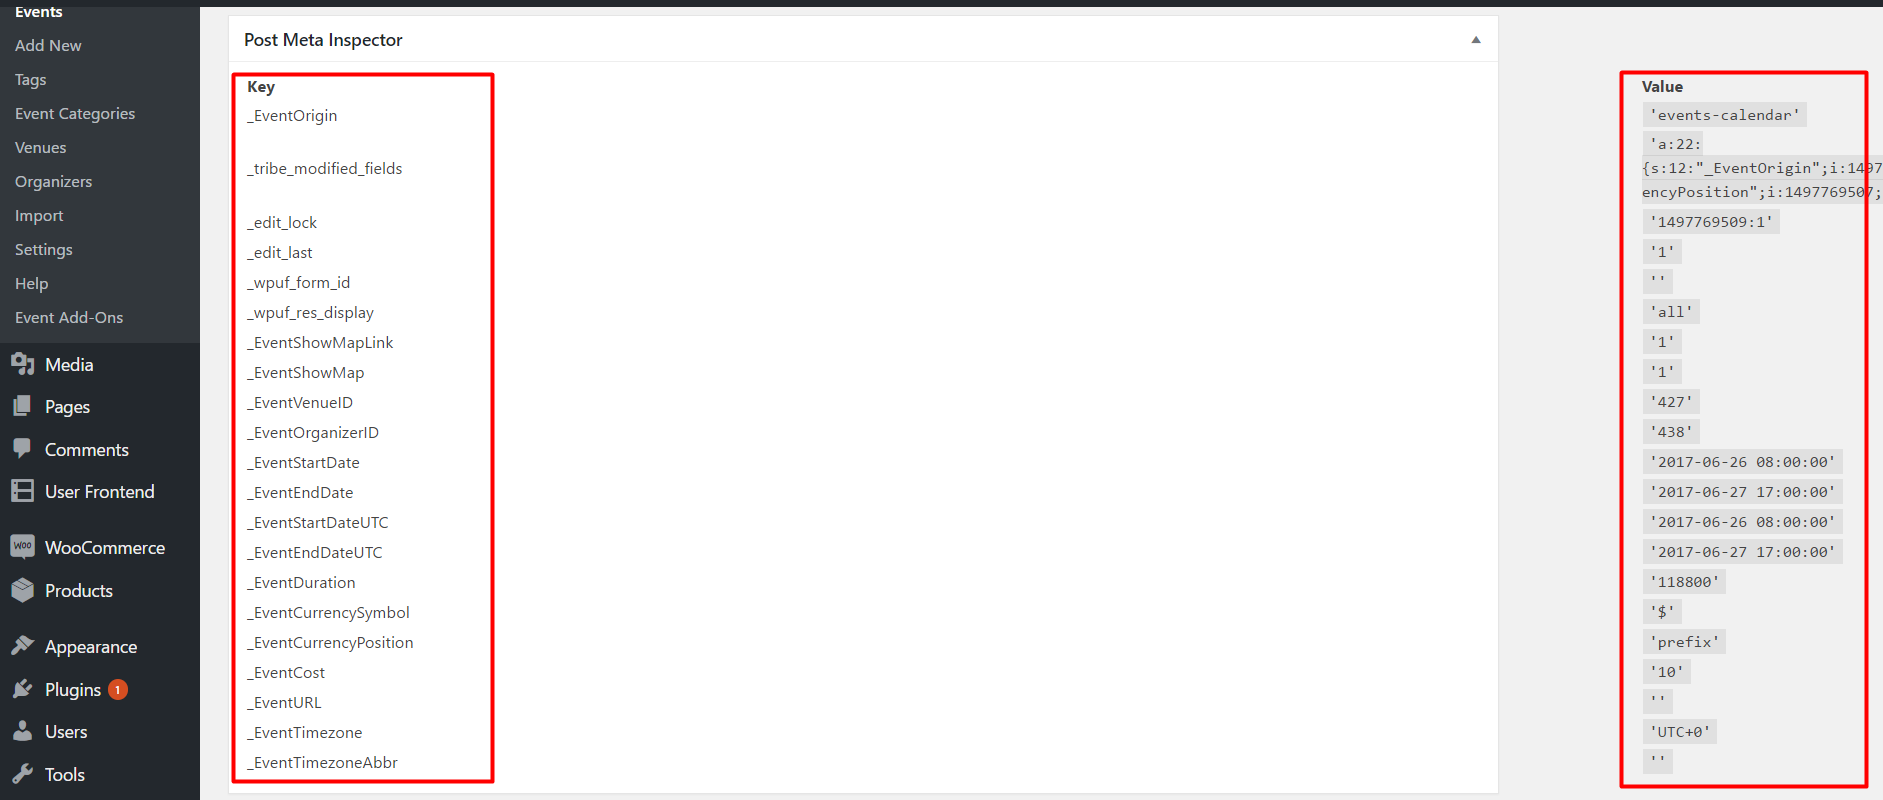
Now, you have to identify and copy post meta keys that you will be required to create an event form using WP User Frontend.
For this tutorial, we will create the event with the most basic fields. Thus, we will require the following post meta keys –
- _EventVenueID
- _EventOrganizerID
- _EventStartDate
- _EventEndDate
- _EventCurrencySymbol
- _EventCost
- _EventURL
Create A Post Form Using WP User Frontend Pro
In this step, you have to add a post form with WPUF and include the post meta keys within the custom form fields.
First, navigate to WordPress Dashboard → User Frontend → Post Form → Add Form.
Select Blank Form and add some fields.
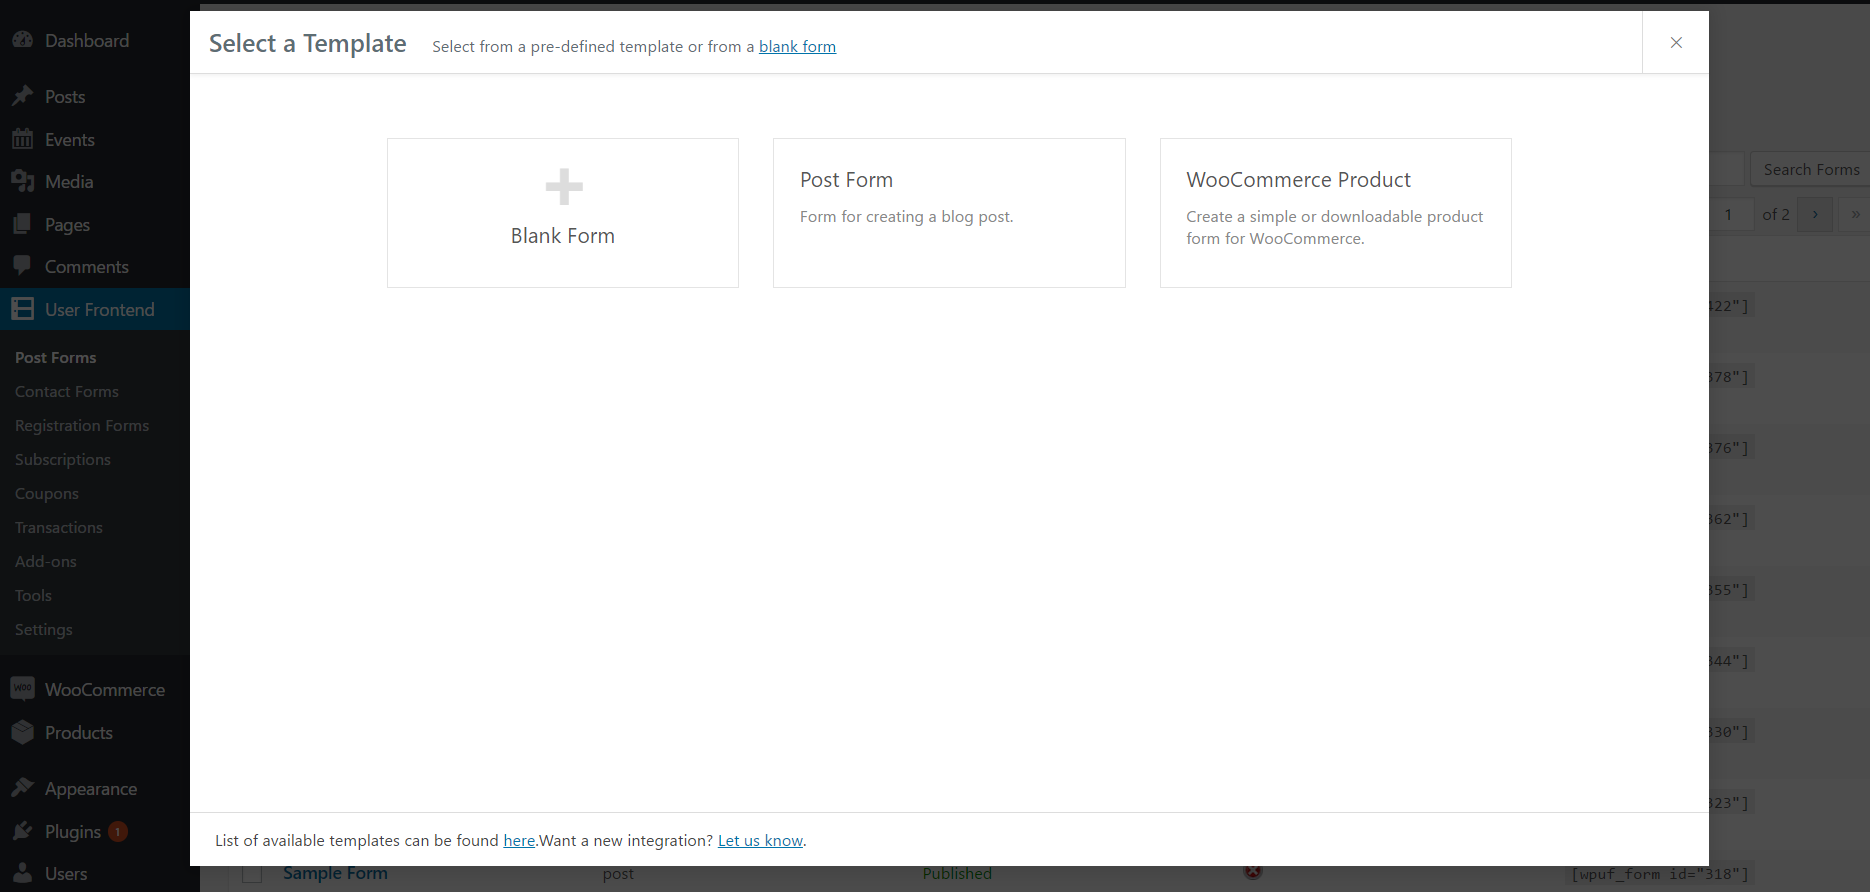
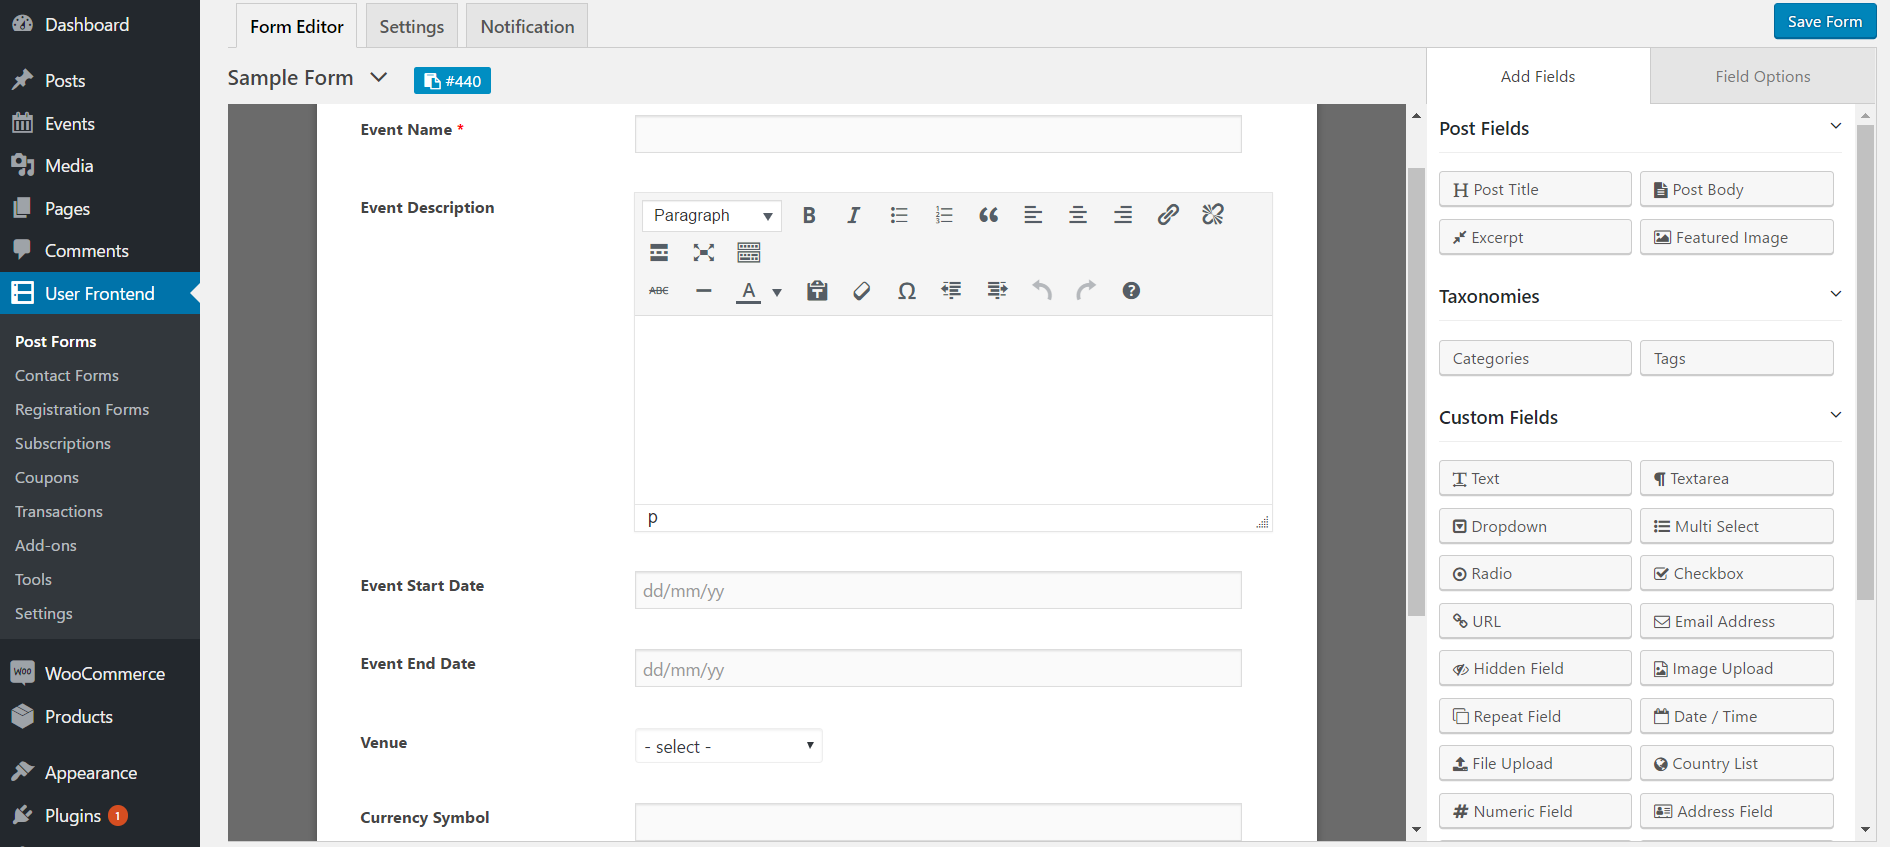
Please note that the Title and Description post meta keys are set by default within WordPress. So, we don't need to collect those keys from post meta inspectors.
Add Custom Post Meta Key in the Created Fields
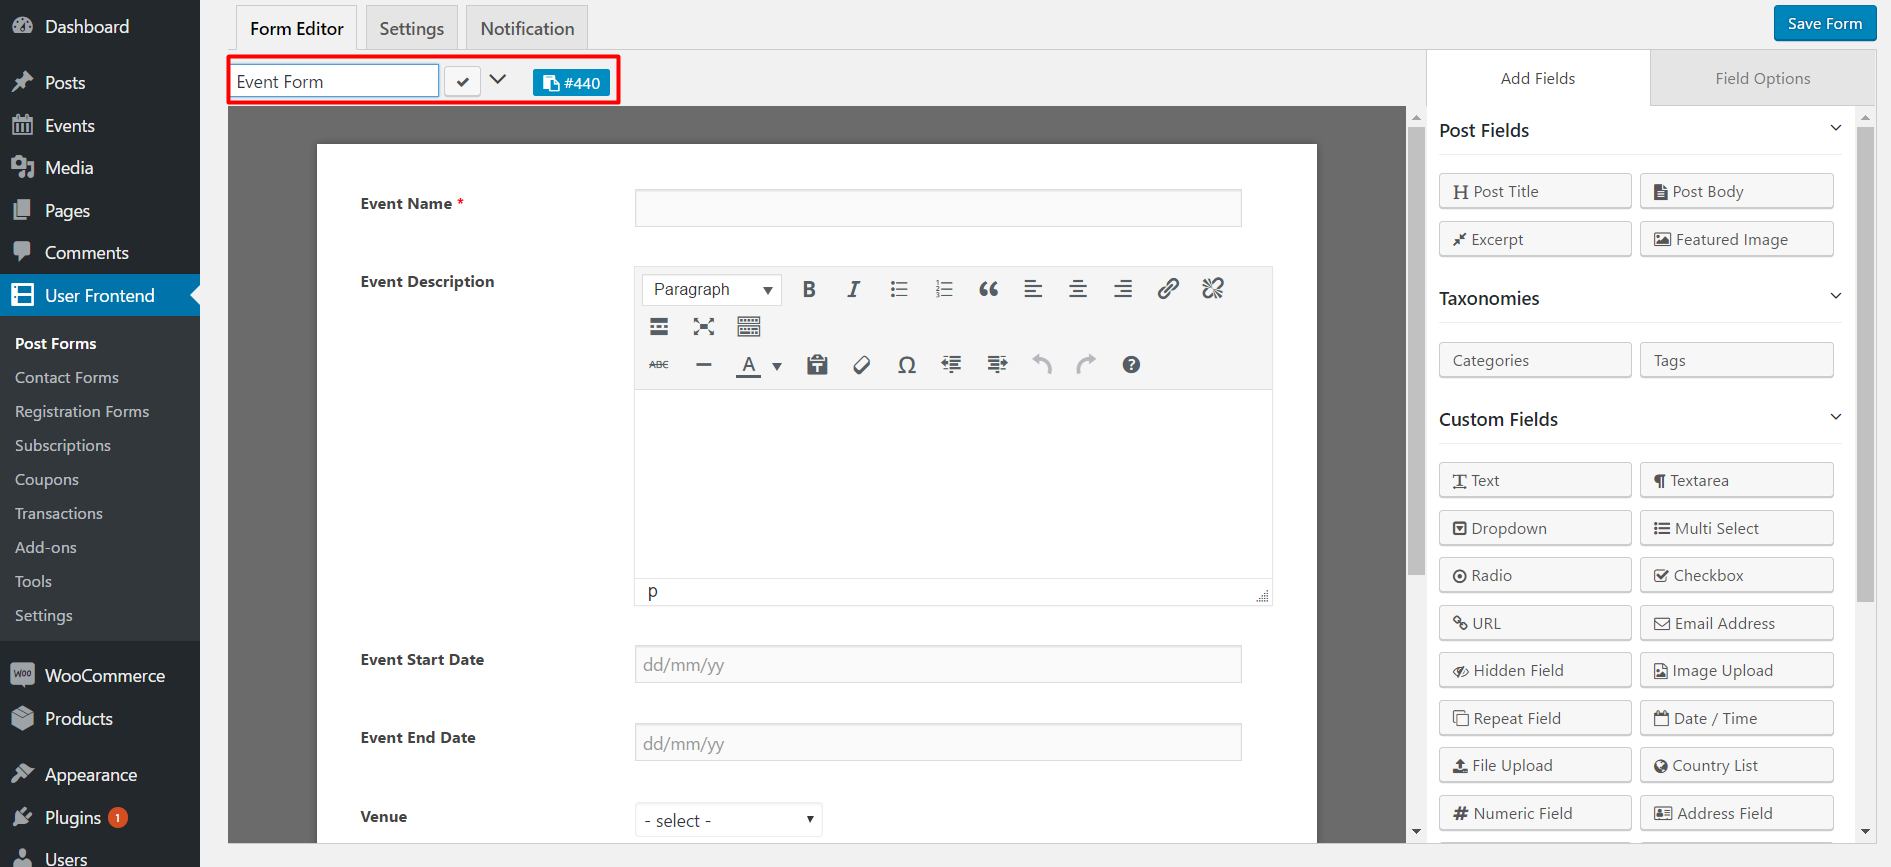
Now comes the most important part of this tutorial. You have to include the collected post meta keys from The Events Calendar. For this event form, I have used Event Start Date, Event End Date, Venue, Currency Symbol and Ticket Cost. I have included some of the collected post meta keys from the above list. You can also add other ones if you want.
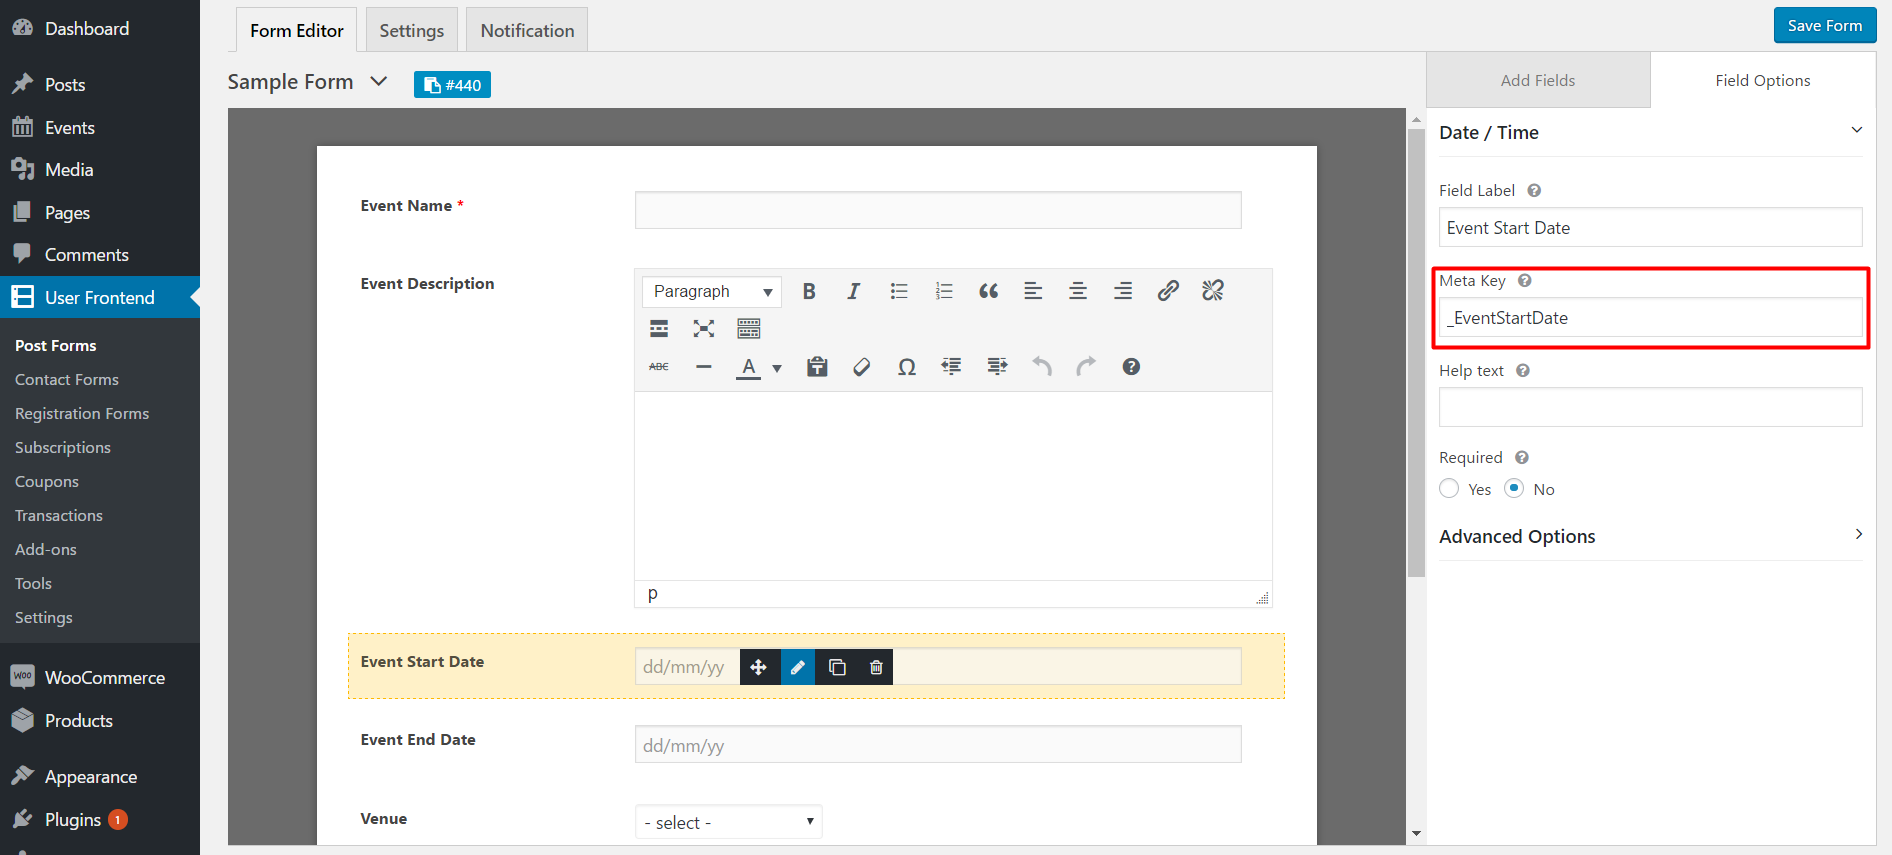
To add post meta keys, copy the collected post meta key. Click on the edit icon of a field and paste it on the Meta Key field (Showed in the screenshot). You have pasted all post meta keys for the custom fields you have included in this form.
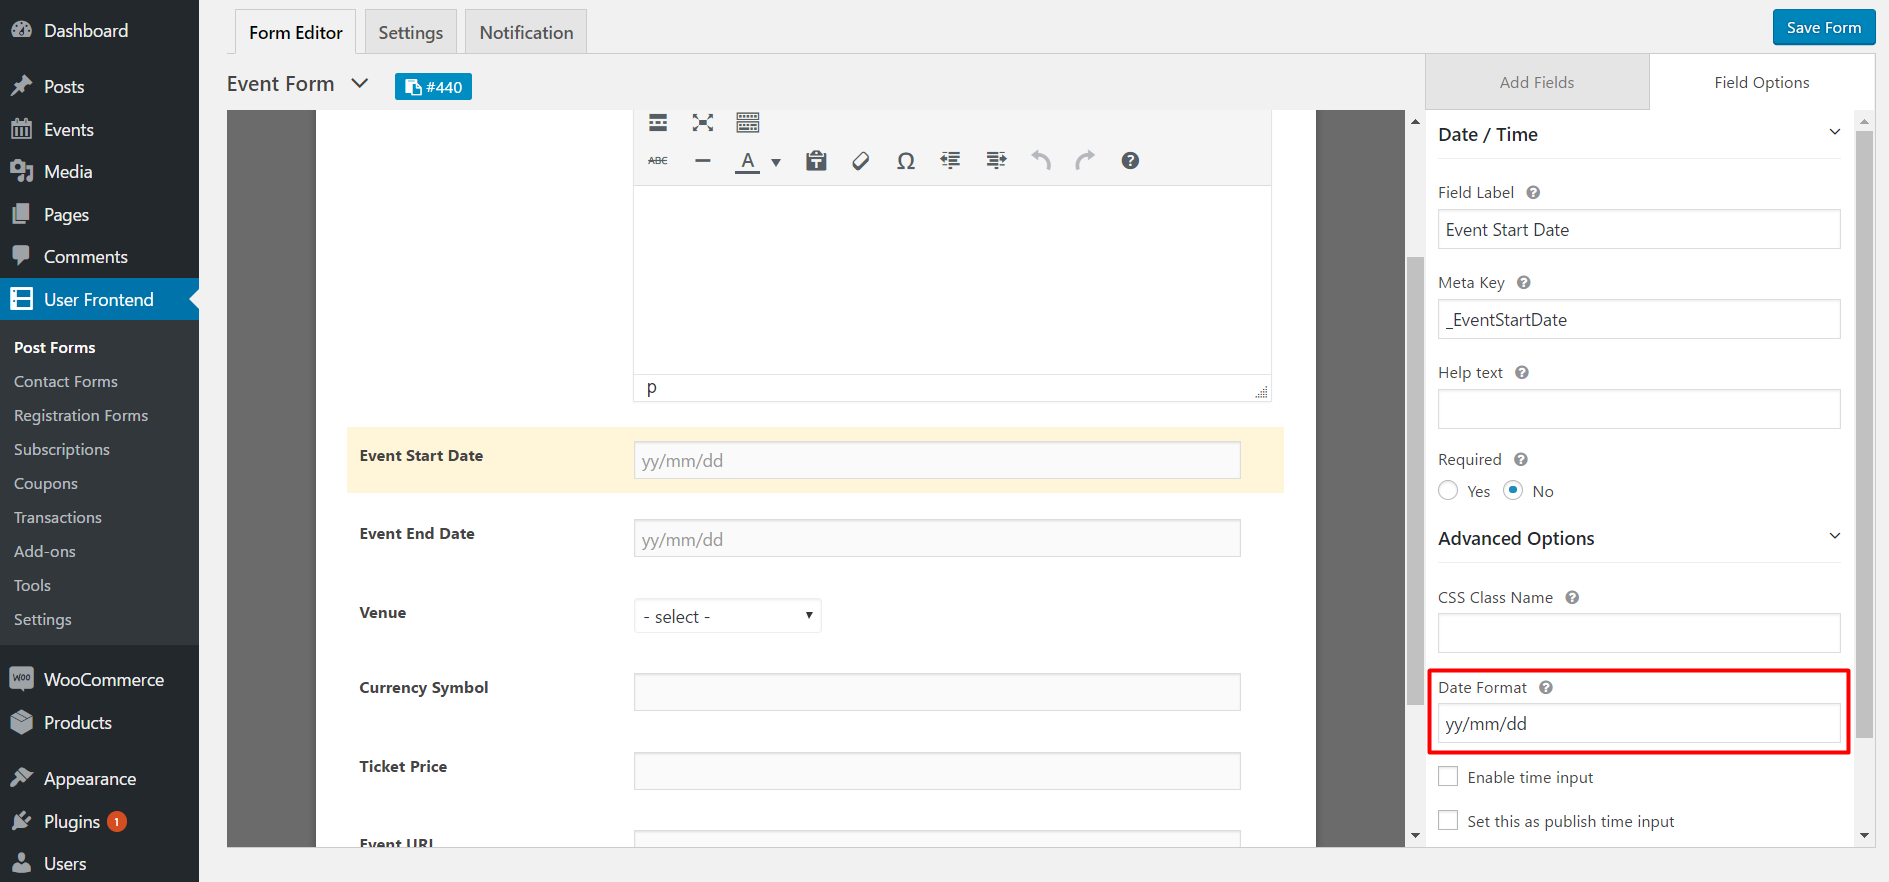
while you are adding custom post meta to a date field, you have to make sure the date format is similar to that post meta field. You can check that from the post meta inspector. For the events, the date format is “yy/mm/dd”. Click on the Advanced Options and insert this date format on the date format field.
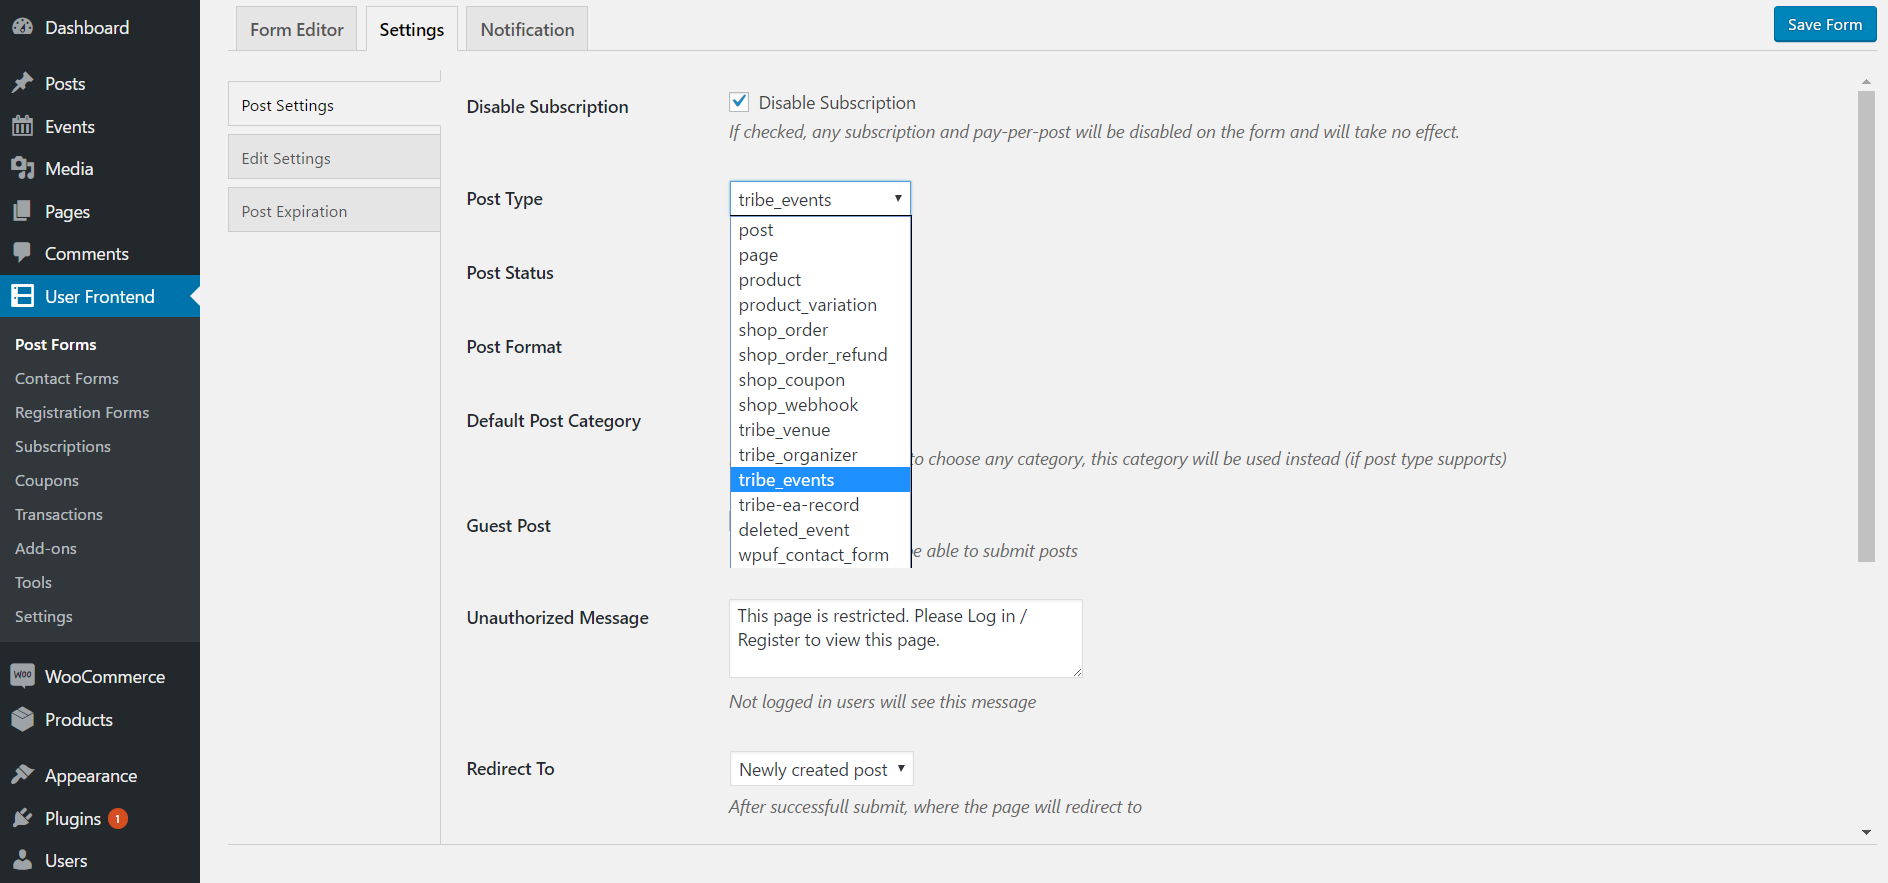
After adding all the post meta keys, click on the Settings tab. Select ‘tribe_events' on the Post Type Drop-down Menu.
No, give a title to the Event Form (clicking on the form name will open the rename function) and save the form. Just click on the blue copy icon with the Form ID to copy it.
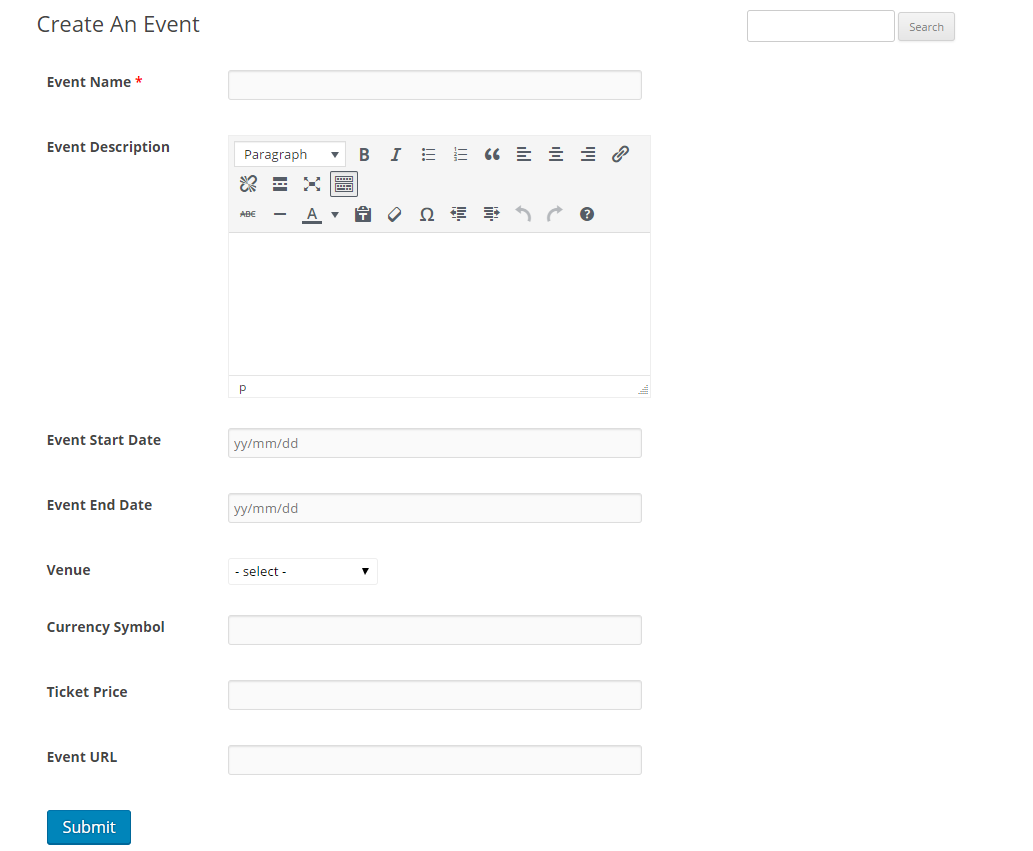
Now, paste the form id to a page or post so that you can publish your event form. After publishing the form will look like this.
Submit the Event Form to View the Event
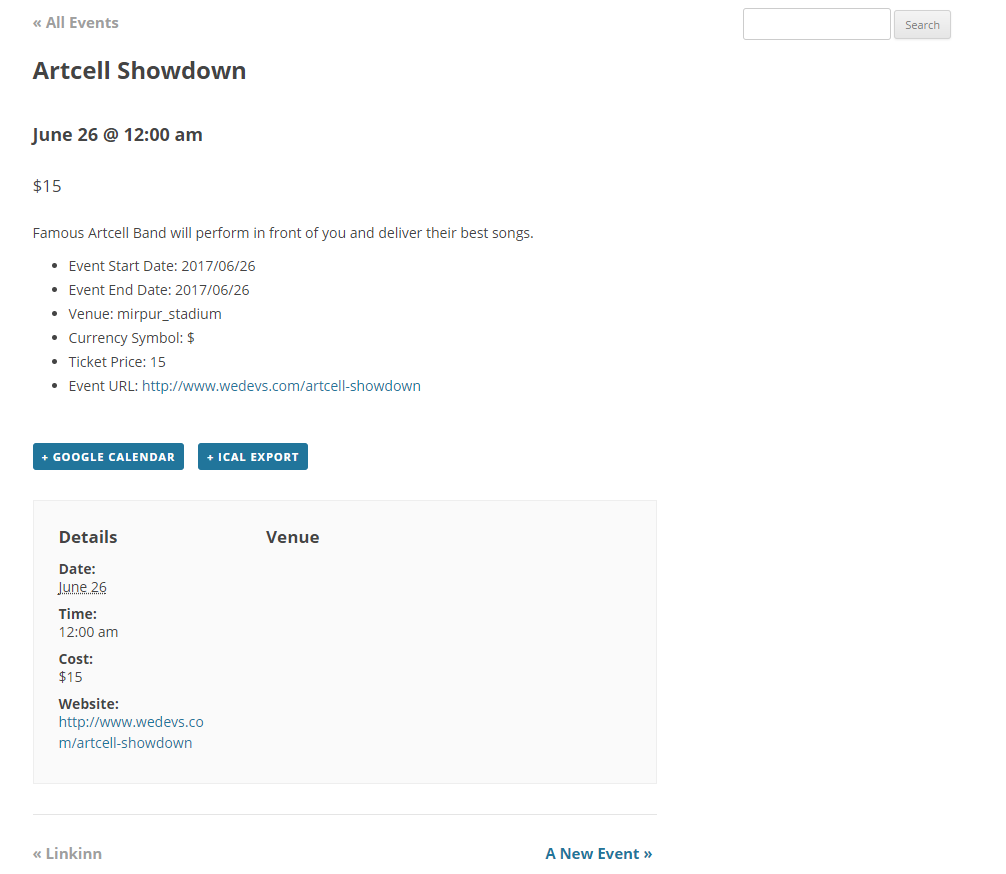
You have successfully created your very own frontend Event Form. Now, your users can create events directly from frontend. Here is how an event looks like after submitting.
Wrapping Things Up
WP User Frontend Pro allows you to create events forms easily so that your users can post events directly from the frontend. If you are using WPUF for a long time, then you will get the total idea here. All you have to do is to insert post meta keys and you will be able to use the events form. Here's a complete video on this tutorial.
However, you will need the Pro version of User Frontend as the Free version does not allow you to use custom post types. So, why wait? Take the advantage of custom post types and meta keywords to make the ultimate events for your users.

