
How to Add Extra Field to WooCommerce Checkout Page
If you are doing online business, you already know about the significance of a checkout page. Sometimes you might need to do customization on your eCommerce website due to specific requirements.
In this tutorial, we will show you how to customize the WooCommerce checkout page and add extra fields to it. We will be discussing two ways to get your job done:
- Add Extra Fields to WooCommerce Checkout Page Using Code (for technical users)
- Add Extra Fields to WooCommerce Checkout Page Using a WordPress Plugin (for non-technical users).
Before jumping to the tutorial, let's find out what a checkout page is.
What is a WooCommerce Checkout Page?
A checkout page is an eCommerce term that refers to a page shown to a customer during the step-by-step checkout process. Generally, it is the most important page for both sellers and customers.
Customers have to provide crucial information like address, billing details, and payment method on this page. And if somehow this page produces an error, no customer will be able to make any purchase! So we can imagine how important this page is to the sellers.
When you are using WordPress for powering your website and WooCommerce as your eCommerce solution, you will get your own checkout page. However, being a free solution, WooCommerce does not give you the opportunity to customize the WooCommerce checkout page from settings.
So, how would you customize the WooCommerce checkout page if necessary? Well, now we are going to show you the tricks to customize the WooCommerce checkout page.
How to Add an Extra Field to the WooCommerce Checkout Page?
Adding custom fields to a WooCommerce checkout page can sometimes be a challenging task. This tutorial will walk you through the process. After reading this blog, you'll know how to add a custom field to the WooCommerce checkout page. Let's dive right into it:
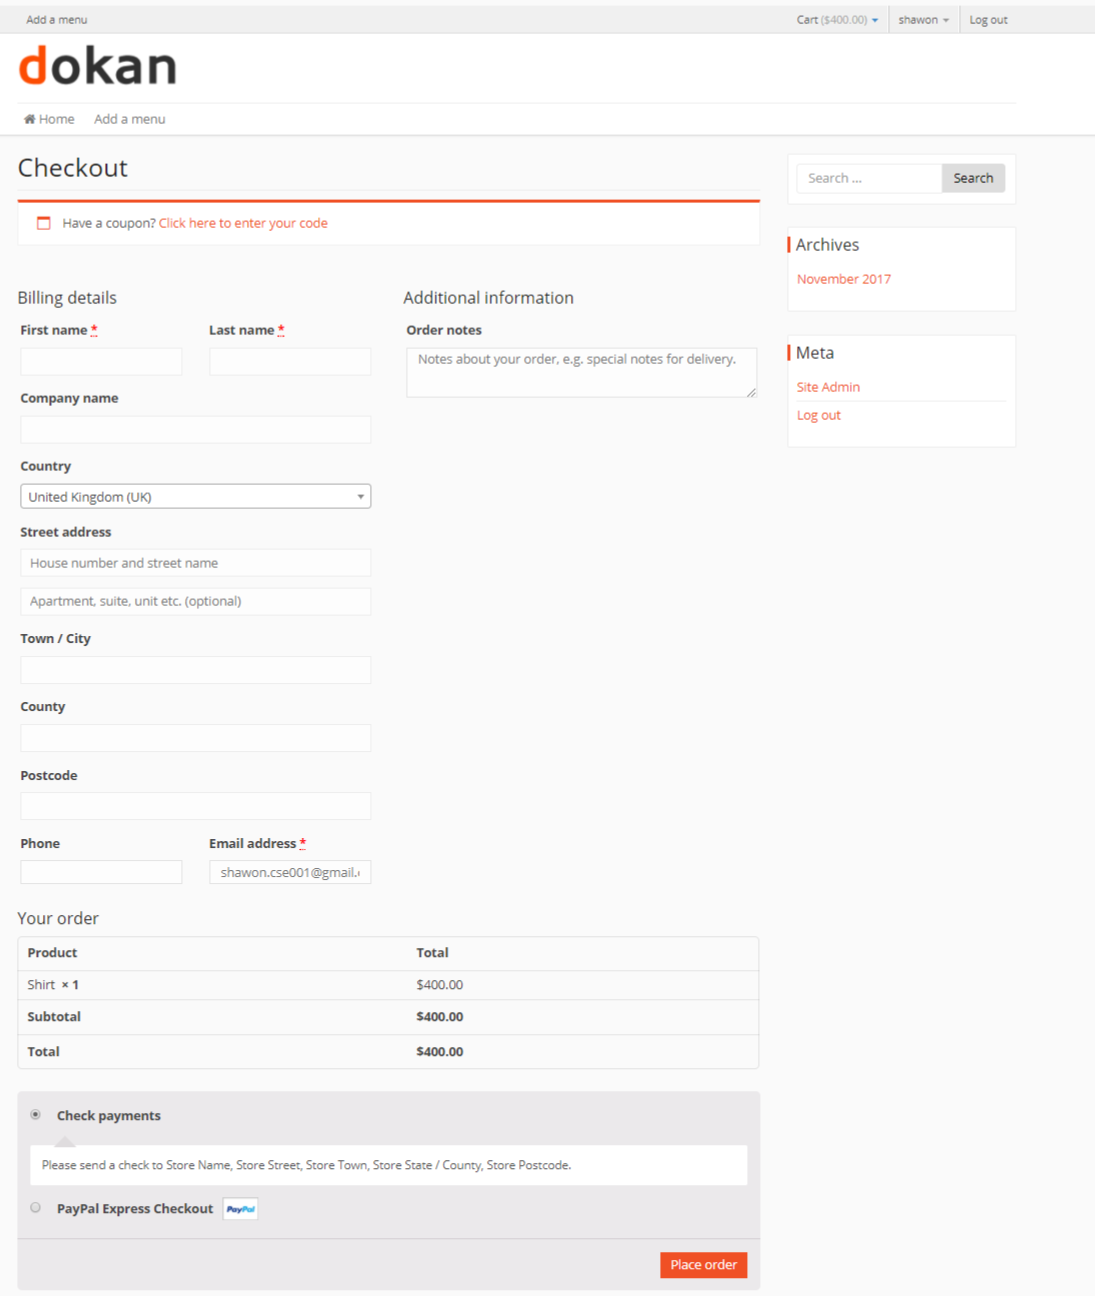
Let's imagine that this is your default checkout page.
There are two completely different approaches that will help you in adding custom fields to the checkout page in WooCommerce. Those are-
- using custom coding (for coders)
- using a WordPress plugin (for non-coders)
1. Add Additional Fields to WooCommerce Checkout Page Through Coding
For the people who know how to code or who have basic coding knowledge can follow this approach. This method adds the custom field to the checkout page using the code given below. To start out with the WooCommerce checkout page code, follow the below steps:
First, you need to perform an action to our functions.php file. Copy this entire code to your theme's function.php file.
/**
* Add custom field to the checkout page
*/
add_action('woocommerce_after_order_notes', 'custom_checkout_field');
function custom_checkout_field($checkout)
{
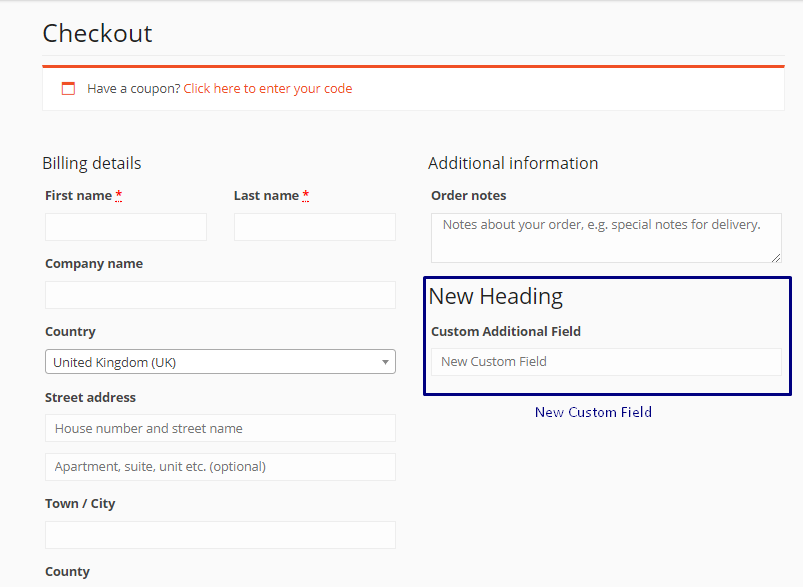
echo '<div id="custom_checkout_field"><h2>' . __('New Heading') . '</h2>';
woocommerce_form_field('custom_field_name', array(
'type' => 'text',
'class' => array(
'my-field-class form-row-wide'
) ,
'label' => __('Custom Additional Field') ,
'placeholder' => __('New Custom Field') ,
) ,
$checkout->get_value('custom_field_name'));
echo '</div>';
}After adding this code, the checkout page should appear as :
For data validation of the custom field, you can use the code given below:
/**

* Checkout Process

*/

add_action('woocommerce_checkout_process', 'customised_checkout_field_process');

function customised_checkout_field_process()

{

// Show an error message if the field is not set.

if (!$_POST['customised_field_name']) wc_add_notice(__('Please enter value!') , 'error');

}
So we’ve added a replacement field to the checkout page along with the validation check! Great!
Let's confirm that the details entered into the custom field by the client, are being saved or not.
This can be done by using the code below:
/**

* Update the value given in custom field

*/

add_action('woocommerce_checkout_update_order_meta', 'custom_checkout_field_update_order_meta');

function custom_checkout_field_update_order_meta($order_id)

{

if (!empty($_POST['customised_field_name'])) {

update_post_meta($order_id, 'Some Field',sanitize_text_field($_POST['customised_field_name']));

}

}
Add a Custom Field to WooCommerce Checkout Page Using a Plugin
With the above lines of code, we have added custom fields to our WooCommerce web store!
If you are a non-coder, you also can use a plugin to add a new field to the checkout page. There are many plugins that can be used for this purpose. Some are as follows-
- WooCommerce Checkout Manager
- Checkout Field Editor
- Checkout Field Editor and Manager for WooCommerce
By using these plugins anyone with zero coding knowledge can add extra custom fields to the WooCommerce checkout page. Let's see how to add a field with Checkout Field Editor and Manager for WooCommerce.
Simply install and activate the plugin. You will find a new menu under WooCommerce which is ‘Checkout Fields'. Navigate to WP Admin Dashboard > WooCommerce > Checkout Fields.
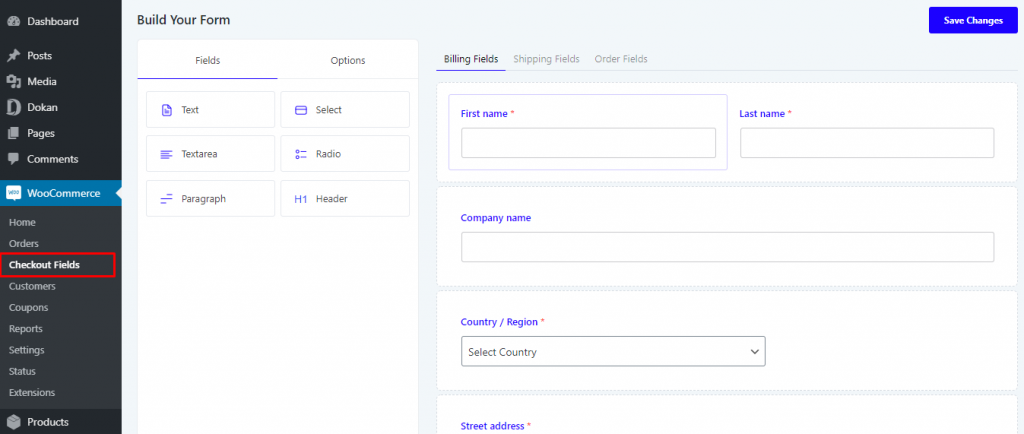
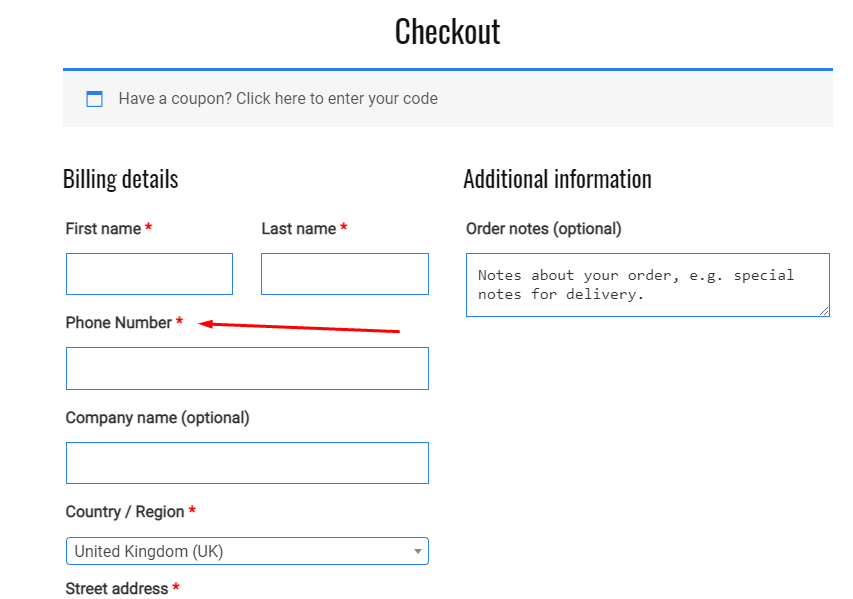
On the left side, under Fields option, you can find 6 different types of fields. Depending on which type of field you want to add, choose that accordingly. We want to add a field for phone number, so we are choosing Text. We will just drag the Text button to under the name fields.
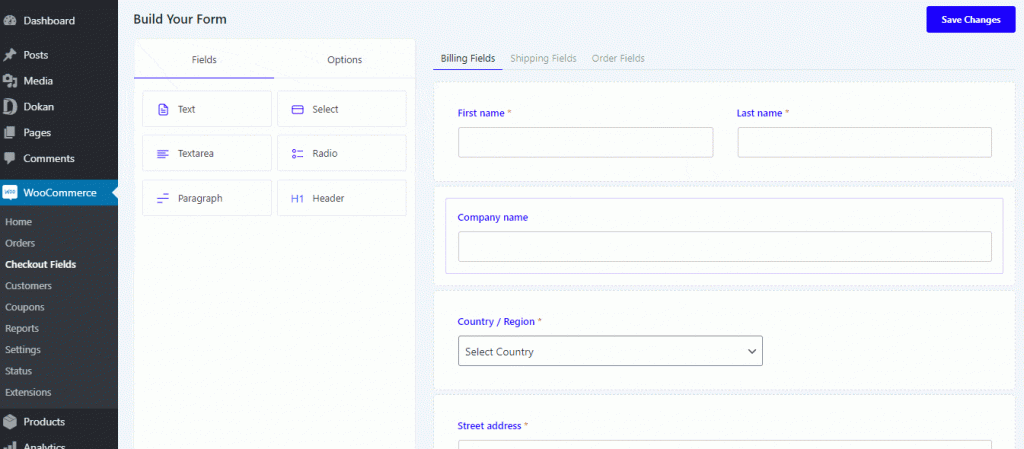
While adding new fields, noticed how we made the field a required one. You can opt for not doing that if you don't need the field to be a required one.
In the same way, you can add any type of field that this plugin has to offer.
You will find the new field added to your checkout page. Easy, right?


Add Fields to WooCommerce Checkout – End Note
From now on, you know how to add an extra WooCommerce checkout field and it's not too hard at all.
Now, whatever the reason is like- a mandatory client request or your own needs, you are ready to customize the WooCommerce checkout page!
If you have any questions, don't hesitate to comment. We promise we will get back to you.