Create Quiz Forms easily for your WordPress Site using weForms
Making something more interactive always brings in more attention. No matter how simple it might be. One great way to do this is to create a fun quiz for your users.
Truth be told not all online quiz makers are made equal. Creating a quiz form, customizing them, managing entries – all these functionalities don't perform equally well in all solutions. But if you are using WordPress look no further than the weForms Quiz plugin.
weForms Now Comes With Quiz Module
Whereas other quiz form solutions are exclusively used for that purpose, weForms is an all type form builder plugin. No matter what you are looking for in a WordPress Quiz plugin we are sure you are bound to find it in weForms.
Quizzes Make Everything Interesting
Before when you would have tried to create a quiz form with weForms, another WordPress quiz builder option, you would have needed to manually build it. Now with the recent addition of weForms Quiz module, you will get lots of features within its form editor and interface that makes your job much easier.
All you would need to do is enable the Quiz module from the backend of your site. Go to wp-admin→weForms→Modules→Quiz. Enable it at you are good to go.
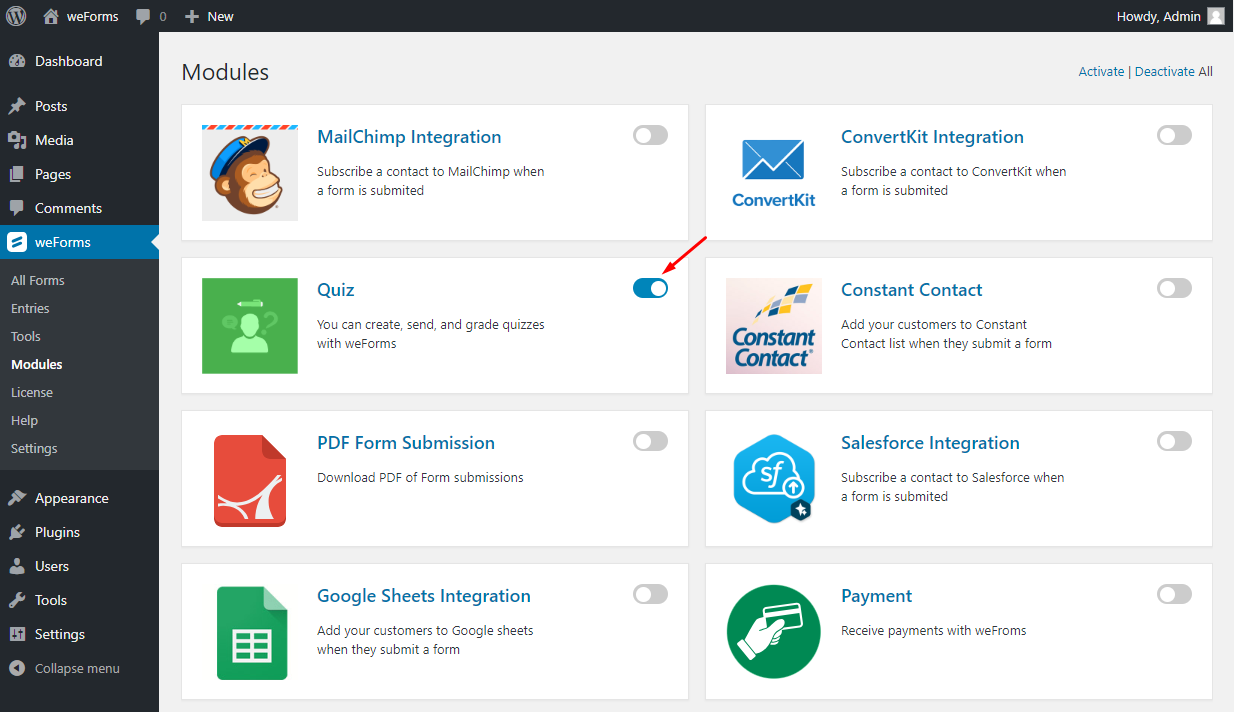
After successfully enabling the module, all the options you will need to make quiz form will be enabled automatically. Just head over to the form builder, create a form, go to the settings. There will be now a quiz with all the available options to customize your forms.
Note: Please see our official documentation to learn more about Quiz.
Available Settings
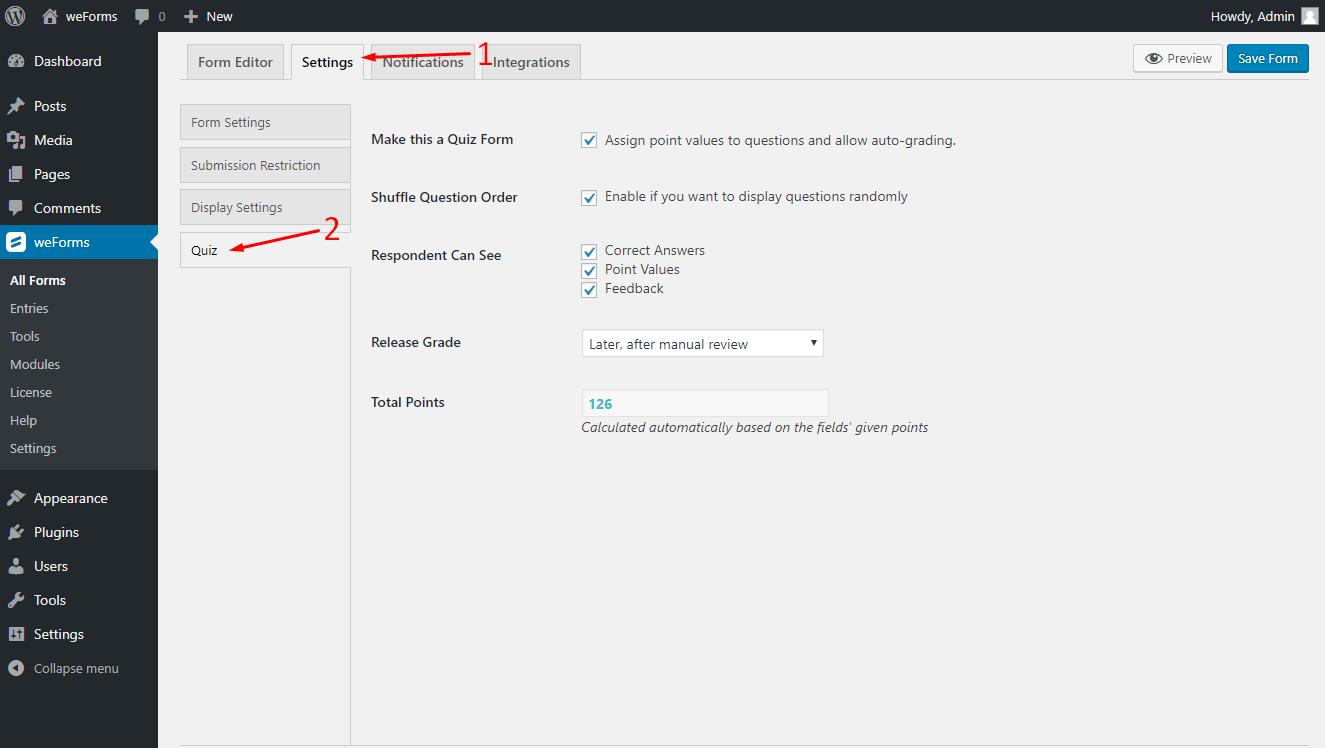
Making a quiz does not have to be tough. That's why the weForms Quiz settings layout has been built with the most user-friendly interface. Everything has been put under the form of building settings.
- Make this a Quiz Form: This setting enables everything. If you want to start making a quiz form you need to first enable it. As this sets up your form to be a quiz form.
- Shuffle question orders: The questions order will be different each time the quiz taker reloads the page
- The respondent can see: If you want to let your quiz taker have some visual representation of their scores this option enables that. There are three options including:
- Correct Answer: The quiz taker will be able to see the correct answer after answering.
- Point Values: Enables to show the point value of each question. They will also be able to see the total points for their quiz.
- Feedback: This option gives the admin to set a message after successful form submission. Generally, this includes if their answer is correct or not.
- Release grade: Select if you want to show the results immediately or after you have reviews the answers manually.
- Immediately after each submission
- Later, after manual review
How Do You Start Creating A Quiz Form?
Getting started is relatively easy. At first, you would need to create a form. To start making a quiz form you need to have at least one of the fields that are prerequisites for creating a form. The prerequisite fields include:
- Drop-down field
- Radio button field
- Checkbox field
- Multi-Select field

After adding your required fields, now comes the part to configure your quiz settings. All the quiz features will be there after enabling the Quiz module. Once you have set up the questions for your quiz and created the form, you will need to set which answers are the correct ones.
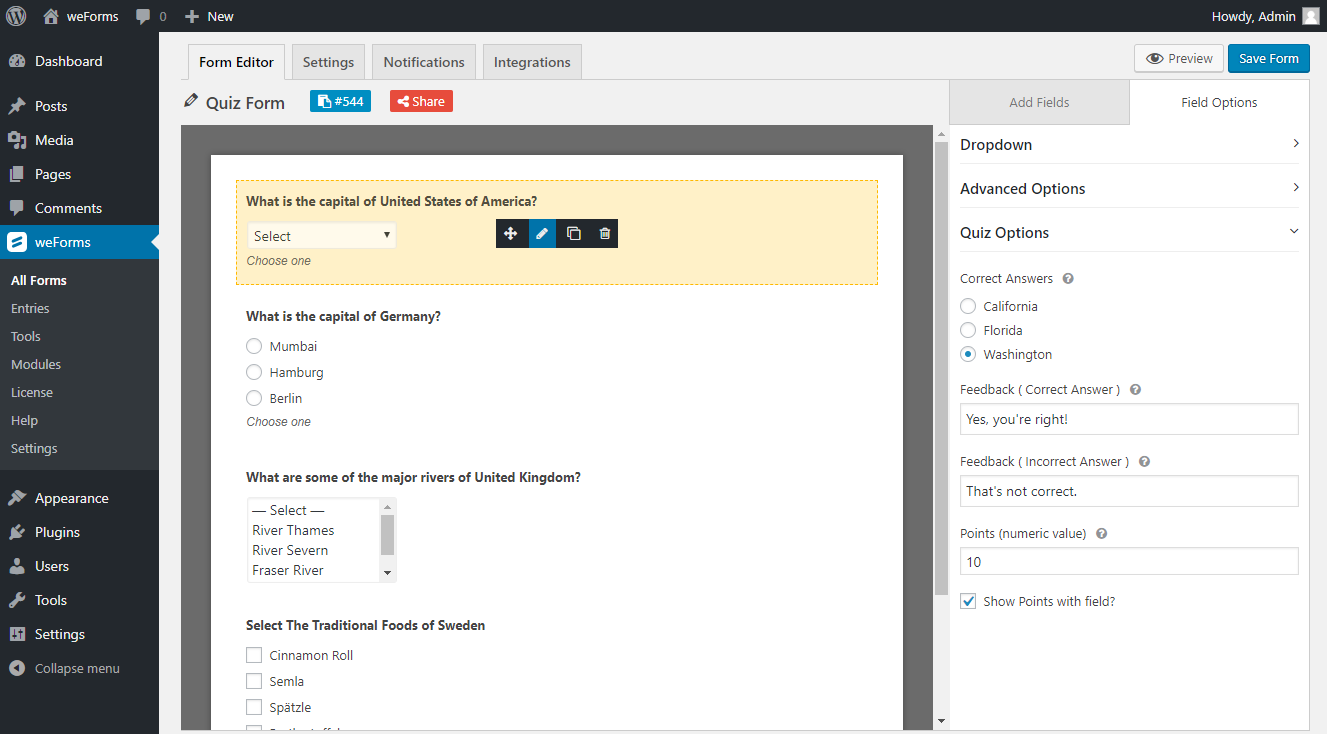
To do this go to the Field Options and click on the Quiz options to configure that question. Options include:
- Correct Answer: Choose which one is the correct answer. For multiple options select multiple answers
- Feedback for correct answer: The text that will be shown after the correct answer
- Feedback for incorrect answer: Text shown after the wrong answer
- Check box to show points with fields: Enables the option to show points for each question for the user to see
Want To Set Email Notification?
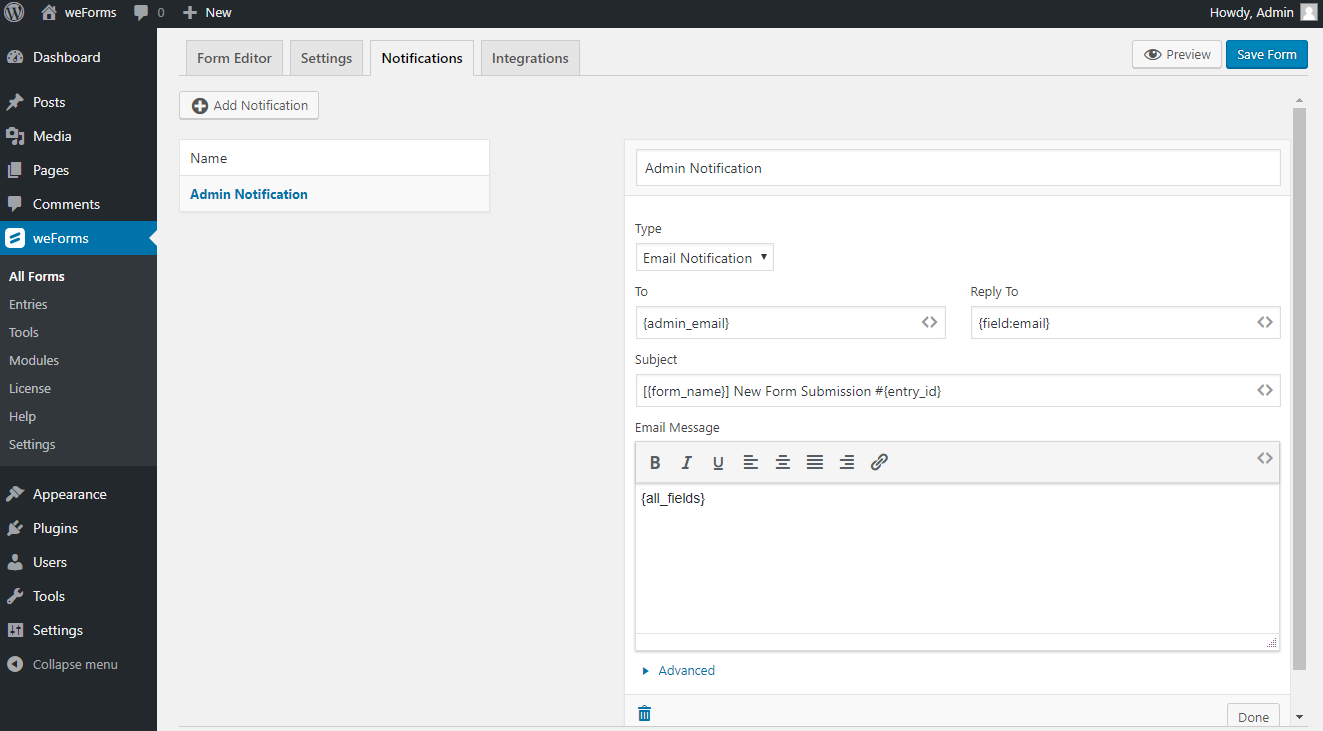
There is a built-in email notification feature for weForms that you can use to receive a notification. Go to the notification menu and select the notification platform. Then configure the email to your liking. You can learn more from here.
Frontend View Of Your Quiz Forms
After you have successfully created your quiz form, now you need to publish it for the users to see. It is the default process of publishing a WordPress post(For your WordPress quiz post you created using weForms). When your user has submitted all the answers they are going to see the result according to the settings beforehand.
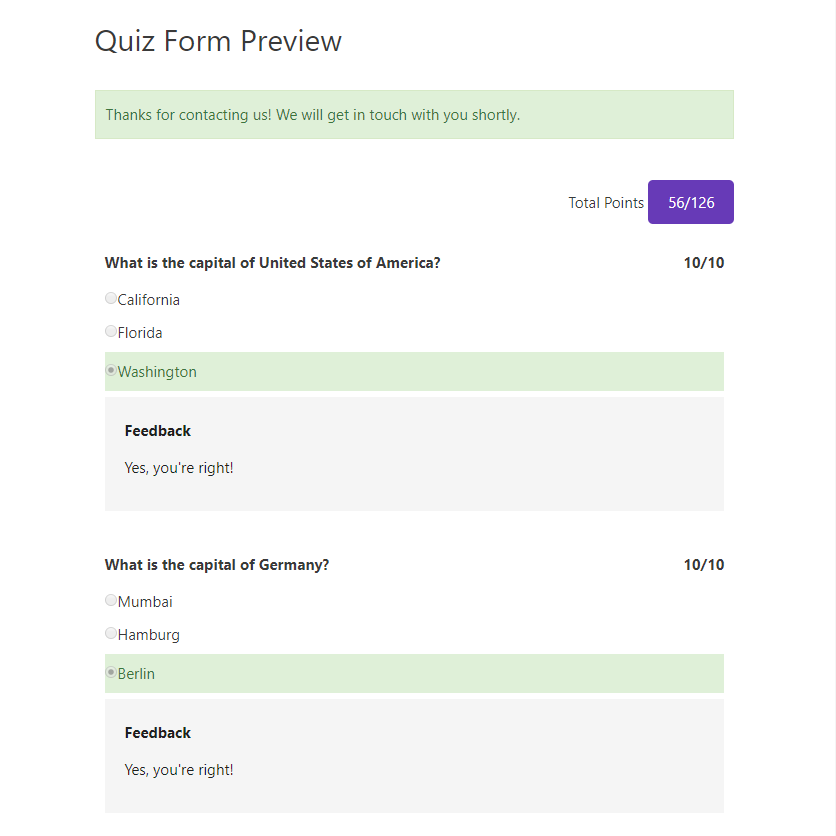
Respondents will see their total achieved points, feedback that you have set for correct/incorrect answers.
See All The Entries In One Area
Letting your users take a quiz is one thing, but managing those results is another. It can get really confusing managing all the results that you might get. That's why we have added an Entries section. After a user has submitted the answers you will be able to see their detailed submission information from the Entries.
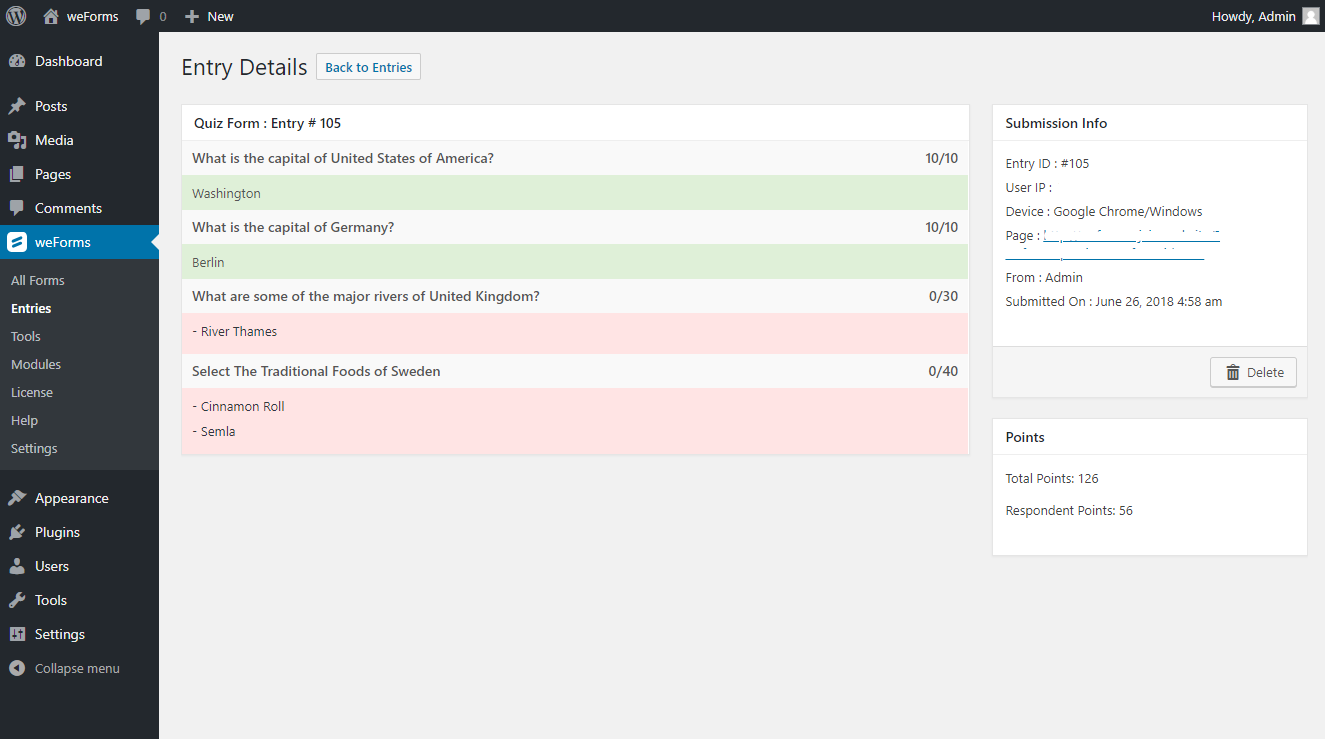
You can check the results, the user's information, total points that the user got. There is even an option to download all the entries as CSV format file. This really helps if you want to share the results with someone or want to manage it using other platforms.
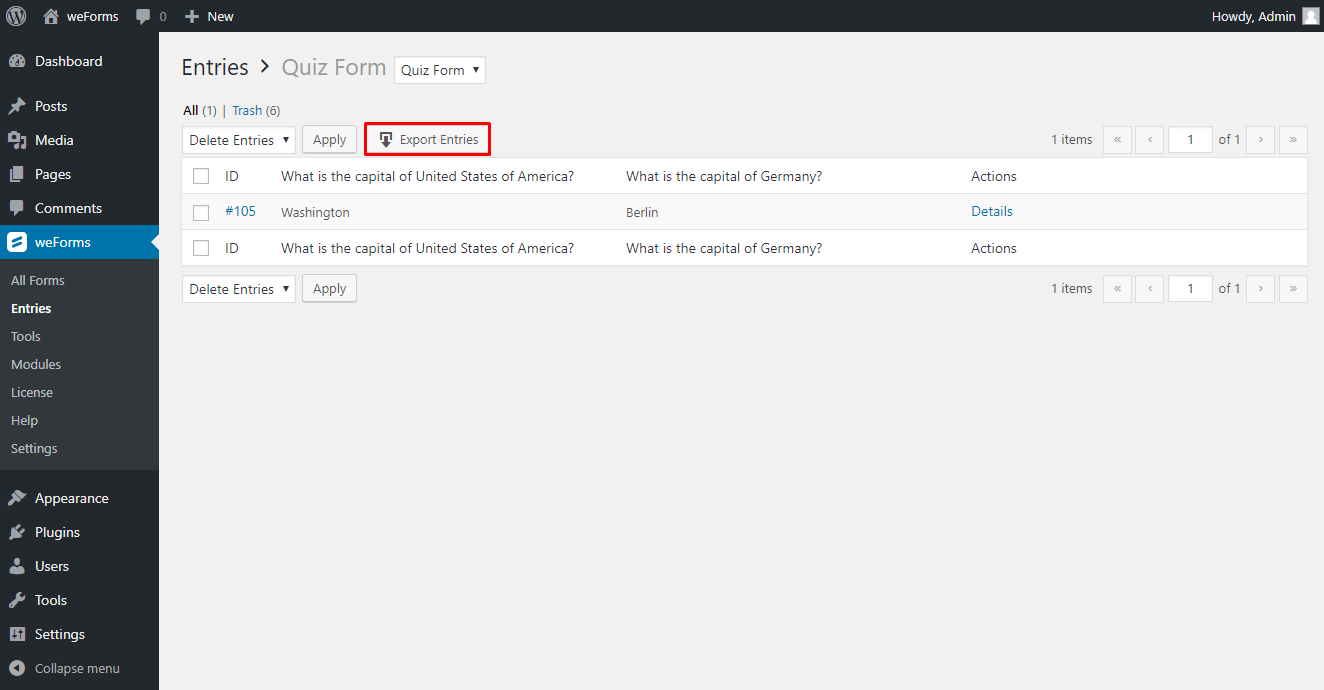
Pro Tip: Check out the premium extension for weForms called PDF Form Submission. After enabling it you will be able to download your entries as PDF. Learn more from here.
Now It's Your Turn
The process is as simple as it gets. Enable a module, create the form, configure the settings and start managing the entries. Get to attract and engage your visitors in creative ways. And generate more leads.
If you want to get a hands-on experience we also create an official demo just for you.