How to Add Wallet & Cash Back Offer to Dokan Multivendor Marketplace
Payment is the most important thing that differentiates an online store from a physical one. While shopping on an eCommerce store, you get the privilege of buying products using electrical payment options. So, you often need digital currencies that lets you pay for the things you want to buy.
In case of WooCommerce stores or multivendor shops, customers might feel the necessity of having their own wallets where they can store some money and use them when required. This is what we call a digital wallet. To make shopping even more interesting, store owners tend to provide cash back offers.
While you are using Dokan to power up your Multivendor marketplace, you might also need this feature. Dokan do not have these features built-in and there is also no module. So, how can you get these features inside your marketplace?
Well, you can use other plugins that may solve this issue. WooCommerce Wallet is a FREE plugin with 5 stars rating and it adds wallet and cash back features to online stores. So, why not take the advantage of this WooCommerce wallet plugin?
WooCommerce Wallets Works Flawlessly with Dokan
Recently, we have noticed many plugins are being compatible with Dokan multivendor, which is a good sign. Woo Wallet is one of them. According to their plugin descriptions, it supports Dokan!
That's why we thought – let's give this plugin a try. And today's blog will walk you through the process of adding wallets to your multivendor store along with the cashback offer feature.
Adding Wallet to Your Marketplace
For this tutorial, you will need to have WooCommerce, as well as Dokan, installed on your WordPress site.
As you are reading this post, we can assume that you already have a fully functional eCommerce site or marketplace. So, you will need to install WooCommerce Wallet to get started.
Installing WooCommerce Wallet to Your Marketplace
Head over to the Plugins page of your WordPress site and click on the Add New button. Now, search for ‘WooCommerce wallet' in the WordPress plugin store. Install and activate it.
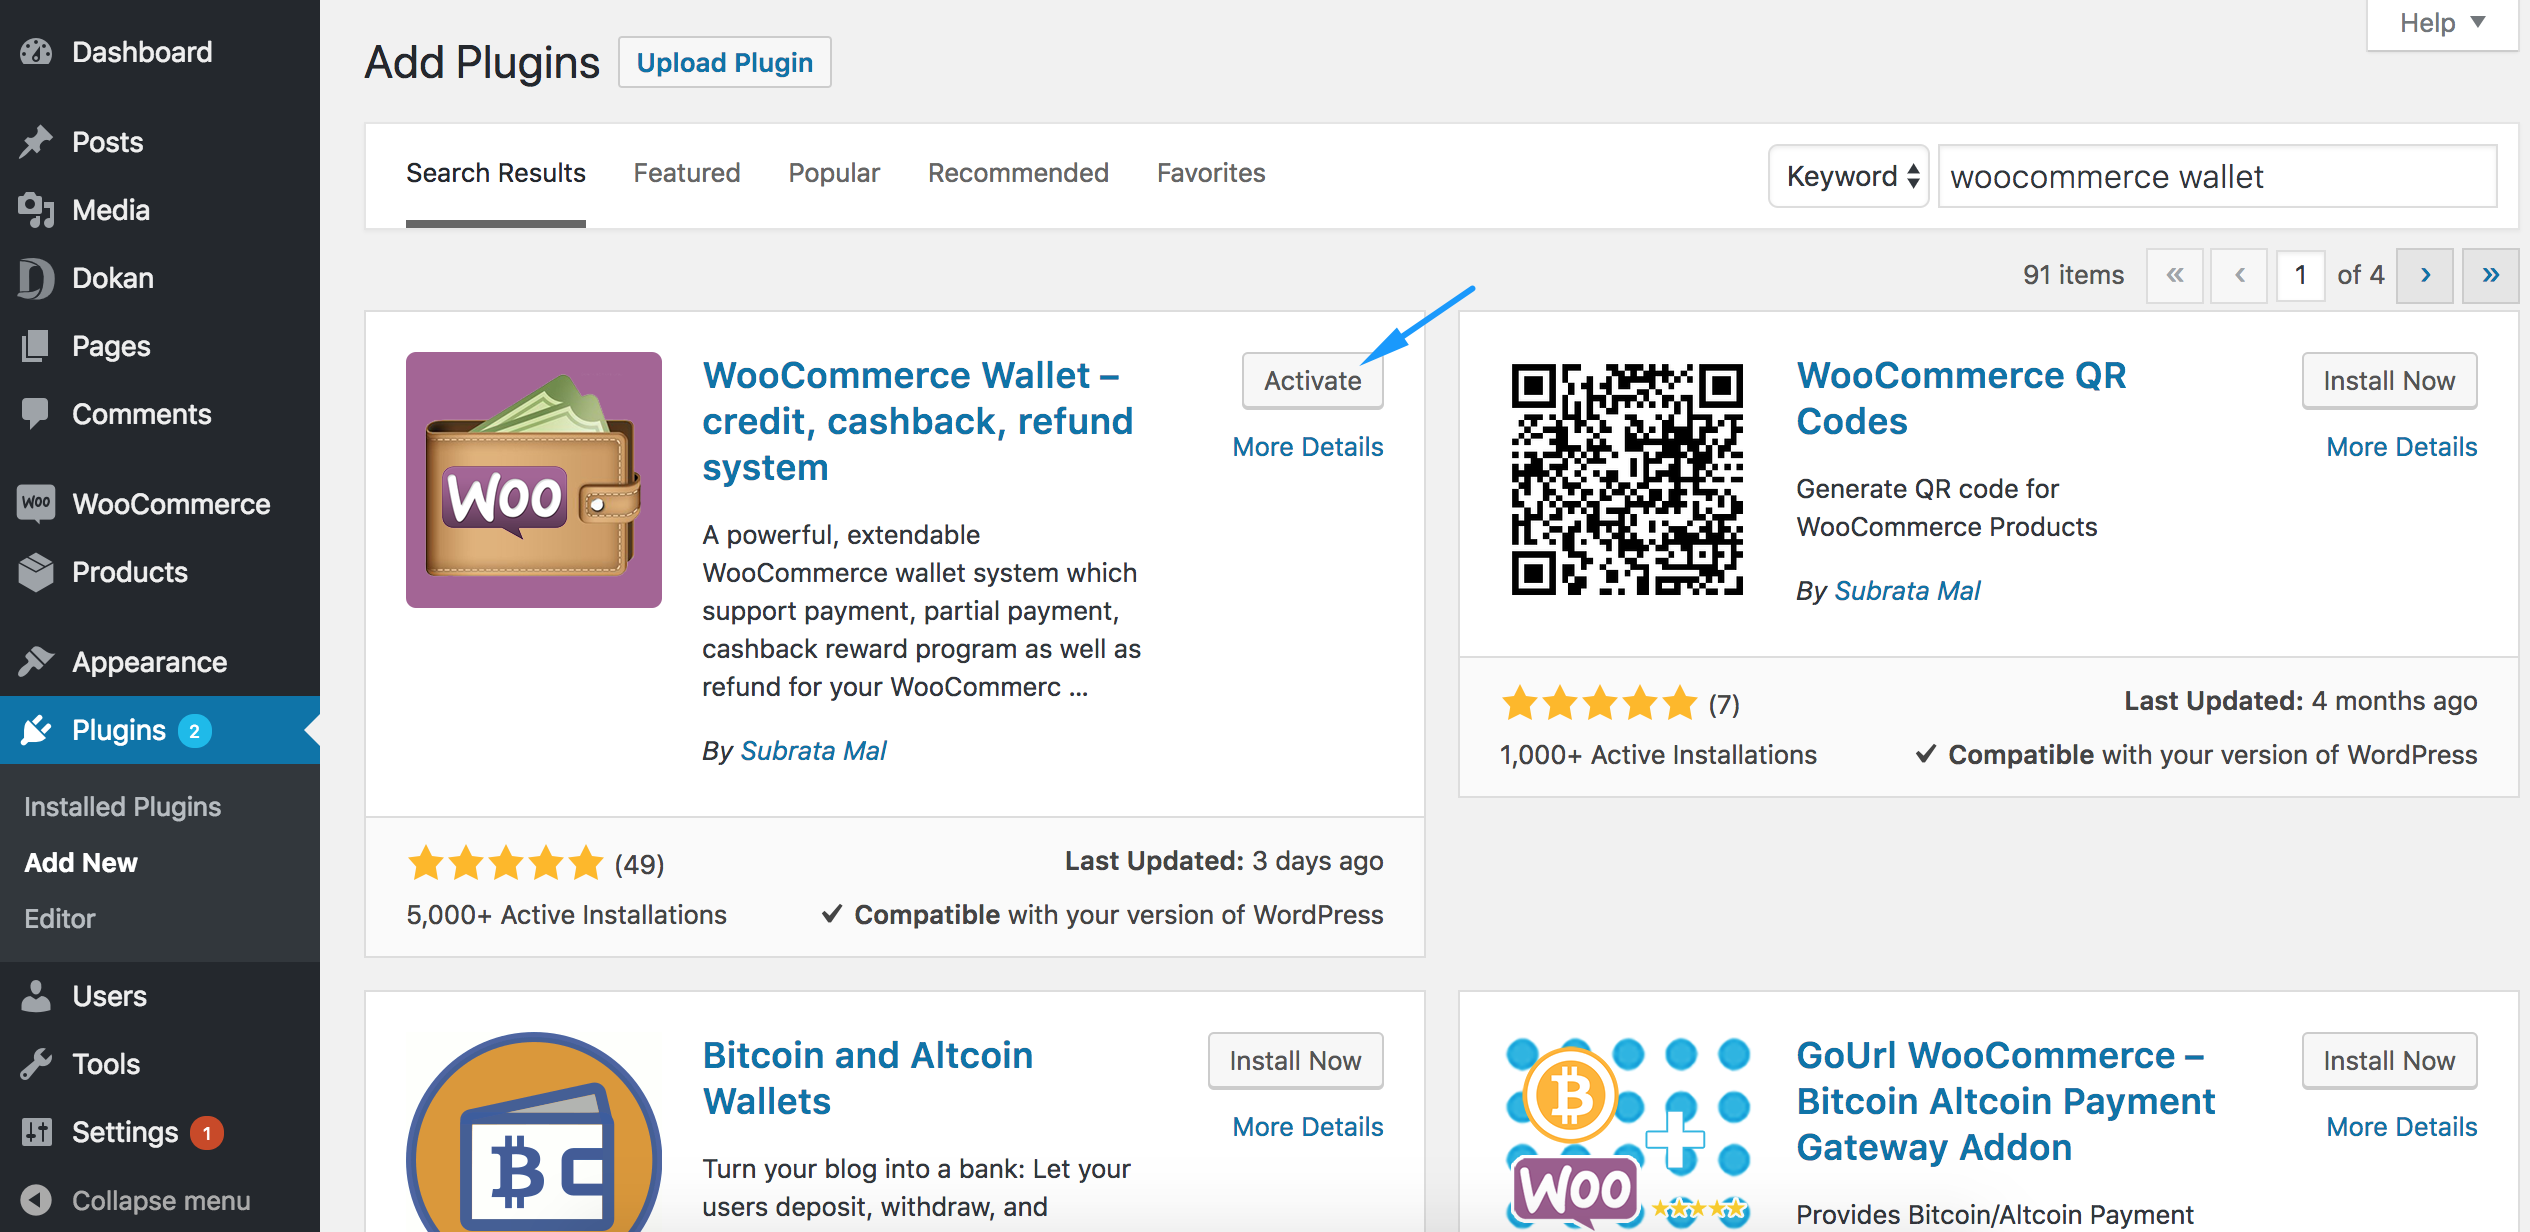
WooCommerce Wallet is enabled by default. However, you should navigate to –
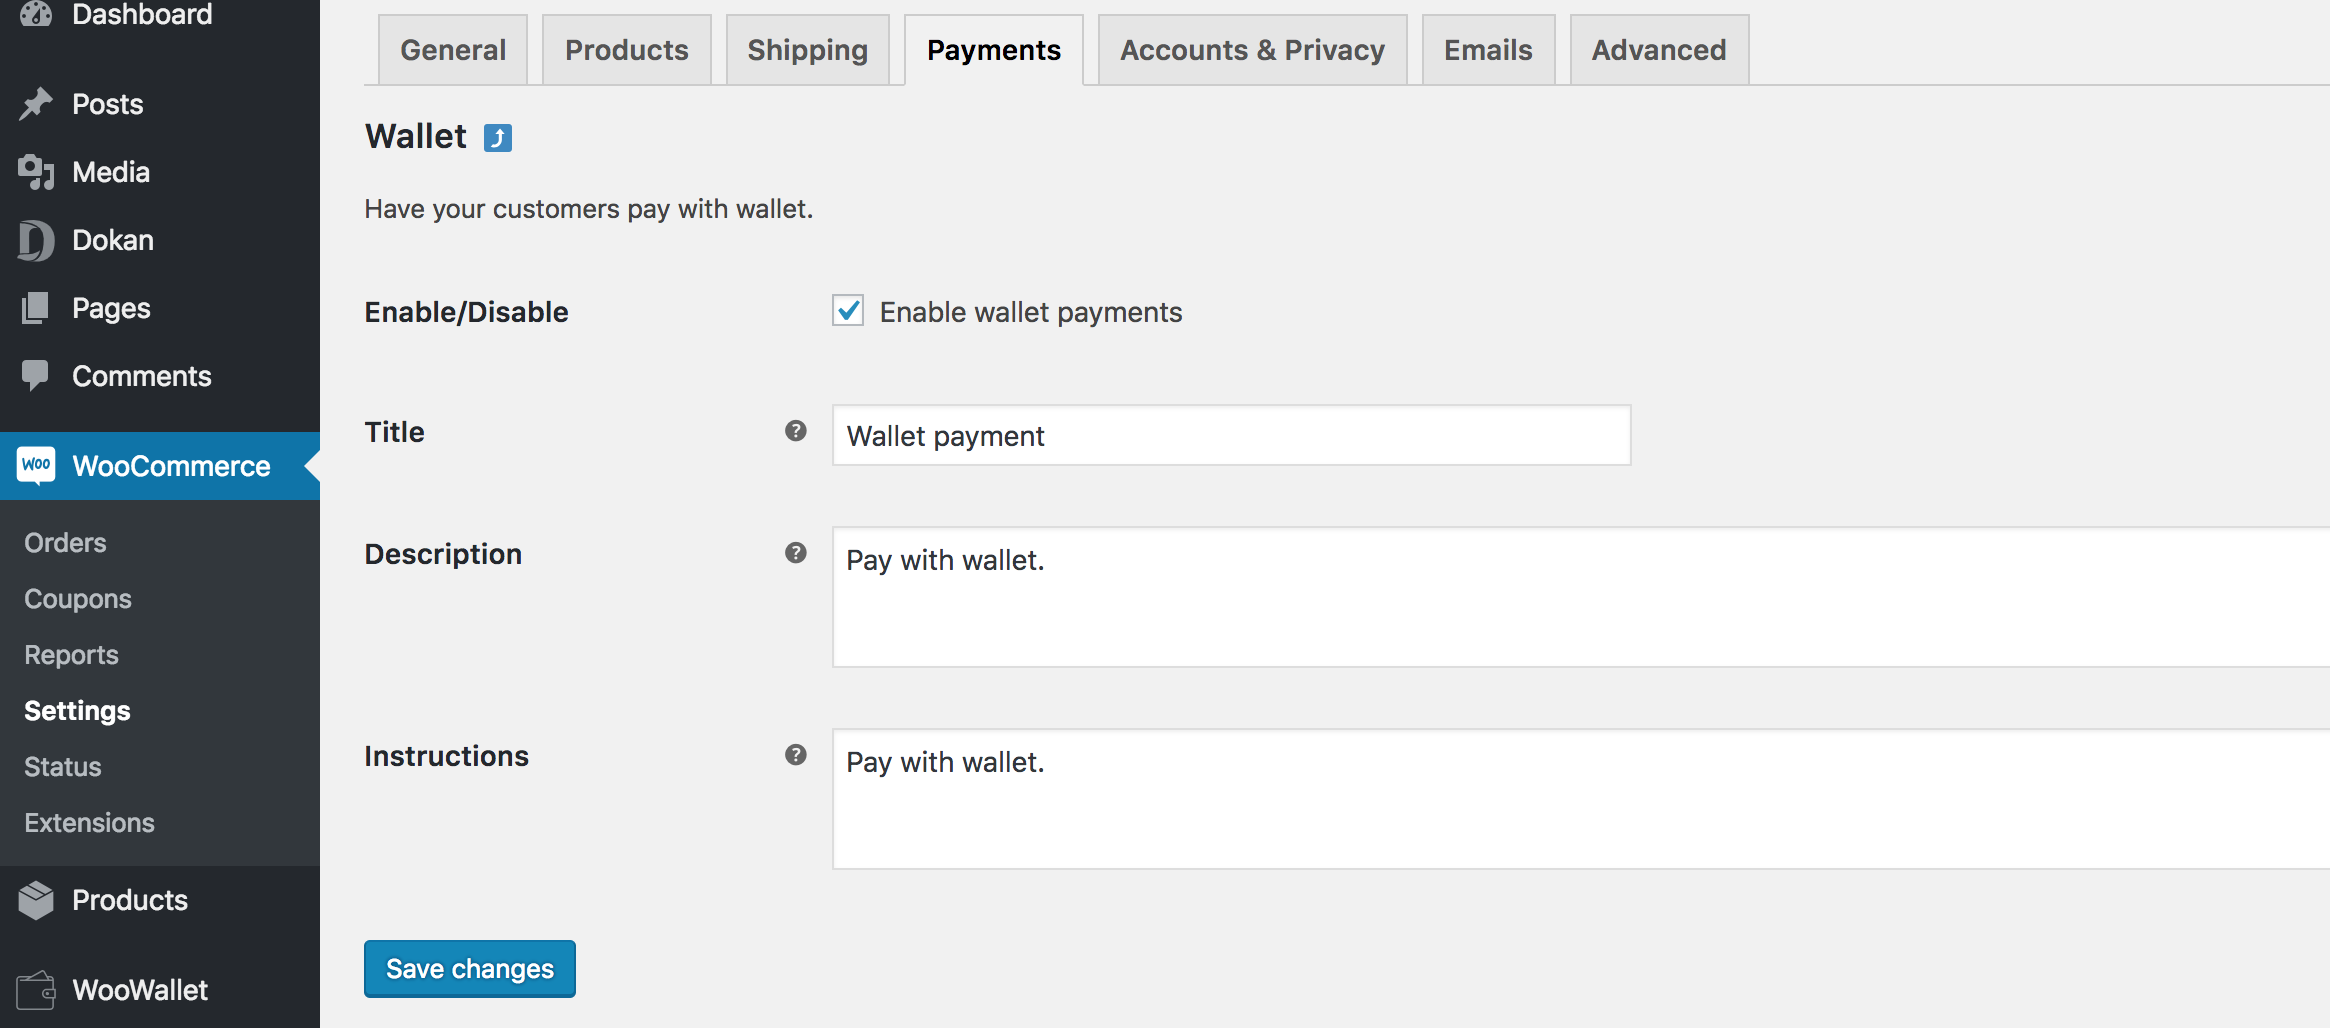
WooCommerce → Settings → Payments
You will find a new payment method – Wallet. Enable it turning on the toggle button.
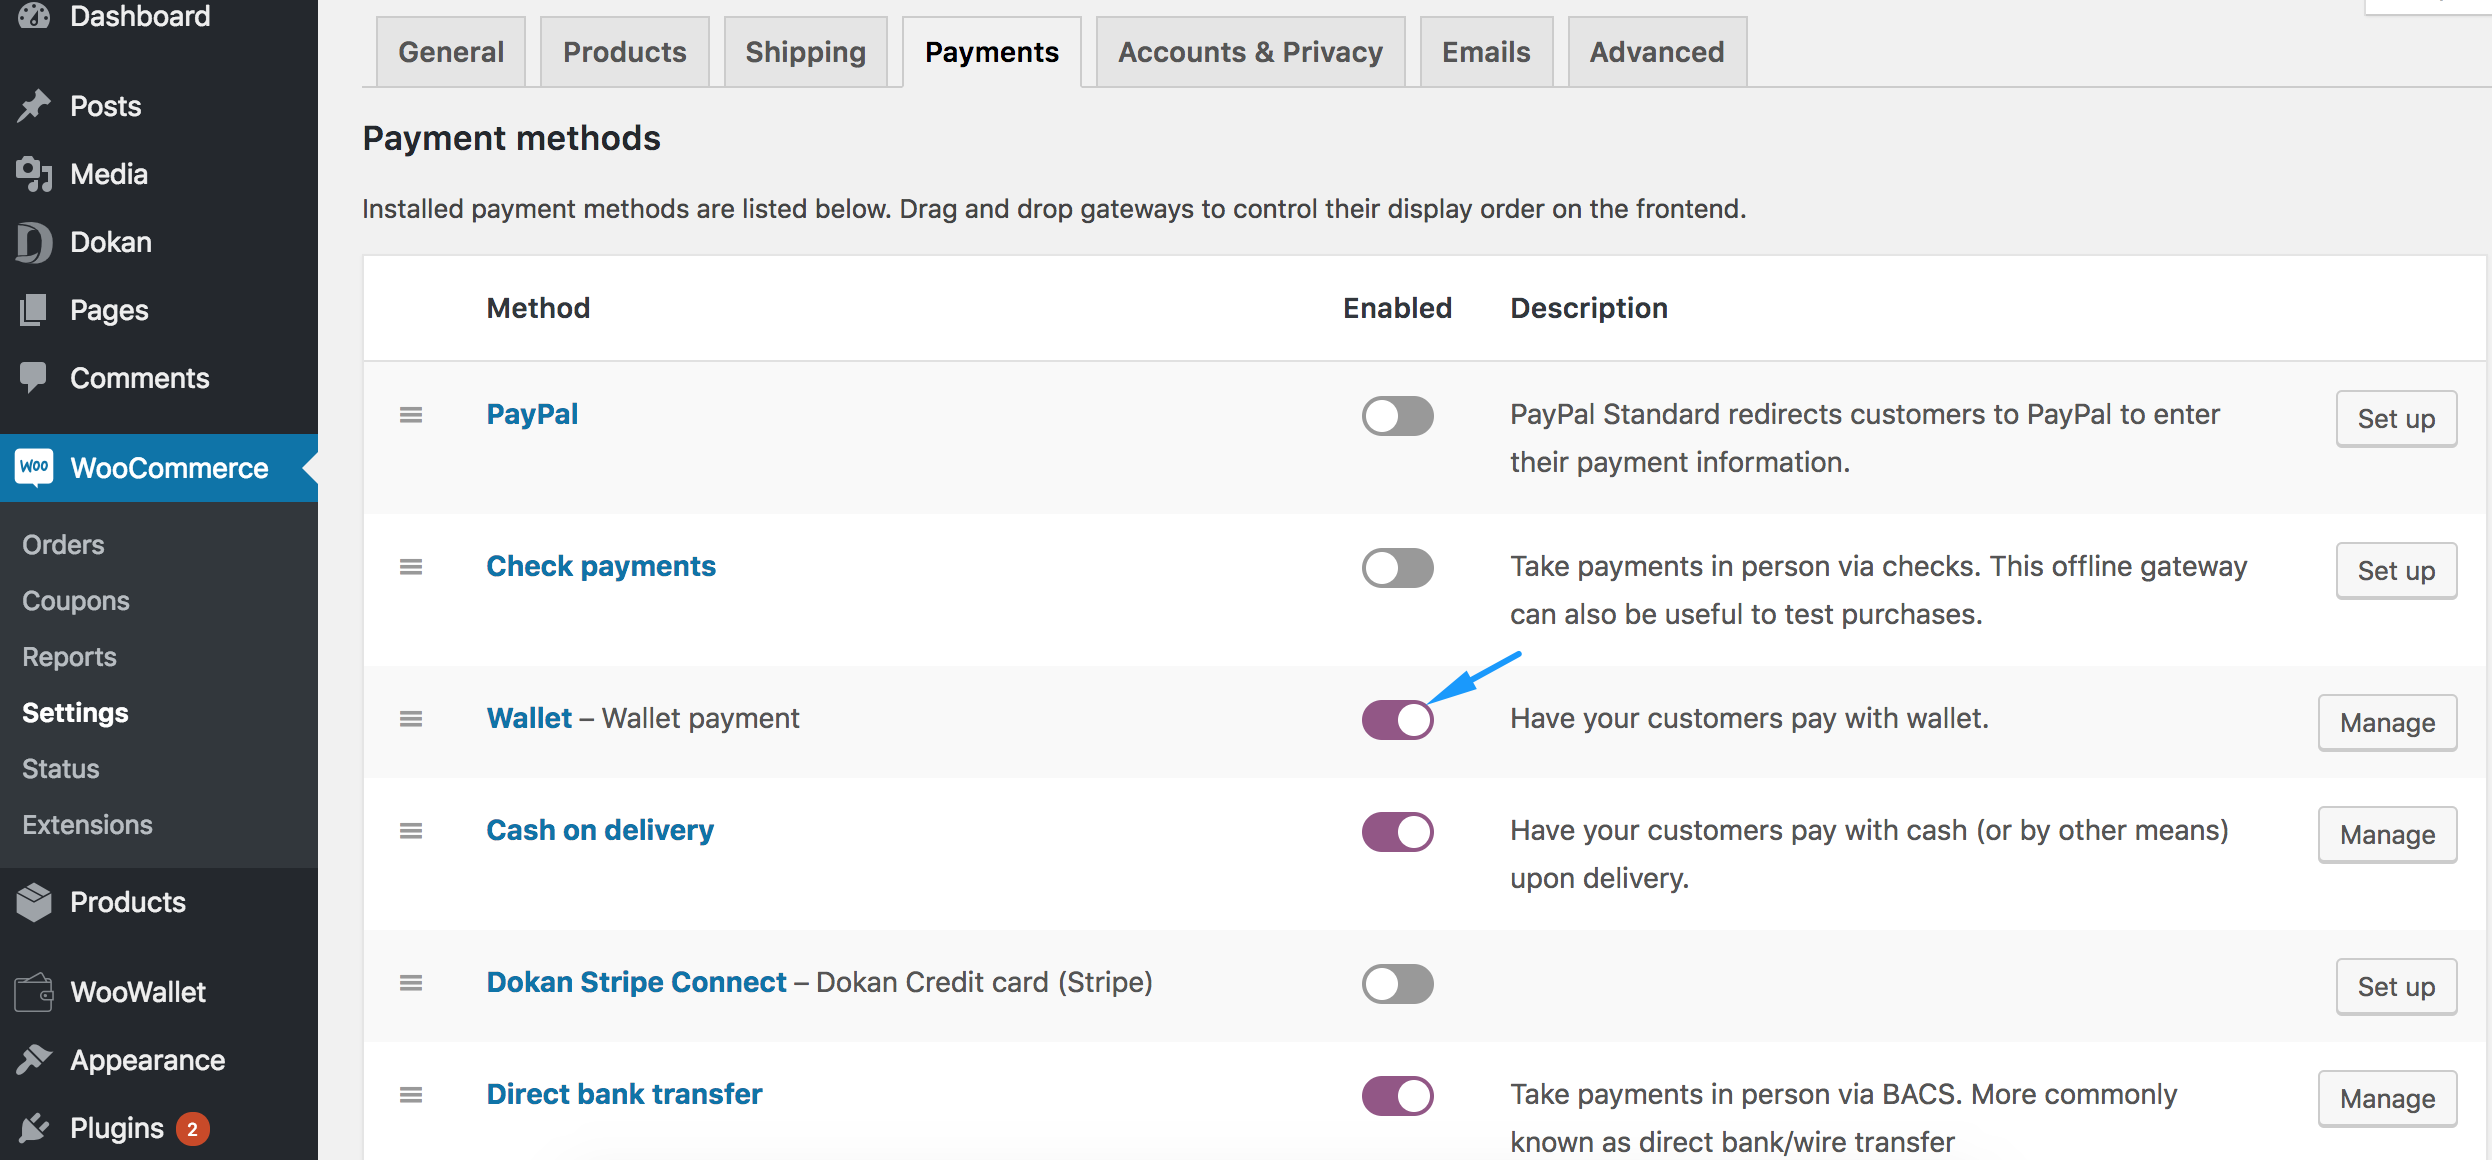
You can also manage its details. Click on the Manage button beside it to edit title, description, and instructions.
Setting Up Wallet Feature for Your Store
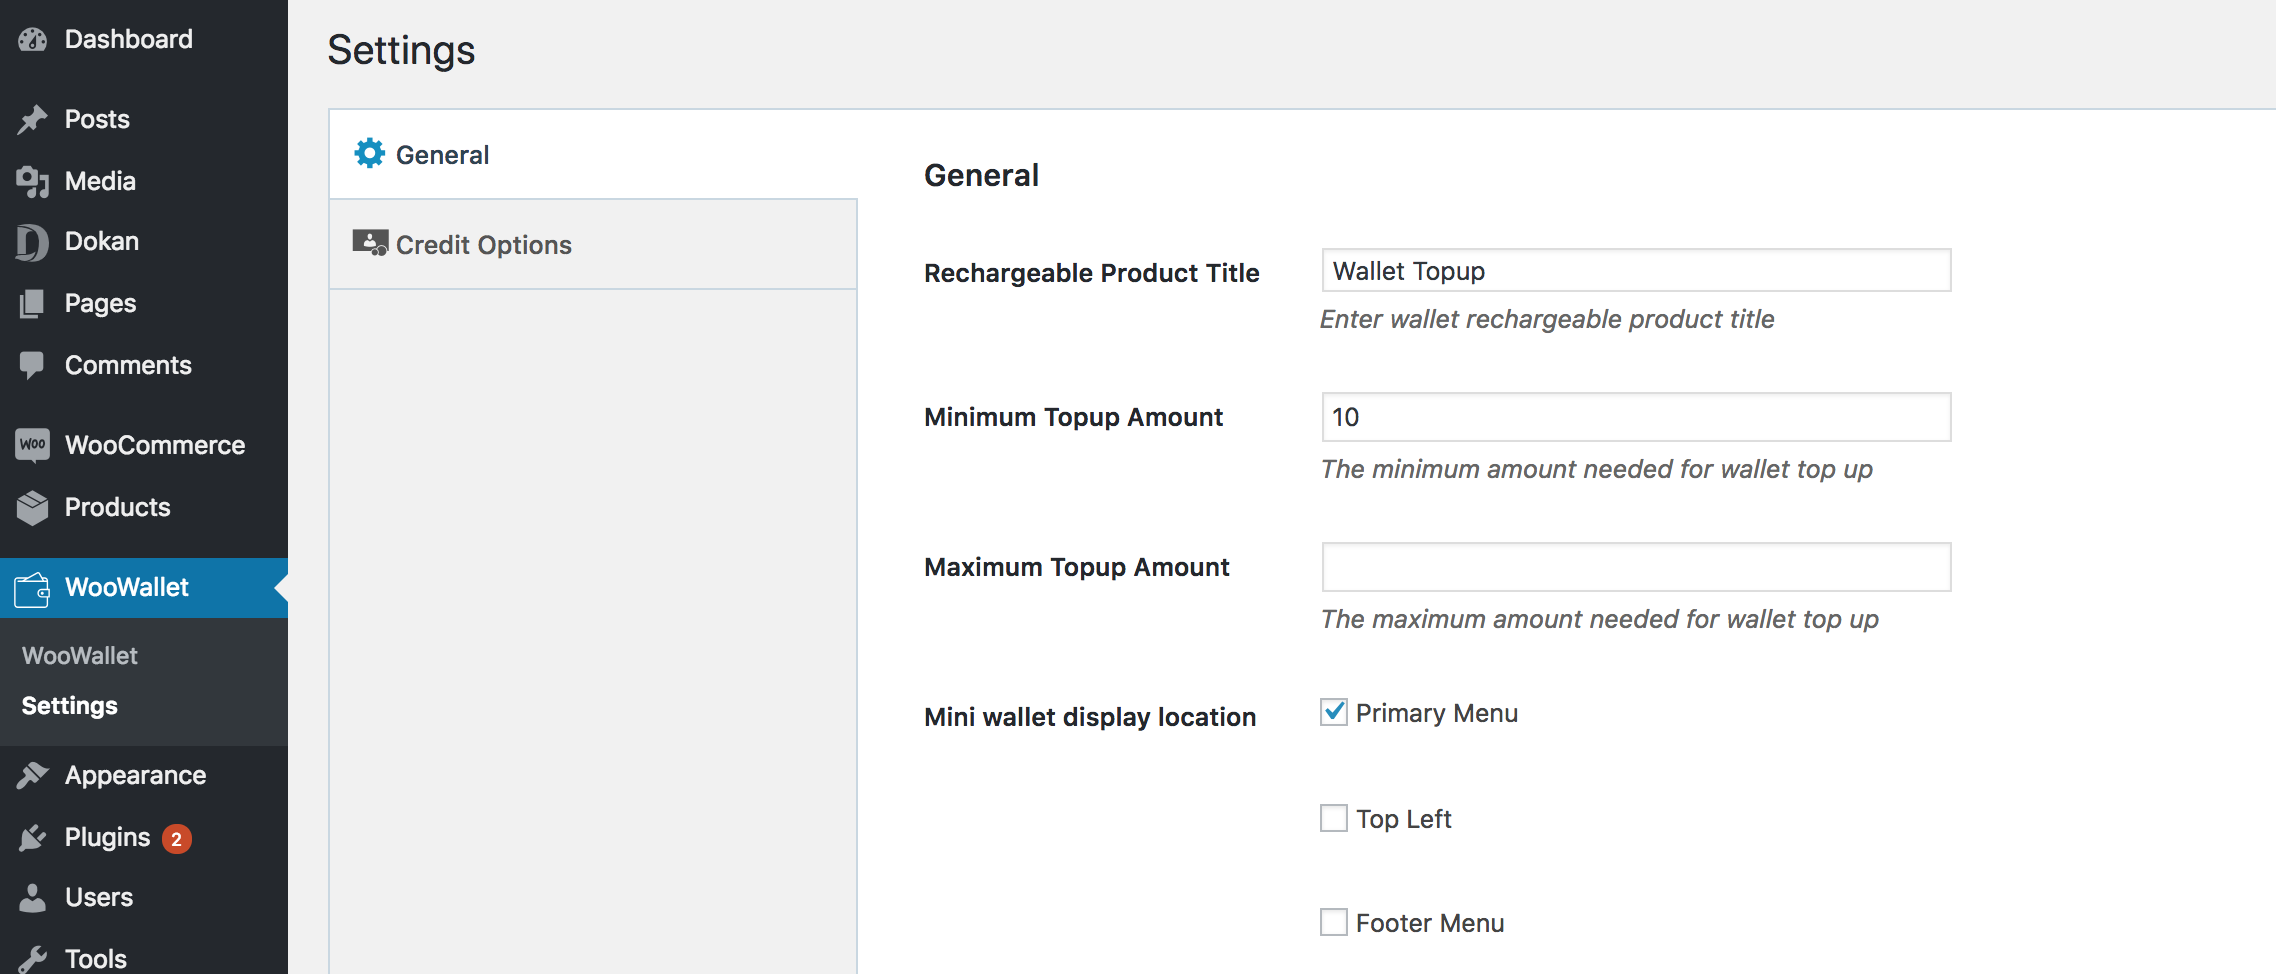
Now, you will find a new option on your WordPress menu – WooWallet. Under that menu, you will see the settings to configure the plugin. Besides that, you can choose where you want to display the mini wallet menu.
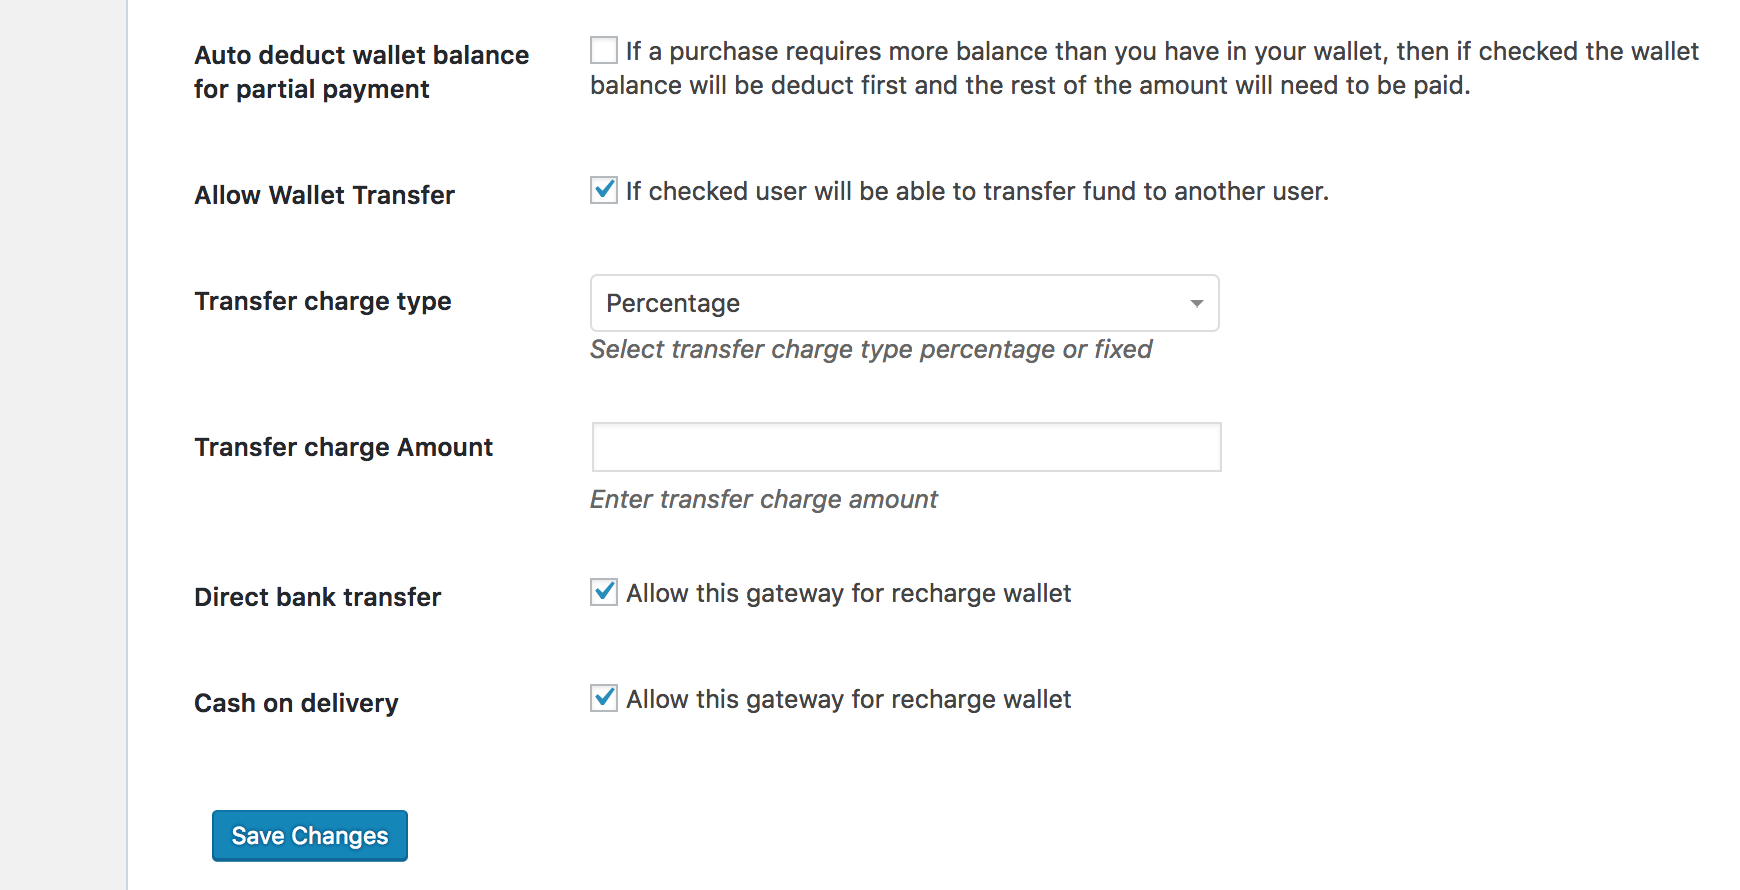
You can enable or disable wallet transfer between your users including customer and vendors. There are even options to choose transfer charge type, amount and the additional payment methods that it will support.
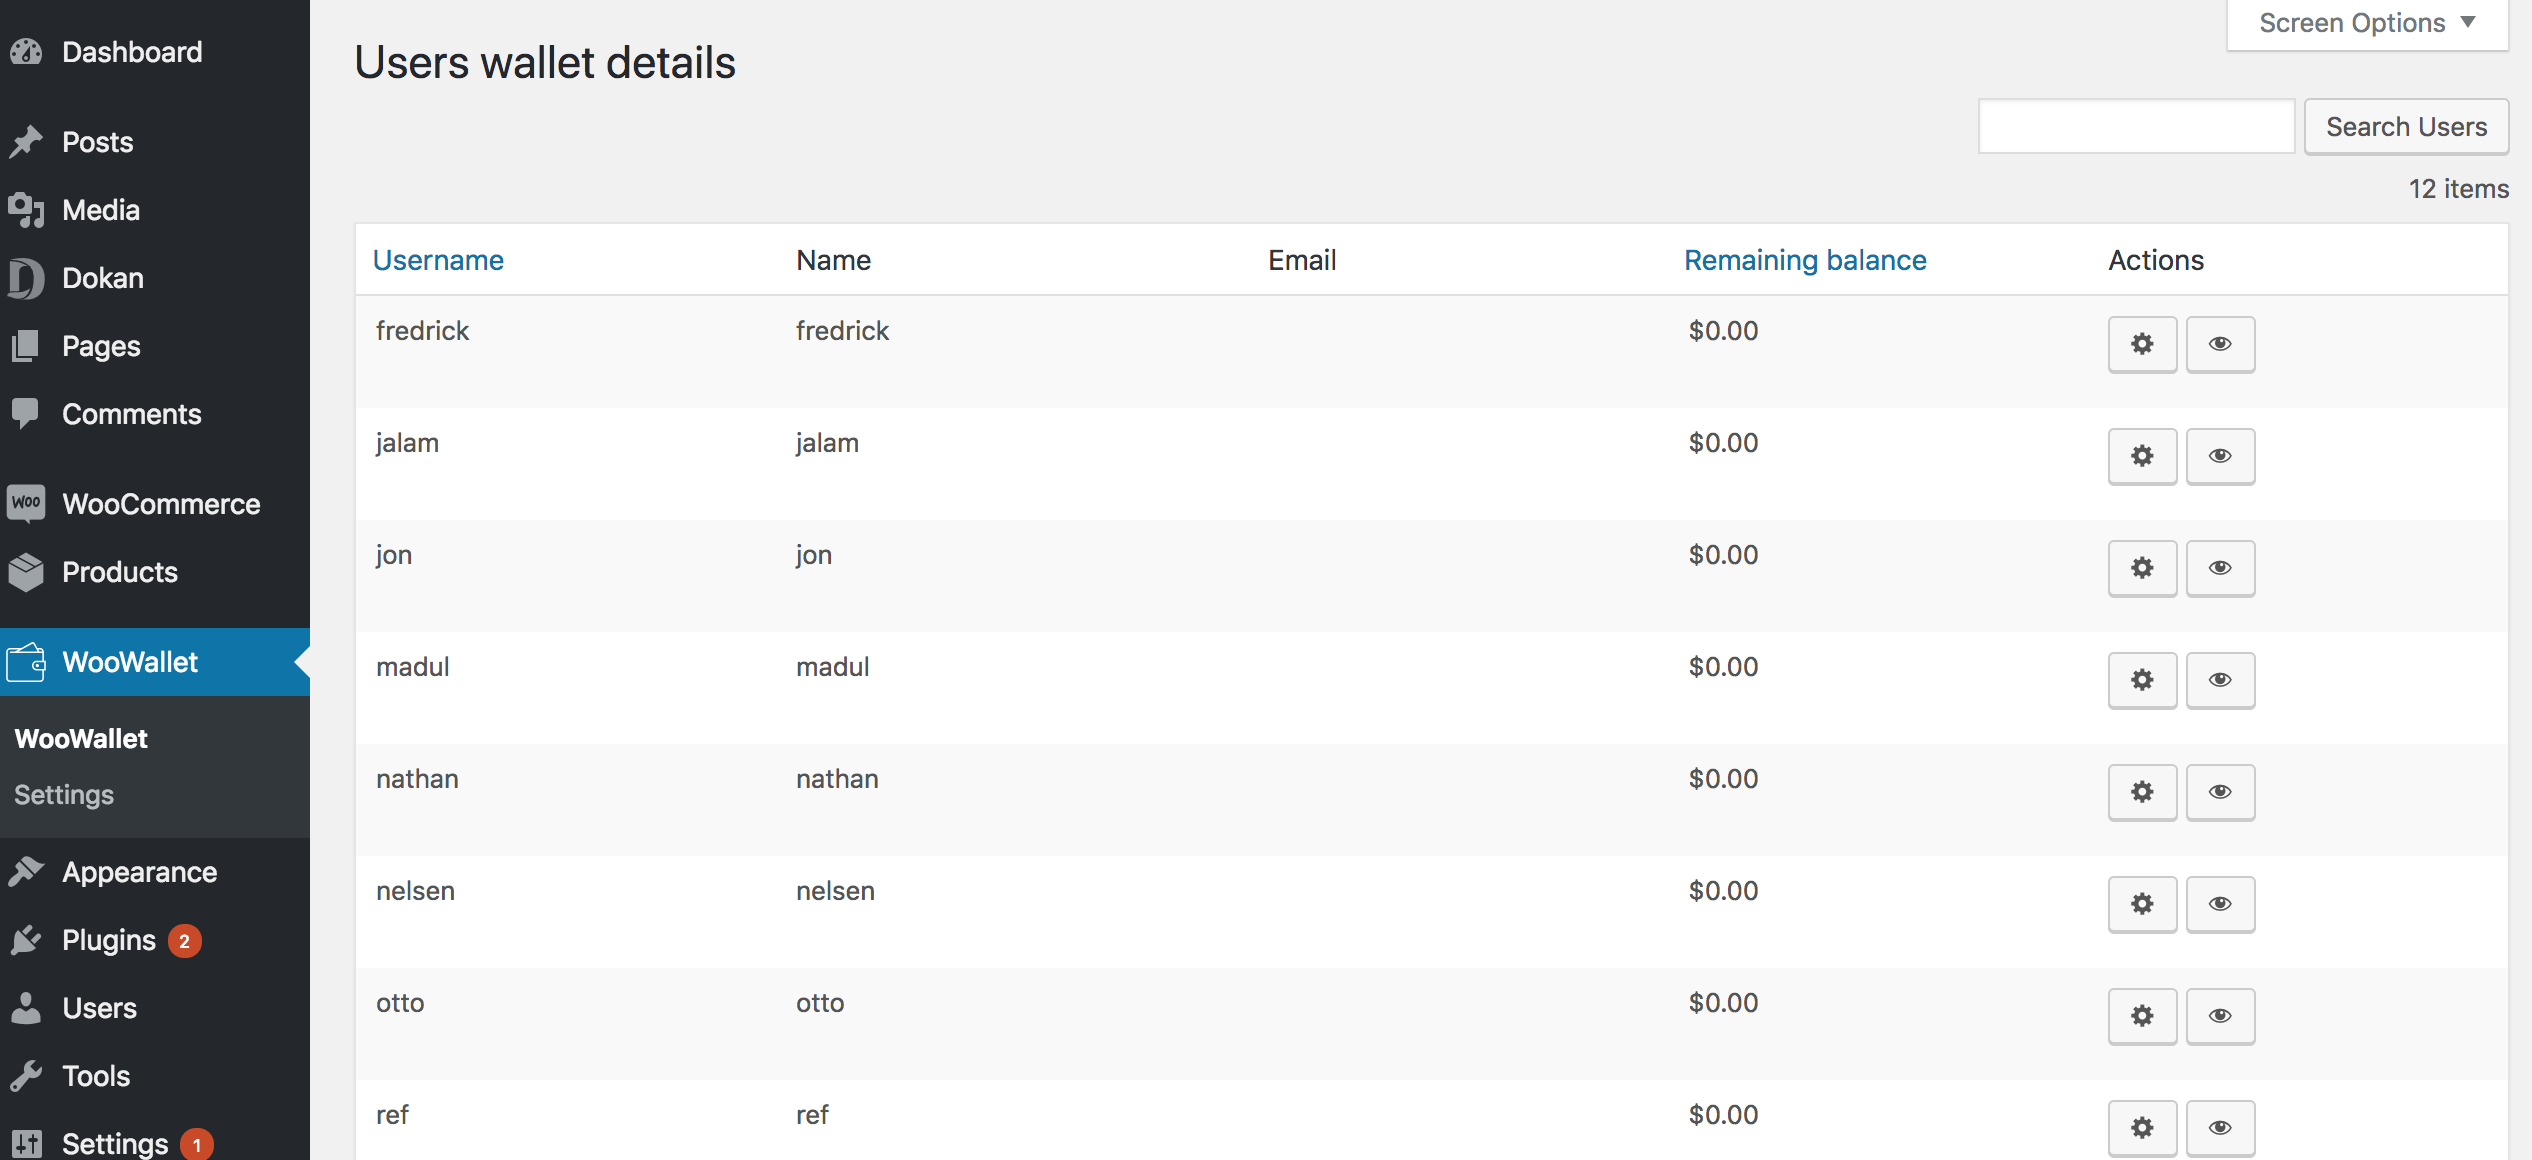
After you have setup your wallet, you can navigate to – WordPress Admin Dashboard → WooWallet. You will find all your users list with their Wallet status.
Cashback Offer on Your Marketplace
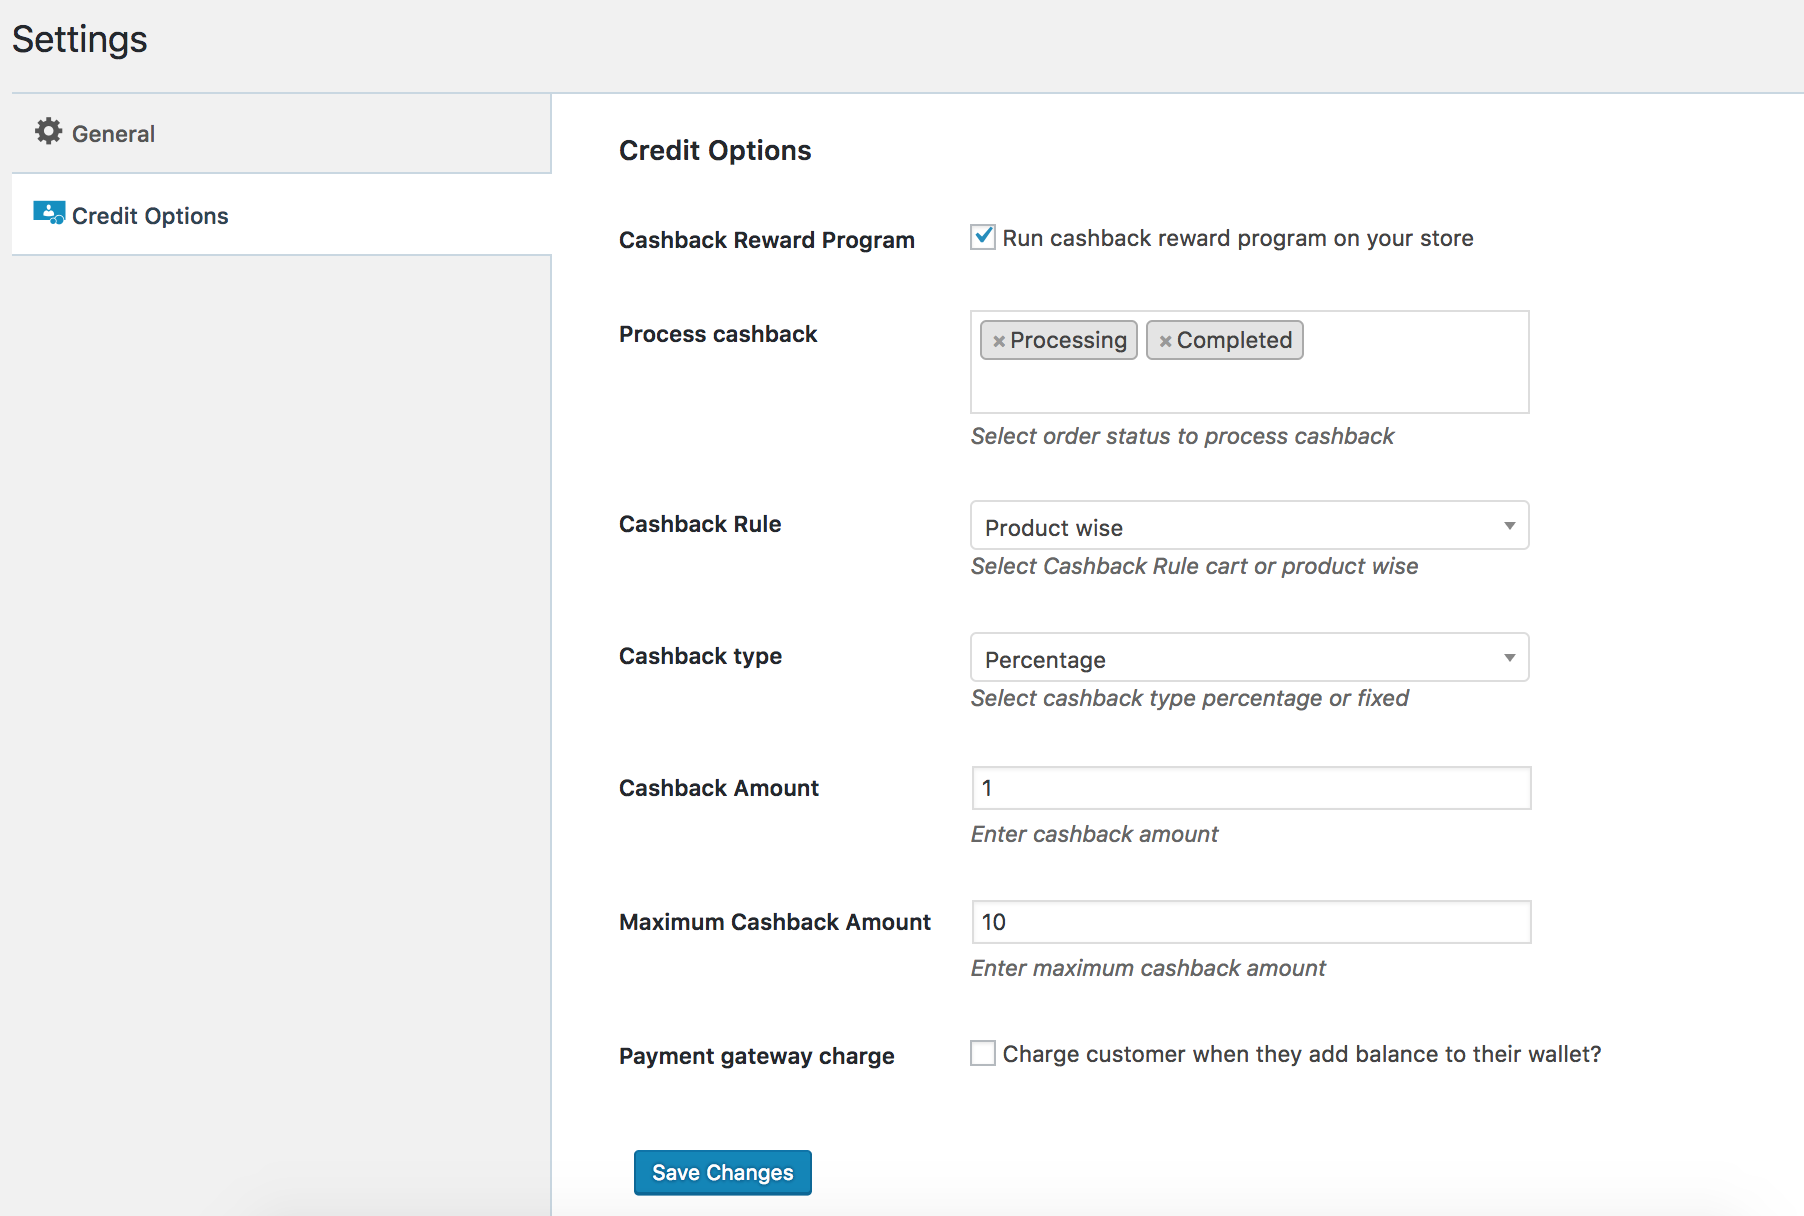
Luckily, the Woo Wallet plugin offers Cashback Reward program for your multivendor store. You can enable this feature from WordPress Admin Dashboard → WooWallet → Settings → Credit Options.
There are options to choose the process of cashback, rules, type (Percentage or Fixed Amount), cashback amount, maximum cashback amount etc. You can also charge for cashback payment methods if you want. After configuring the setting, save changes.
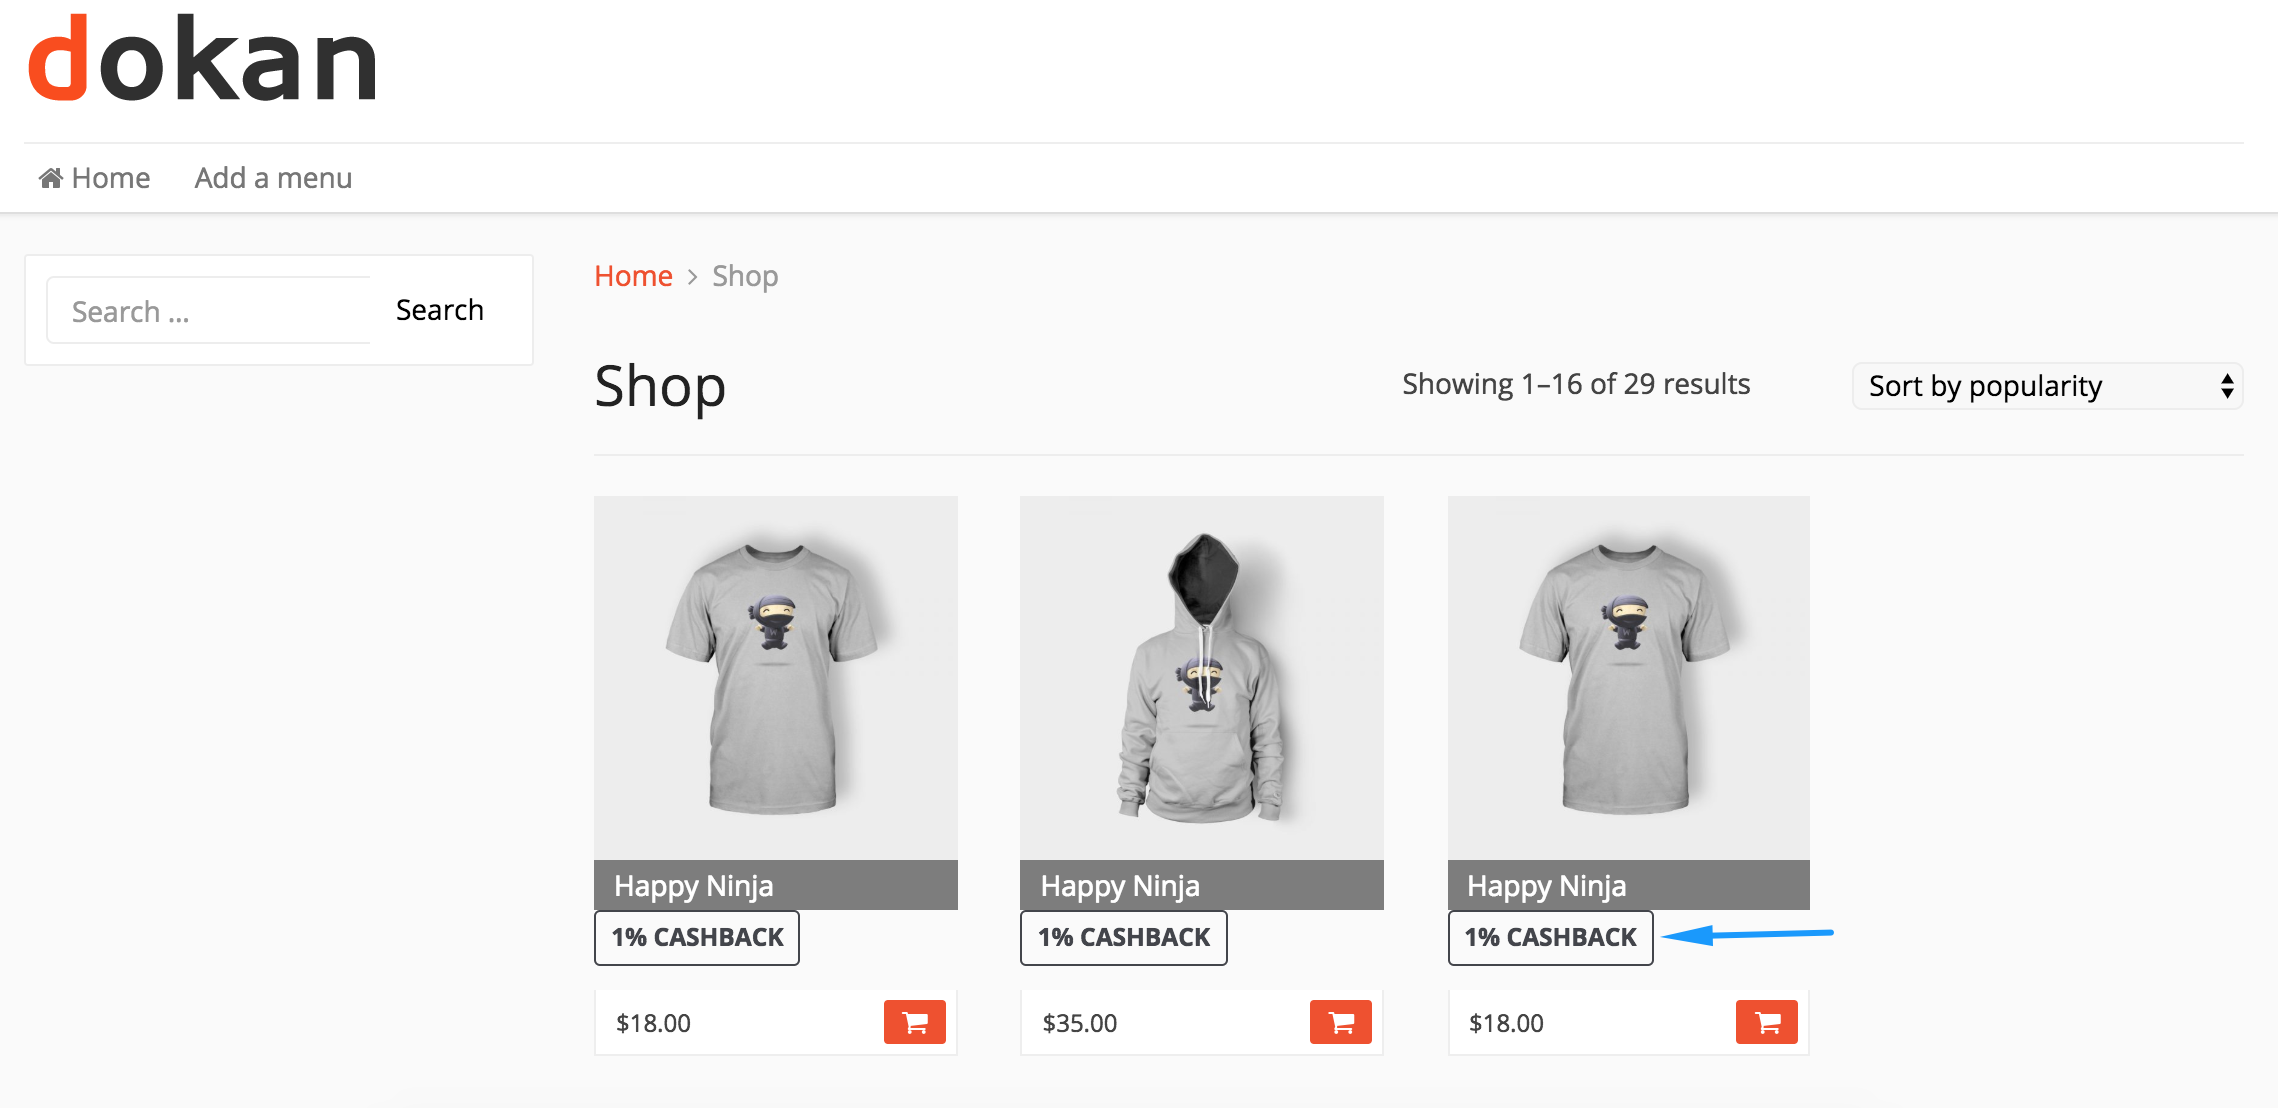
If you enable cashback program, your customers will view cashback amount under the product names in the store page.
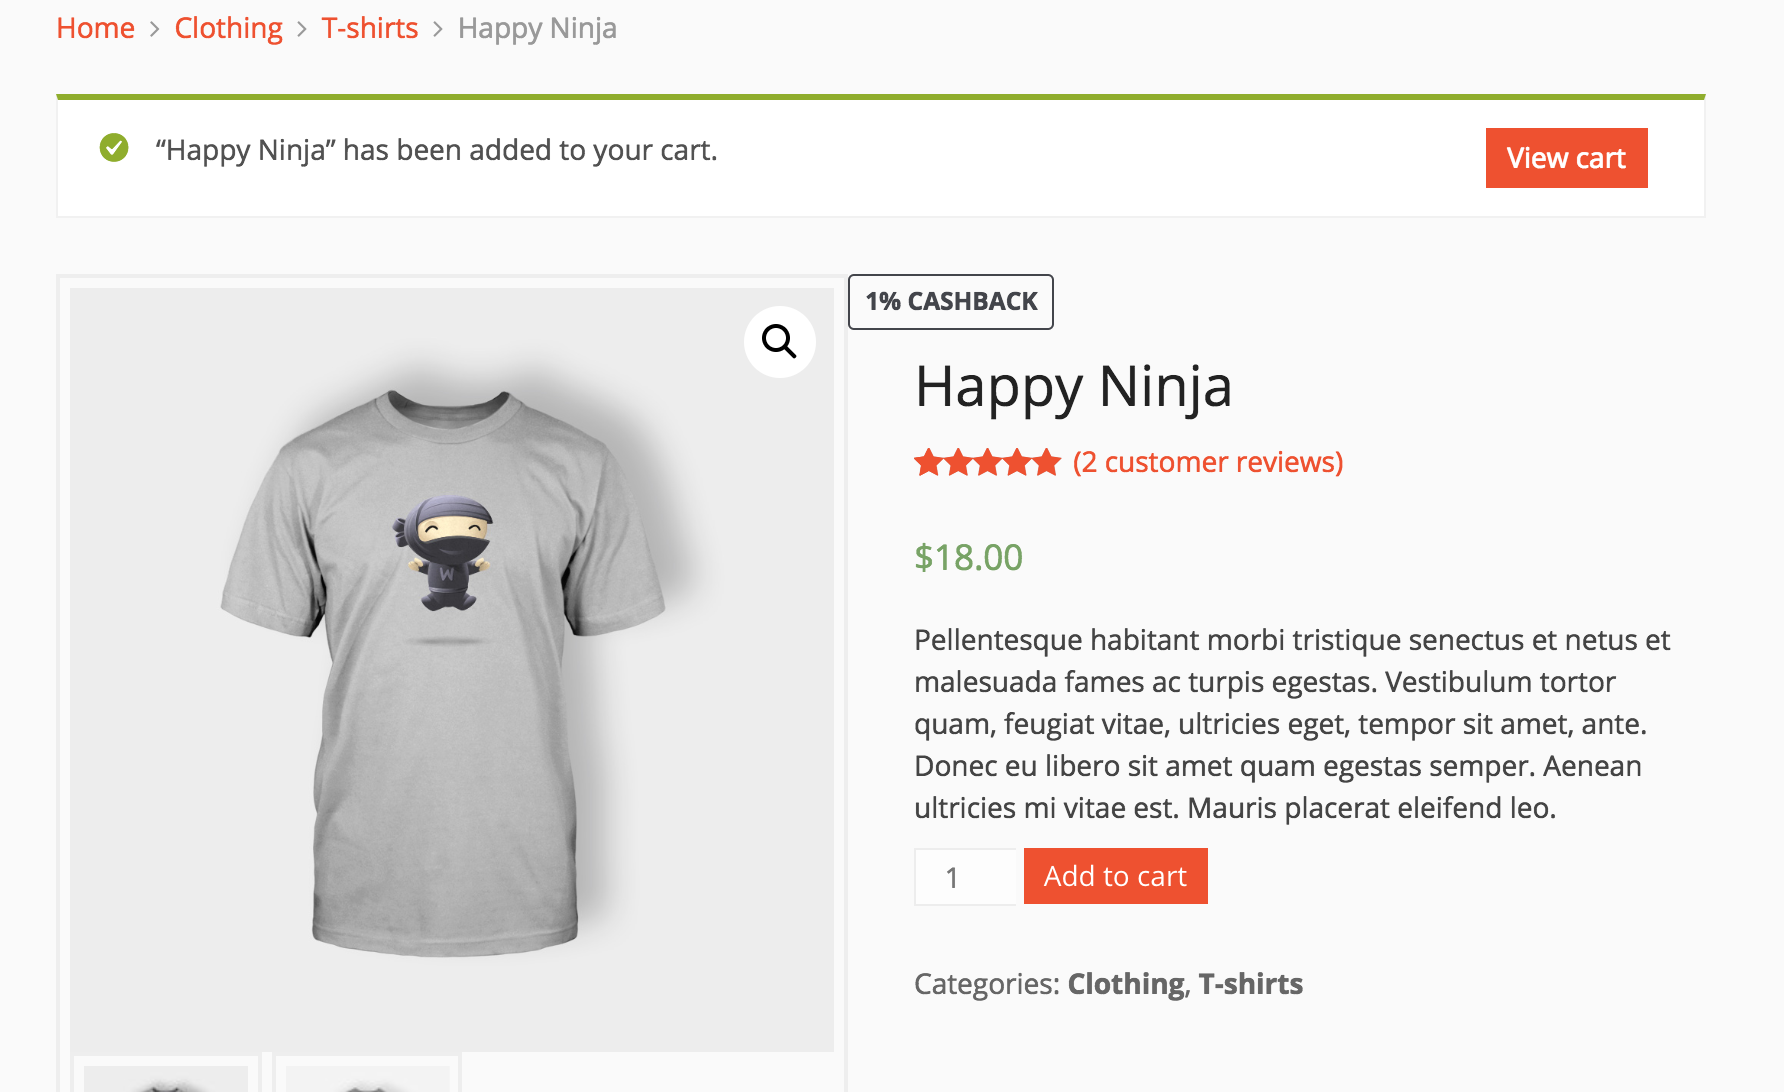
Besides that, all your products will have cashback widget added to their detail page.
Adding Balance to Your Wallet
Your customers and vendors will have their own wallets in the account page. A new menu will be added there named My Wallet. This page contains the total wallet management for their accounts.
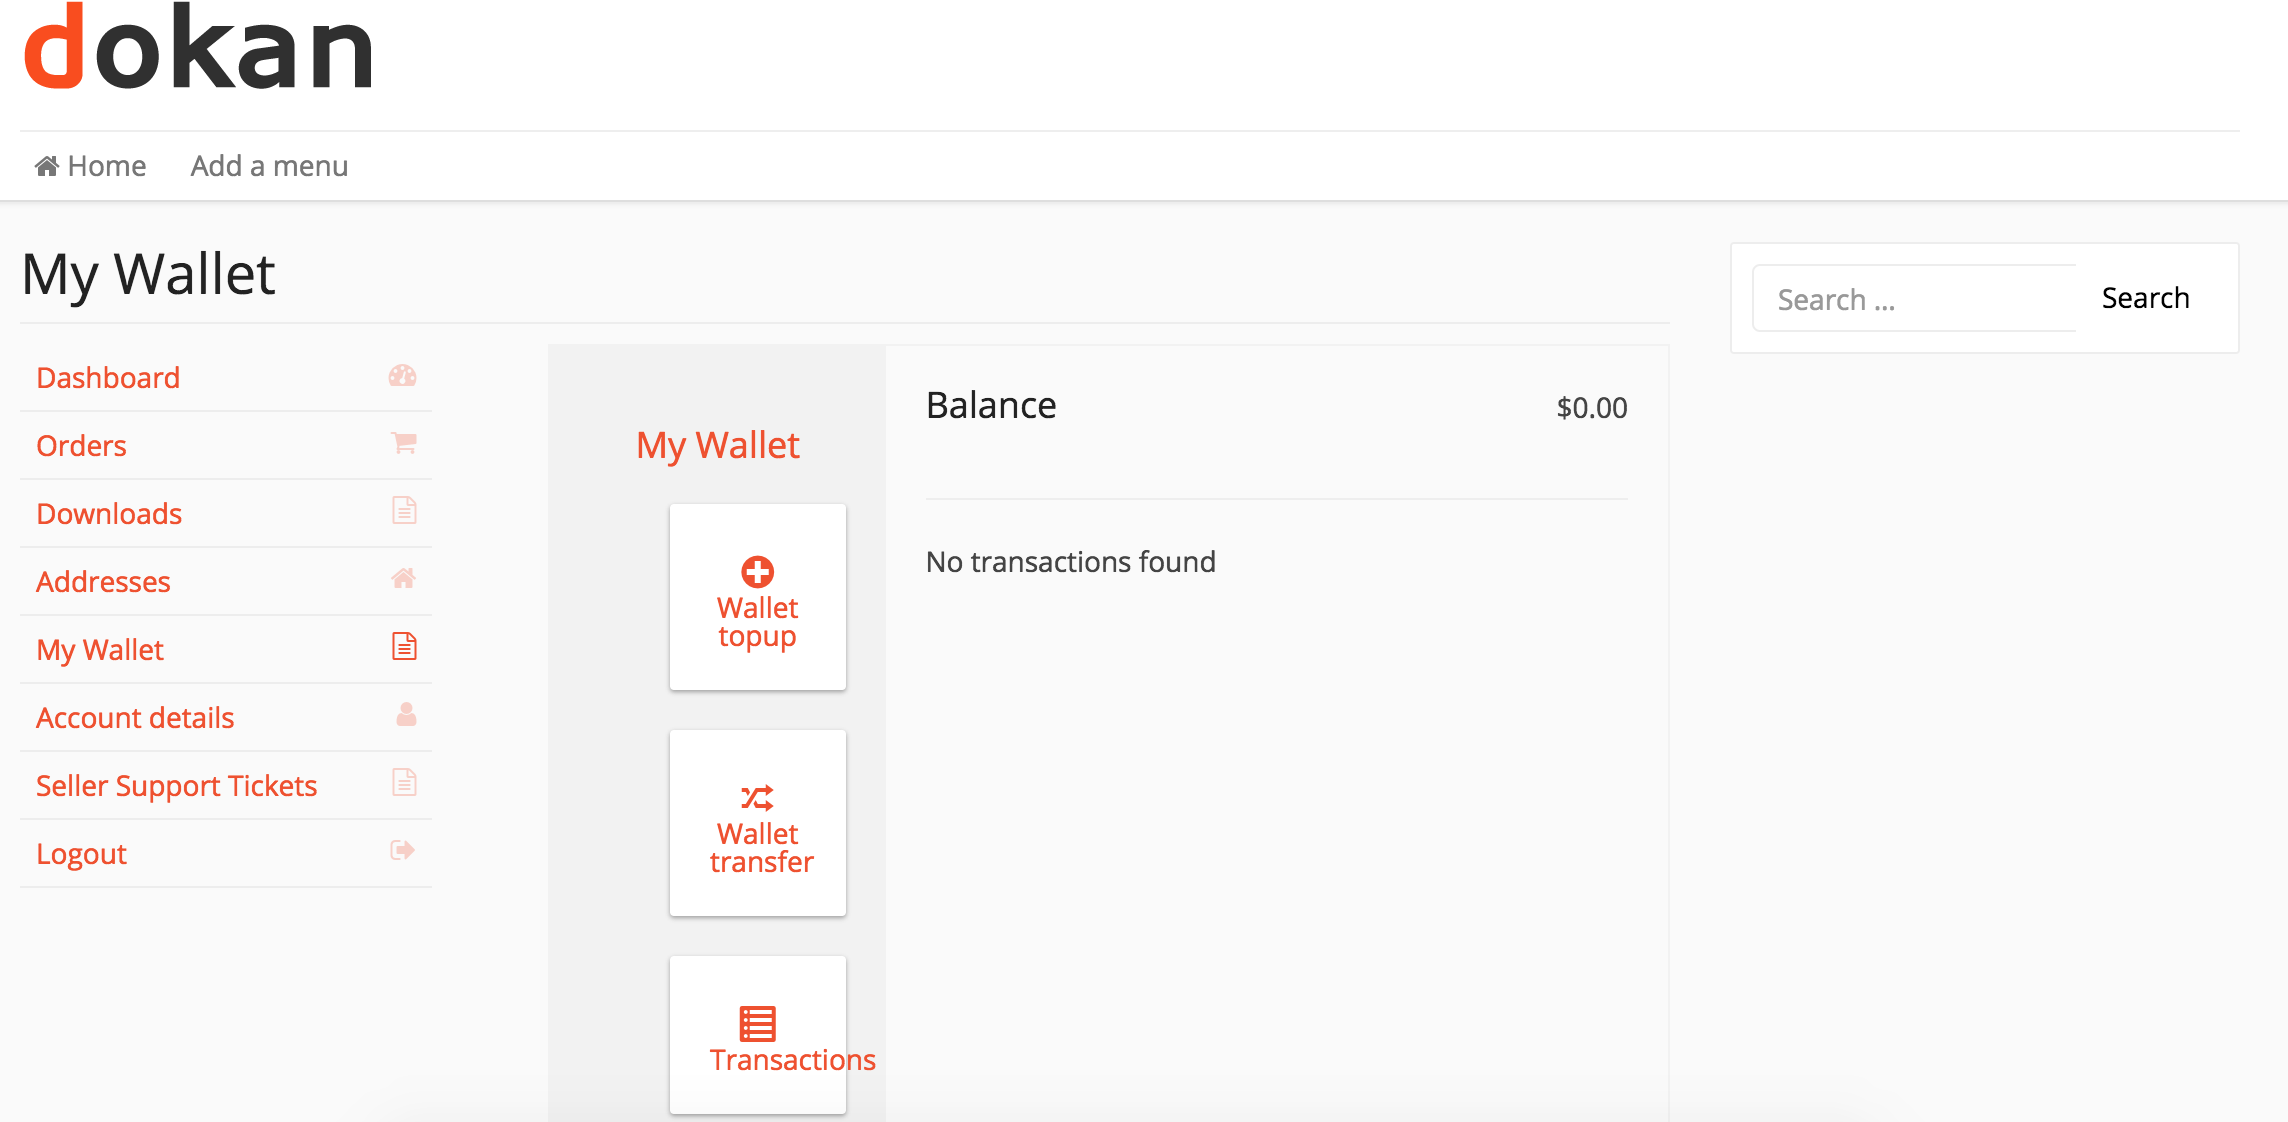
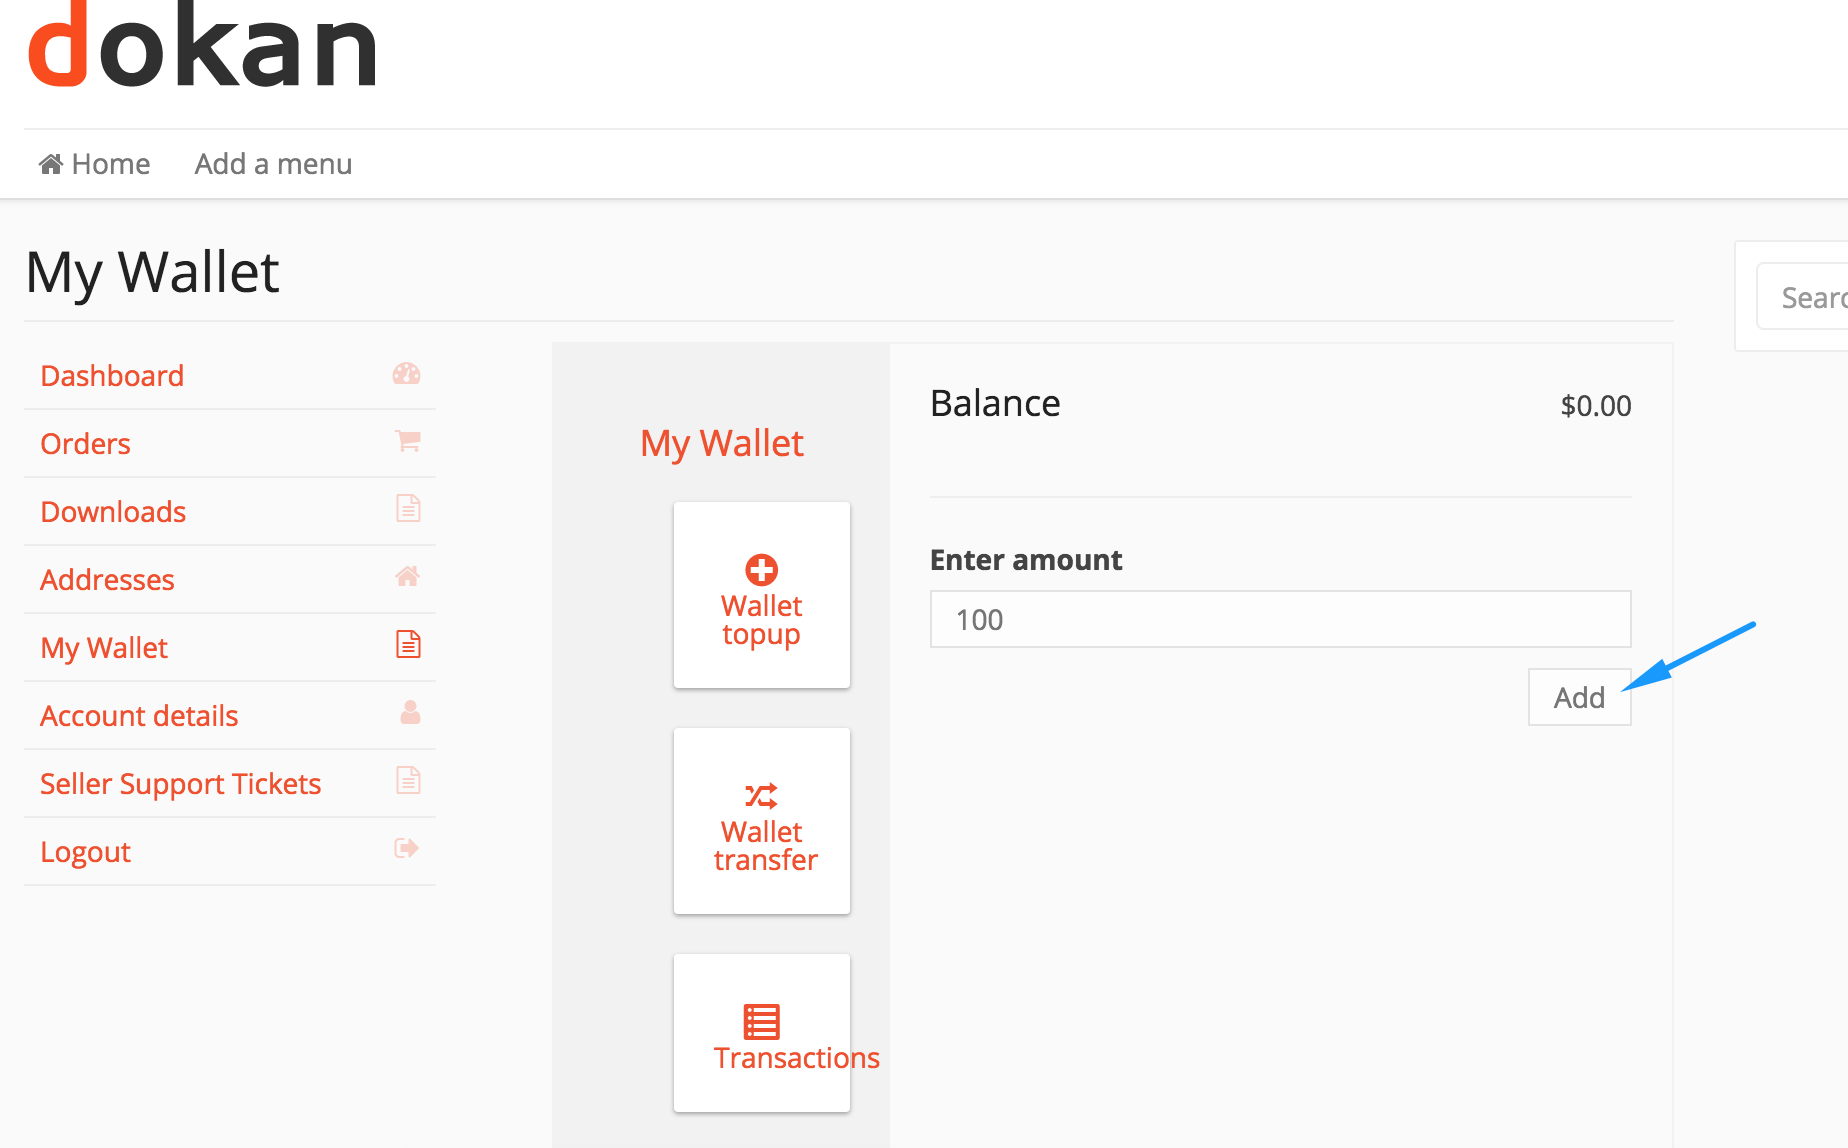
They can add balance to their wallets from the Wallet topup menu. They just need to put the amount and click on the Add button.
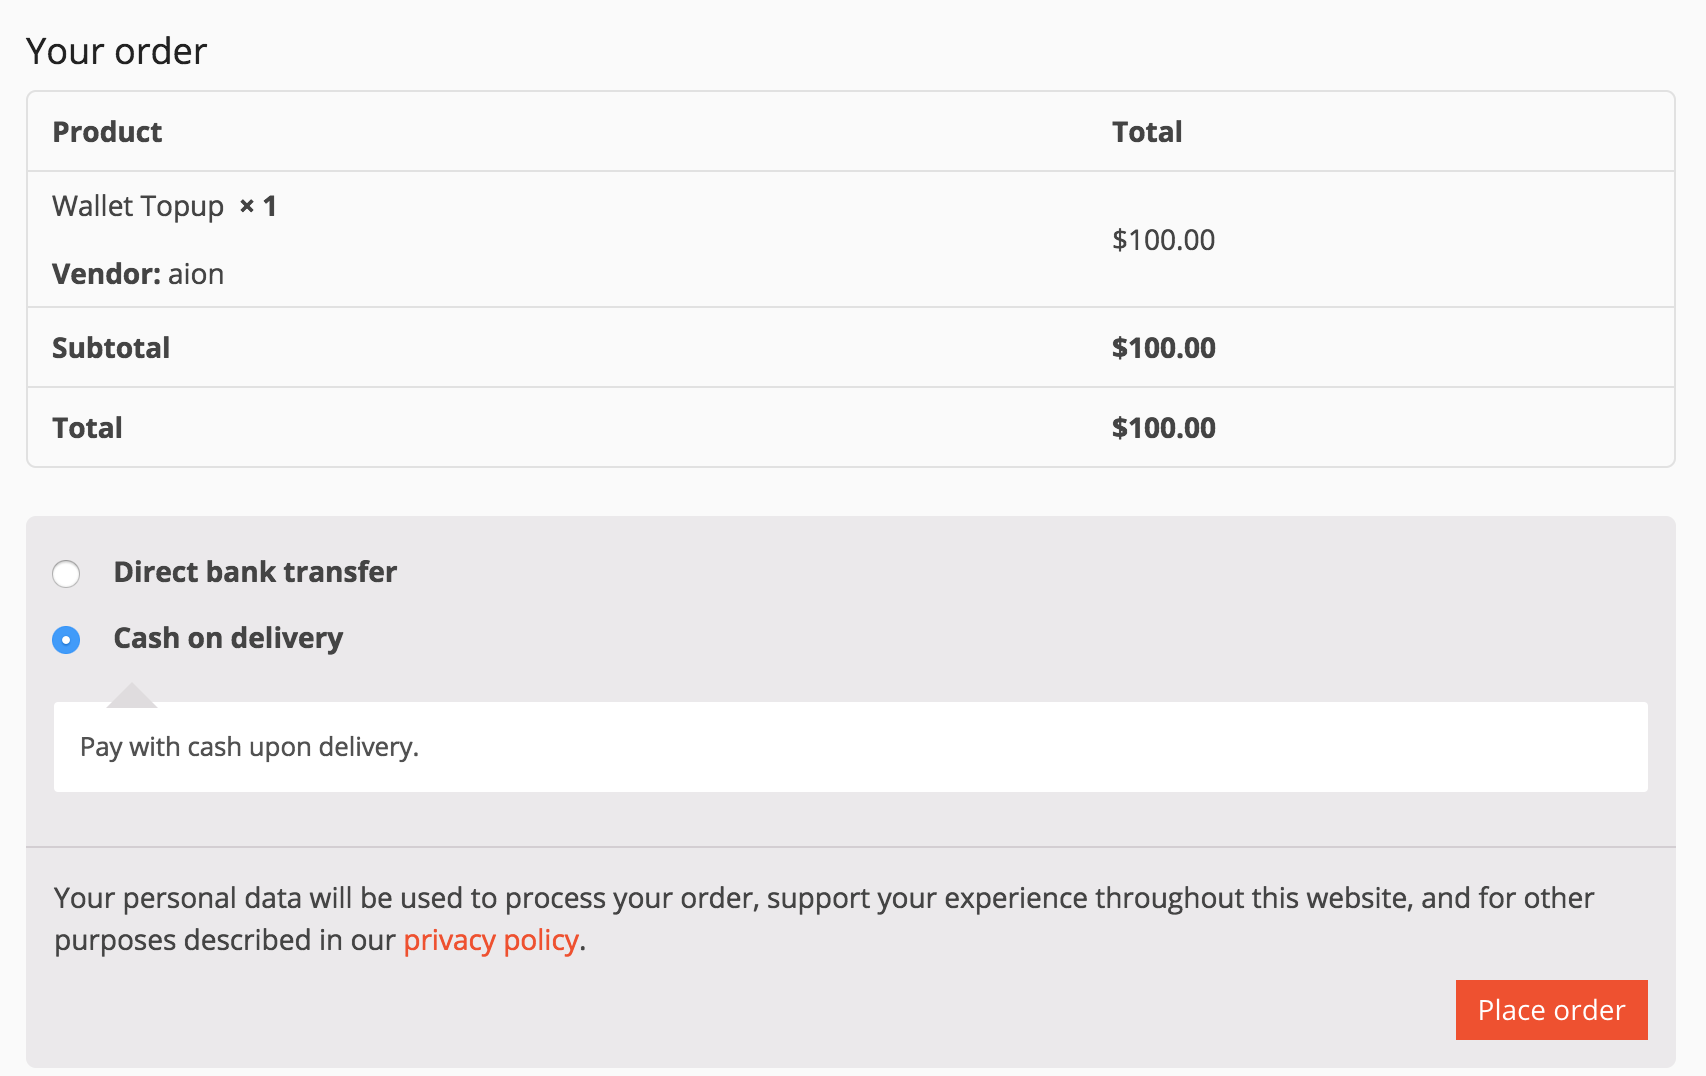
After that, they will be taken to checkout page. From there, they can place the order just like any other product in WooCommerce.
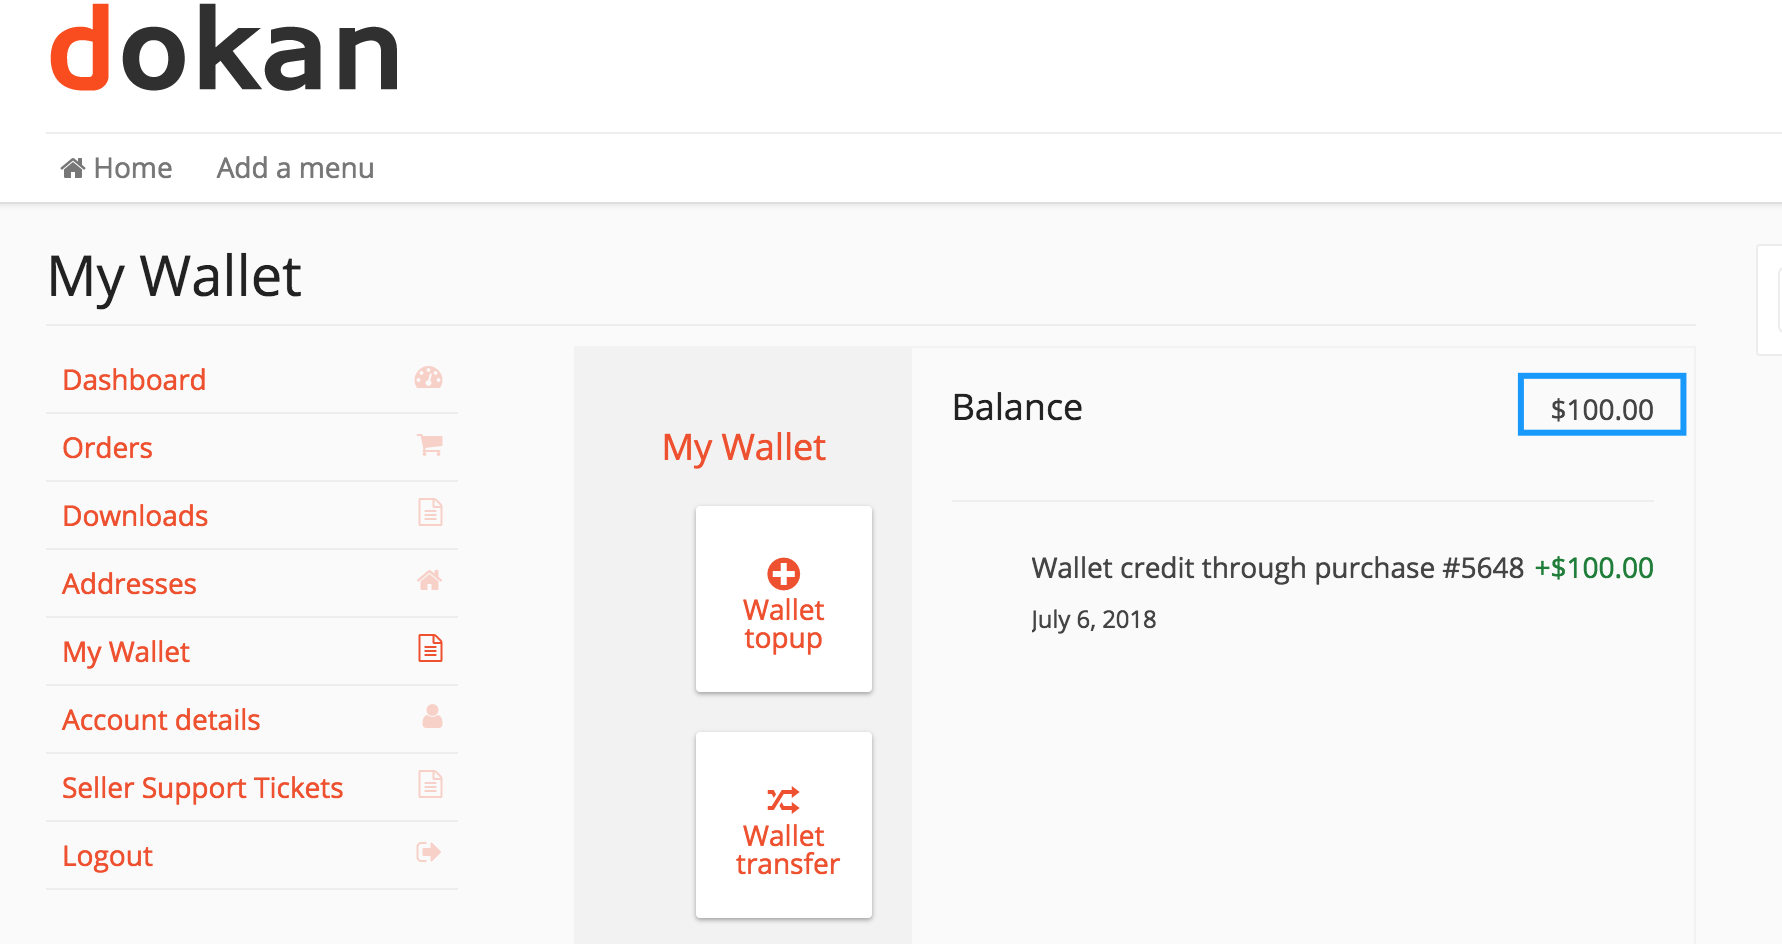
After successful purchase, the amount will be added to their Wallet Balance. This gives them the opportunity to shop using their wallets.
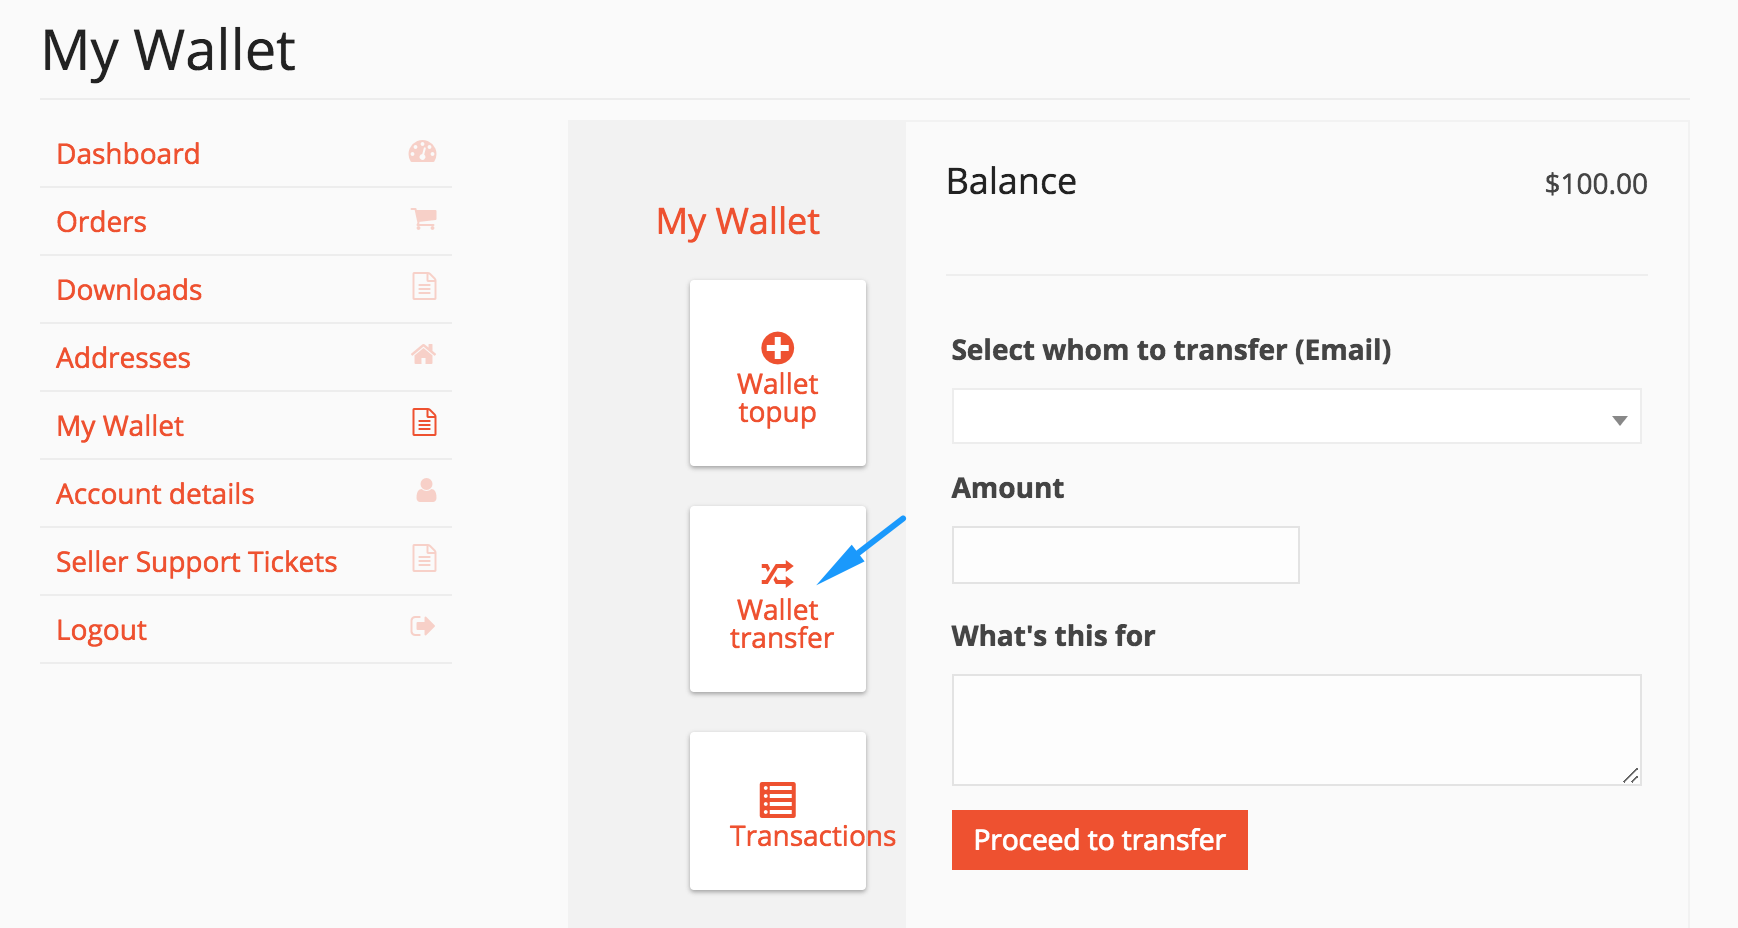
For transfering their balance to another user, they can use the Wallet transfer menu. They will have to choose to whom they want to send the balance with the amount.
Using Wallet Balance to Buy Products
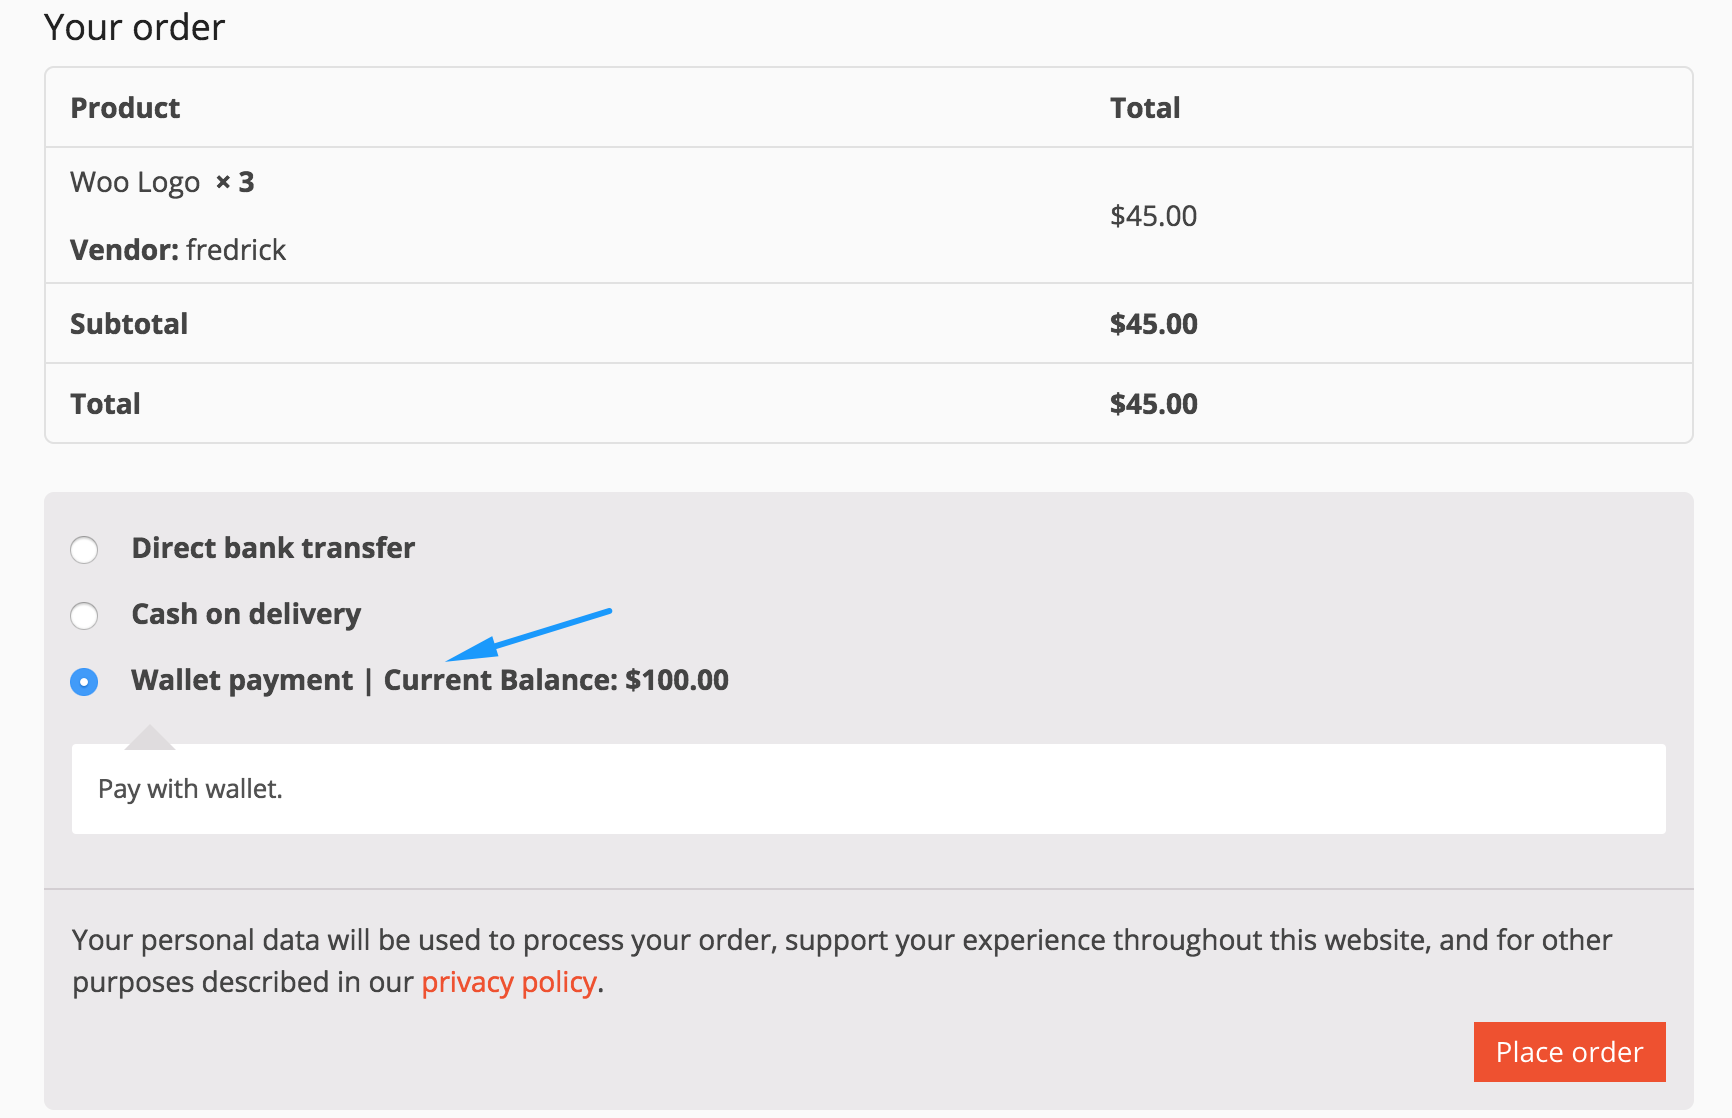
When a customer wants to buy products using their wallets, they will have to add the product to cart. In the checkout phase, they will find a new payment method – Wallet Payment. So, they can use their balance to place the order.
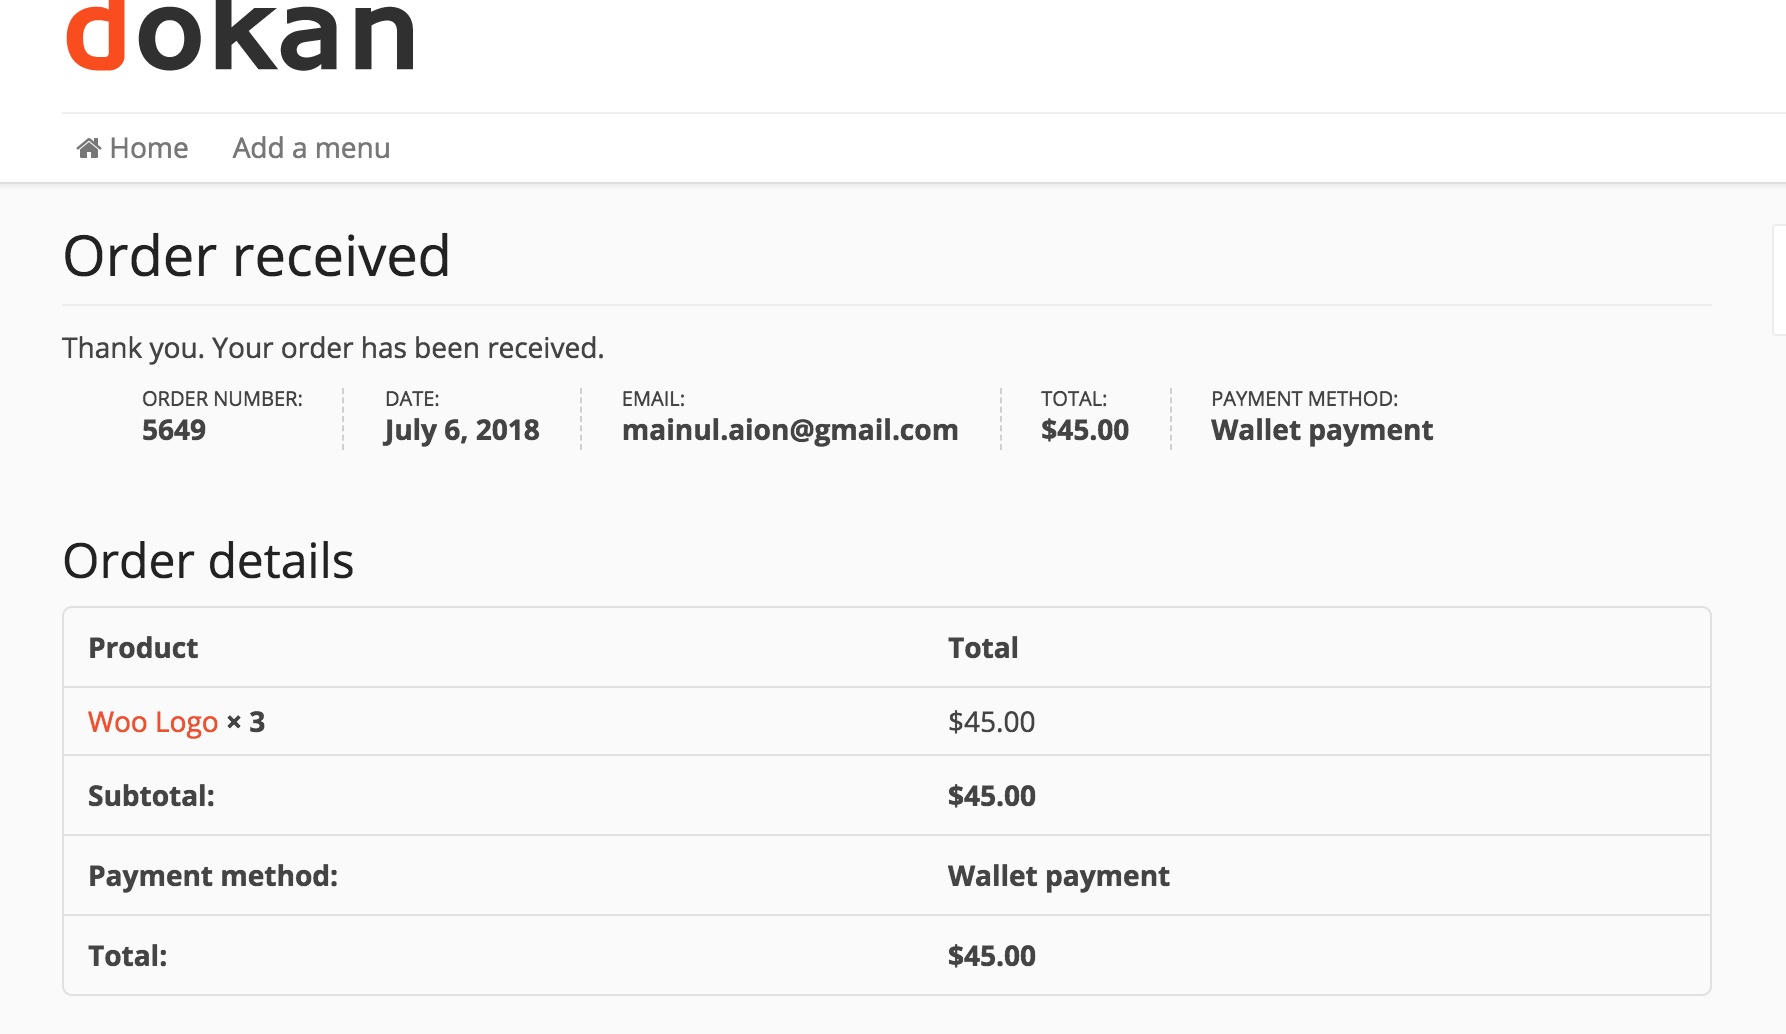
After placing orders, the receipt looks like this.
Cashback Offer Up and Running
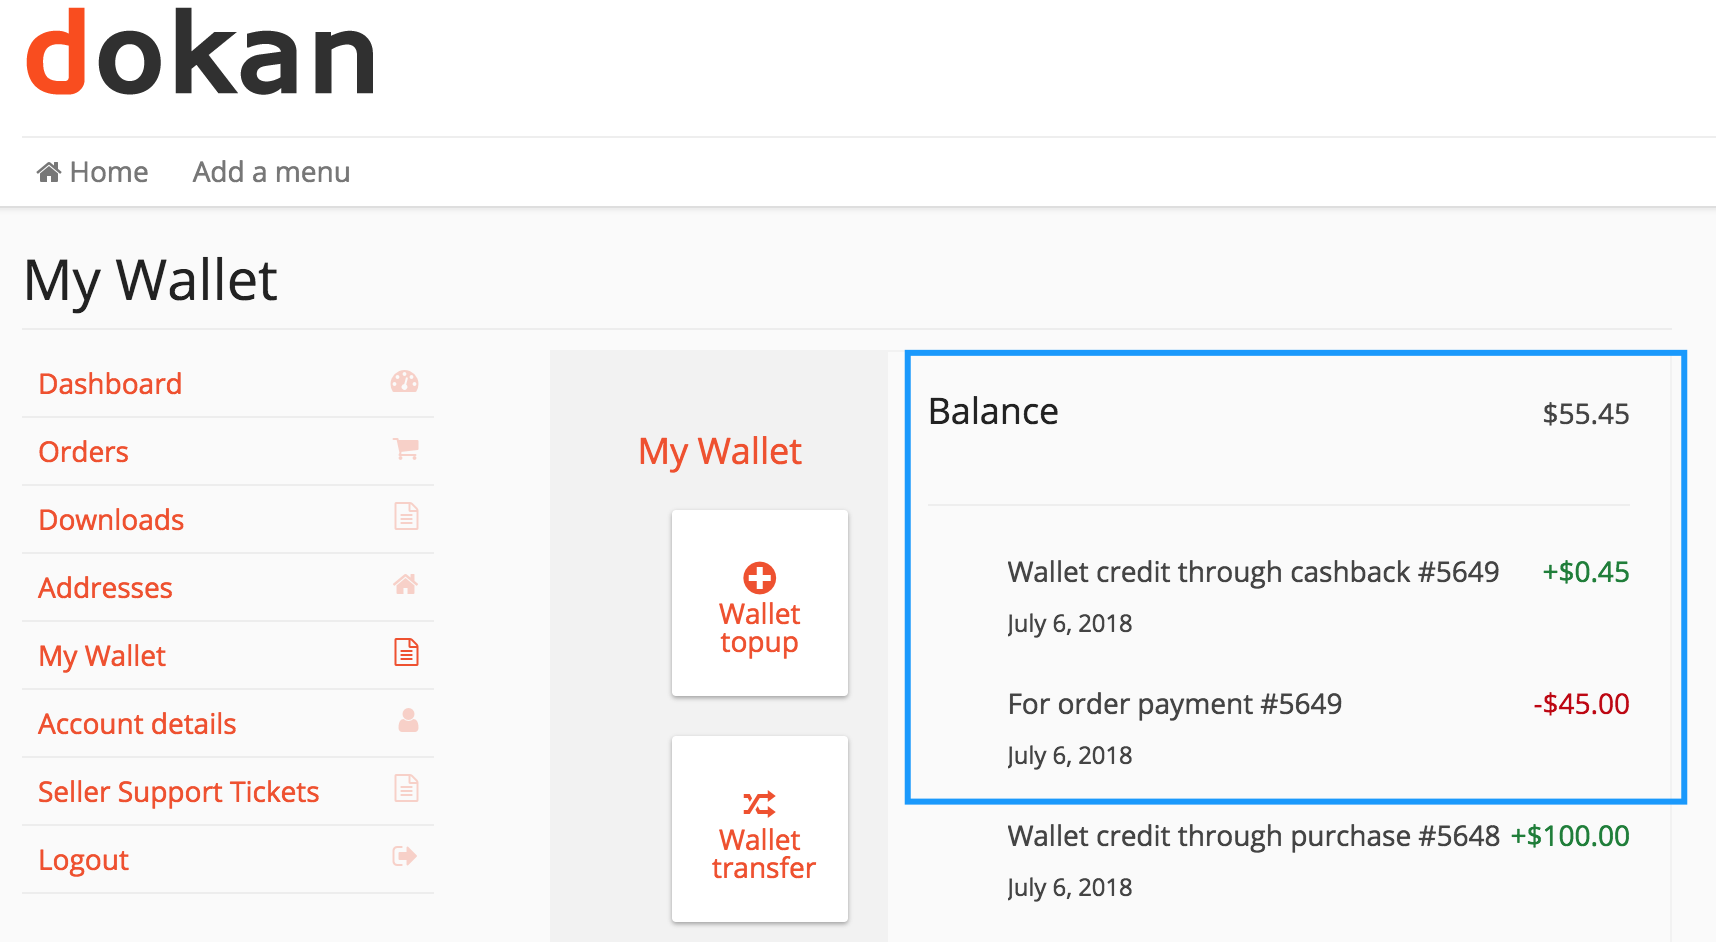
The cashback reward program works with the wallet feature too. When a customer buys something that has cashback offer enabled, the reward money will be added to their wallets. Later, they will be able to use that balance to buy other products.
Wrapping Up
If you were looking for a way to add Wallet feature to your multivendor store, then now is the time. As Woo Wallet supports Dokan completely, you can easily enable this feature and run interactive cashback reward program on your marketplace. This could be a good way to encourage customers to buy. Besides that, having your own currency inside your eCommerce business increases customer loyalty and there is nothing to lose. And to help you out, we have curated this detailed tutorial. Simply follow the steps and stay ahead of your competitors.
