
How To Add Rich Snippets to WordPress in 2026 (Plugin+Manually)
Are you looking for an insightful guide on how to add rich snippets to WordPress? We've got you covered.
Rich snippets are a powerful tool for improving your site's visibility and engagement in search engine results. They aim to increase click-through rates by giving users more context before they click on a link.
This blog will walk you through each step to add rich snippets to your WordPress site. Let's start from scratch ⤵️ ⤵️
What are Rich Snippets?
Rich snippets (rich results) are search engine results that include extra information about a webpage.
Rich Snippets enrich your search results by showing additional data. This approach can significantly improve your website's visibility and click-through rates.
Common types of rich snippets include reviews, recipes, events, products, and articles.
- Recipes: Shows additional details like ingredients, cooking time, and calories.
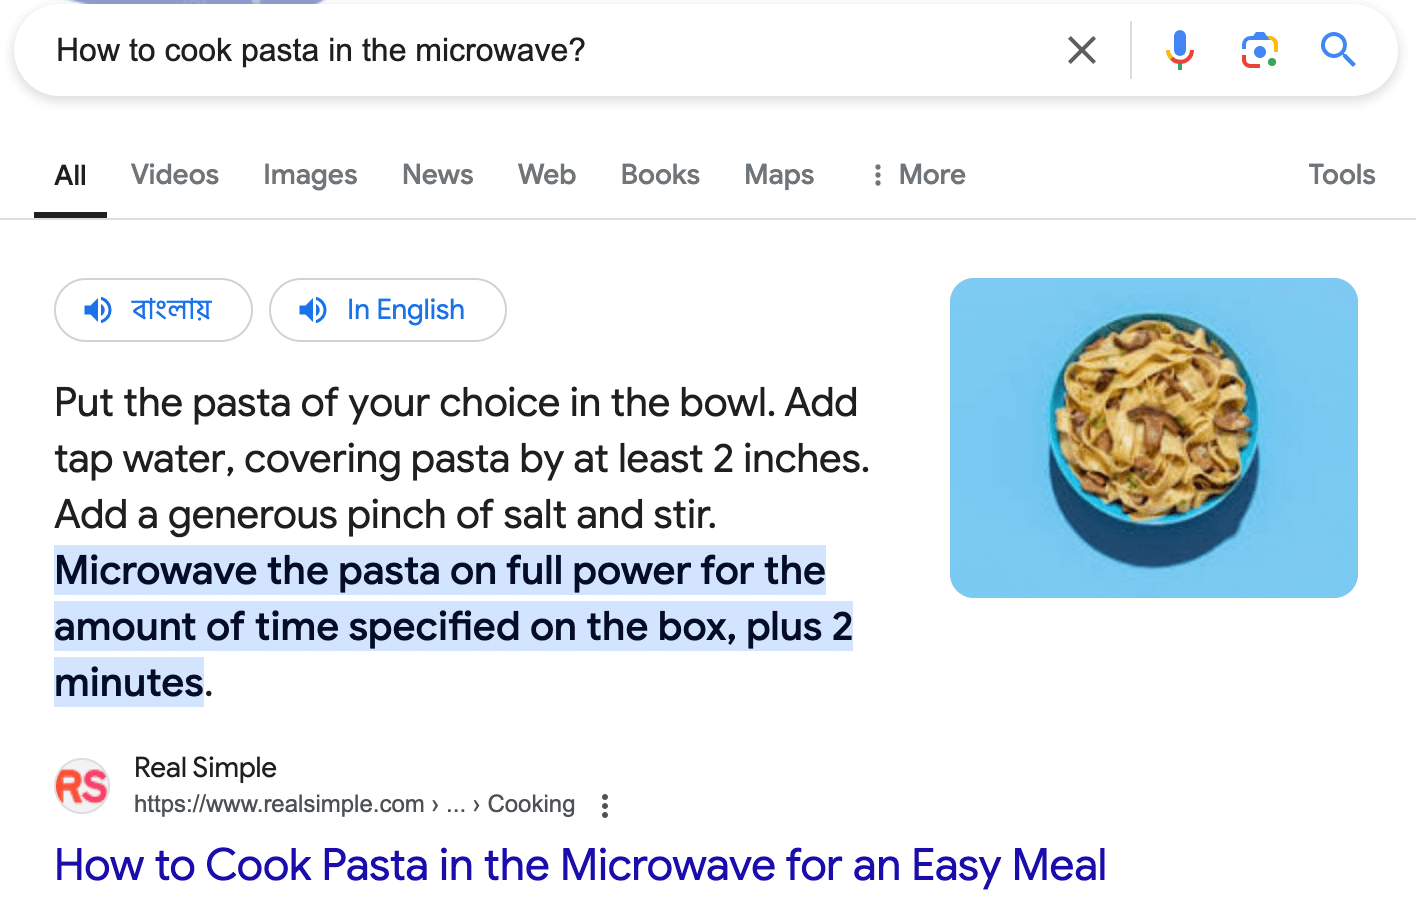
- Products: Displays information such as price, availability, and product details.
- FAQs: Shows a list of frequently asked questions with collapsible answers directly in the search results.
- Events: Provides details like event dates, locations, and times.

- People/Organization Info: Shows information about notable people or organizations, like job titles, locations, or founding dates.

- Videos: Displays video thumbnails with key information like length, upload date, or video description.
- Articles: Displays headlines, images, and publication dates for news articles or blog posts.
- How-to: Offers step-by-step instructions for completing a task, often with images or videos.
- Local Business: Shows essential business details like address, phone number, and hours of operation.
- Software Applications: Highlights information about software, including rating, price, and compatibility.
There could be other types of rich snippets as well. These enhanced search results give users a quick glimpse of your content beyond the standard page title, URL, and meta description.
Why Use Rich Snippets for Your WordPress Website?
There are several reasons to use rich snippets on your WordPress website.
First, rich snippets can help you improve your click-through rate (CTR). They can make your search results more informative and visually appealing. When users see rich snippets, they are more likely to click on your website.
Second, Rich snippets make your result stand out by adding details that catch the user's eye. Readers get more context and useful information about your content directly from the search page.
While rich snippets don't guarantee higher rankings, they can lead to better user engagement and lower bounce rates. This may positively influence your overall SEO performance.
Besides, rich snippets increase brand awareness by displaying your company logo and other information in search results.
How Does the Rich Snippet Work?
To generate rich snippets, webmasters or website owners use structured data in the form of schema markup.
This markup is code added to a webpage to give search engines more detailed context about the page content. Common formats for structured data include JSON-LD (recommended by Google), Microdata, and RDFa.
For example, if your page contains a product, you would add structured data that informs search engines about the product's name, price, availability, and reviews. Google reads this markup and displays the relevant information as a rich snippet in the search results.
How to Add Rich Snippets to WordPress – 2 Methods for Beginners

There are two main methods for adding rich snippets to WordPress:
- Using a WordPress plugin
- Adding schema markup manually
Method 1: Add Rich Snippets Using a WordPress plugin
There are several WordPress plugins to add rich snippets to your website. Today we'll show you how to add rich snippets using the “All In One Schema Rich Snippets” plugin.
This plugin allows you to add rich snippets to your content with ease. It supports a variety of schema types, such as reviews, articles, events, and products. The simple interface makes it easy for anyone to enhance their search presence.
Note: Later, we'll show you other popular rich snippets plugins for your WordPress site.
Here are the steps you need to follow:
- Install the Plugin
- Configure the Plugin Settings
- Add Rich Snippets to Your Content
- Fill in the Snippet Details
- Test Your Rich Snippet
Step 1: Install the Plugin
To install the plugin, first log in to your WordPress dashboard. Next, navigate to Plugins → Add New. In the search bar, type – All In One Schema Rich Snippets.

When the plugin appears in the search results, click Install Now. Once the installation is complete, click Activate.
For further assistance, check our beginner's guide on how to install a WordPress plugin.
Step 2: Configure the Plugin Settings
After activating the plugin, you'll see a new menu item called Rich Snippets in your WordPress dashboard. Navigate to Rich Snippets → Configuration.

The plugin provides several snippet types, including:
- Review
- Events
- Person
- Product
- Recipe
- Software Applications
- Video
- Article
- Service
Each type has specific fields to fill in. Complete the required fields based on the schema type. This may include information like title, author, date, rating, and other relevant details.
For instance:
- Review: Input rating criteria and set values for ratings.
- Event: Include date, location, and description.
Under the “Customization” tab, you'll find the option to change the Box Appearance. You can modify how the Rich Snippets box appears on the front end of your site, like changing its background color or borders.
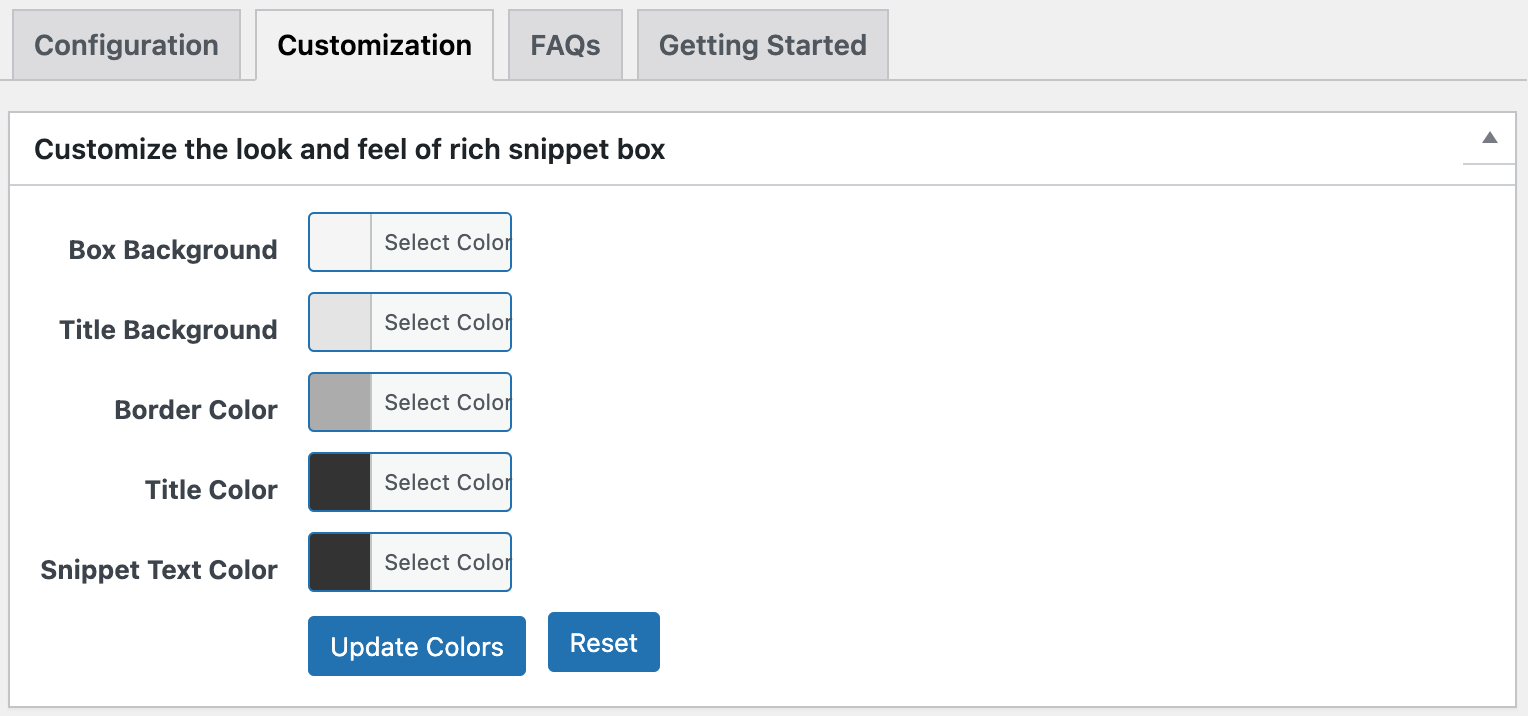
Check other two tabs “FAQs” & “Getting Started”. Here you can learn more about the plugin and its configurations.
Step 3: Add Rich Snippets to Your Content
Now that the plugin is configured, it's time to add Rich Snippets to your posts or pages. You can create a new post/page or edit an existing one.
On your editor, scroll down to the bottom of the editor, and you'll see a new section labeled Configure Rich Snippet.

From the dropdown menu, select the type of Rich Snippet that applies to your content, such as Article, Review, Recipe, Product, and so on.
Step 4: Fill in the Snippet Details
Once you choose a Rich Snippet type, fields related to that type will appear. If you select the type “Article”. You'll get the fields below-
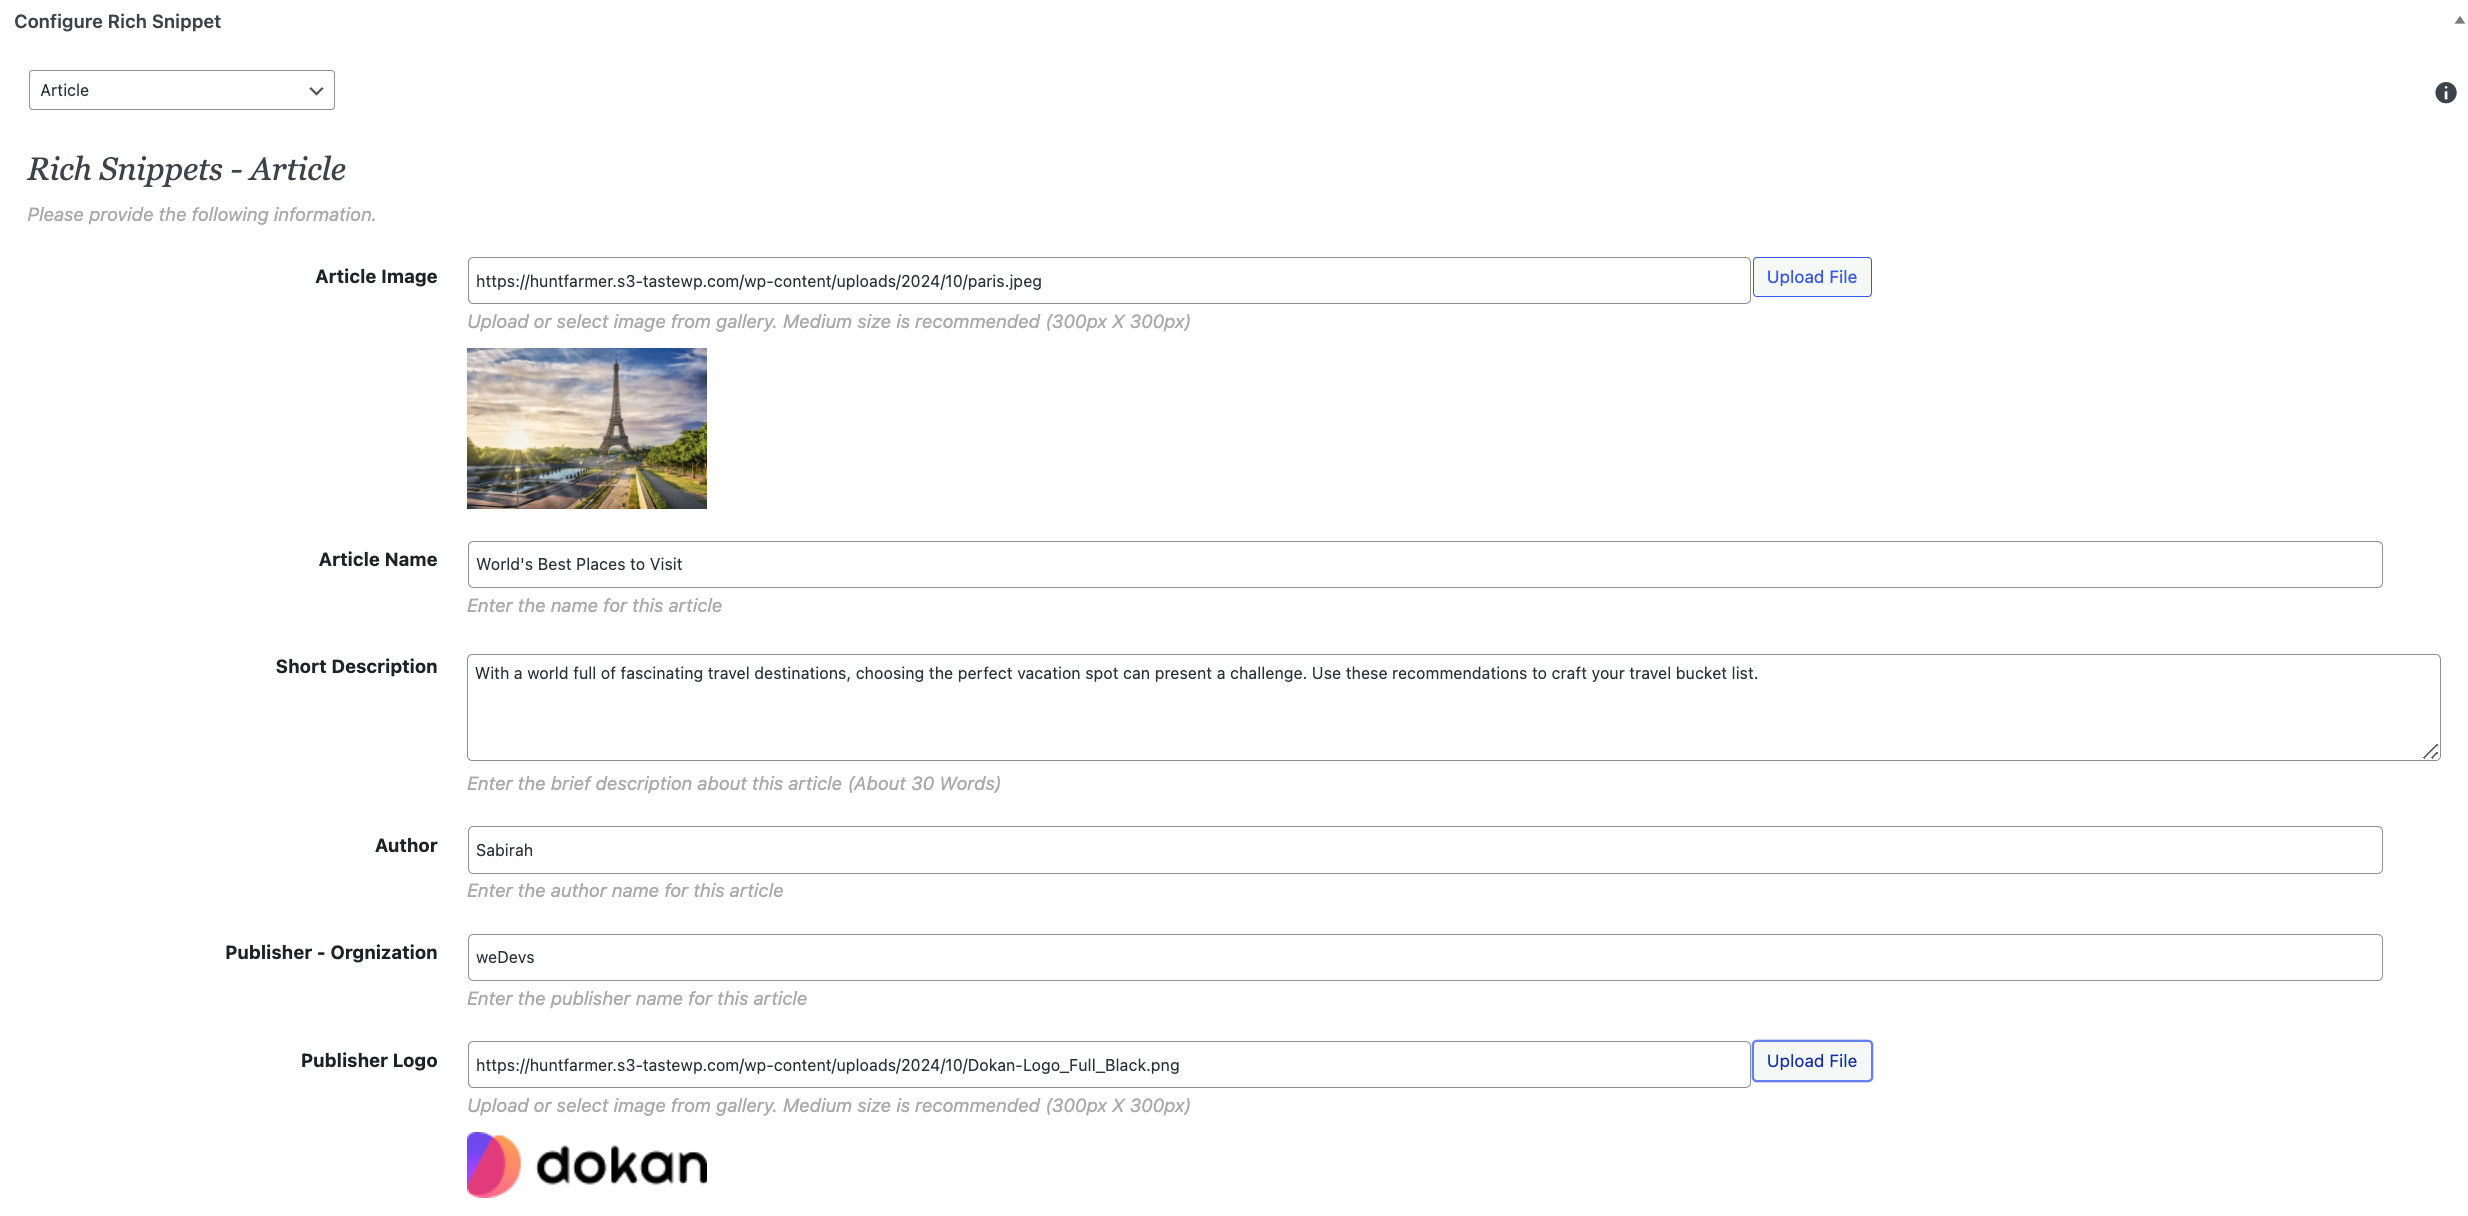
Fill in all relevant fields for the selected Rich Snippet type. The more details you provide, the better chance Google will display this information in search results.
After filling out the Rich Snippet information, save or publish your post/page.
The plugin will automatically create the necessary structured data (schema.org markup) in the background. It will embed this data into your page's HTML in JSON-LD format, which is preferred by Google.
Step 5: Test Your Rich Snippet
Before you wait for Google to pick up your Rich Snippet, you can test to ensure the structured data is correctly implemented:
Go to Google's Rich Results Test.
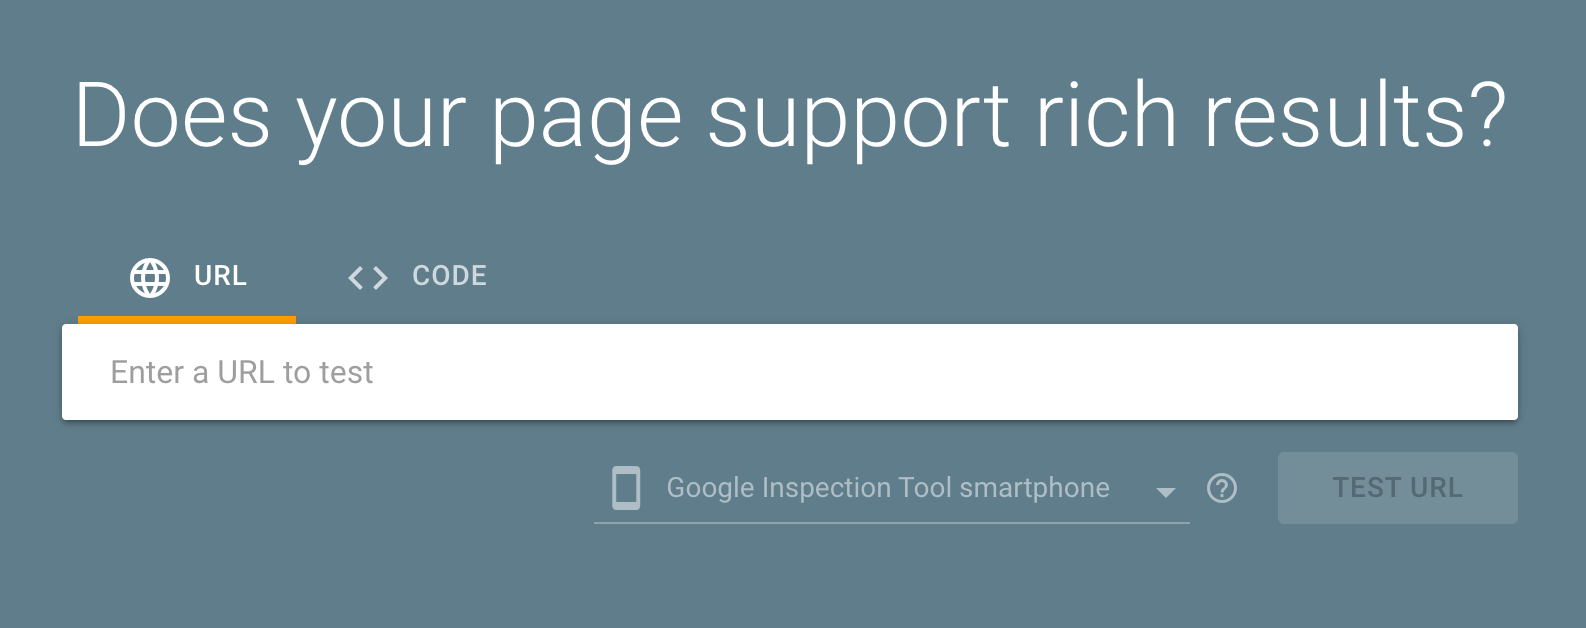
Here, you can see a text box for URL. Enter the URL of the post/page you've added the snippet to. Then click the button Test URL.
Google will tell you whether your Rich Snippets data is correctly added and which types of Rich Results are eligible.
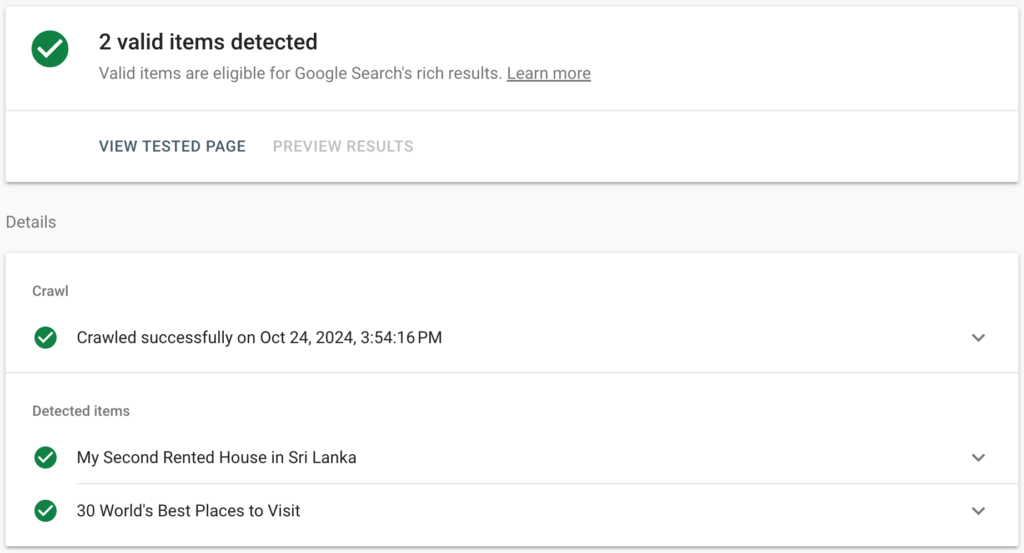
The All In One Schema Rich Snippets plugin will automatically display a visual “Rich Snippets box” on the front end of your post/page. You can customize its appearance in the plugin settings, as mentioned earlier.
Important Note: The plugin works well with other SEO plugins like Yoast SEO and Rank Math, but it focuses specifically on Rich Snippets, so you can use it alongside your primary SEO tool.
Method 2: Adding Schema Markup Manually

If you're comfortable with coding, you can also add schema markup to your website manually. Schema markup is a type of code that you can add to your website that tells search engines what your content is about. This can help search engines understand your content better and display it more accurately in SERPs.
To add schema markup manually, you'll need to edit your website's HTML code. You can do this by using a text editor or your WordPress theme's code editor. Once you've edited your code, be sure to save your changes.
Before making any major changes to your site, it's better to keep a backup of your WordPress site.
To add Rich Snippets manually, you need to create the correct schema for each page type, such as:
- Product schema for product pages.
- Review schema for reviews.
- FAQ schema for frequently asked questions.
Important Note: Google prefers JSON-LD format for structured data.
Below are the steps to configure schema markup for your site manually :
Step 1: Identify the Type of Structured Data You Need
Decide what type of Rich Snippet you want to create. Common schema types include:
- Articles
- Products
- Recipes
- Reviews
- Events
- FAQ and How-To
You can find the full list of available schema types and examples on Schema.org or use Google’s Structured Data Markup Helper to generate the markup.
Step 2: Generate JSON-LD Markup
To make things easier, you can use online schema generators like:
- Schema Markup Generator by Merkle
- JSON-LD Generator by Hall Analysis
- Google's Structured Data Markup Helper
Alternatively, you can write the JSON-LD markup manually. Here's a basic example for a Product:
<script type="application/ld+json">
{
  "@context": "https://schema.org/",
  "@type": "Product",
  "name": "Sample Product",
  "image": "https://example.com/photos/1x1/product.jpg",
  "description": "This is a sample product description.",
  "sku": "0446310786",
  "offers": {
    "@type": "Offer",
    "url": "https://example.com/product-page",
    "priceCurrency": "USD",
    "price": "29.99",
    "itemCondition": "https://schema.org/NewCondition",
    "availability": "https://schema.org/InStock"
  },
  "aggregateRating": {
    "@type": "AggregateRating",
    "ratingValue": "4.4",
    "reviewCount": "89"
  }
}
</script>
Step 3: Add the Schema Markup to Your WordPress Page/Post
Once you've generated the JSON-LD schema code, you need to add it to the HTML of the specific page or post.
- Go to your WordPress Dashboard.
- Edit the post/page where you want to add the Rich Snippet.
- Switch to the Text/HTML editor (if you're using the Gutenberg block editor, click the three dots in the top-right corner, and select “Code Editor”).
- Paste the JSON-LD markup inside the
<head>or<body>section of the post/page.- Ideally, structured data should be placed in the
<head>section, but WordPress doesn't provide easy access to it in posts, so it's okay to place it within the post body.
- Ideally, structured data should be placed in the
For example:
<!-- Your content starts here -->
<script type="application/ld+json">
{
  "@context": "https://schema.org/",
  "@type": "Review",
  "itemReviewed": {
    "@type": "Product",
    "name": "Sample Product"
  },
  "reviewRating": {
    "@type": "Rating",
    "ratingValue": "4",
    "bestRating": "5"
  },
  "author": {
    "@type": "Person",
    "name": "John Doe"
  }
}
</script>
<!-- Your content continues here -->
- Update the page/post.
Once you've added your Rich Snippets to the page, test to make sure everything is set up correctly.
You can do it as we've shown in the previous method above.
After Google crawls your page, it may take some time before Rich Snippets appear in search results. Make sure to monitor your Google Search Console for any errors related to your structured data.
Bonus: Top 3 Rich Snippets Plugins for WordPress in 2026
Here are five of the best rich snippets plugins for WordPress that can improve your website's SEO and enhance the appearance of your content in search results:
- Schema
- Schema & Structured Data for WP & AMP
- Schema App Structured Data
1. Schema

Schema plugin simplifies the process of adding structured data (schema.org markup) to your content. The plugin supports various schema types, including articles, recipes, reviews, organizations, events, and more. This flexibility allows you to optimize different types of content easily.
Key Features:
- Simple setup with pre-configured schema types (reviews, articles, FAQs, events, etc.)
- Automatically adds schema markup to your pages.
- Supports custom post types.
- Highly customizable and integrates well with popular SEO plugins like Yoast SEO.
Best for: Advanced users or marketers looking for a comprehensive schema solution.
2. Schema & Structured Data for WP & AMP
Schema & Structured Data for WP & AMP is a plugin that adds Google Rich Snippets markup according to Schema.org guidelines. This comprehensive plugin supports over 35 schema types and is designed for compatibility with AMP (Accelerated Mobile Pages). It allows you to add structured data to improve your site's visibility in search results.
Key Features:
- Supports a wide range of schema types.
- Works seamlessly with AMP pages.
- Includes a built-in testing tool to check your markup.
- Customizable settings for advanced users.
Best for: Users who want extensive schema support and are using AMP for better mobile performance.
3. Schema App Structured Data

Schema App Structured Data is a powerful plugin that enables you to create and manage structured data for your website easily. It offers a wide range of schema types and advanced features for optimal SEO performance.
Key Features:
- Extensive support for various schema types, including organizations, products, and articles.
- Easy integration with existing content.
- Customizable options for specific needs.
- Automatic updates to keep your schema compliant with Google's guidelines.
Best for: Advanced users and developers looking for a comprehensive and flexible schema solution.
FAQs on How to Add Rich Snippets to WordPress
No. Rich snippets don’t boost rankings directly, but they help your pages stand out in search results. This usually increases click-through rate, which can indirectly improve your overall SEO performance.
Not always. Even with valid schema, Google decides whether to show a rich snippet. If the content is thin, irrelevant, or doesn’t meet Google’s quality criteria, Google may choose not to display enhanced results.
Yes, but only if it makes sense. For example, an Article page can also include FAQ schema. However, adding conflicting or unnecessary schema types can confuse search engines, so stick to what fits the page intent.
Using a schema plugin is the simplest method. Most plugins offer one-click schema selection and structured fields, so you don’t need coding. Manual JSON-LD is recommended only if you want full control over markup.
You can test your structured data using Google’s Rich Results Test. It identifies errors, missing fields, and whether the page is eligible for rich snippets. Testing after every major content or plugin update is a good practice.
Closing Notes: How To Add Rich Snippets to WordPress
As marketers, our main goal is to make our site stand out in search results. Rich snippets can be a powerful tool in this manner.
Rich snippets are a type of structured data that gives search engines more information about your content. This information can show up as enhanced snippets, often including images, ratings, or other details. It boosts your site's SEO and overall performance.
You can easily add rich snippets to your WordPress site using a plugin by following these steps:
- Install and activate the plugin.
- Configure the settings in the plugin’s Rich Snippet section.
- Choose the Rich Snippet type for each post or page.
- Fill in the relevant details.
- Save and publish the post or page.
- Test your snippet with Google’s Rich Results Tool.
If you have coding skills, you can also add schema markup manually.
We've explained all the methods in detail above.
Now, we'd love to hear from you! Have you used rich snippets on your site? Share your thoughts or questions in the comments below!