

WooCommerce Conversion Tracking Custom Integrations
The WooCommerce Conversion Tracking custom integration setting is important if you want to configure other social media platforms with WooCommerce Conversion Tracking. The procedure to configure other social media platforms is same. We assume that you want to configure Facebook manually. But how could you do it?
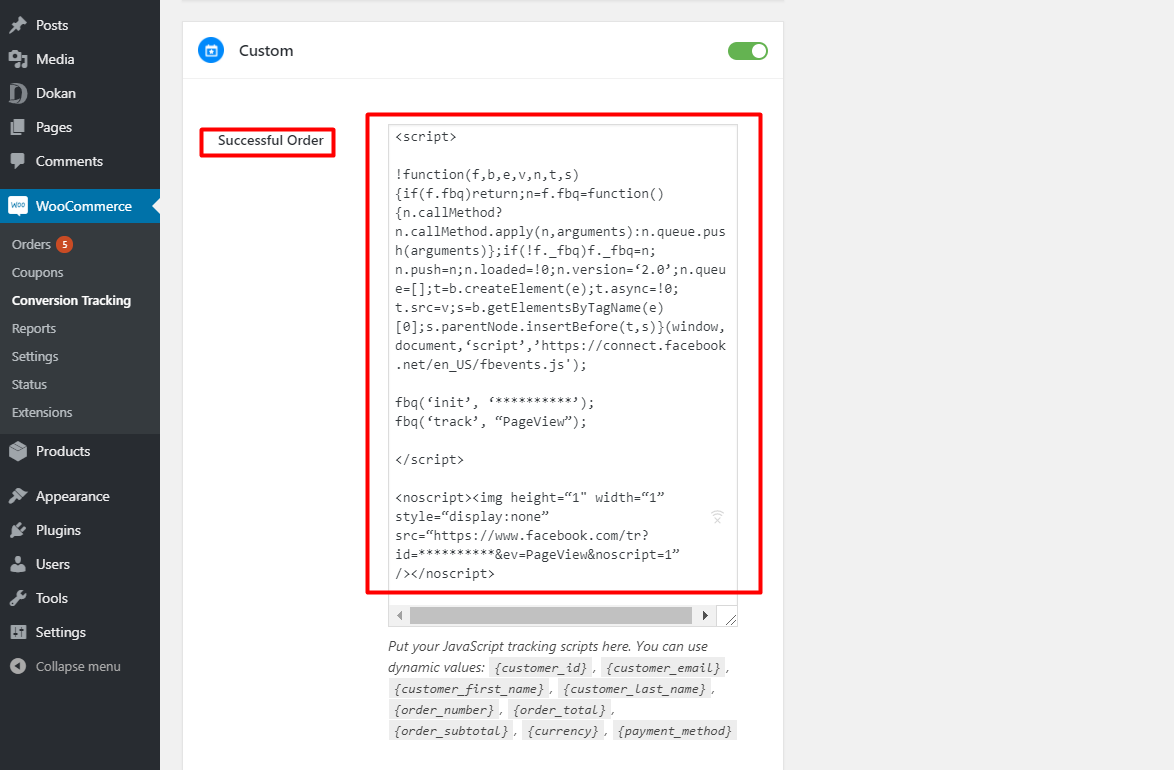
Successful Order Custom Integration Setting
Turn on the toggle button for Custom channels from WP Admin Dashboard → WooCommerce → Conversion Tracking→ Integrations→ Custom.
![]()
Collect the JavaScript tag API from Facebook's developer page.
https://gist.github.com/suzauddowla/7a328c6dd4fd1d80d572db740687119d
https://gist.github.com/suzauddowla/da23cb5f57686db59389decb2f8faaf6
N.B. Enter Your Facebook Pixel ID instead of the asterisks(*).

After that, copy the script tag and paste it into WooCommerce Conversion Tracking's Successful Order field:
Now, copy this piece of code:
fbq('track', 'Purchase', { });
Next, paste this code right there where it is marked by the red rectangle:
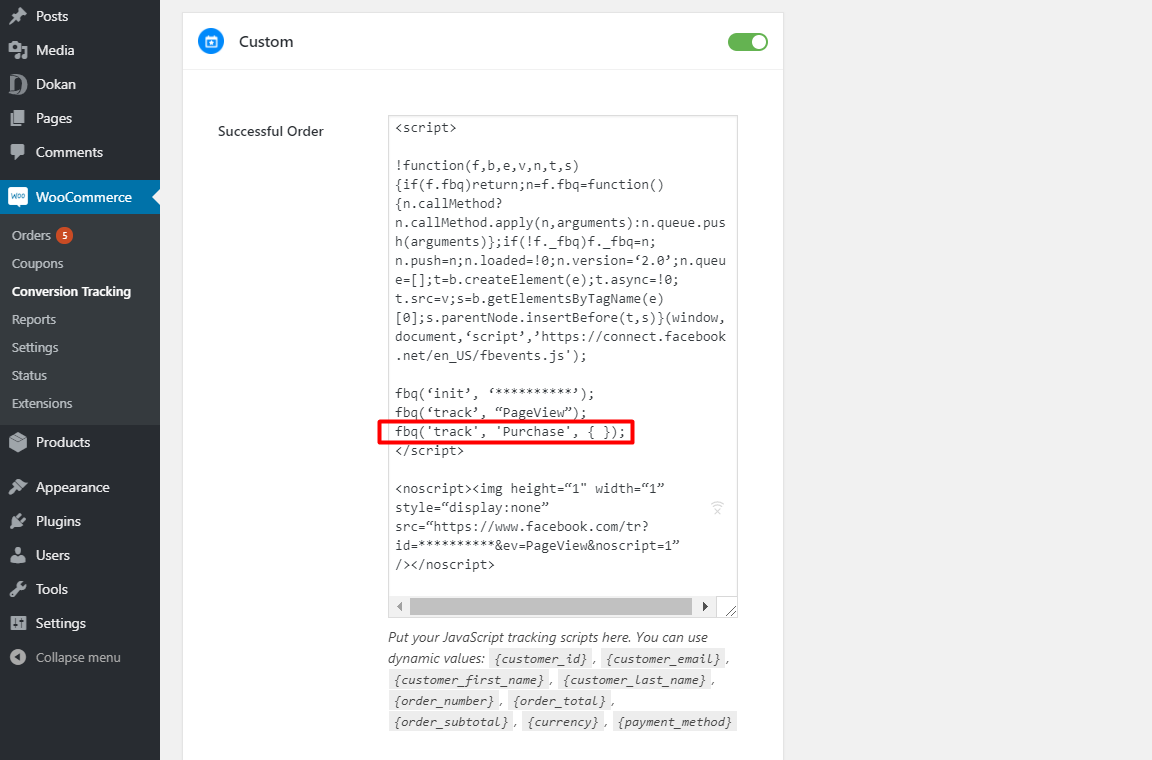
Now, put dynamic values in between the curly braces according to what you want to track. Here are some dynamic values: {customer_id}, {customer_email}, {customer_first_name}, {customer_last_name},{order_number}, {order_total}, {order_subtotal}, {currency}, {payment_method}
You must separate these values with commas. Take a look at the following screenshot:

Click on Save Changes and you are finished with the custom successful order event. This method is more or less same for the other social re-marketing platforms.
Registration Scripts Custom Integration Setting
Suppose that we want to track visitors' registration events on Facebook manually. But how could we do that?
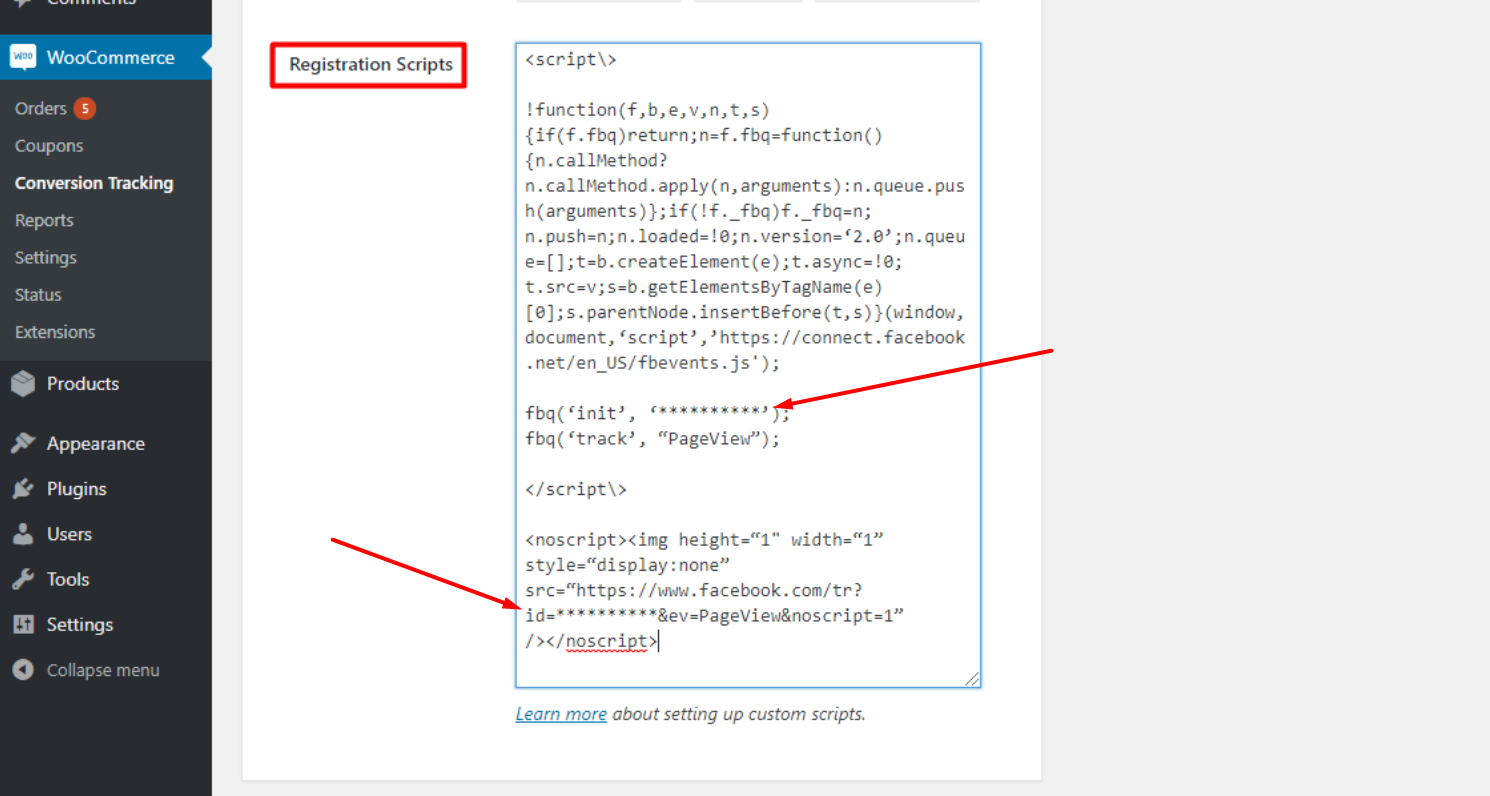
Copy and paste the following code into WooCommerce Conversion Tracking:
https://gist.github.com/suzauddowla/c08f81d0a0029057352055c7f2bd3768
N.B. Collect this JavaScript tag API from Facebook's developer page. Enter your Facebook Pixel ID instead of the asterisk marks(*). This rule is same for other social media re-targeting platforms.
Take a look at the screenshot:
Now, copy this line of code ( you can find it in the same developer page of Facebook):
fbq('track', 'CompleteRegistration');
Paste the code right there as denoted by a red rectangle in the screenshot below:
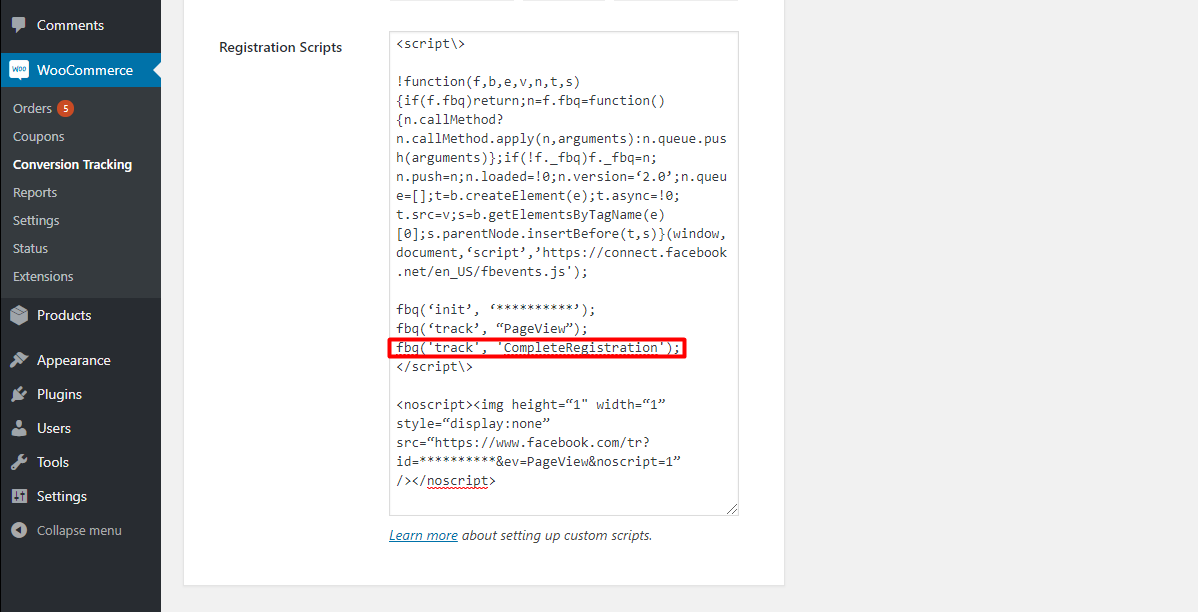
Next, hit Save Changes button and you are done with configuring the Registration events manually.
N. B. In either of the cases, you must add the Facebook Pixel ID or the unique ID of the concerned social media re-targeting platform you are using. Here is a screenshot for a comprehensive understanding:
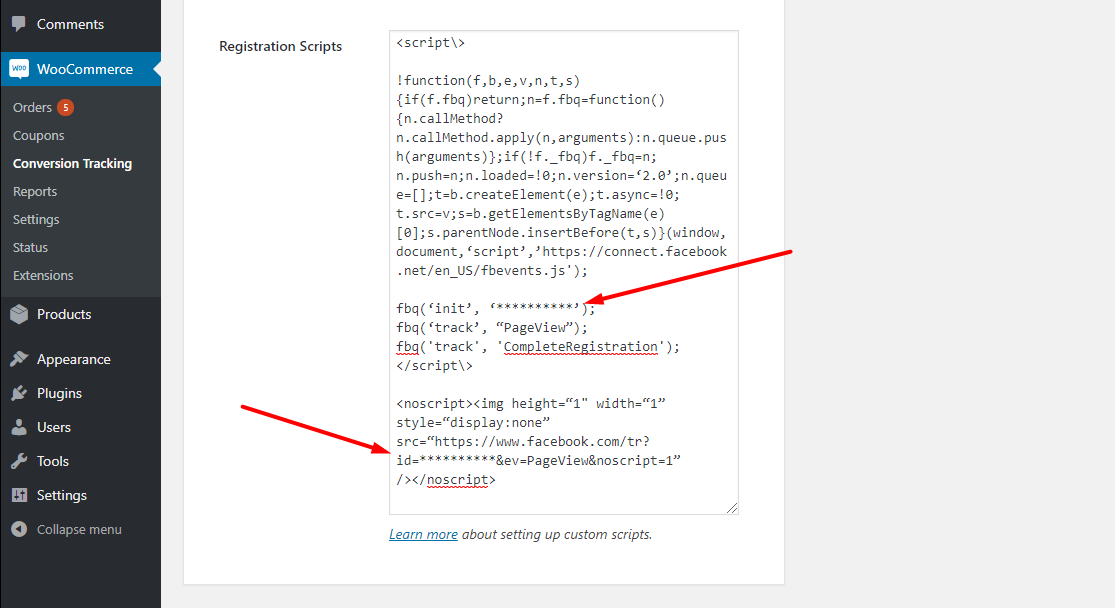
You have to replace the asterisks with your Facebook account's Pixel ID right there where it is marked by the red arrows.