How to Install WP User Frontend
Like any other plugin in the WordPress repository, the installation process for the WP User Frontend is also the same. You just need to install the plugin in your WordPress plugin area and then activate it.
Let's get started with the process:
System requirements
To get the best experience with the WP User Frontend, we suggest the following:
- PHP 5.6 or later
- MySQL 5.6 or later
- WordPress 4.4.1 or later
This documentation assumes you have already installed WordPress. If you do not know how to install WordPress, please contact your hosting provider for assistance and also ask them to make sure that the PHP and MySQL versions above are ensured. Now follow the steps below:
You will need both the FREE and PRO extensions to fully use WP User Frontend PRO.
Here is the process of installation:
- Install the Free version from the WordPress.org. Simply go to yoursite → plugins → new → search “WP User Frontend”.
- Activate after installation.
- Get the PRO zip file from WeDevs. If you have not already downloaded the PRO.zip file, download it from your account dashboard. You will find all your purchased plugins there.
- Log in to your site's admin panel and navigate to Plugins → Add New → Upload.
- Click Choose file, select the plugin file, and click Install
- Activate after installation.
- If you see new menu at the sidebar named WP User Frontend, you are successful.
If you are using FTP to transfer your files to your server, then just unzip the plugin and upload the directory to your directory.
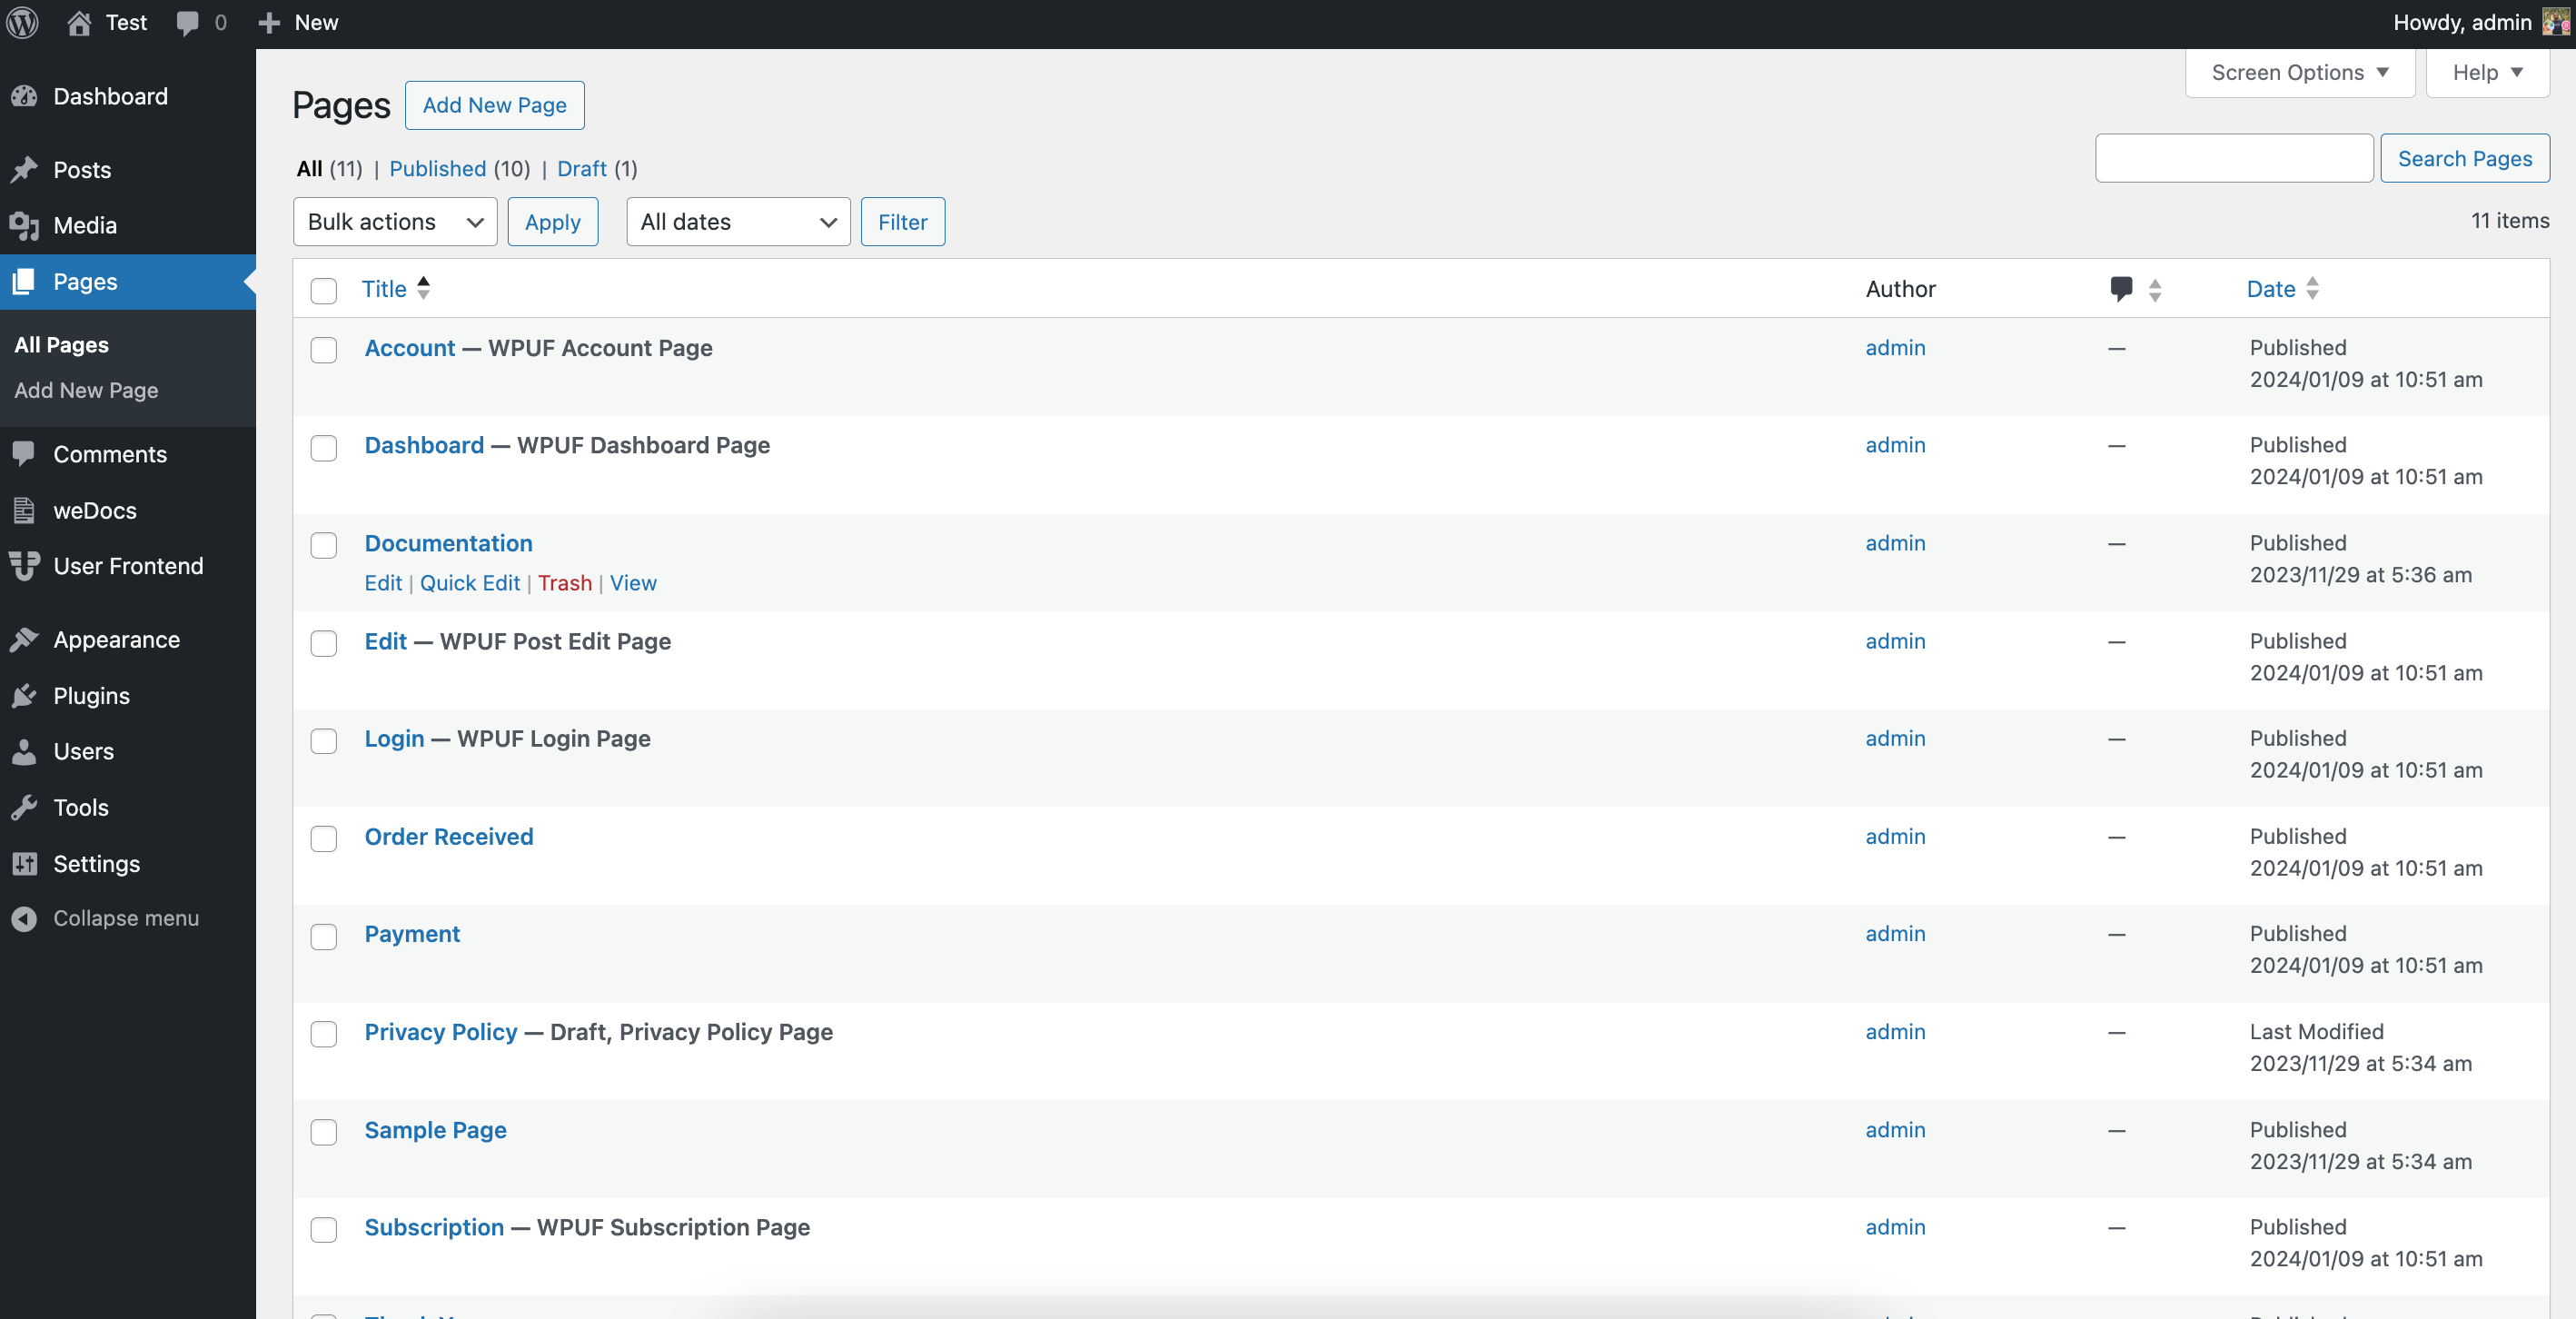
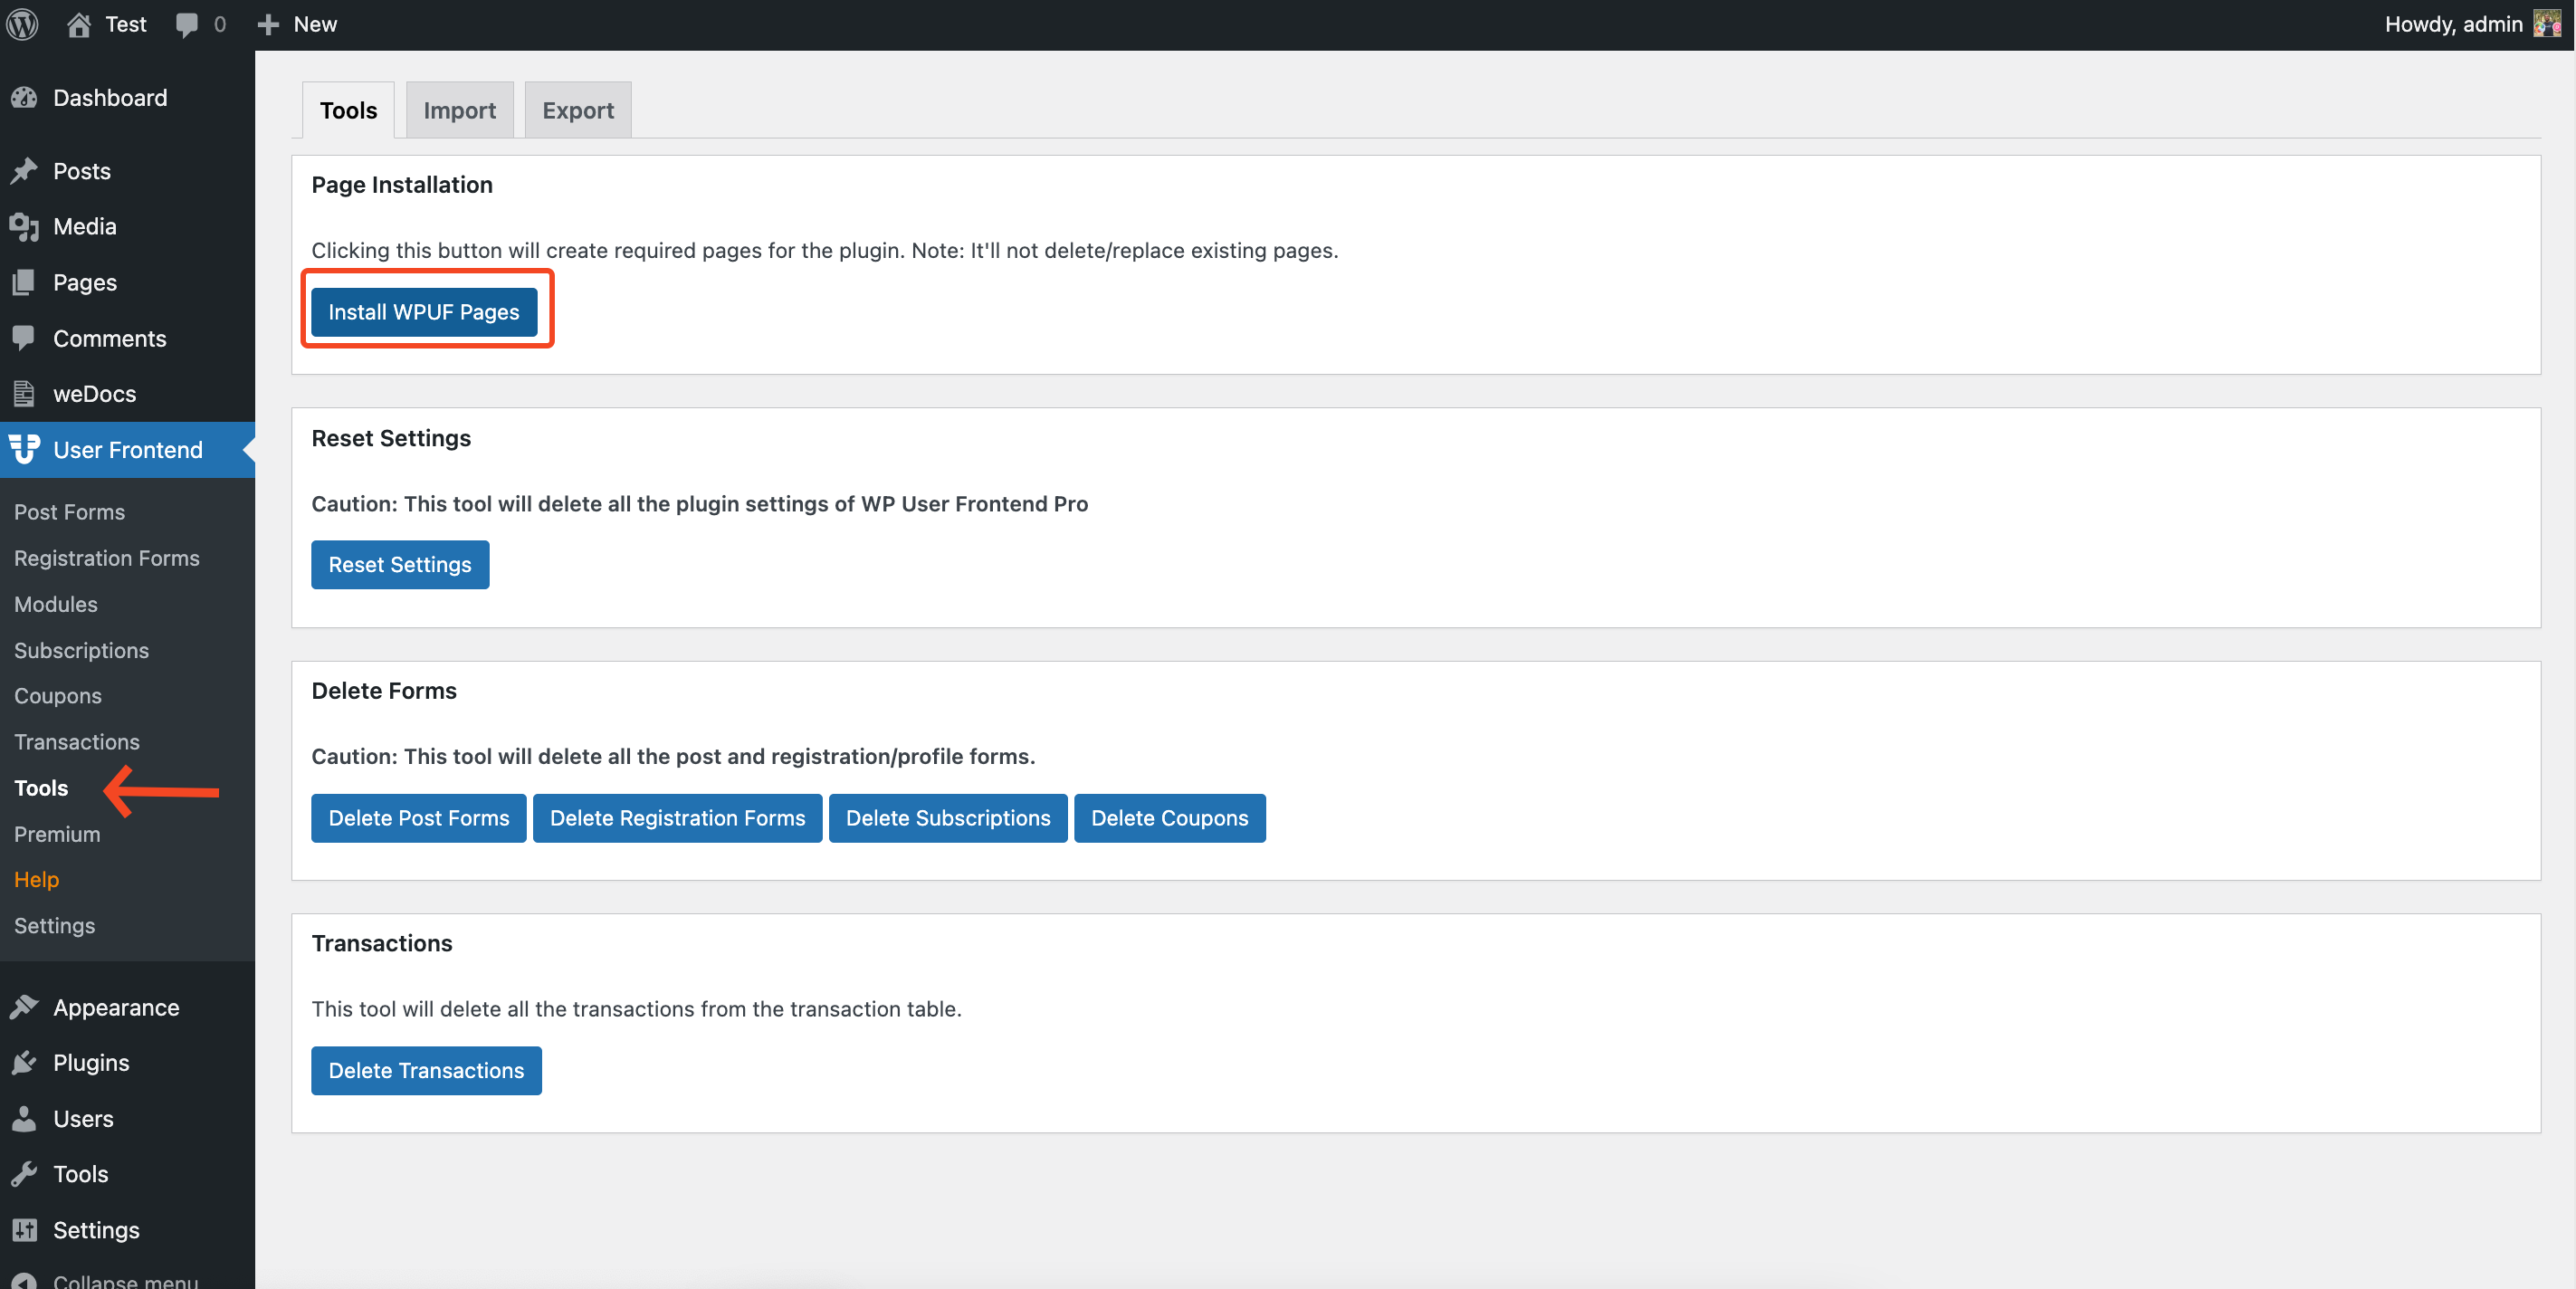
WPUF Pages
Simply click on the Install WPUF Pages. It will automatically create the required pages for your WordPress site.
After installing them, here are the essential pages of WPUF.