

How to Setup Automatic Post Expiration
Post expiration is a feature to take down posts on your sites after a given time. This is helpful because it ensures you to always display the new posts on your site, prevent old or backdated posts affect new ones or just to keep your site fresh. You can set post expiration for subscribed users and non-subscribed users as well.
Here is how it works:
Configuration – Admin
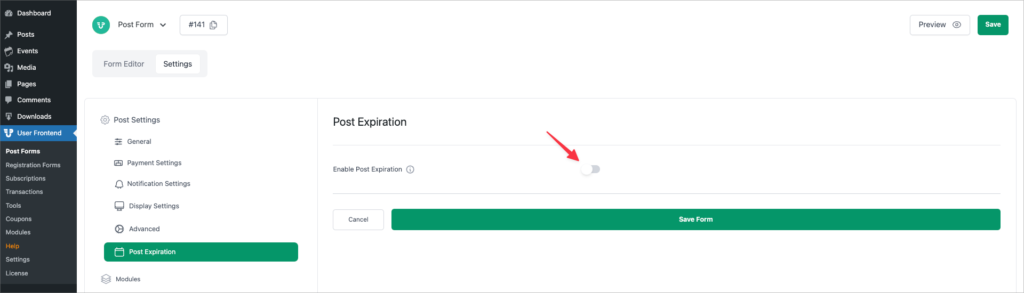
For setting an expiration limit for public posts please go to wp-admin > WP User Frontend > Post forms > Settings > Post Expiration.
From here, Toggle to get options:
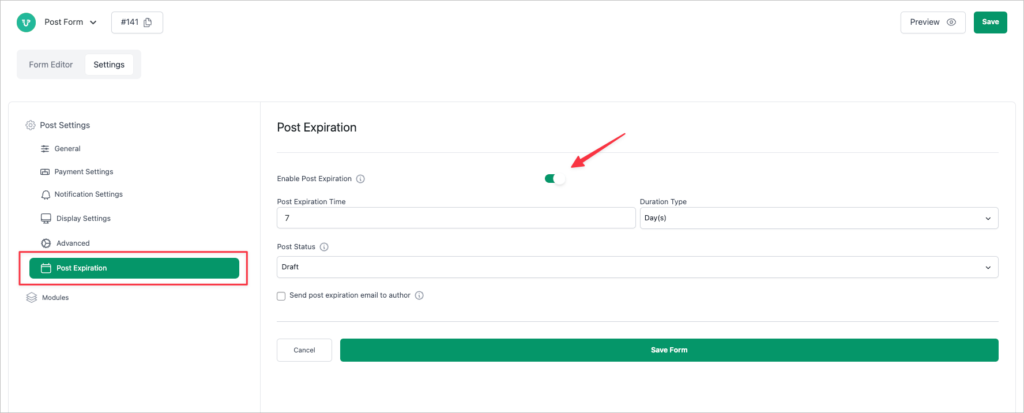
Features
Now, you will get the options for this feature. From here you can set the time of expiration in days, months, or years, change the post status after expiration as pending, draft, private, or it will remain published. You also have the option to email the author on expiration.
The text field below is the email message. With the release of the WP User Frontend free version 3.1.11, you can use the shortcodes like {post_author}, {post_url}, {blogname}, {post_title}, {post_status} to auto-insert the link of the associated author of a particular post.
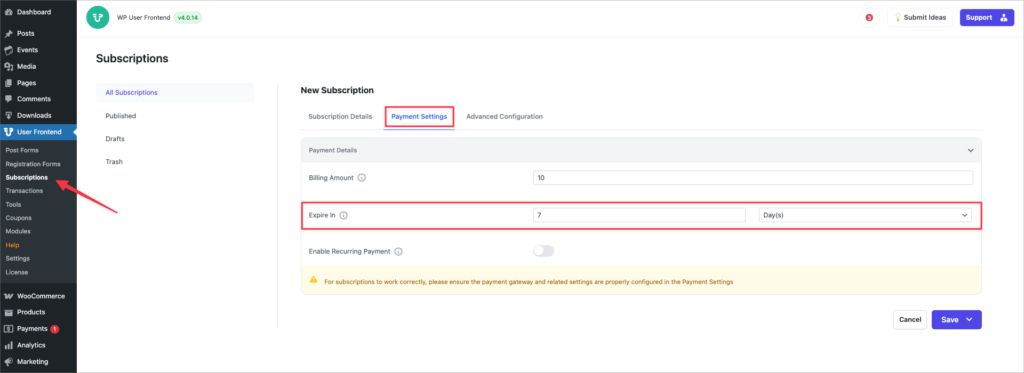
For Subscribed Users
Go to wp-admin > WP User Frontend > Subscription
From here, you can set the post expiration feature for your subscribed users. The options and features are exactly the same as before. Please note that only the options inside the red box after the “Enable Post Expiration” are a part of the post expiration feature. The “Expires In:” field above the red box is not a part of this.
That's all about setting up the WP User Frontend Automatic Post Expiration feature.