

How to Change Button and Price Color in WooCommerce in 2026
Having a reach library of useful plugins and dynamic themes makes WordPress a perfect CMS platform for creating any type of website. On top of that endless customization options let users redesign a site with a personal touch.
However, one big challenge to working within WordPress is that a large number of people may use the same theme/design/format to create their sites. In order to make your appearance unique and stand out from the competitors, you must do some customization. It'll ensure a great customer experience during purchasing as well.
If you're also up to customizing the fundamental design of your WooCommerce site, this blog is for you. Today we'll show you-
- How to change button color in WooCommerce
- How to change the price color in WooCommerce
Let's dive into the details-
Why It is Important To Customize Button and Price Color in WooCommerce
There are almost 12-24 million eCommerce stores around the world, with more and more being created every single day. Without having a strong appearance and effective marketing strategy you can't stay in this crowd.
Being one of the most important pages for any online store, a WooCommerce product page must be attractive and engaging. Because this is the place where most of the customers make their purchase decisions.
Although the default WooCommerce product page gives you a good-looking and functional product page to operate. But the design is not that much attractive as it's just the skeleton of the page.
The good news is that WooCommerce gives you all the flexibility and essential tools to personalize the design with your unique branding. You can essentially modify every bit of design on your WooCommerce product page including- the CTA button, description, price, title, etc.
Also, customizing the page is important to maintain the same style throughout your WooCommerce store.
To be more specific, WooCommerce Product Pages are the cornerstone of your online store and play a vital role in conversion.
Key takeaways: This is essential to customize your WooCommerce product page to-
1. Make your store stand out
2. Create a unique shopping experience
3. Survive in the competition
4. Make your product page more engaging
4. Convert more visitors into customers
Read More: How to Customize WooCommerce Product Page!
How to Change Button Color in WooCommerce
The WooCommerce button color inherits the CSS from the theme you currently use on your site. You have to change/override the default CSS style of the buttons in order to change the color of WooCommerce buttons.
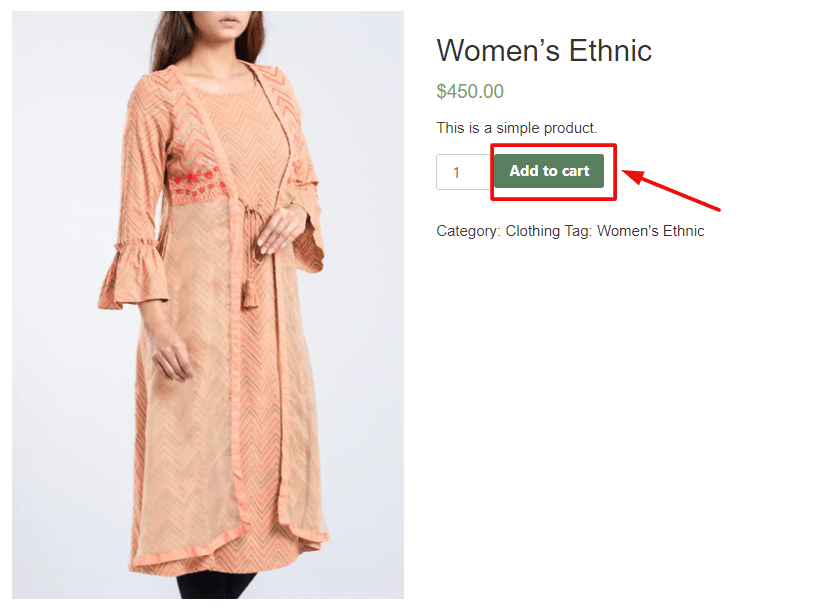
This is the button we're going to change color today.
Below are the steps you need to follow-
- Step1: Inspect the Button For Class Name
- Step2: Find the Color Hex Code
- Step3: Apply The New CSS Code
Step 1: Inspect the Button For Class Name
At first, we need to find the class name of the button we want to customize today.
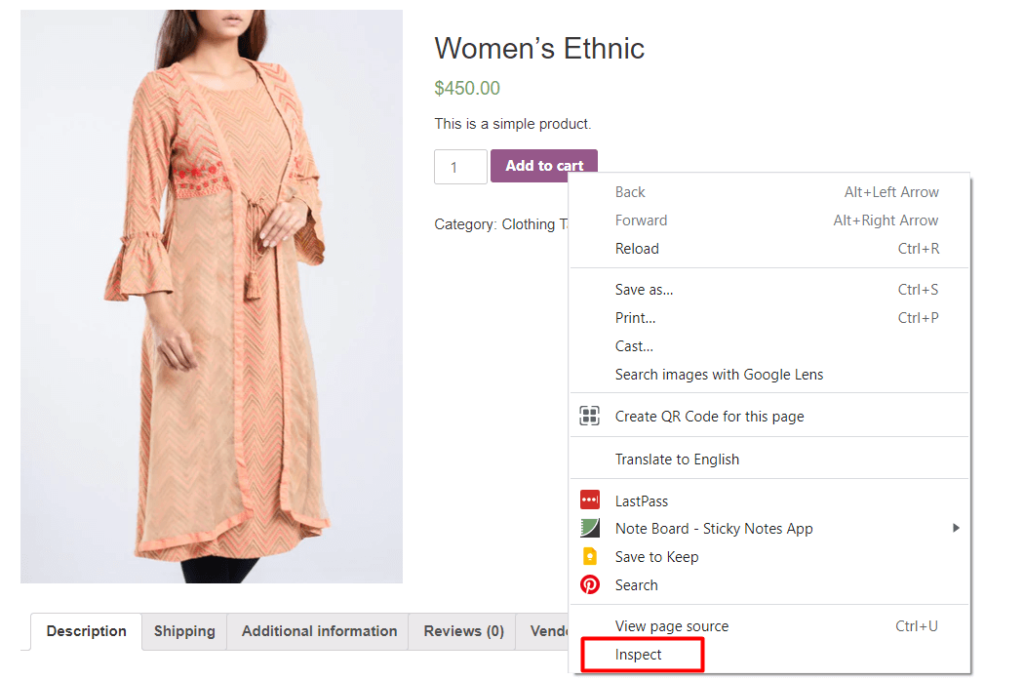
For that, go to any product page. Then right-click on the ‘Add To Cart' button, and click Inspect.
From your browser console, you can see the HTML code written for styling the button. Find the class of the button and copy it-

In the above image, you can see the name of the class is- single_add_to_cart_button. We'll use it late.
Step 2: Find the Color Hex Code
You need the hex code of your desired color to apply it to the button.
Go to your Google browser and search for “Color Picker”. You'll get a color palette to pick a color for your button.
Here, move your picker and the slider, and position it on the chosen color. Once decided, copy the Hex number.
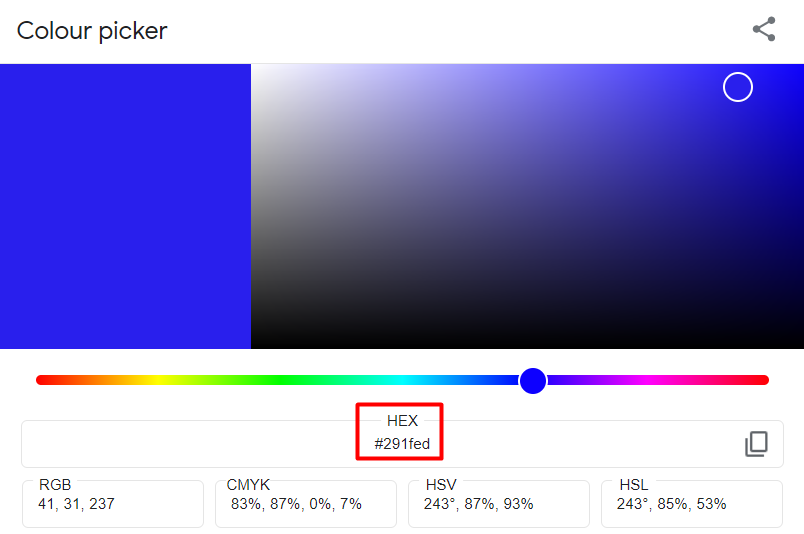
Here, we've picked the color code “291fed” for our WooCommerce button.
Step 3: Apply The New CSS Code
Now we have both the button class and the desired color code. So, it's time to apply the new CSS rules.
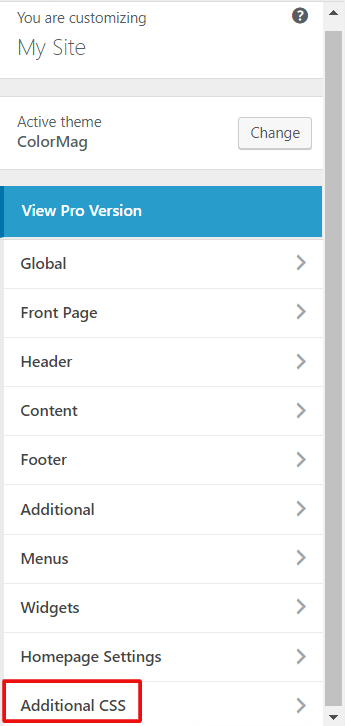
Login to your WordPress dashboard and navigate to Appearance → Customize → Additional CSS. After clicking on the tab, a writing panel will appear.
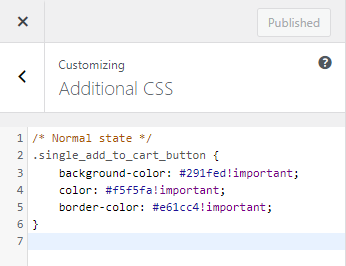
Now copy the rules below and paste them into the writing editor. Then, replace the Color Hex with your desired color code that you've copied from Google Color Picker.
/* Normal state */
.single_add_to_cart_button {
    background-color: Color Hex!important;
    color: Color Hex!important;
    border-color: Color Hex!important;
}
/* Hover state */
.single_add_to_cart_button:hover {
    background-color: Color Hex!important;
    color: Color Hex!important;
    border-color: Color Hex!important;
}
Here, you can find the code both for the static button color and for the hover effect as well.
Click on publish once you are done. Now, let's check from the frontend store if the WooCommerce button color has been changed successfully.
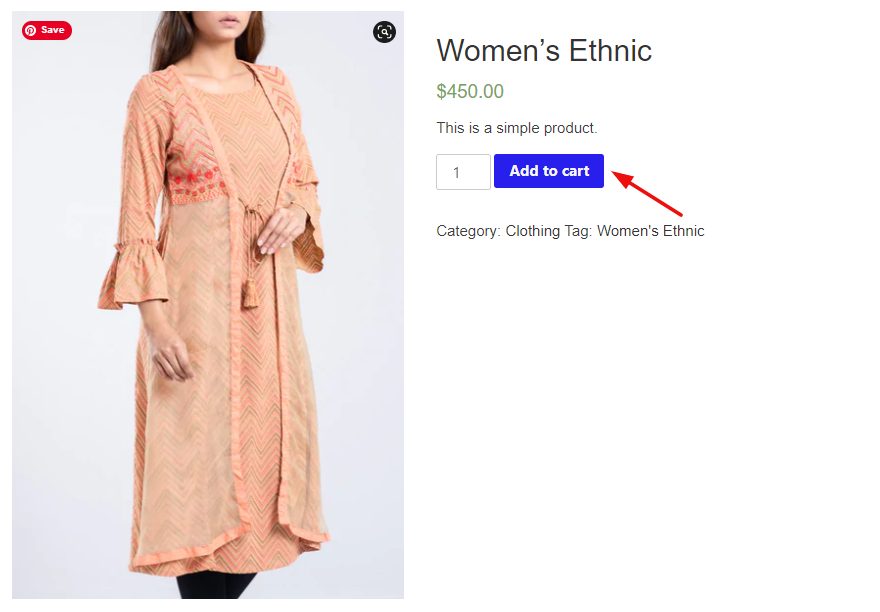
As you can see we've changed here the button's background color, text color, and border color. But it's not necessary always to use all the CSS lines. Suppose, you would only like to change the background color of the normal state.
And want to keep the text color or the border color unchanged. Then, the .single_add_to_cart_button{background-color: Color Hex!important;} would be enough to meet your goal.
This is the most convenient way to customize your WooCommerce button color as it works seamlessly with every theme and is super easy to apply. Moreover, you can use this method for other buttons on your site as well.
Alternatively, you can use a WordPress plugin to make the necessary changes. You may check these plugins-
How to Change Price Color in WooCommerce
In the screenshot below, you can see the price in green color:

With a different theme, the text's color would be different.
However, let's show you how to change the price color in WooCommerce. These are the steps-
- Step1: Inspect the Text For Class Name
- Step2: Find the Color Hex Code
- Step3: Insert The New CSS Code
Step 1: Inspect The Text For the Class Name
The first step is to find the CSS selector of the price. Open your WooCommerce site's product page in Chrome. Then, right-click on Price and select the option ‘Inspect'.
A new window will appear, and you can see the HTML code written for the price-

This means our price amount is under the class woocommerce-Price-amount. Copy the class for further use.
Step 2: Find the Color Hex Code
Now it's time to pick a color you want to apply to your price amount. A convenient way is to go to Google and search for the term “Color Picker”.
By moving the selector you can check different colors until you get the desired one. Once you've found it, copy the HEX code and save it somewhere.
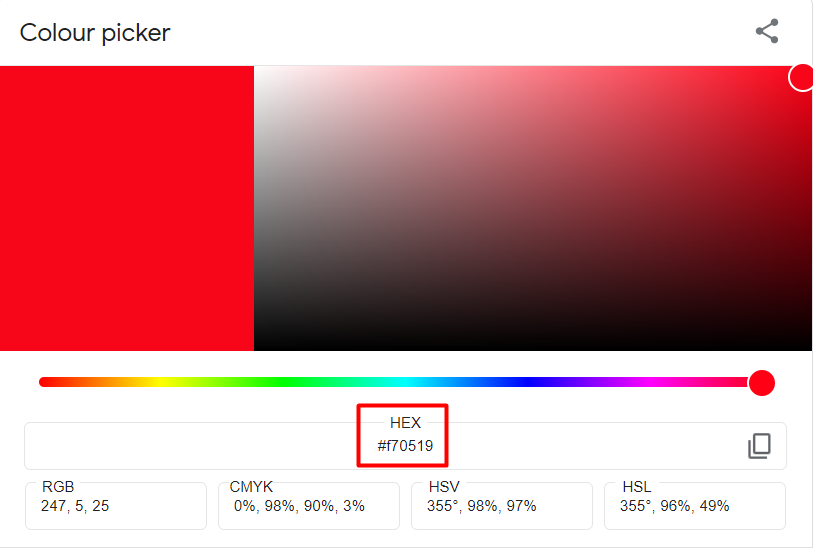
Here, we chose the red color for the price amount.
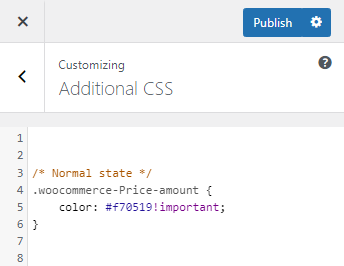
Step 3: Insert The New CSS Code
From your WordPress dashboard, let's go to your theme customizer by navigating to Appearance → Customize → Additional CSS.
Next, insert the following rule in the code box:
/* Normal state */ .woocommerce-Price-amount { color: Color Hex!important; }Replace the Color Hex with your desired color code that you've copied from Google Color Picker. I'll look like-
Finally, click on the publish button. Now. let's check the customized view from the storefront-

Like the WooCommerce button color, you can use plugins to change the WooCommerce price color. Some of our editorial picks are-
Bonus: How To Edit WooCommerce Product Page With Elementor
To enhance your web development experience, you can use Elementor to customize your WooCommerce Product Page. It gives you full control over your design and product page layout. And you don't need to incorporate actions or hooks or insert any code.
Using a simple drag-and-drop option, it would be super easy to bring necessary changes to your product pages, including a new color, style, format, and so on. Also, you can witness all the changes witha live preview without changing the tab.
Furthermore, Elementor gives you the flexibility to add more functionality to your single product page, such as product add-ons, size charts, 360º images, product videos, and more.
There are two ways to edit your WooCommerce product page-
- First Method: Use A Premade Single Product Page Template
- Second Method: Create A New Single Product Page From Scratch
You can check the detailed tutorial & learn how to customize every bit of a WooCommerce page with ease.
The final preview of the customized product page would be like the one below-
FAQ for WooCommerce Product Page Customization
Let's go through the questions people usually ask regarding WooCommerce product page customization-
1. What is the code to change the color & weight of the product title?
The product title is one of the most engaging parts of the product page. It should have a strong appearance so users can easily notice the product title. The default WooCommerce product title is not easily noticeable. Use the code below to modify the color and format of the product title-
.woocommerce div.product .product_title { color: #f54251; font-weight: bold; }2. How to Edit WooCommerce Cart Page with Ease?
Using Elementor, you can give a unique look to your WooCommerce cart page. For that, you need the plugins-
- WooCommerce
- Elementor
- Happy Addons free
- Happy Addons Pro
Right after activating all the plugins on your site, start following the steps below:
- Step#1: Navigate to the Elementor Canvas Page
- Step#2: Drag and Drop WC Cart from the Elementor Widget Gallery
- Step#3: Enable Coupon and Cross-Sells
- Step#4: Customize Your Table Contents From the Style Section
- Step#5: Make Your Table More Responsive from the Advanced Section
Read More: How To Customize Your WooCommerce Store Using Happy Addons.
3. How to optimize your product pages for SEO?
An optimized WooCommerce product page improves your site's ranking. And the better position on search engines brings more traffic to your eCommerce. Eventually, it increases the conversion and increases the revenue significantly. These are some actionable tips to optimize your product pages for SEO-
- Follow a Powerful Keyword Strategy
- Do on-page SEO for every single product page
- Get feedback from real customers
- Use optimized media files on your site
- Configure the breadcrumbs for product pages
- Audit your product pages to solve technical issues

Customize Your WooCommerce Product Pages Effectively and Start Earning More
eCommerce has become a fiercely competitive space. Retail eCommerce sales are forecast to grow by 50 percent over the next four years, reaching about 7.4 trillion dollars by 2026. So in order to survive in this competition, you must be creative. Luckily, WooCommerce offers a wide range of customization for its users.
In this article, we discussed two customization processes for WooCommerce product pages- how to change button color in WooCommerce & how to change price color in WooCommerce.
This customization is so easy that it can be carried out by adding simple code to the theme customizer. Also, you can use a WordPress plugin to make essential customizations for your eCommerce site.
If you have any questions or suggestions about the tutorial, do leave a comment below.