
How to Install Facebook Pixel on WordPress & WooCommerce Store
Facebook offers amazing advertising capabilities including powerful remarketing and retargeting campaigns. On the other hand, WordPress is the easiest and most efficient way of creating and starting a business online.
To utilize Facebook's advertising capabilities to boost up your business, you will need to install Facebook's pixel code on your WordPress site, just like Google Analytics tracking code!
In today's article, we will discuss the process of installing Facebook pixel on WordPress and give you the easiest step by step guide so that you can get started immediately.
So, What and Why Facebook Pixel?
[You can skip this section and if you already know and go to the tutorial section!]
Advertising tools are almost same for every platform. Facebook definitely offers many groundbreaking features, but they are complex and hard to understand. Facebook pixel is one of them.
Although pixel is common in most of the advertising tools. It is simply a piece of code that drops cookies to track visitors on your website so that you can reconnect with them late and show your advertisements. As you may already know, this is retargeting or remarketing.
Using pixels you can track the behavior of your customers to who you have already shown advertisements. This is a great way to measure how your ads are doing.
Similarly, Facebook Pixel gives you the options to track the behavior of the people who have visited your site while they are logged into Facebook. It also uses cookies in this case. Now, here is the most interesting thing – nowadays almost everyone on the internet uses Facebook. So, what does this mean?
You can literally target everyone with Facebook Pixel! On the other hand, if you are running Facebook ads, FB Pixel is a must for you.
How Can You Use Pixel Data?
With Facebook Pixel data, you can do mainly two important things –
- Retarget visitors using ads running on Facebook based on specific actions they have shown on your site. For example, you can target and show specific ads to people who have visited one of your pages or added a product to their cart.
- You can track the conversion from your ads running on Facebook. This data is useful when you are optimizing your ad spend.
How to Add Facebook Pixel on WordPress with Official Integration
The process is very easy. In this tutorial, we will try to make it easier for non-technical people so that they can complete the steps without any kind of coding.
Step 1: Generate the Facebook Pixel
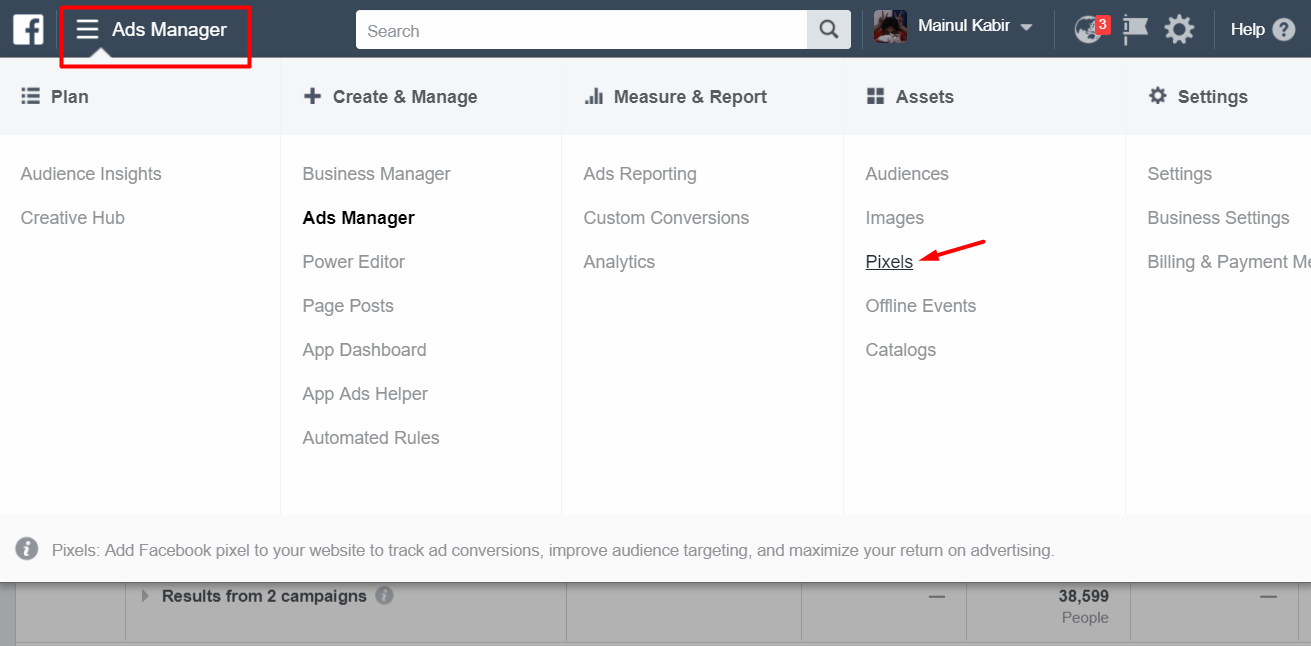
At first, you will need a Facebook ad account from where you can create ads and generate the pixel code. Visit Facebook business manager and log in to your account. Now, navigate to the Ads Manager → Assets menu and click on the Pixels option.
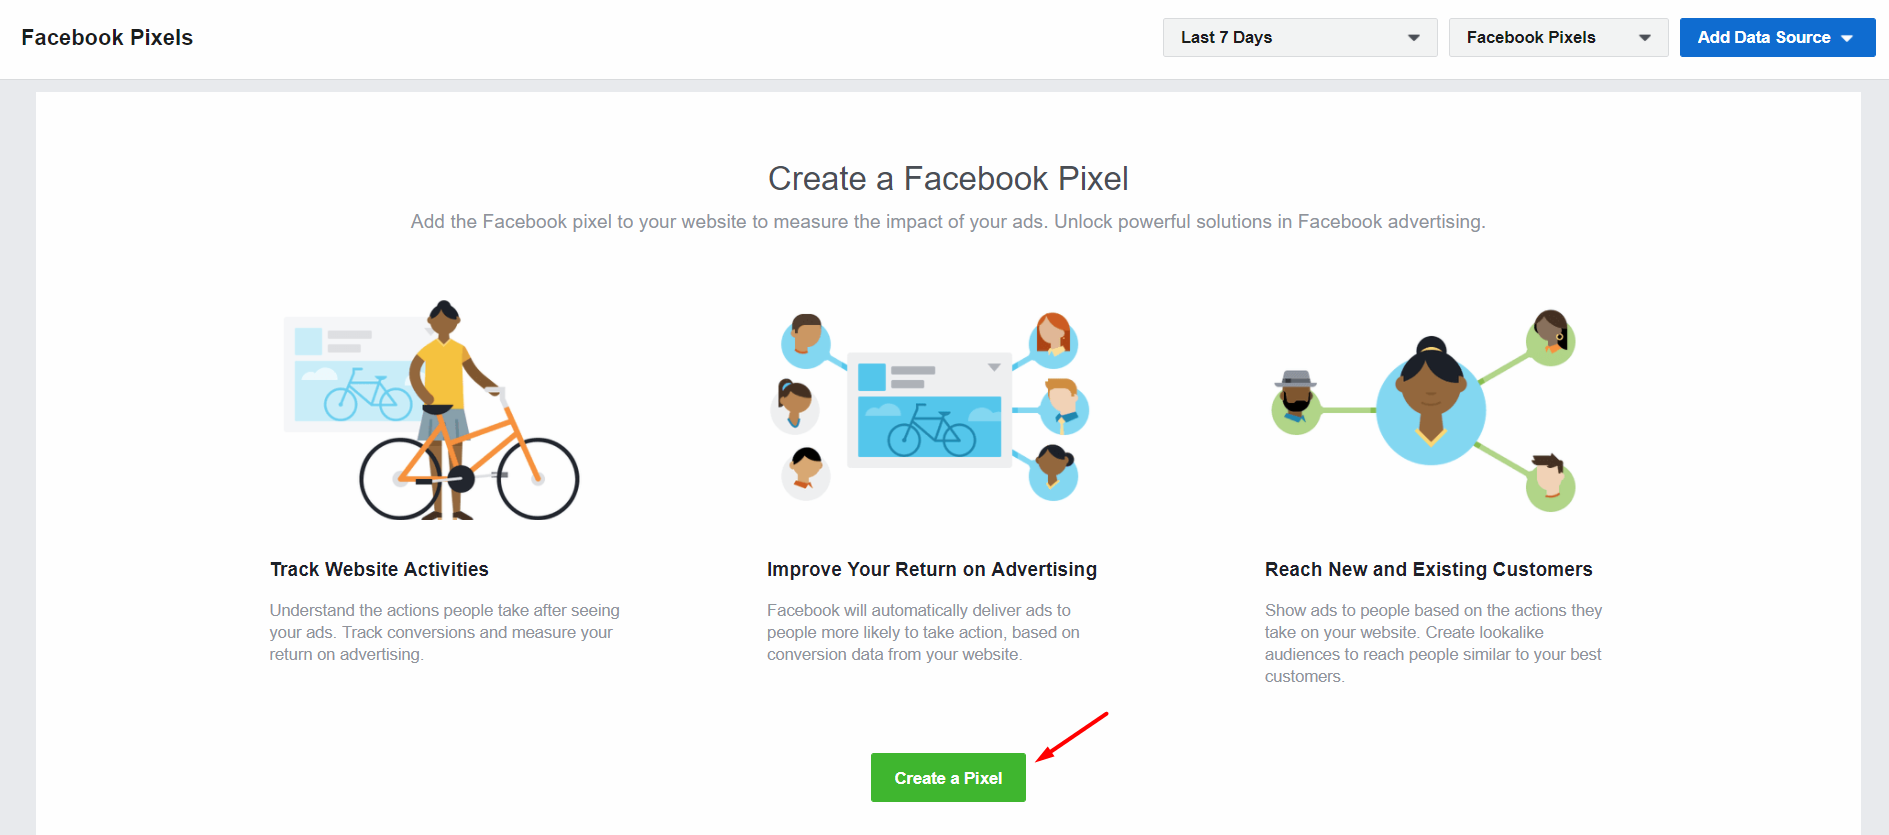
You will view the Facebook Pixel create page. Click on the Create a Pixel button.
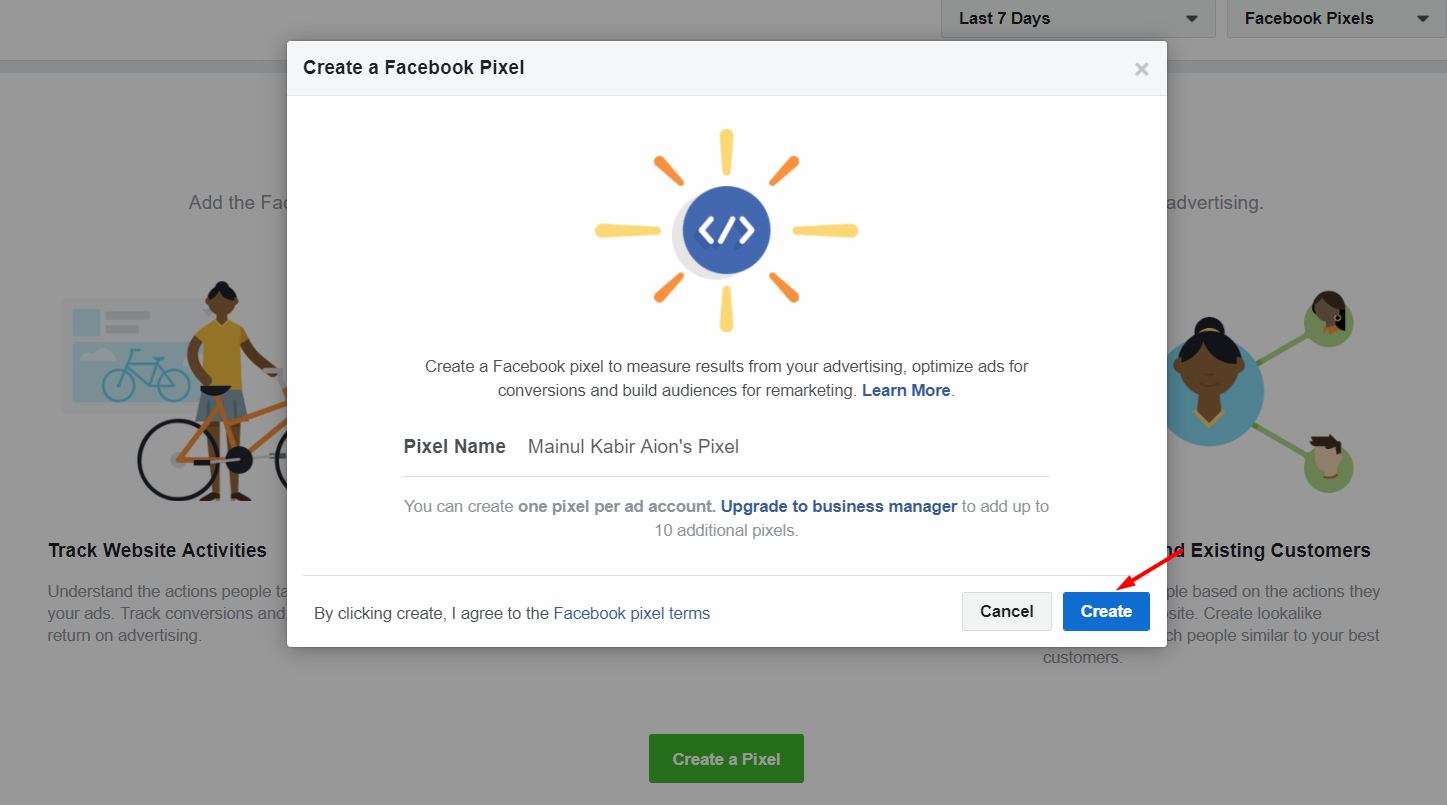
Enter your Pixel name and click on the Create button. When you click on the button, you also agree to the Facebook pixel terms.
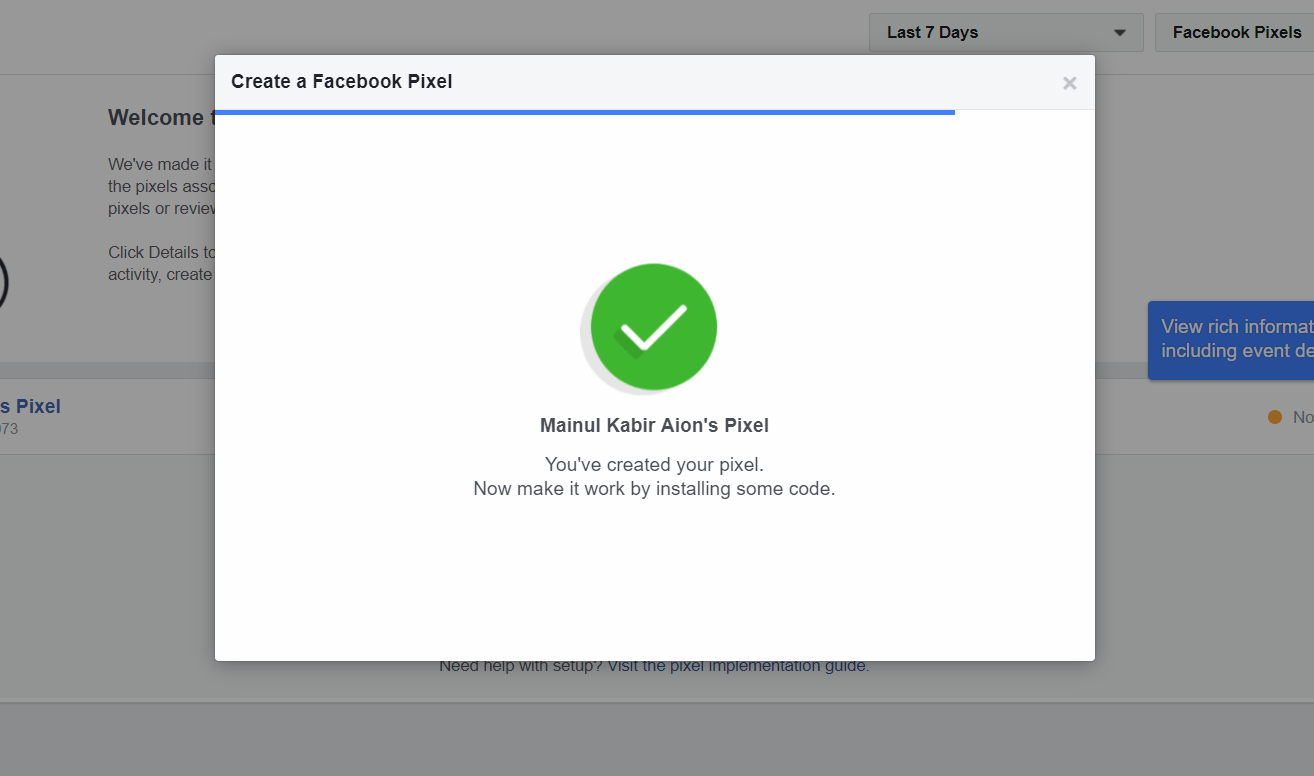
You will view a success message when you pixel is create properly.
Step 2: Installing Facebook Pixel Code
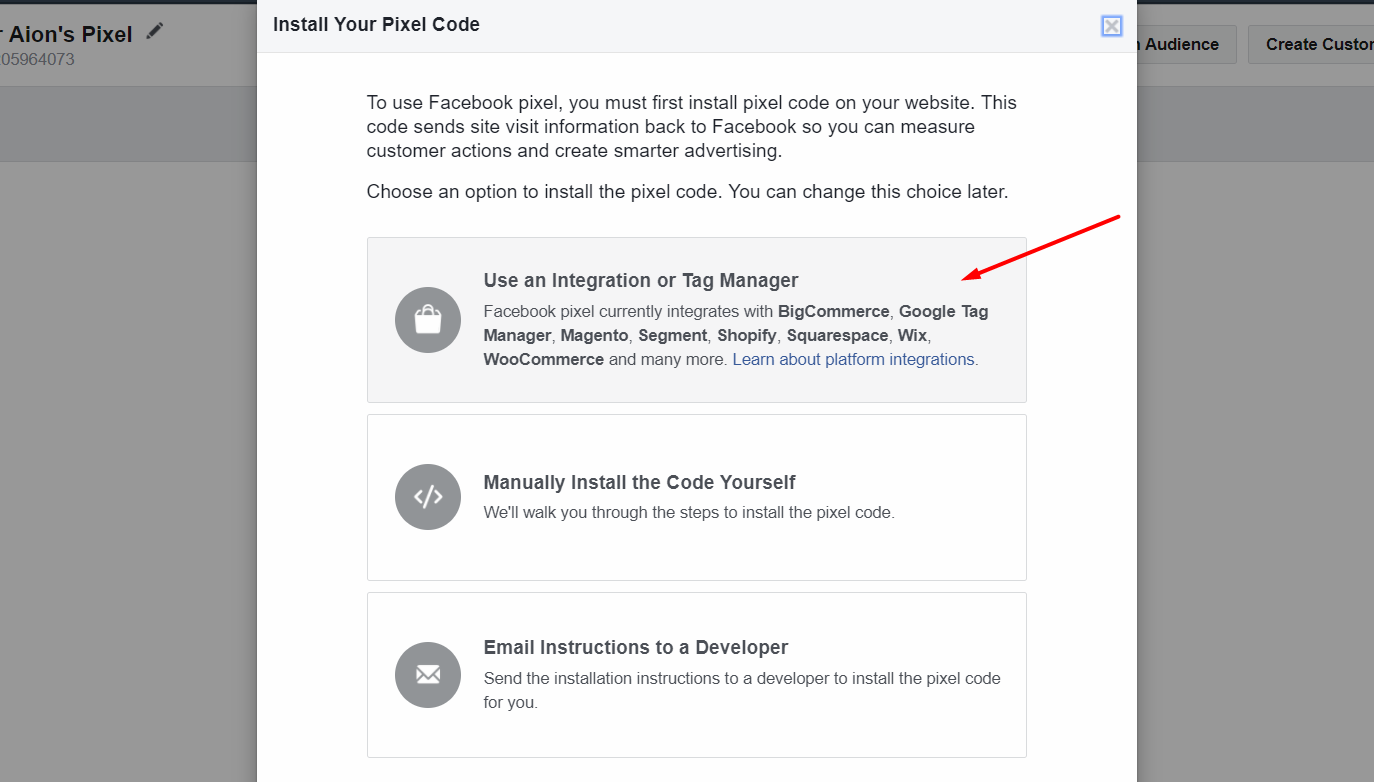
Now, you will see a bunch of option that will let you install Facebook Pixel on your site. In this tutorial we will show you how to install your pixel on a WordPress site. We will also add WooCommerce integration for Facebook Pixel as a bonus just for you!
As the first step, click on the Use an Integration or Tag Manager for installing Facebook Pixel on your WordPress site.
Step 3: Installing Facebook Pixel – Integration Method
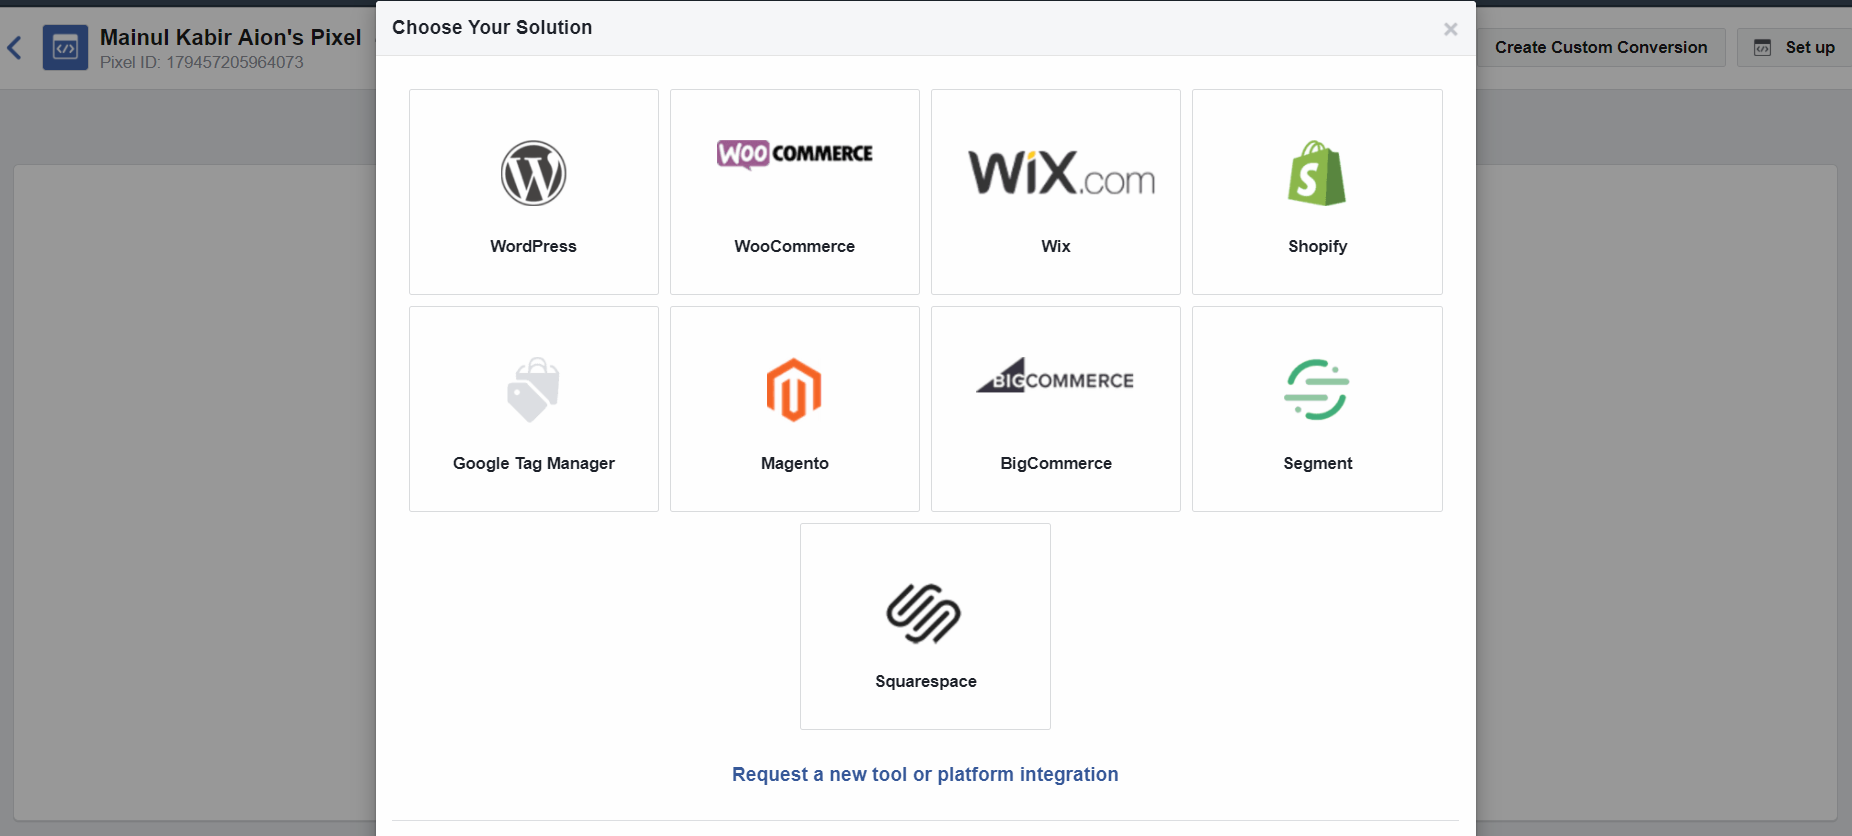
Select WordPress from the Choose Your Solution screen.
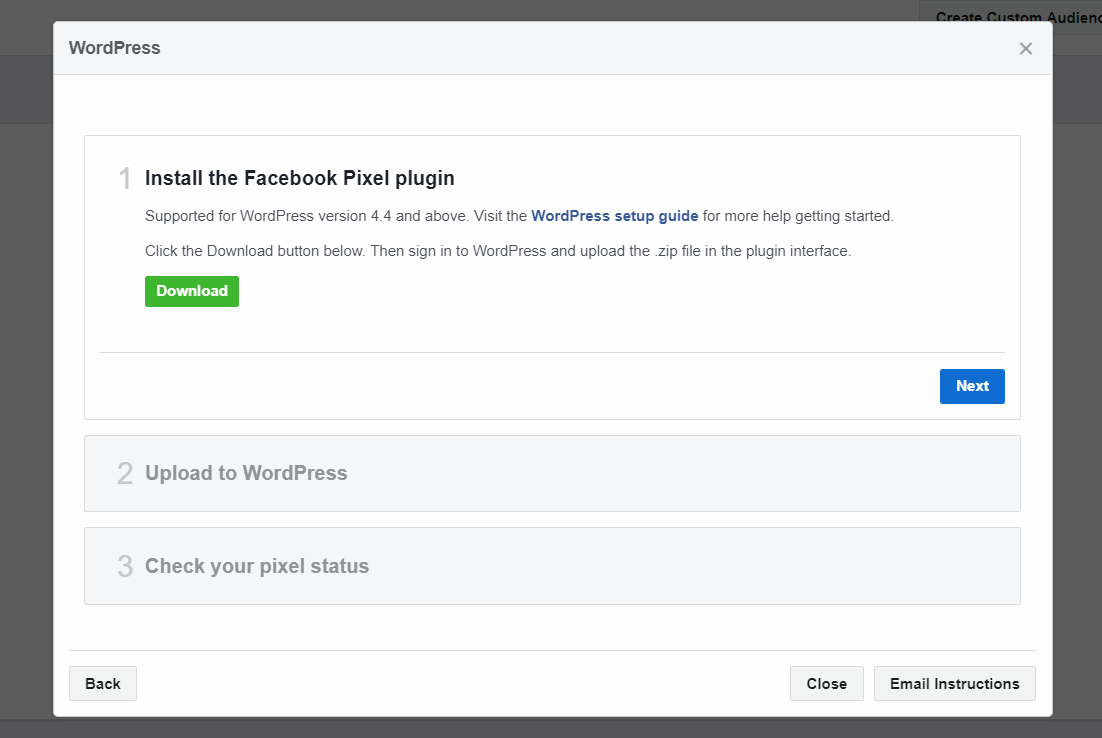
You will now see an instruction screen that you will let you download Facebook Pixel's own WordPress plugin and show you how to install it. Click on the Download button to get the plugin.
You can also click on the Next button to get detailed instructions on this plugin.
In this step, log in to your WordPress site and navigate to the Add Plugin option. Click on the Upload Plugin option, select the file you downloaded and hit the Install Now button.
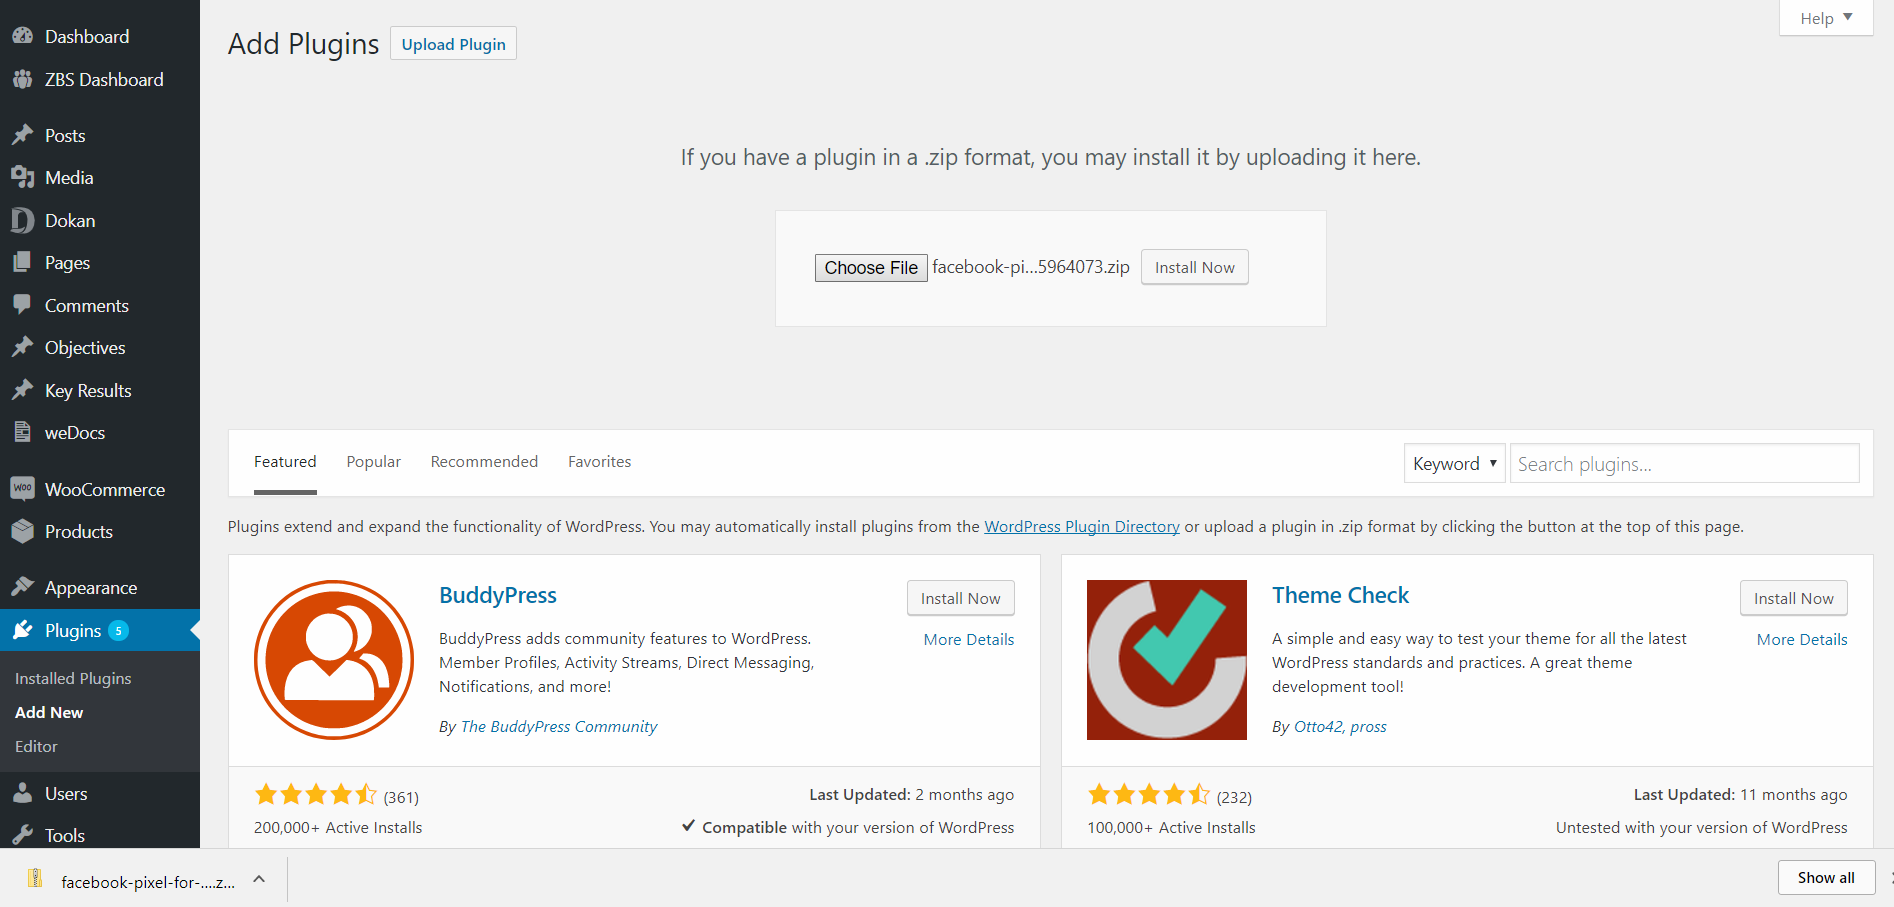
When installing is complete, Activate the plugin.
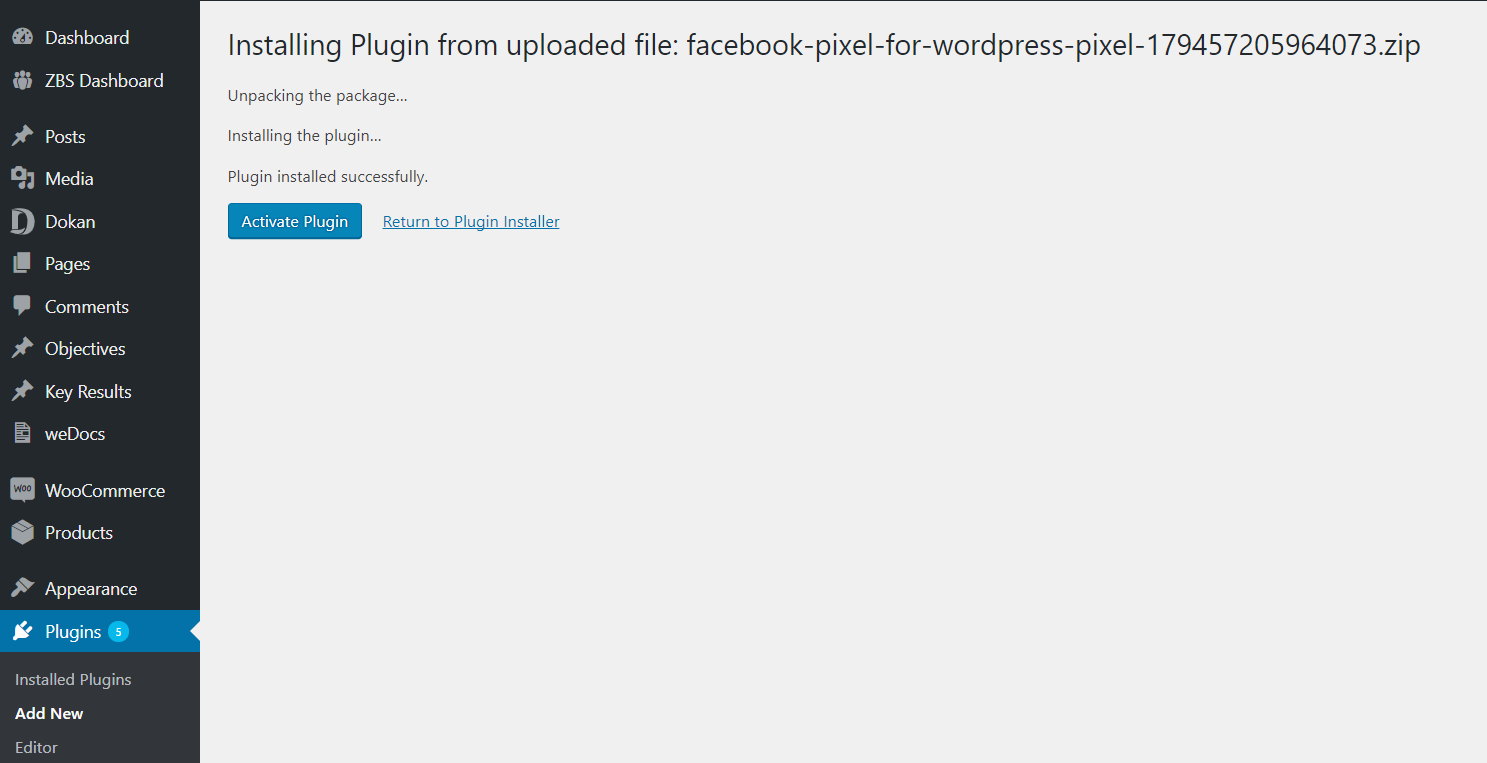
Navigate to – WordPress Admin Dashboard → Settings → Facebook Pixel.
In this Facebook Pixel Settings page, enter your Pixel ID. You can get this ID under you Pixel name from Facebook Ads Manager Pixel page.
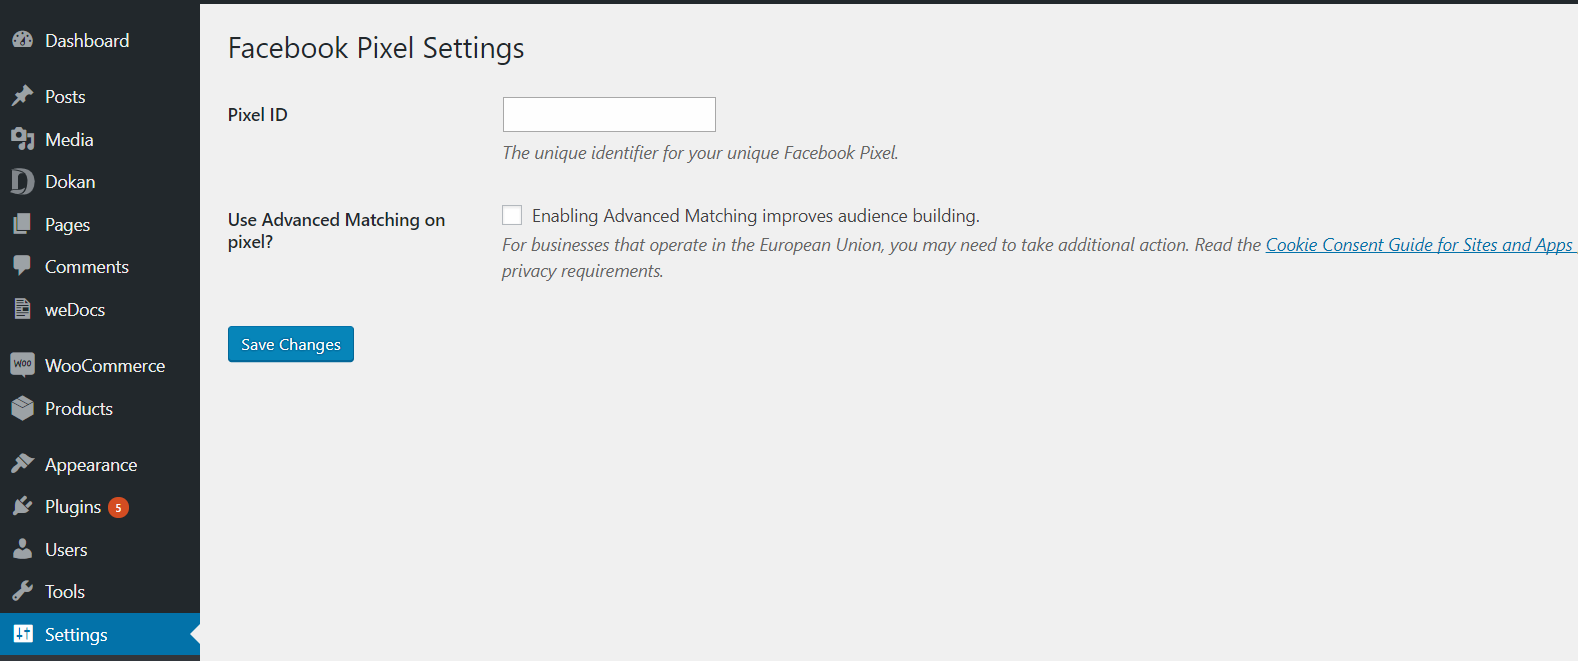
After adding the details hit the Save Changes button and you are done.
Step 4: Installing Facebook Pixel to your WooCommerce Online Store
If you are an online store owner and using WooCommerce, you can easily integrate Facebook Pixel with your site. For this, you have to choose WooCommerce from the Choose Your Solution screen. From there, you will get a plugin offered by Facebook Pixel just like the previous method.
Install and activate the plugin on your site. After installing, you will get a message to complete the setup. Click on the link and you will be redirected to the Facebook pixel for WooCommerce settings. Click on the Get started button.
A new window will pop up and show you a welcome screen. Click on Next button and it will authenticate to your Facebook Ads Manager account. From that screen, select the page you want to integrate with your store.
Choose your Pixel and choose the products. Finally, click on the Finish button and you are done.
Manually Install Facebook Pixel in WordPress
The methods above shows how you can install the Facebook Pixel using integration. This method will show you how to install it manually by yourself. However, the plugins offered by Facebook Pixel are not from wordpress.org. So, you might feel insecure while installing them.
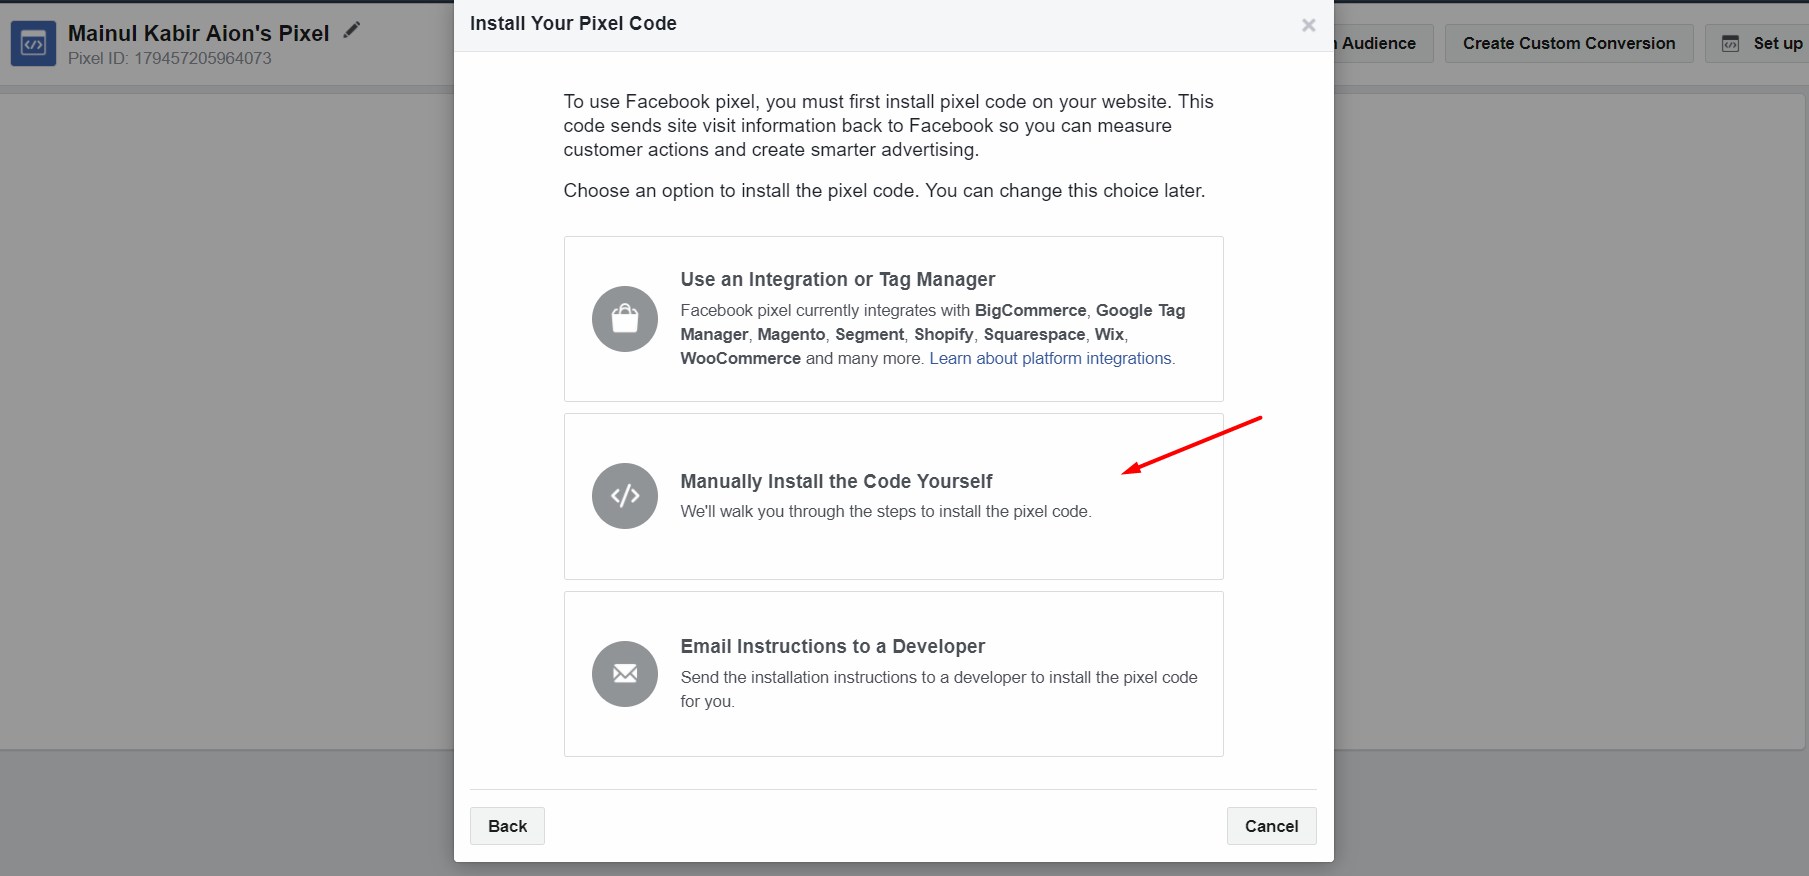
Now, click on the Manually Install the Code Yourself option on the Install Your Pixel Code screen.
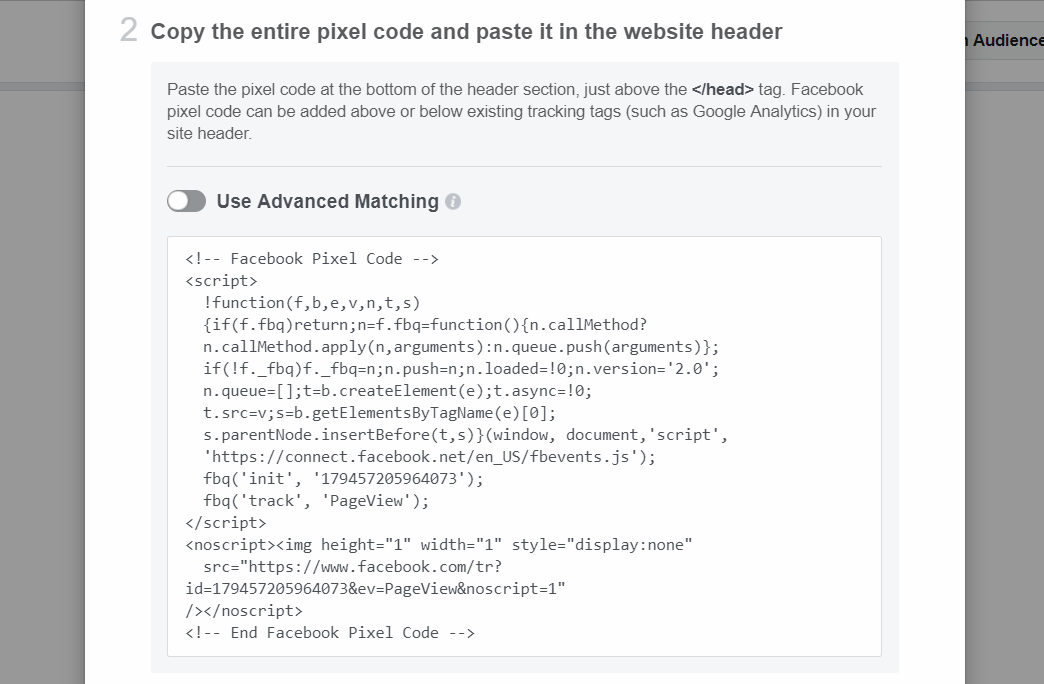
It will show you where you must put the code. You have to put it in the header section of your site.
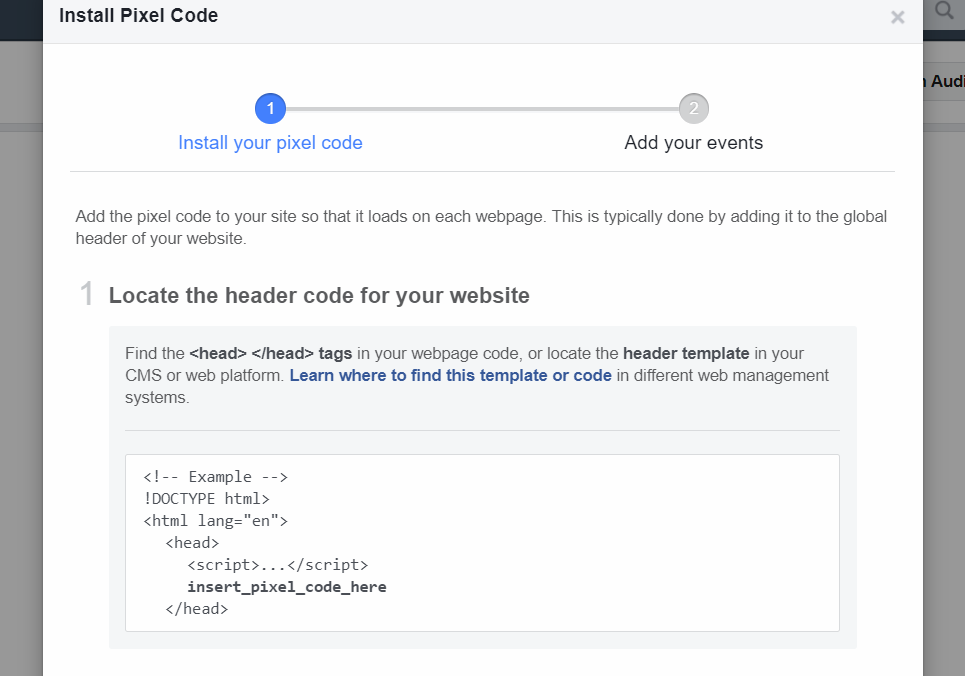
Now, copy your Facebook Pixel code from there. Simply click on the code and it will be copied to your clipboard.
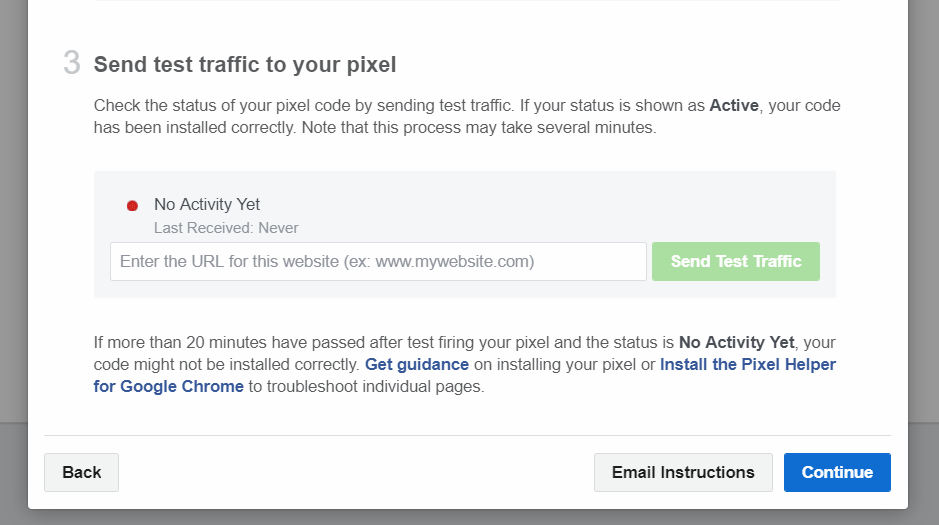
You can also test traffic to your pixel. But you must install the code first.
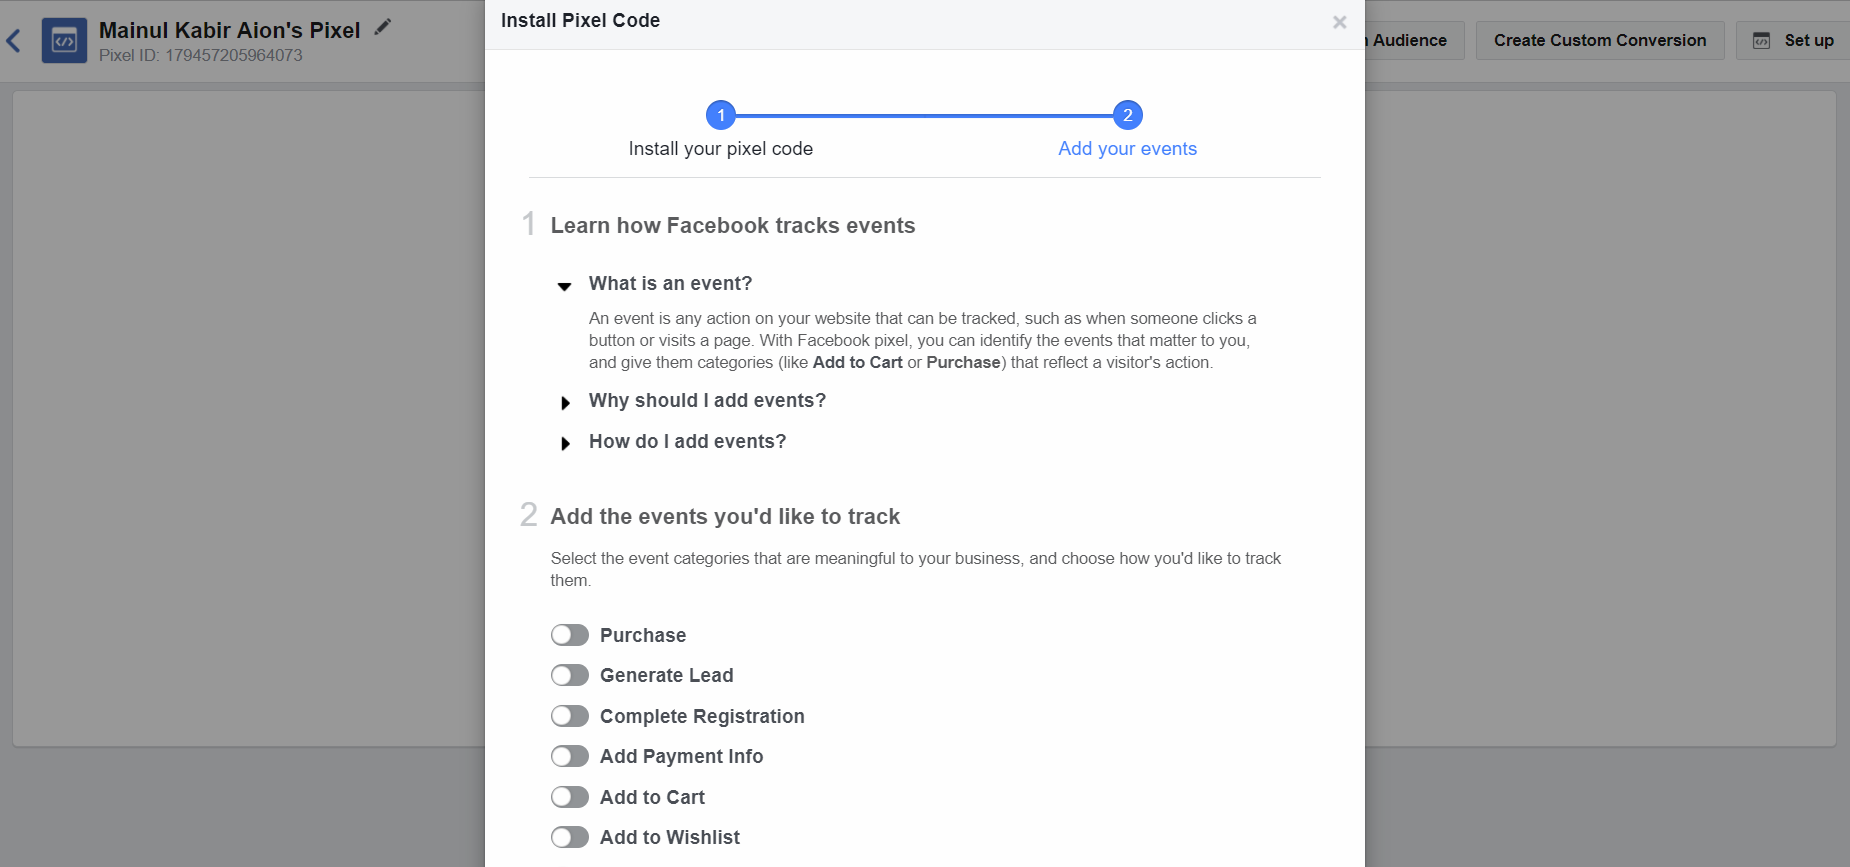
After installting the code, you can add events that you want to track with the pixel.
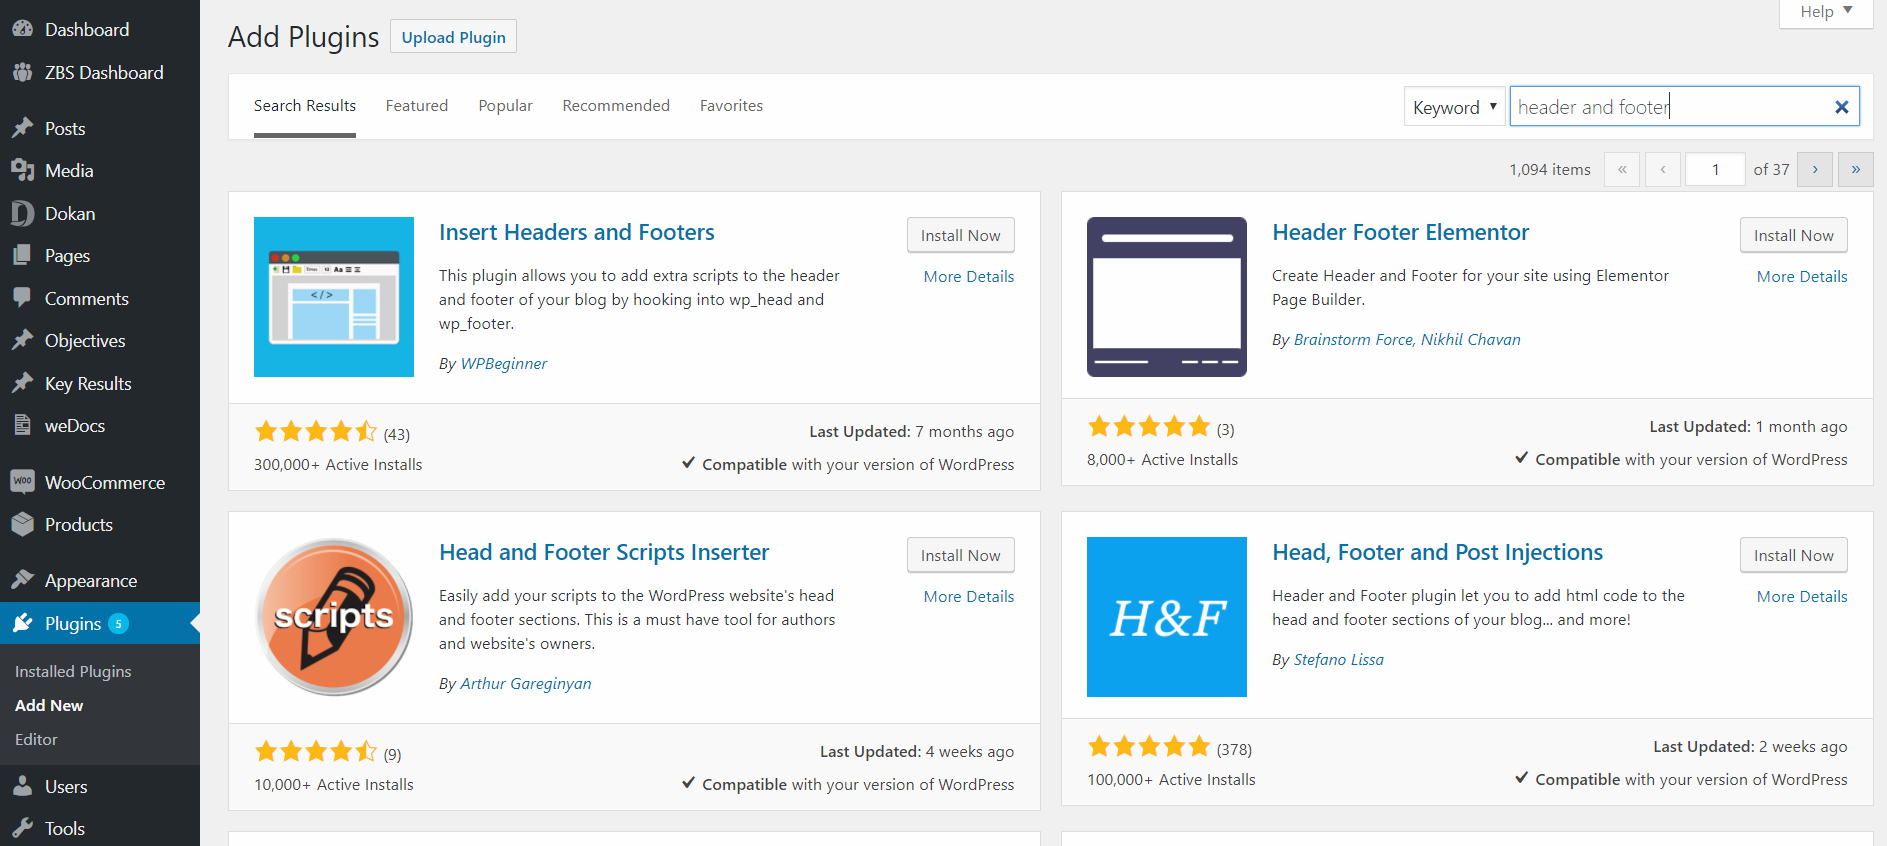
For installing the pixel, log in to your WordPress site and navigate to Add Plugins menu. There are many plugins that allows you to put custom codes on the header section of your site. Some theme has builtin options to add custom tracking codes on the head section.
If you don't have such themes, search for header and footer editing plugin. For this tutorial, we will use Head, Footer and Post Injections plugin. Click on the Install Now button and activate.
Navigate to – WP Admin Dashboard → Settings → Header and Footer.
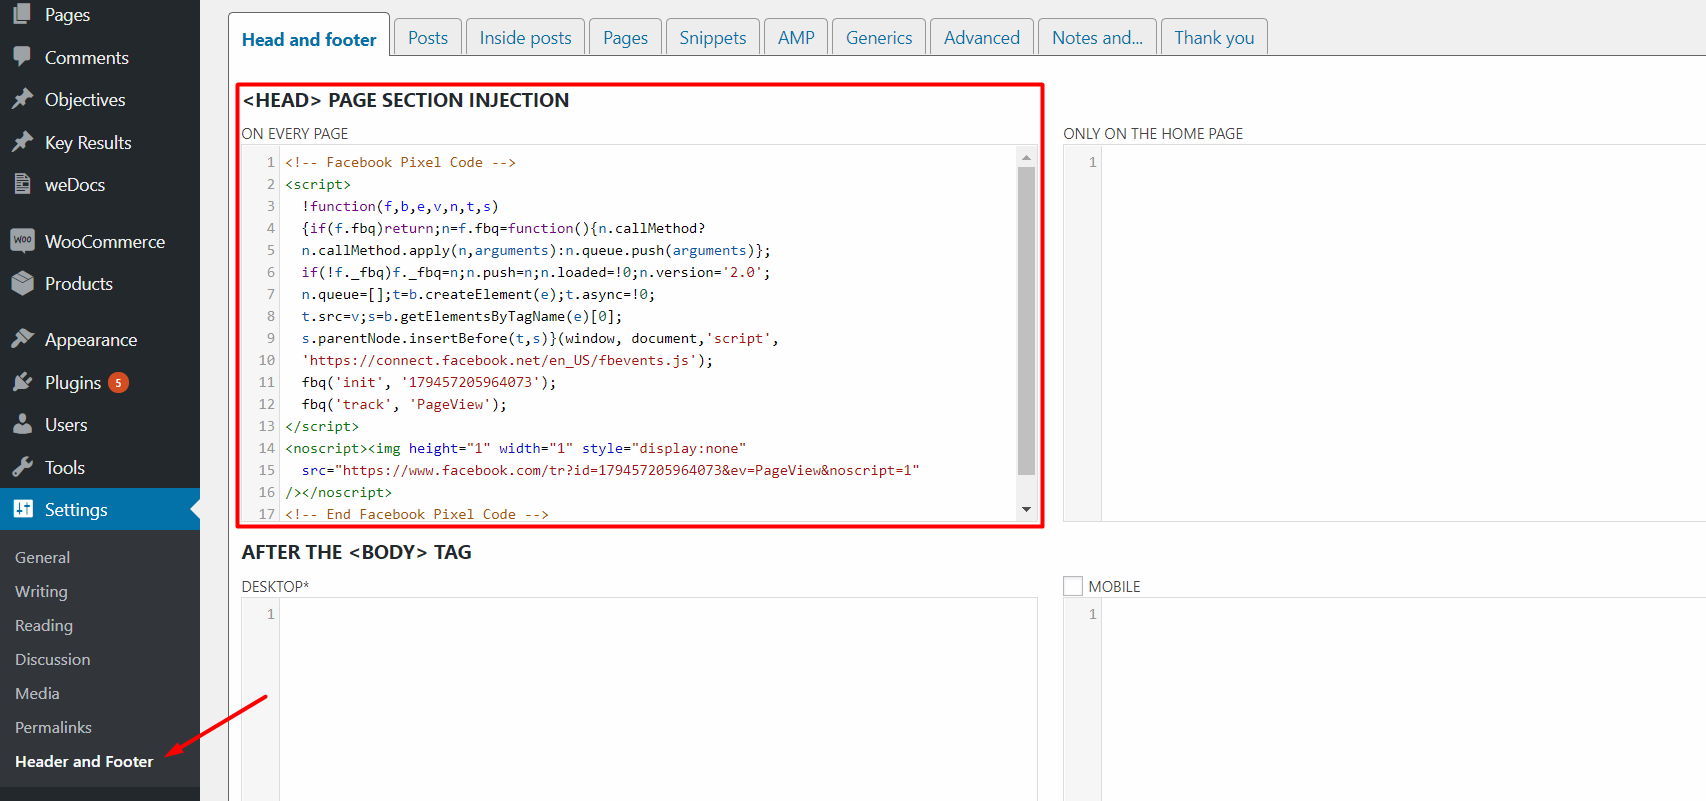
Now, paste your code into the <Head> Page Section Injection field. Hit the save button. Voila, you have successfully installed Facebook Pixel on your WordPress site.
Bonus: Want to Track WooCommerce Conversion on Facebook?
Whether your intentions are integrating WooCommerce store with Facebook or tracking conversions of your WooCommerce store on Facebook Ad platforms, you can consider using this FREE yet powerful plugin – WooCommerce Conversion Tracking.
Details: Track Facebook Pixel Conversion on Your WooCommerce Store

Wrapping Up
Installing Facebook Pixel is really easy. All you have to do is – generate the code and put it in the heads section of your site. That's it, nothing more or less! Facebook offers its own plugin to integrate its pixel with your site. Besides that, you can use their other plugin that helps to integrate WooCommerce. We hope this tutorial will help you out to track your Facebook ads and to an effective retargeting.
Do share your opinions if we have helped you with this post.
