How to Track Events for Facebook with WooCommerce Conversion Tracking
When an action on your website occurs, your Facebook pixel logs it as an “event.” You can use events to track conversions, optimize for conversions and build audiences by adding the appropriate code to your website.
With WooCommerce Conversion Tracking, you will be able to track the following 8 events on your Facebook:
- Add To Cart
- Initiate Checkout
- Purchase
- Complete Registration
- View Product
- View Product Category
- Search Product
- Add To Wishlist
You can select to track all or some of the events.
Configuration
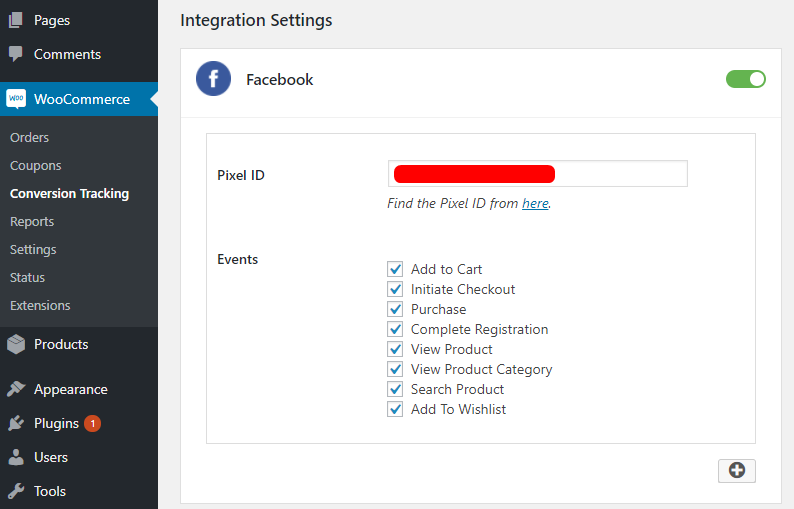
When you enter your Facebook Pixel ID, the plugin will pass data for these events to your Facebook Events Manager. You will be able to see all data relating to the events under the Events tab.
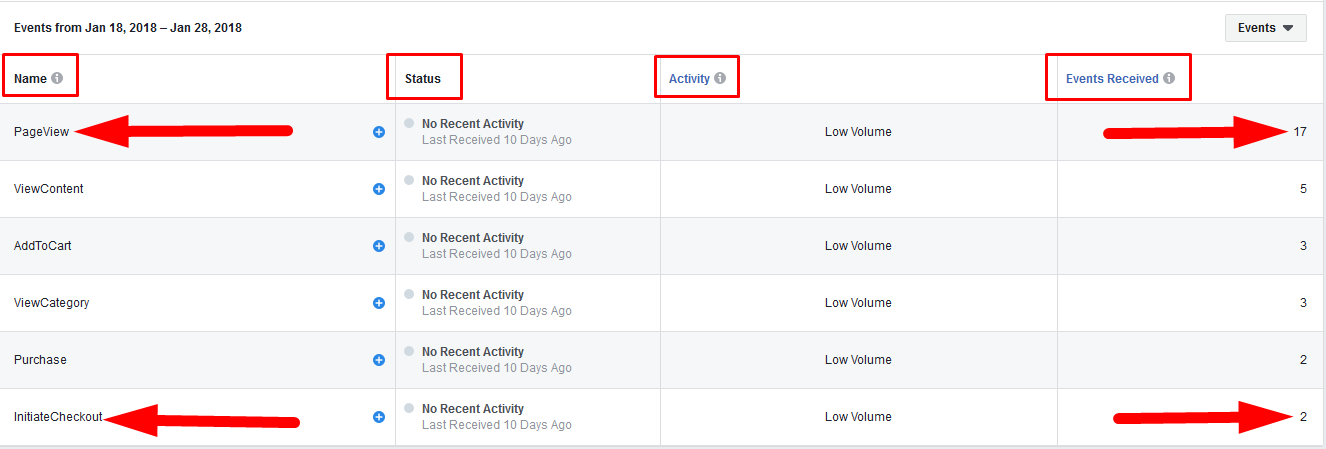
The Events tab shows the event name, status, activity and events received.
Name: This is the type of event detected by the pixel.
Status: This shows when the event was received by the tracker.
Activity: This shows the relative number of events received over time.
Events Received: The total number of events received for this event category.
You can easily see on this page how many Page Views and Product/Content Views happened in total. You can also see the total Add To Carts, Product Category Views, Purchases and Initiate Checkouts. And the time when they were received.
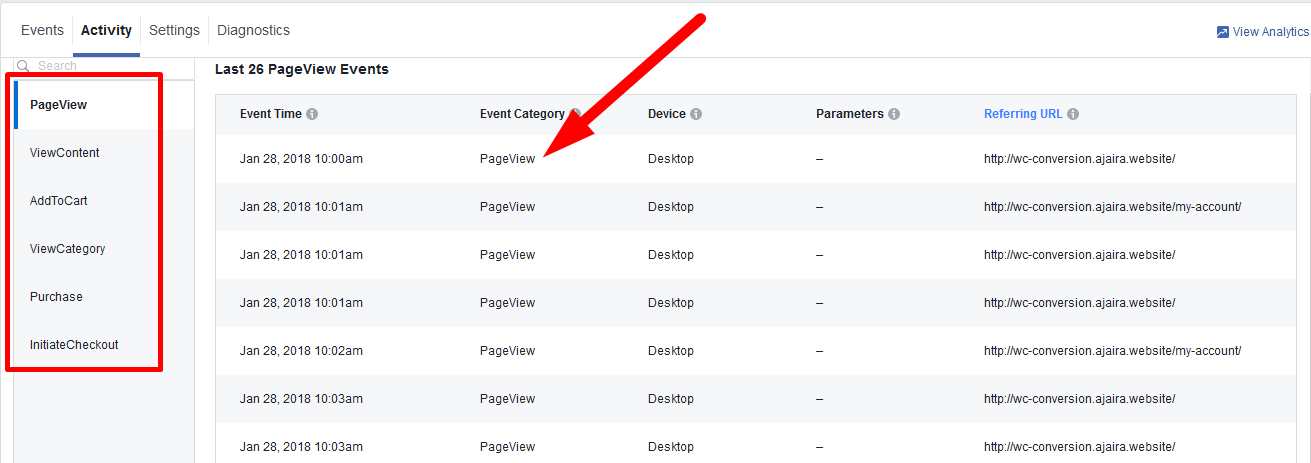
Under the Activity tab, you can view the exact time when the event was received, the name of the event, the device that was used when the action was triggered, parameters, and referring URL.
Event Time: The date and time when the action was triggered and detected.
Event Category: The type of event received
Device: The type of device used to take the action which triggered this event.
Parameters: The parameters sent with an event e.g. content ids, content type, product
Referring URL: The URL of the page where the event occurred.
You can also view all these data graphically under Events.
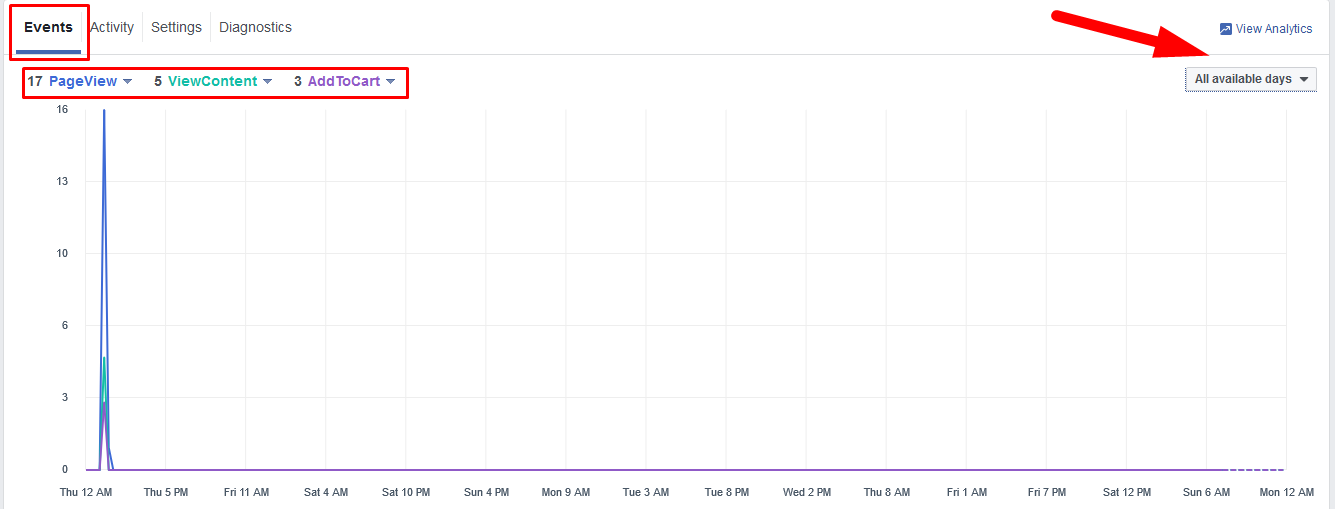
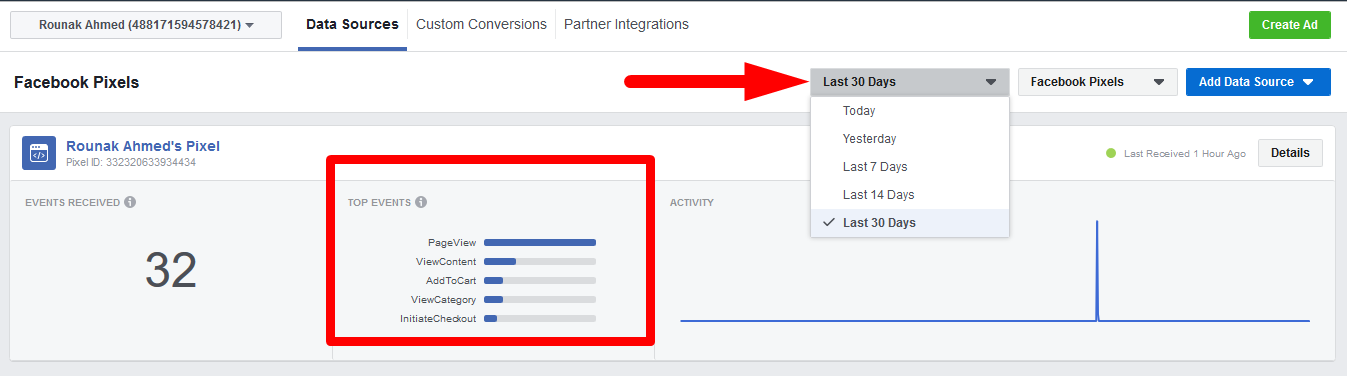
To change the date range, click on data sources and from the drop-down, choose the time period for which you want to track the conversion events on your website.