How to Setup Pixel ID for Facebook
To use Facebook Pixel ID, you need to turn on the Facebook option from the WooCommerce Conversion Tracking plugin. Navigate to –
WP Admin Dashboard → WooCommerce → Conversion Tracking→ Integrations→ Facebook.
Configuration
Click on the toggle button to get the Facebook Pixel ID option.
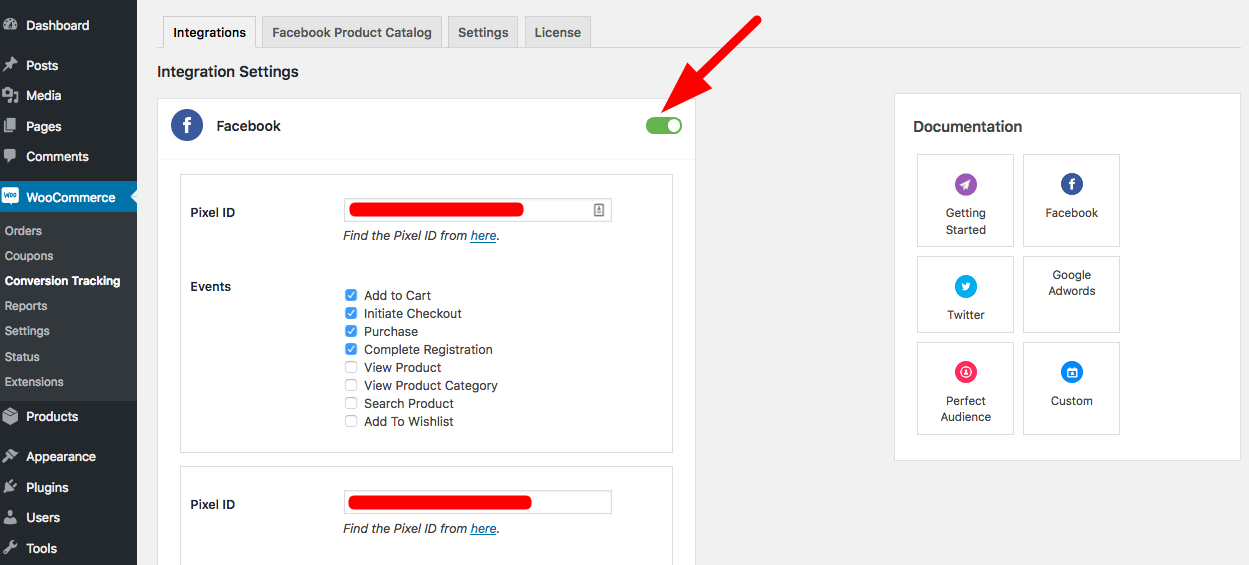
Next, insert the Pixel ID of your Facebook Account.
Click on the link given to find the Pixel ID.
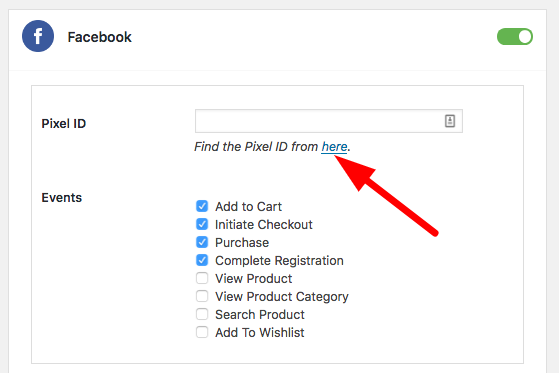
You will be redirected to Facebook Events Manager. Here you will find the data and statistics relating to your paid ads campaigns.
To find your Pixel ID, click on the drop-down located above the screen on the top left. Find Pixels under Events Manager.
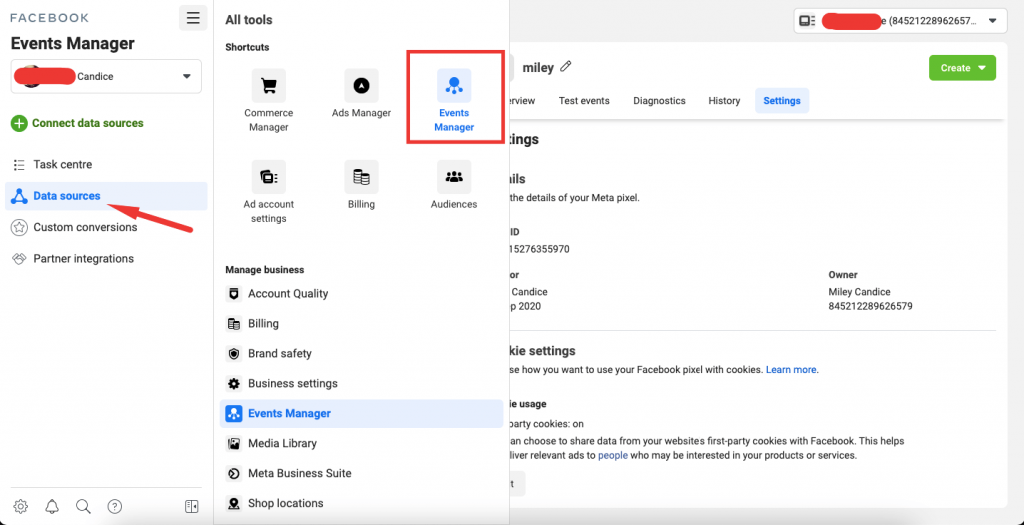
Copy the Pixel ID you will find located above under your event name. Or you can find the Pixel ID in the Settings section.
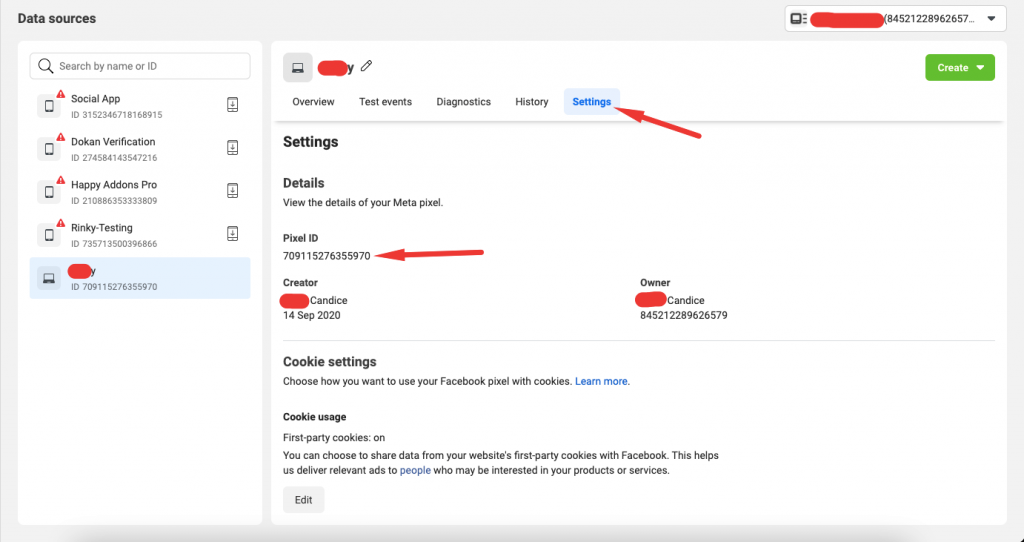
Now, copy this ID.
Paste it on your WC Conversion Tracking plugin in your WordPress dashboard in the field given.
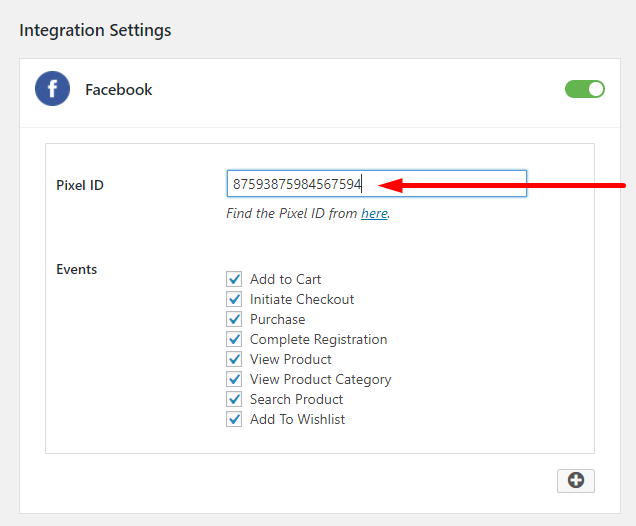
After pasting the ID hit Save Changes button and you are done with the Facebook integration with WooCommerce Conversion Tracking!
Watch Video – Set up Facebook Pixel ID
The PRO Version allows you to enter unlimited Pixel IDs for Facebook. So that if you have different agents looking after your WooCommerce site, the data will be sent to all those separate accounts automatically through the plugin.
To learn how to set up multiple pixel ID for Facebook, check out this documentation.
