How to Install WooCommerce Conversion Tracking
In order to run WooCommerce Conversion Tracking, you will need the following:
Requirements
- WooCommerce 2.1.0
- PHP version 5.2.4 or greater
- MySQL version 5.0 or greater
Installation of FREE Version
- To install the WooCommerce Conversion Tracking FREE plugin, download the zip file from WordPress.org or directly from the website. Then navigate to wp-dashboard->Add New. Then click on Upload Plugin.
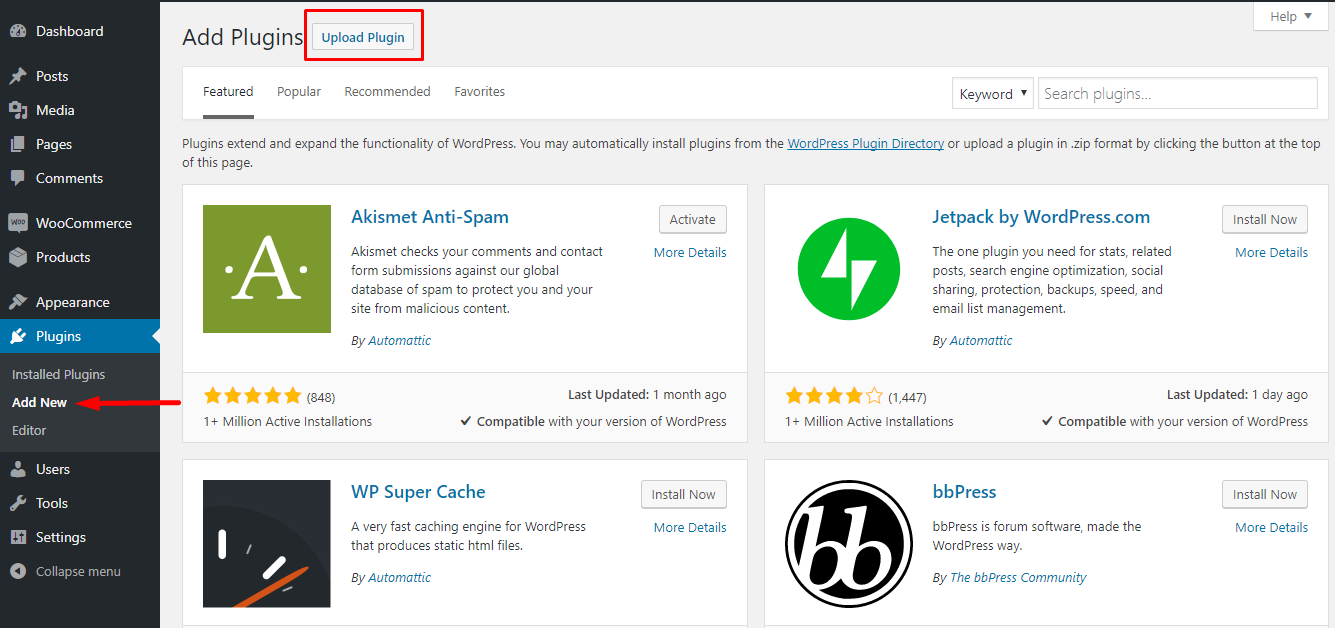
2. Click on Choose File, select the WC Conversion Tracking zip file from your folder.

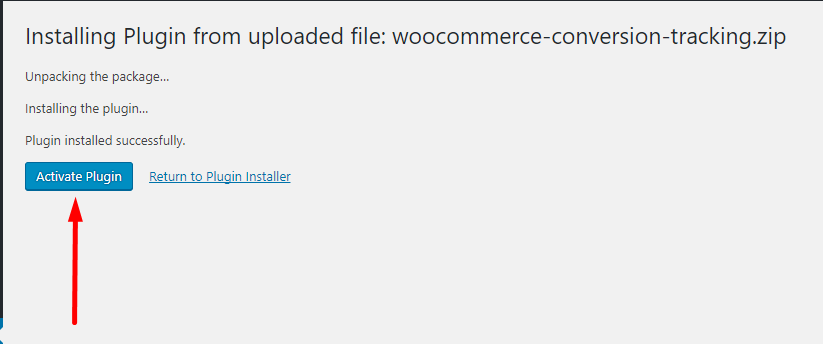
3. Then click on Install Now.

4. Next, click on Activate Plugin. This will complete the installation and activation process.
Watch Video – Download From weDevs & Install
Alternatively, you can search and download the plugin directly from your WordPress dashboard.
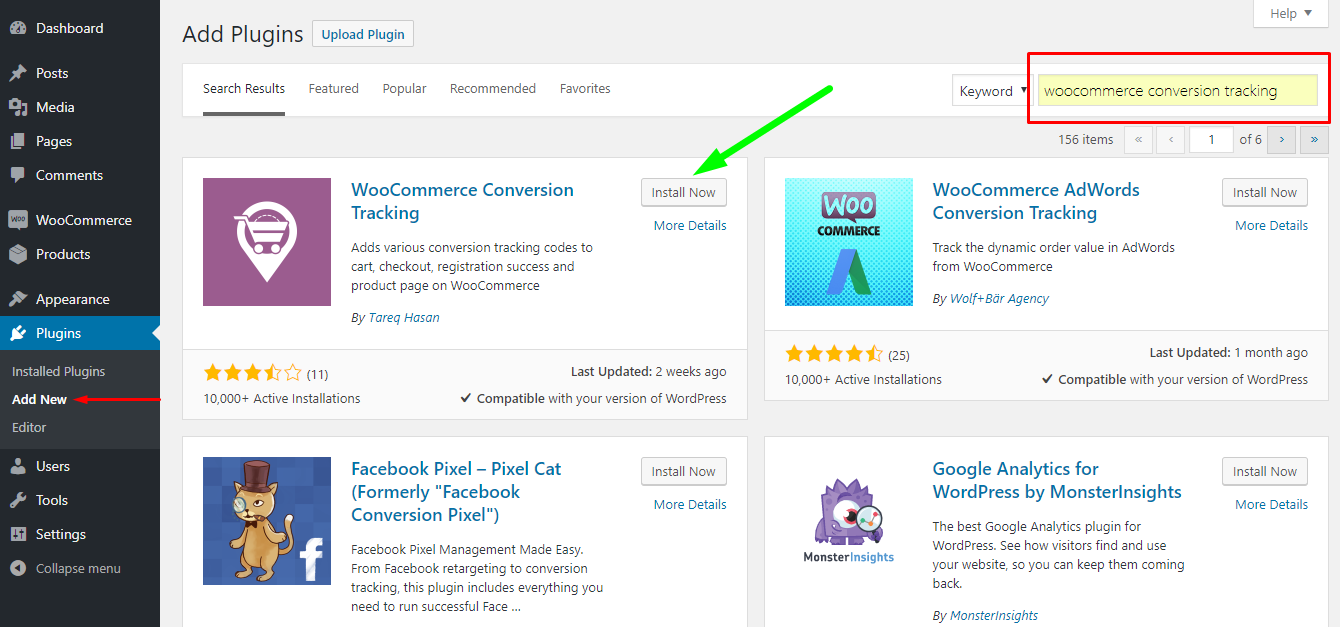
a) Go to wp-dashboard->Plugins->Add New. Then search & find WooCommerce Conversion Tracking from the search bar on the top right, as shown below.
b) You will see the plugin in the results. Click on Install Now.
Then click on Activate.
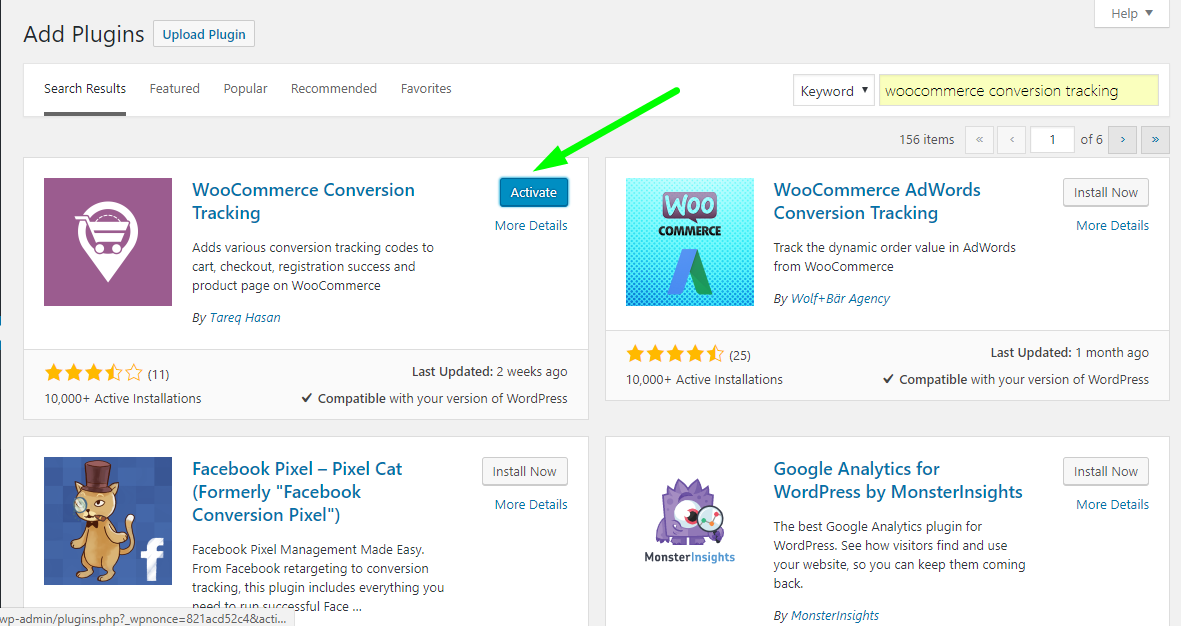
This will complete the installation process of the Free version.
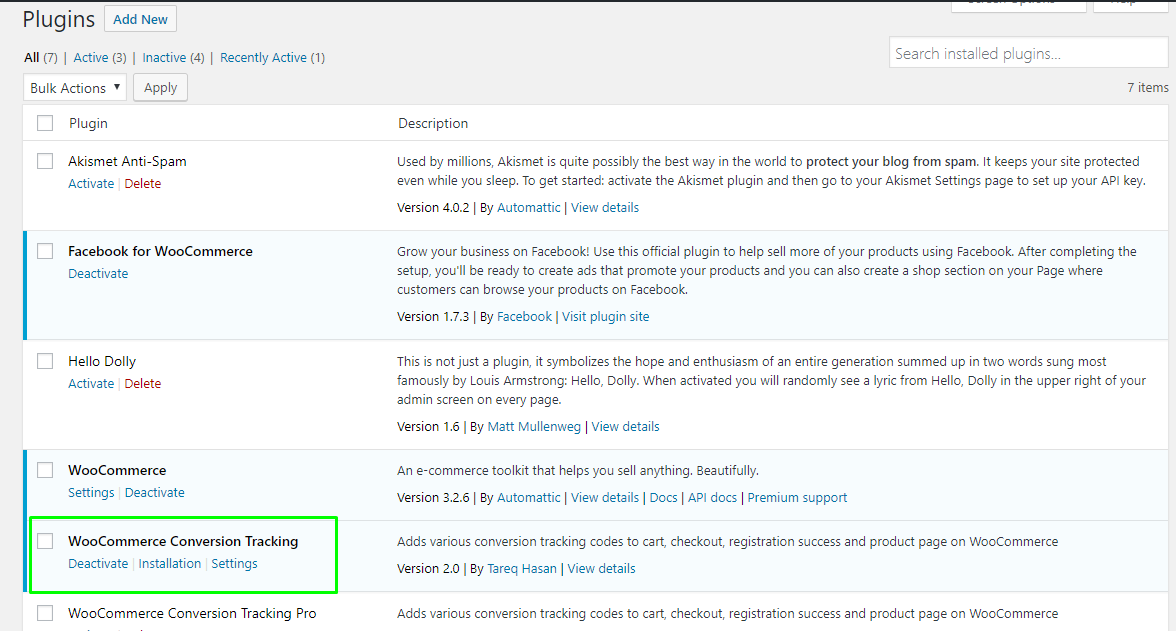
You can now view WooCommerce Conversion Tracking Free under your Plugins directory.
Watch Video – Search From Dashboard & Install
Free Version Interface
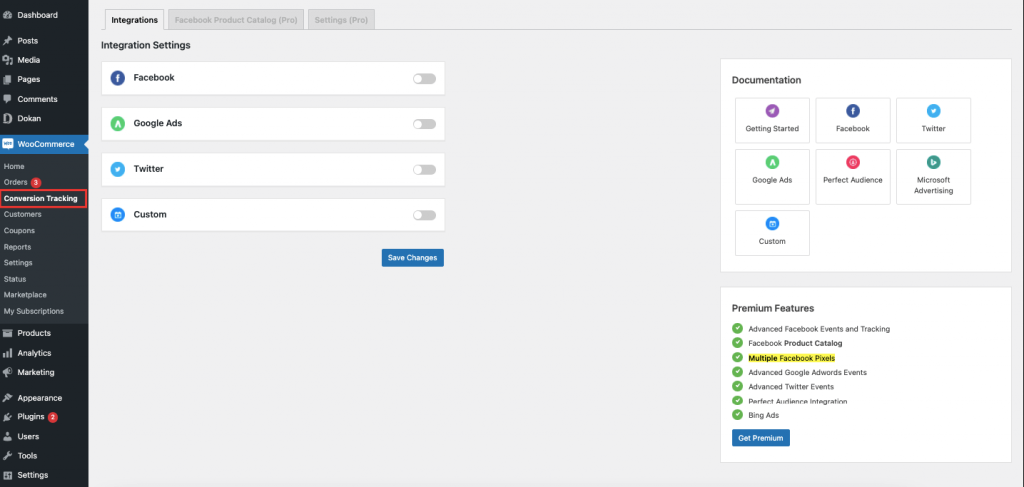
After installation, view WooCommerce Conversion Tracking Free in wp-dashboard→WooCommerce→ Conversion Tracking.
Installation of PRO Version
- After purchasing, download the link from your My Account page.
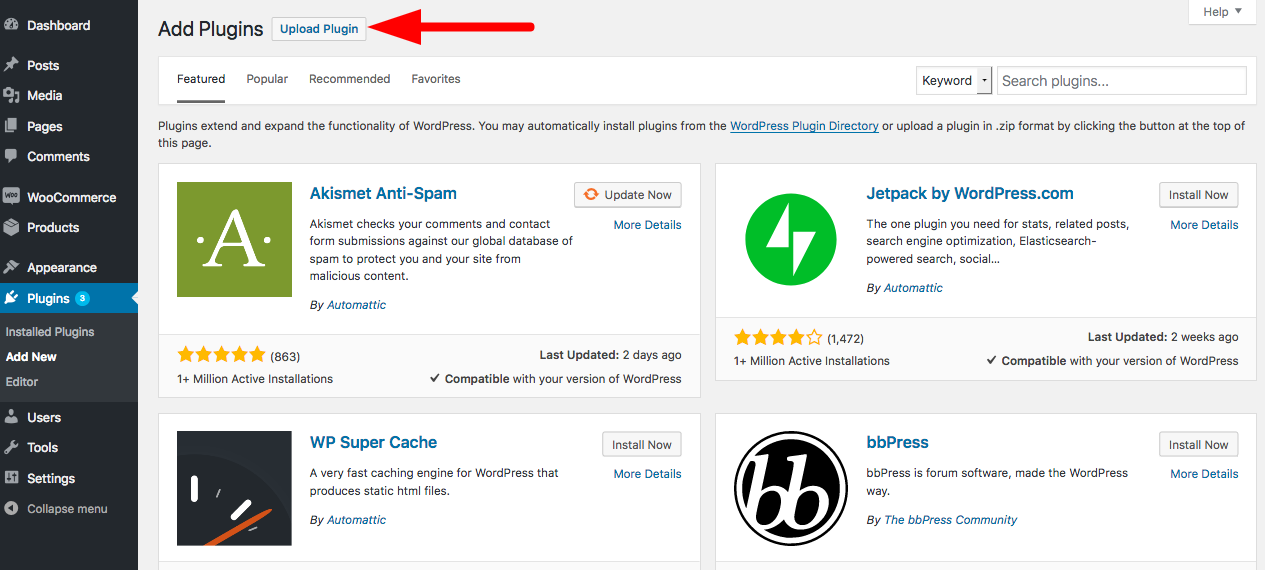
- Then upload the zip file of the plugin from wp-dashboard→Plugins→Add New in the same way like you would with any other premium plugin.
- Click on Upload Plugin and select your zip file.
4. Click on Install Now to finish uploading.

5. Then click on the Activate button located under WooCommerce Conversion Tracking Pro in the page Plugins→Installed Plugins.

This completes the installation process of the Pro version.
Pro Version Interface
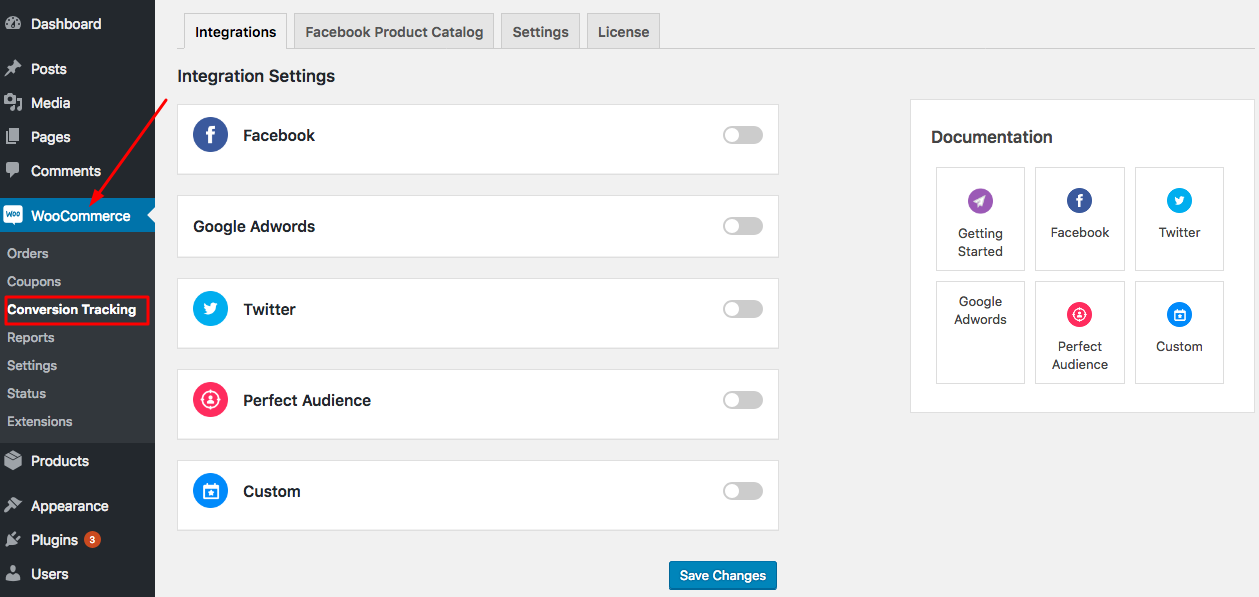
After installation, view WooCommerce Conversion Tracking PRO in wp-dashboard→WooCommerce→ Conversion Tracking.
That's all!