BuddyPress Profile
Pre-requisites to get started
As this is a module, it has some dependencies. You will need the following plugins for using BuddyPress Profile Integration:
This module makes a bridge to exchange data between the two plugins mentioned above.
A quick overview of the BuddyPress module:
Installation
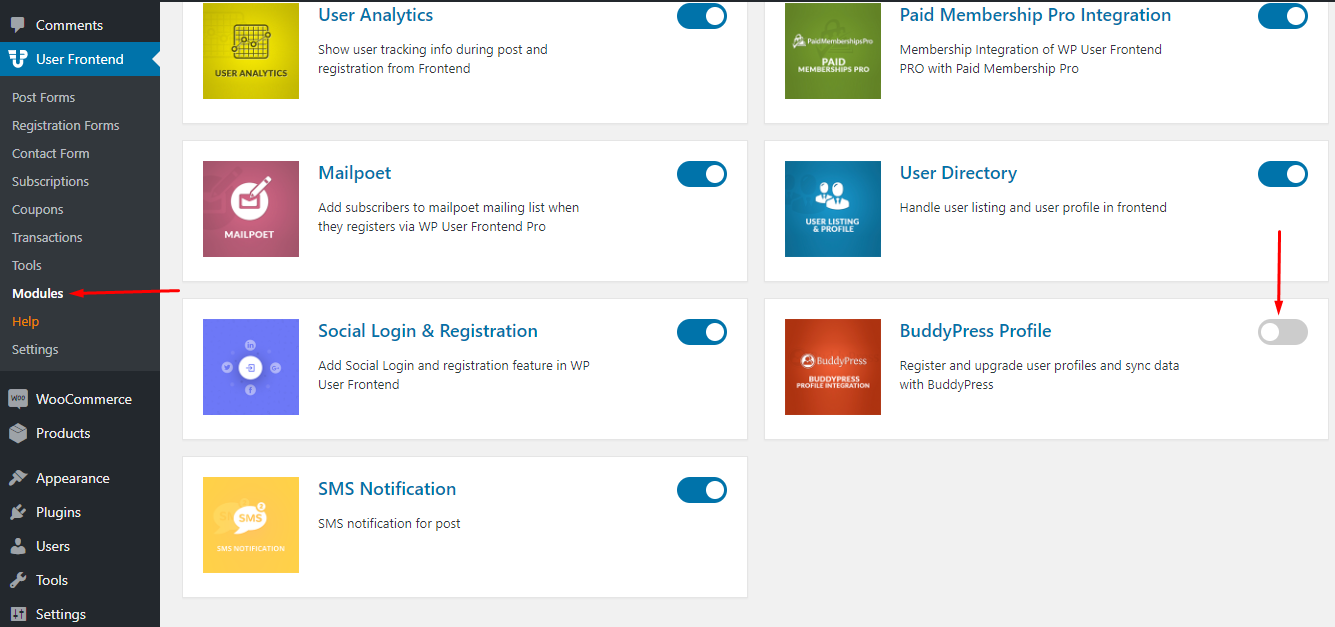
Navigate to your WP dashboard->User Frontend->Modules. Find BuddyPress Profile and turn on the toggle button on the top right to activate this module.
Configuration
The interesting thing is that you do not need to configure anything!
Usage – creating BuddyPress profile fields
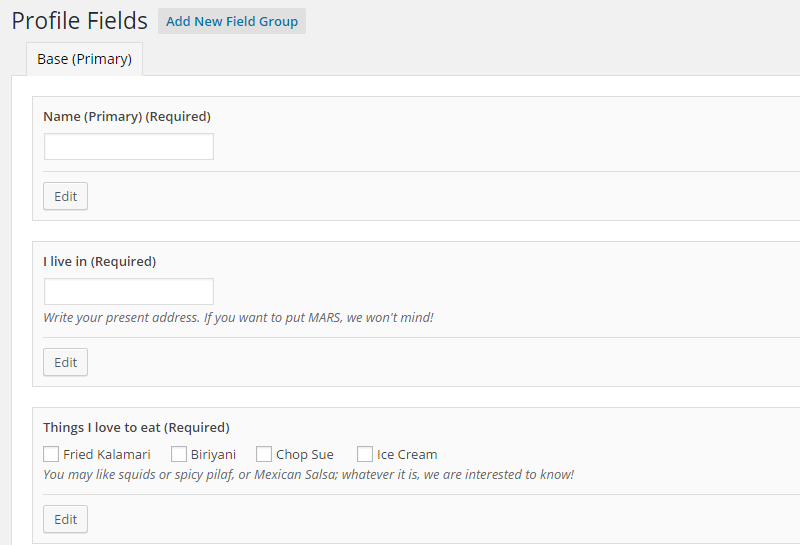
To create the profile fields that you need in BuddyPress, navigate to wp-admin → Users → Profile Fields and click Add New Field
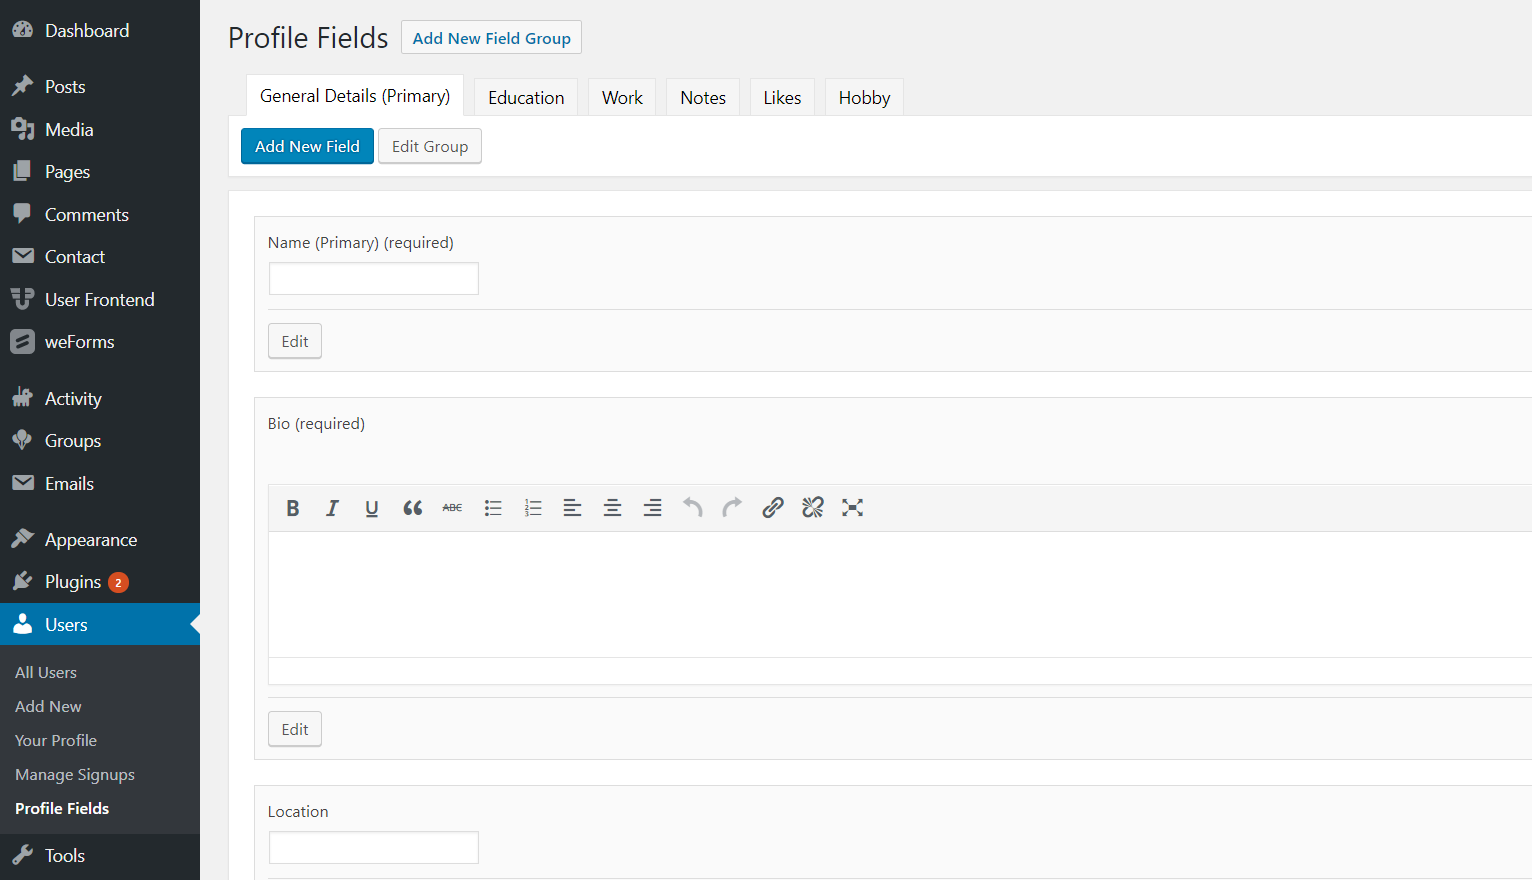
Then you will get a new page to enter the details of a new page. The field name is the name you will see in the form to assign from a dropdown. So you can name this field with a hint so that when you have a lot of fields, you can easily identify the fields and assign them in right place.
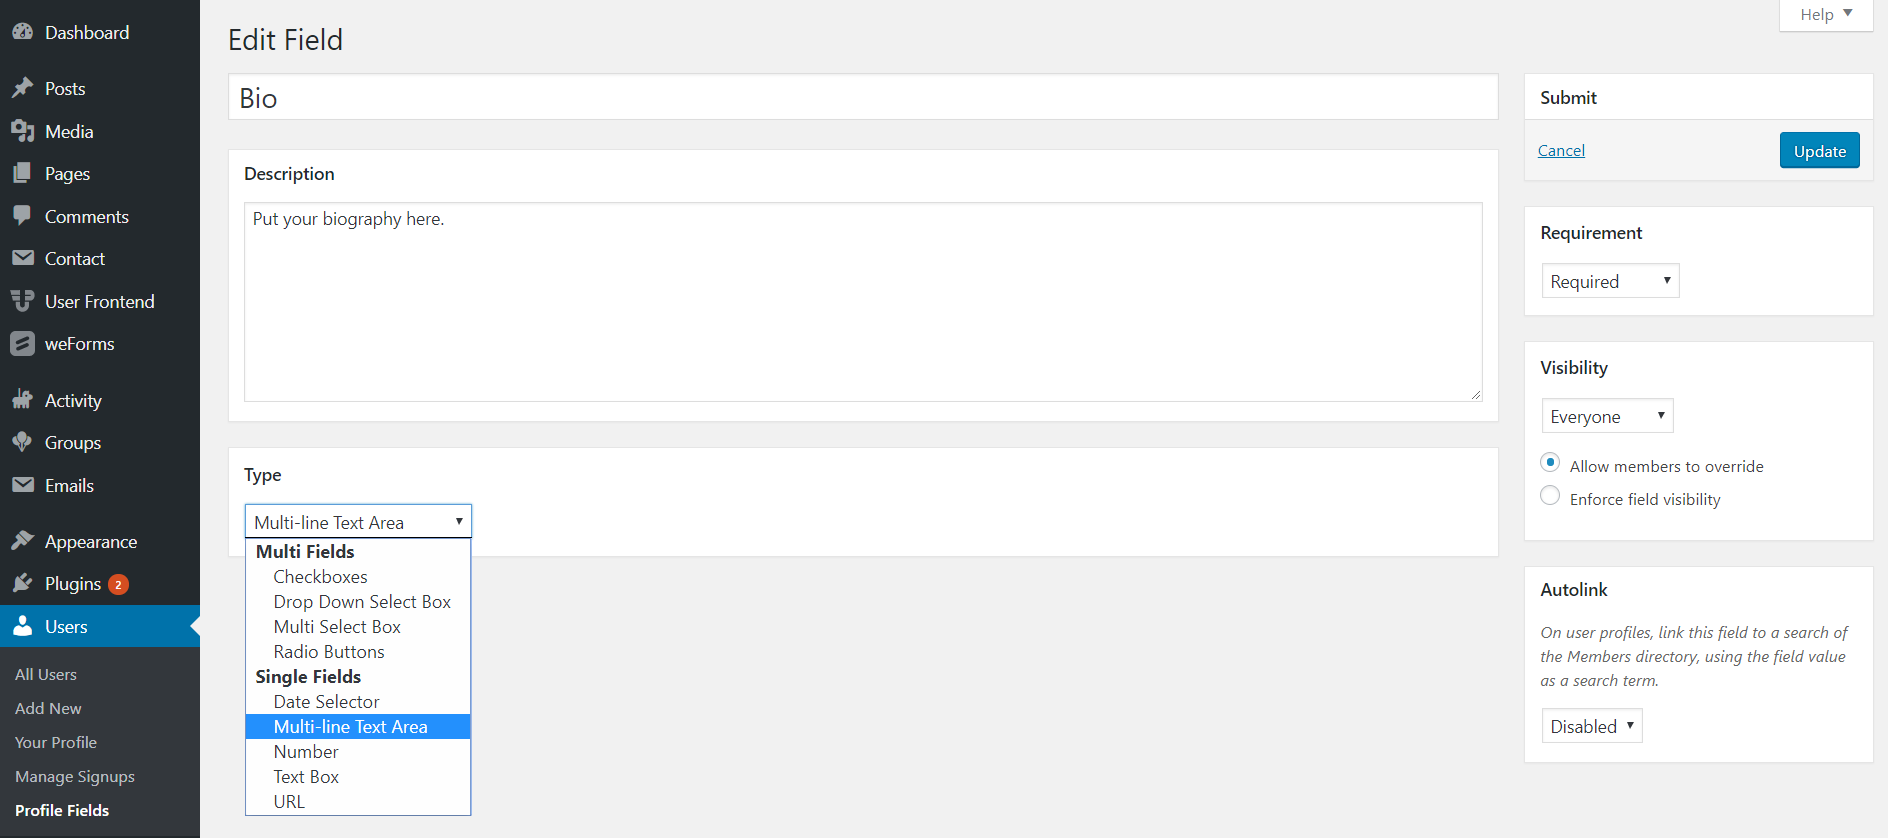
You will find various kinds of fields on the new field creation page. You are free to use any field that fits your needs best. But as you are making something for your users and a lot of people is going to use this, you should keep in mind that you must
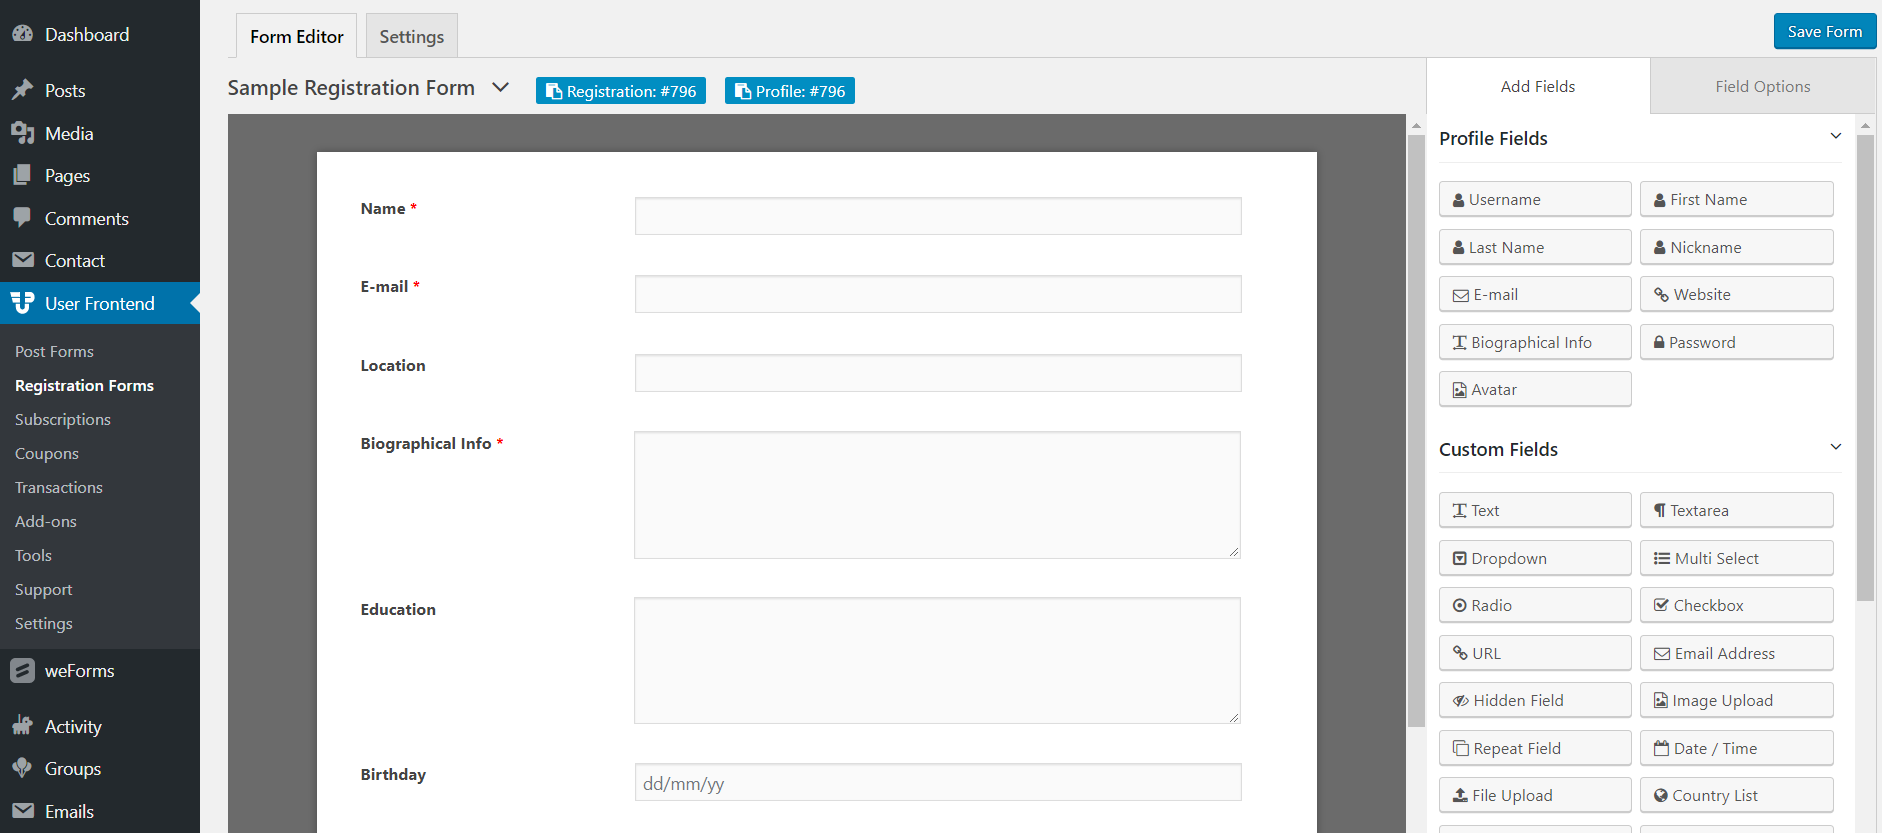
Create a registration form using WP User Frontend Pro
Now we are done with creating custom fields for the BuddyPress profile and we will move on to the registration form for WP User Frontend, which is located at wp-admin → User Frontend → Registration Forms → Your Form.
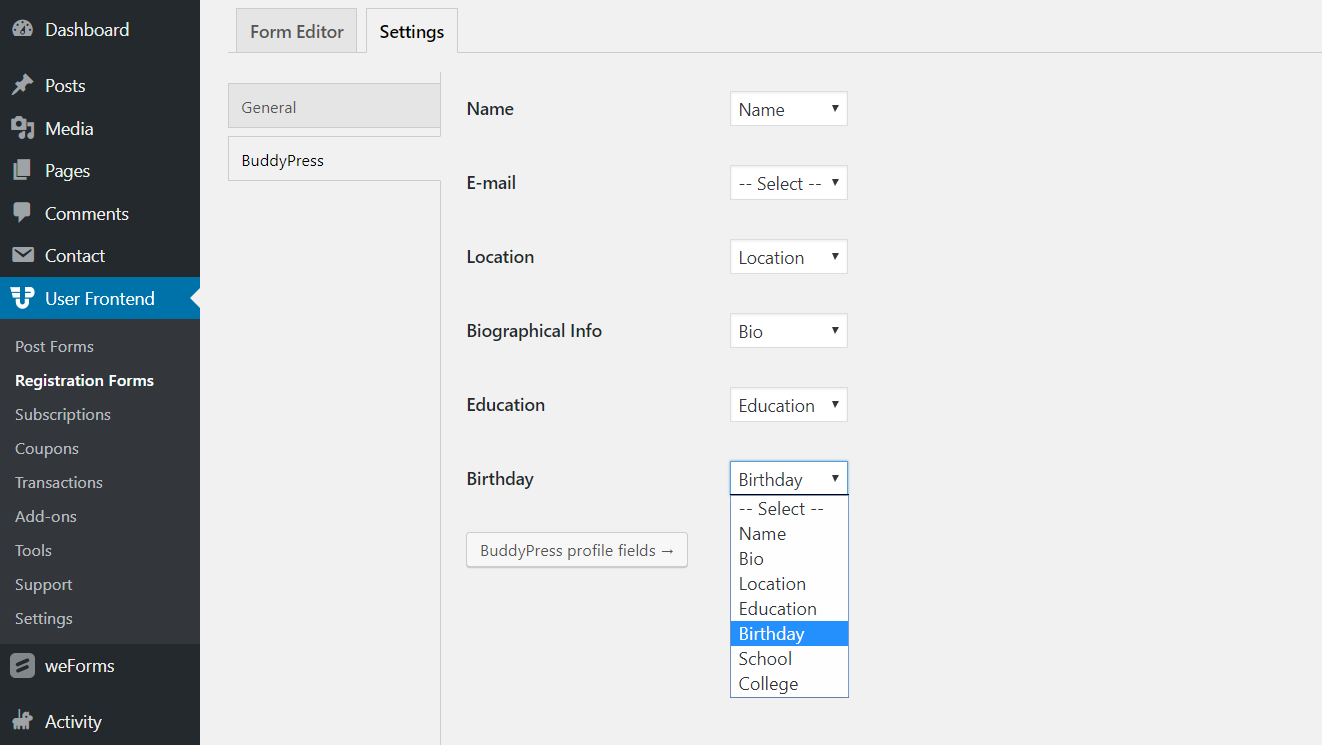
We will find an extra tab for BuddyPress in the registration form edit panel.
If we do not have any custom fields in our form, then the tab for BuddyPress will be empty. Similarly, the tab will be empty if you do not have any extra fields in BuddyPress, as described above. The options in the above screenshot are shown just for testing purposes. These values won't be visible in your form. So there is no point in writing the options in the BuddyPress profile fields. Just make the fields in BuddyPress profiles, and then assign them in WPUF registration. The options should be included in WPUF registration forms, not in BuddyPres profile fields.
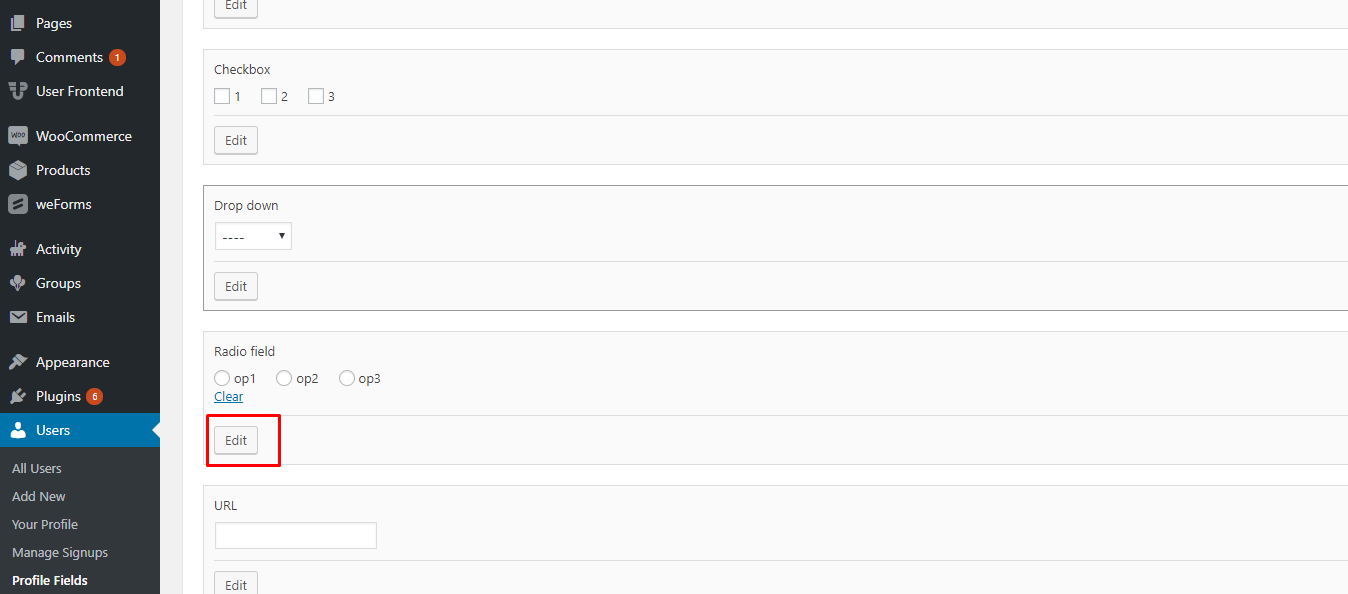
We have to click on that and we will be able to see a screen like this.
Now you just need to save it and check once from the front. And you're done.
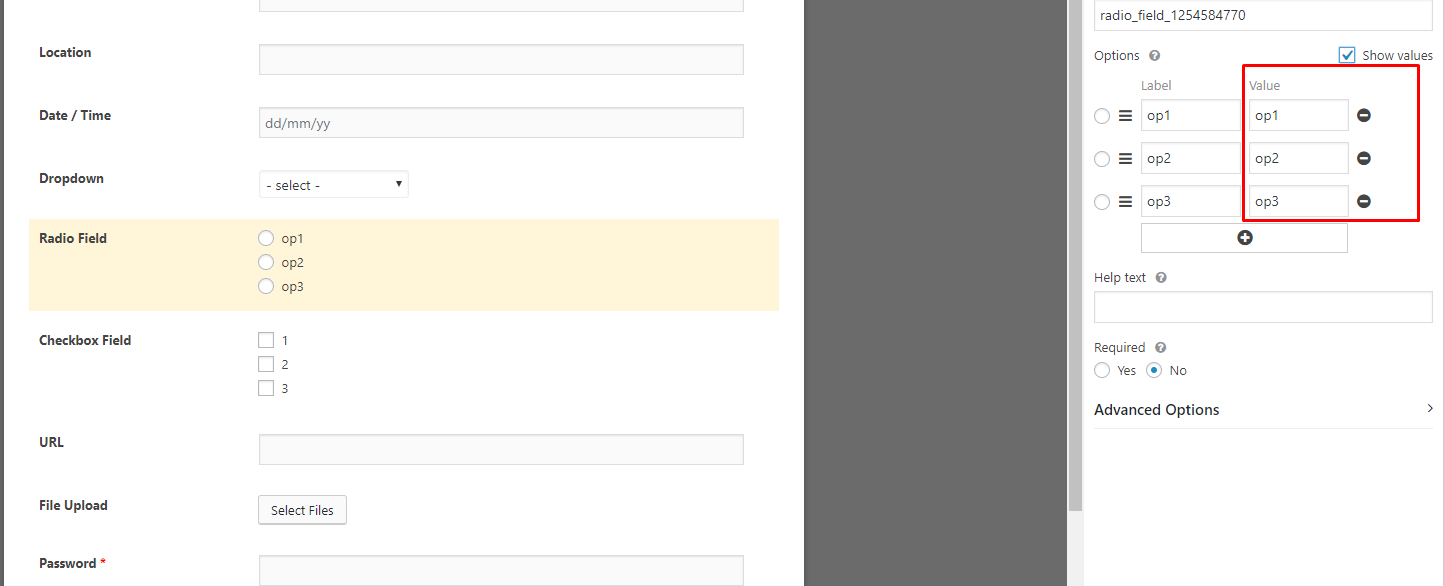
For Checkbox, Radio button, and Dropdown Fields…
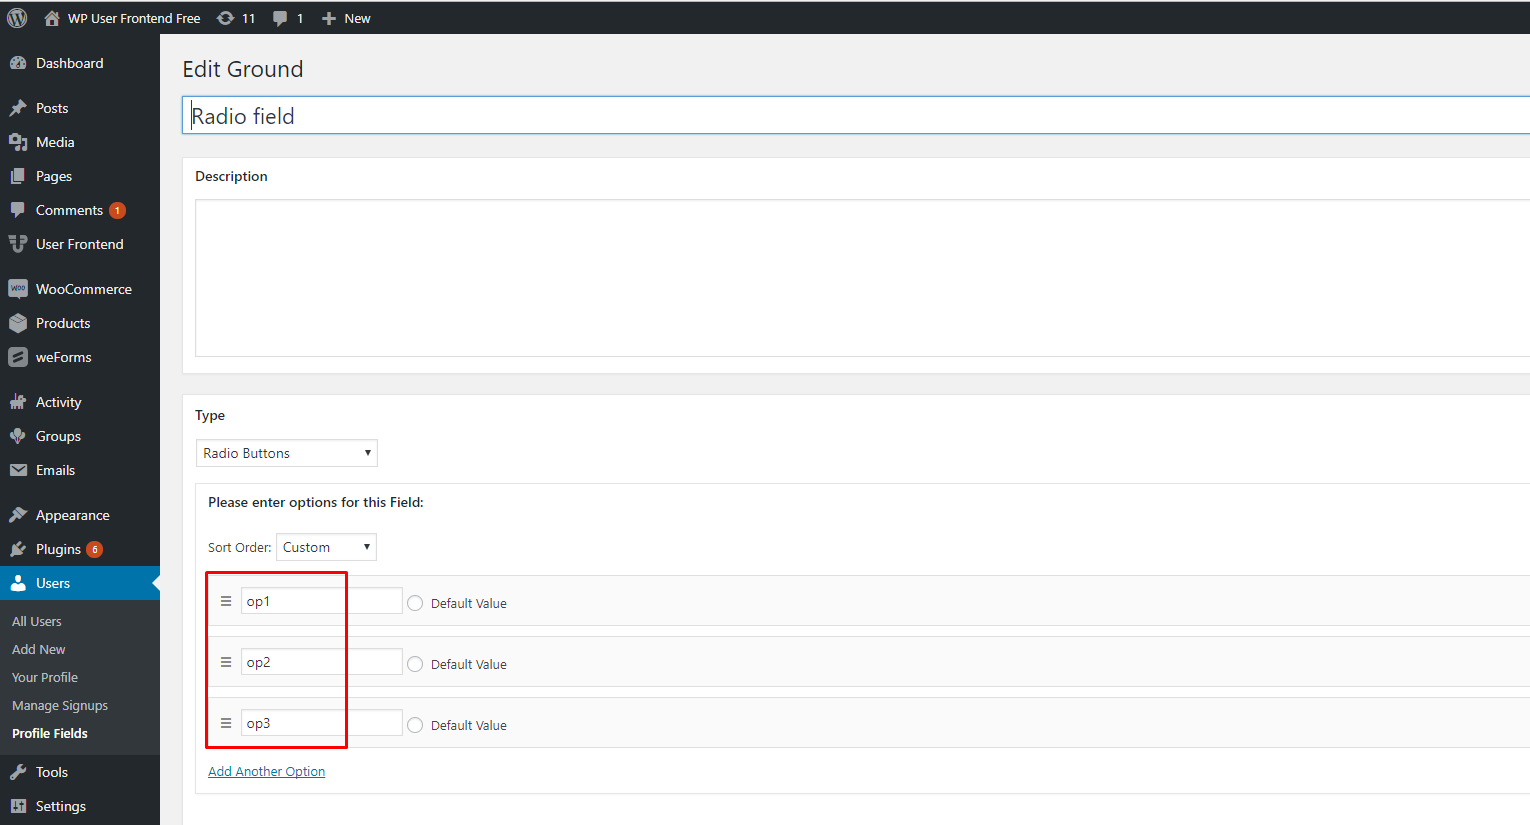
Custom fields like checkbox, dropdown, or radio button, need one extra setting. These fields need to have their meta_keys as same as Registration Forms > Settings > BuddyPress > BuddyPress Profile fields > edit field > Edit ground meta_keys. To do that, first, you need to show the values on the Registration form. Hover on the field and you will reach Field Options. Then you need to check this box to show value.
Now you have to paste the values of this radio field of the right side as same as the BuddyPress profile fields' edit ground. For that you have to navigate through Registration Form > Settings > BuddyPress > BuddyPress Profile Fields, like the screenshot below:
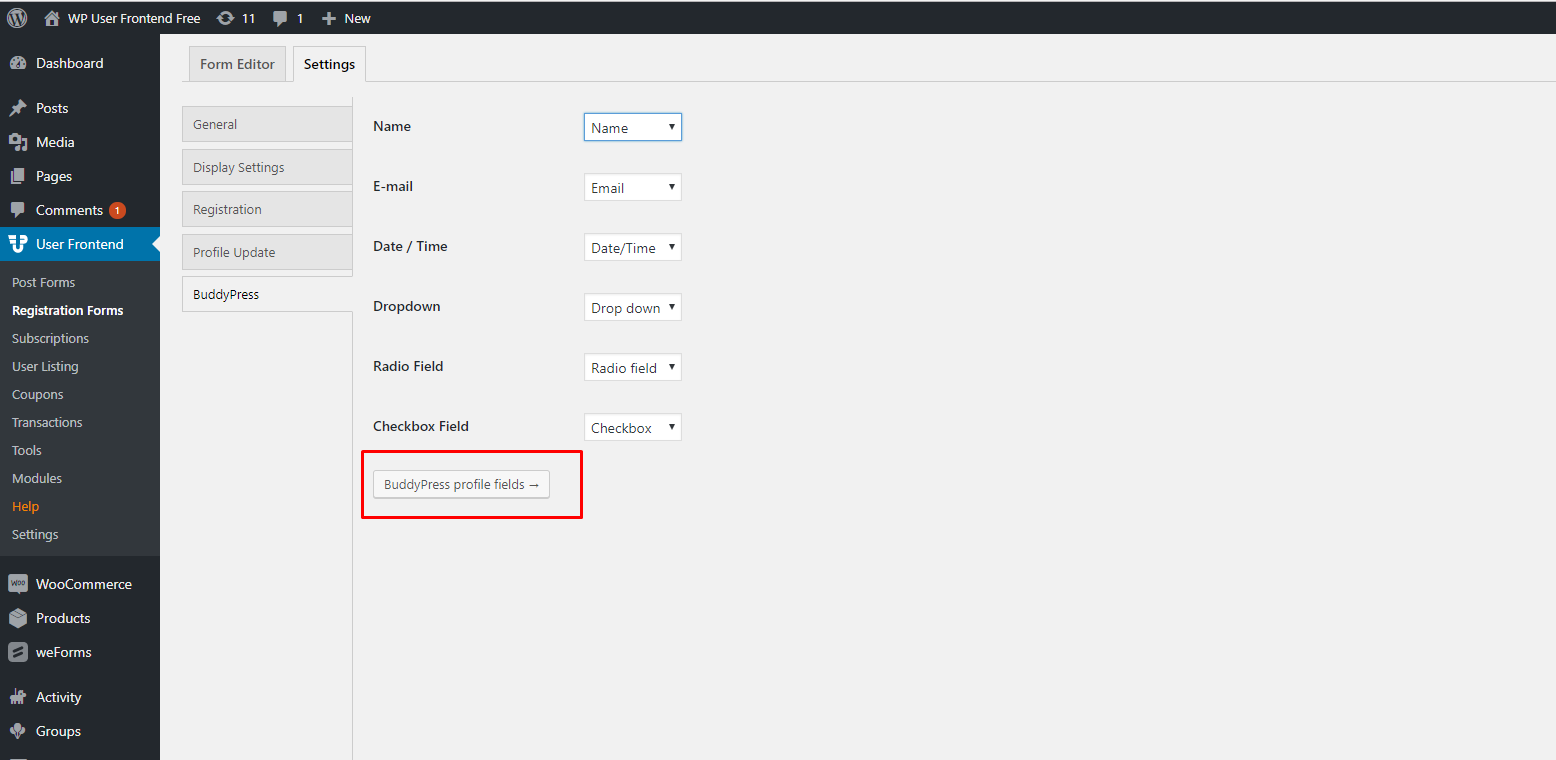
Now you have to set the values of the edit ground of the BuddyPress profile fields. Check out the screenshot below:
When you edit the profile field's edit field, you have to check that the values are the same as in Registration Field > Edit Field > Show Values.
After establishing integration
Note: You need to enable the Anyone Can Register for Membership function to proceed with the integration.
Navigate to wp-admin→Settings→General and enable the check-box Anyone can register, as shown below.
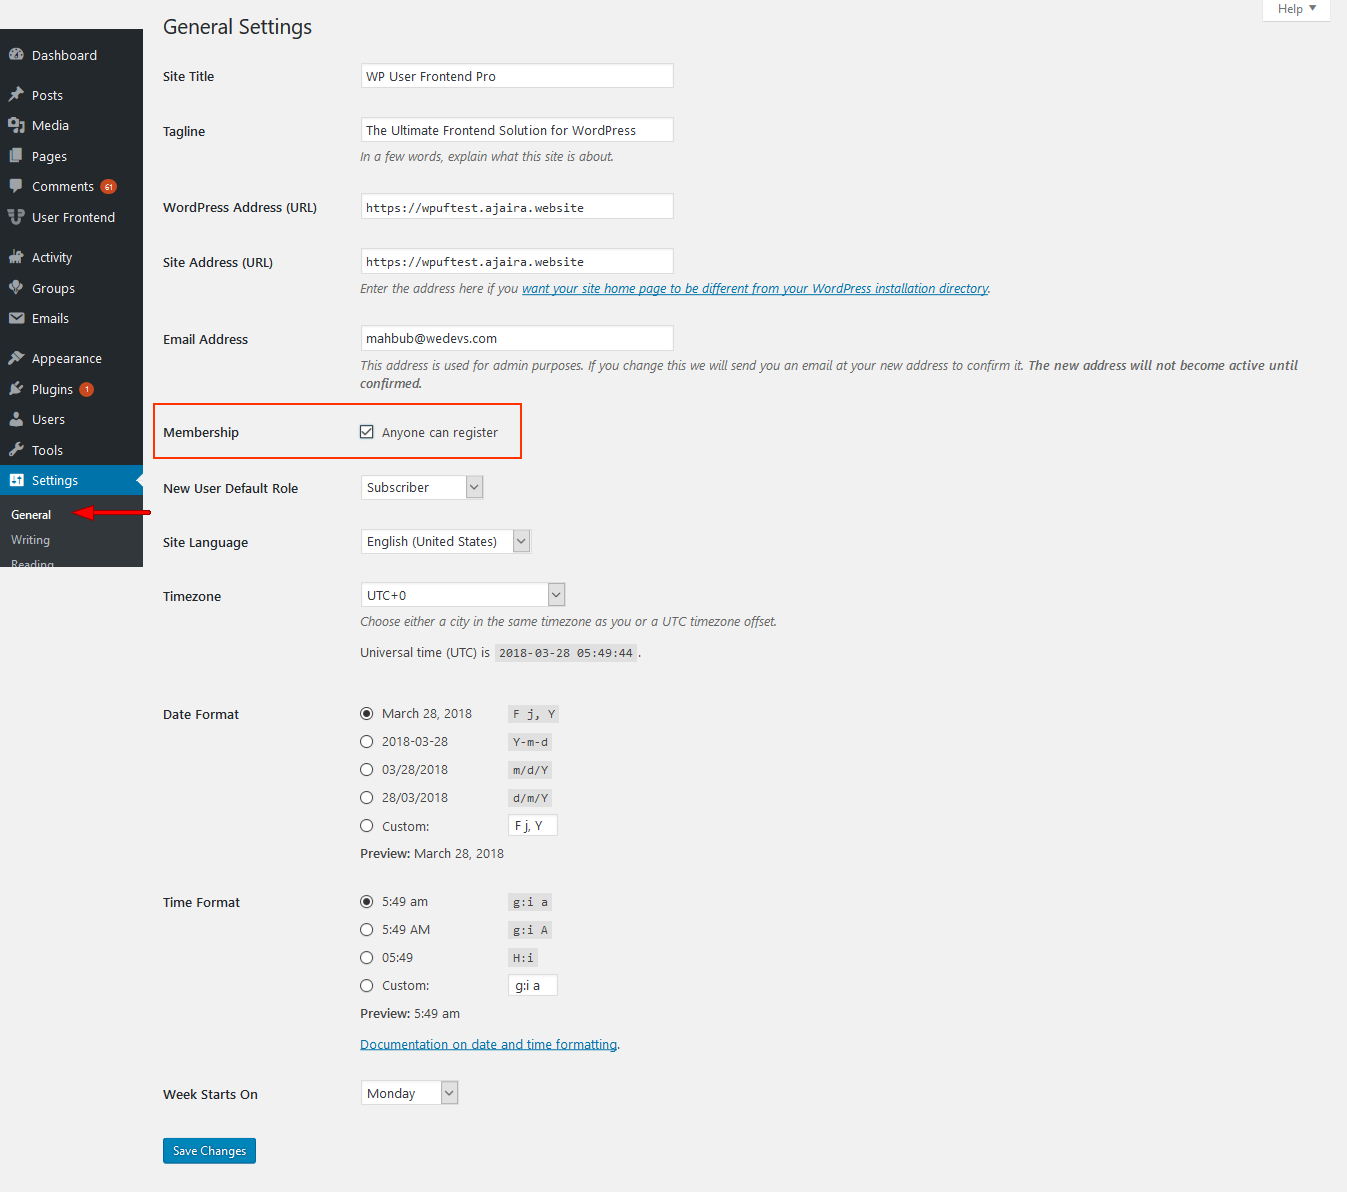
After you are done click on Save Changes.
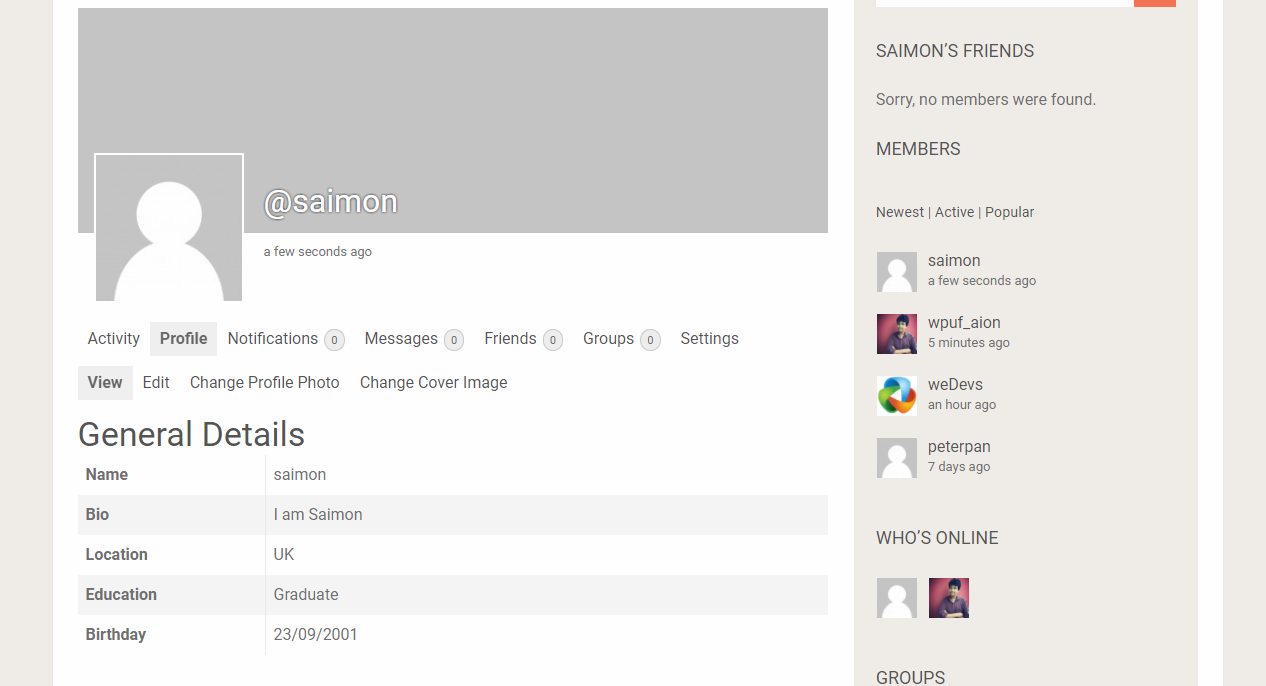
Here's how the form will look when you have created a WP User Frontend Pro registration form with BuddyPress Profile fields.
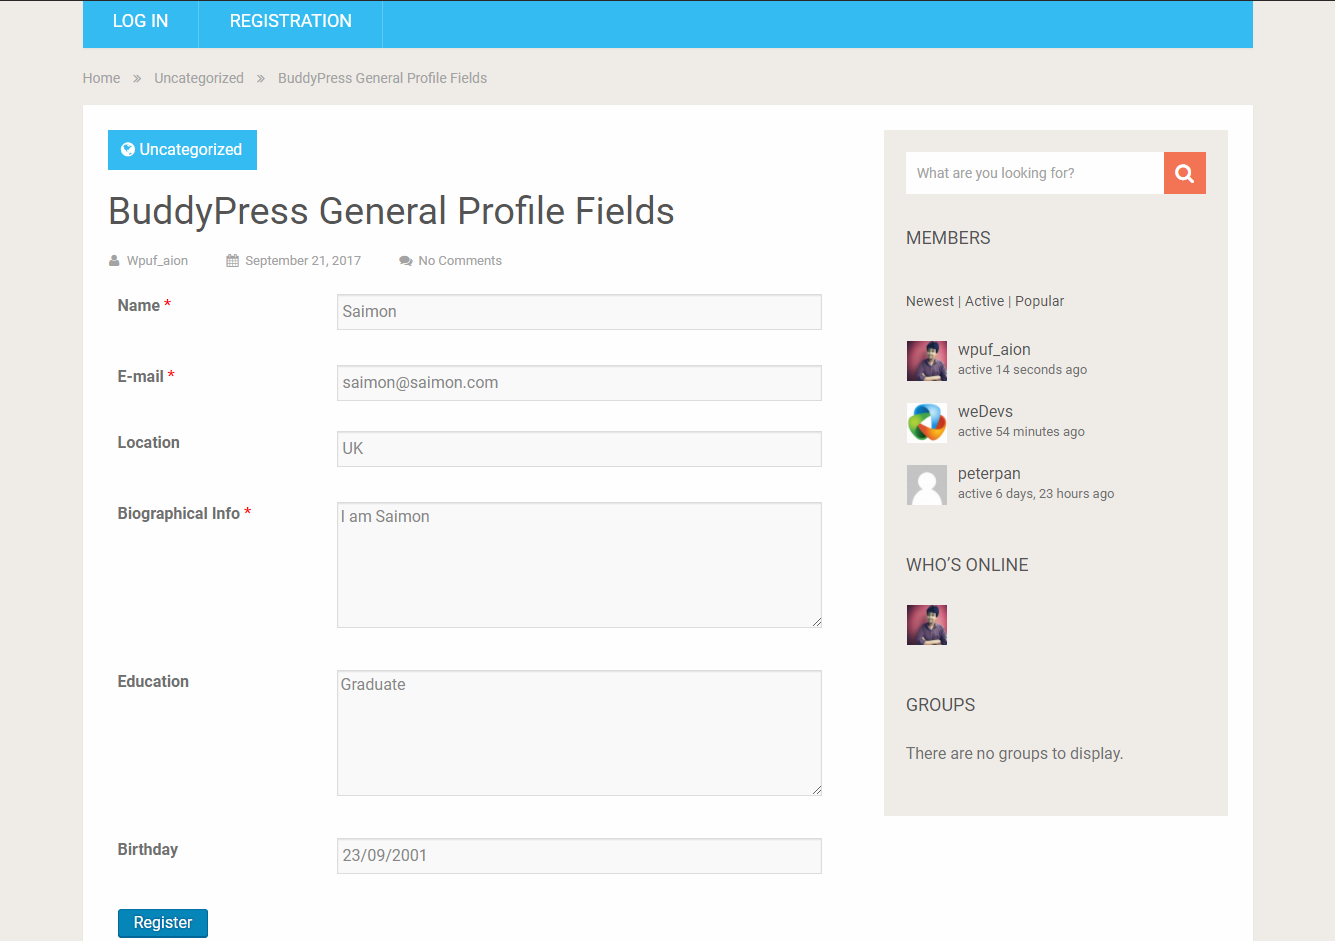
After submitting data, the BuddyPress profile will hold those data. You can even check them in the wp-admin → Users → Profile Fields.