How to Create an Admin Account
In order to provide the quickest support possible, it is helpful if you include an administrator account so our Support Engineers can look into the issue as soon as possible.
We recommend creating a temporary admin login that can be deleted once we are done. We are going to show you how.
Creating an Admin Account
Here is the process to create an admin account.
For non-WordPress.com hosting sites
To create an admin account, navigate to the WP Admin > Users > Add new screen. Create an account with the below-given credentials.
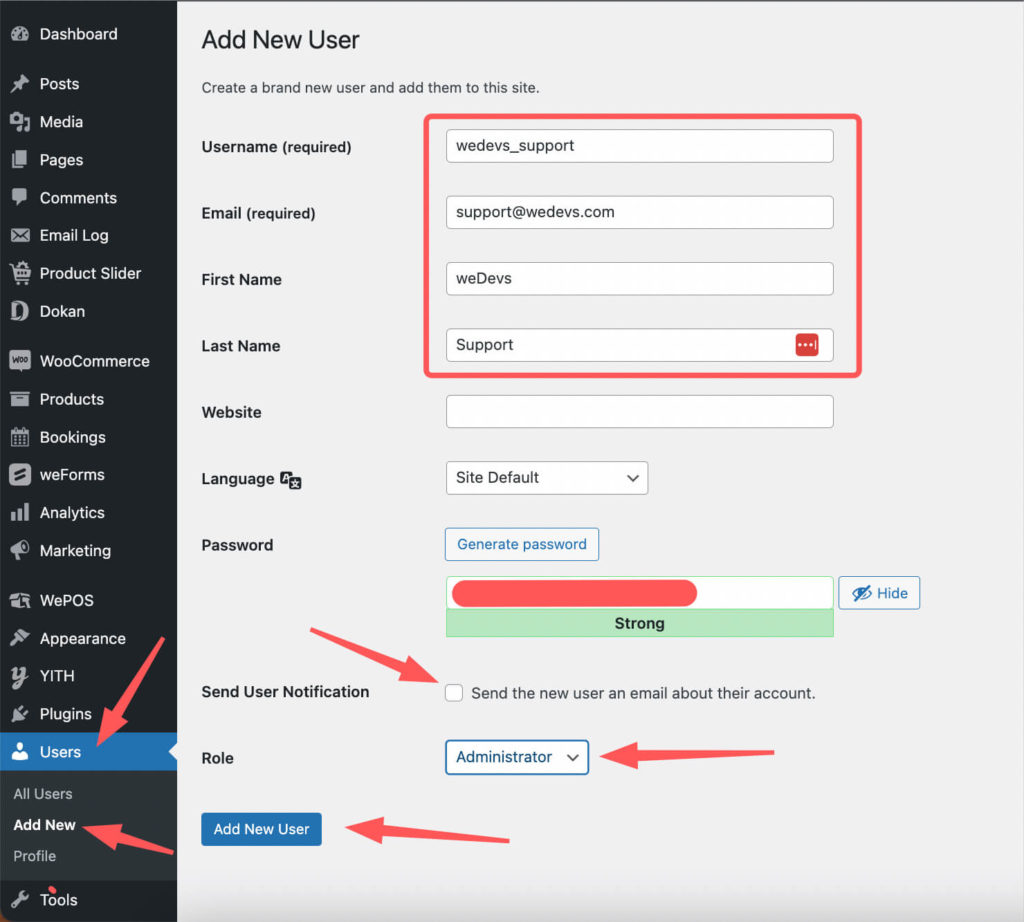
- Username (required): wedevs_support
- Email (required): support@wedevs.com
- First name: weDevs
- Last name: Support
- Password: Put a Strong password. DO NOT give any other person the password. Only provide the password asked by our Support Engineers.
- Send User notification: Un-ticked
- Role: Administrator
After creating the Admin user credentials, provide the Username and Password to our Support Engineers in the ticket only. They will proceed with the necessary testing to look into your site thoroughly to find out the issue.
For WordPress.com hosting sites:
Adding an admin user in WordPress.com hosting is a little bit different than adding a user in non-WordPress.com-based hosting sites. Please follow the steps described in the below-given link to add an admin user account.
Read: How to add an admin account to your wordpress.com hosting
Delete user account
Once the issue is resolved and you no longer need the account, go to Users > All Users screen, then click the username of the account and Delete.
For security reasons, we recommend doing this as soon as the interaction with our support team is finished.