How to Create Categories in WP Project Manager
Project categories specify what kind of project you are creating or working on. You must create a project category before creating a project. This is why it is very important to create several project categories. It will allow your users to specify project categories while creating new ones easily.
In this documentation, we will learn how to create and manage project categories.
Creating Project Categories
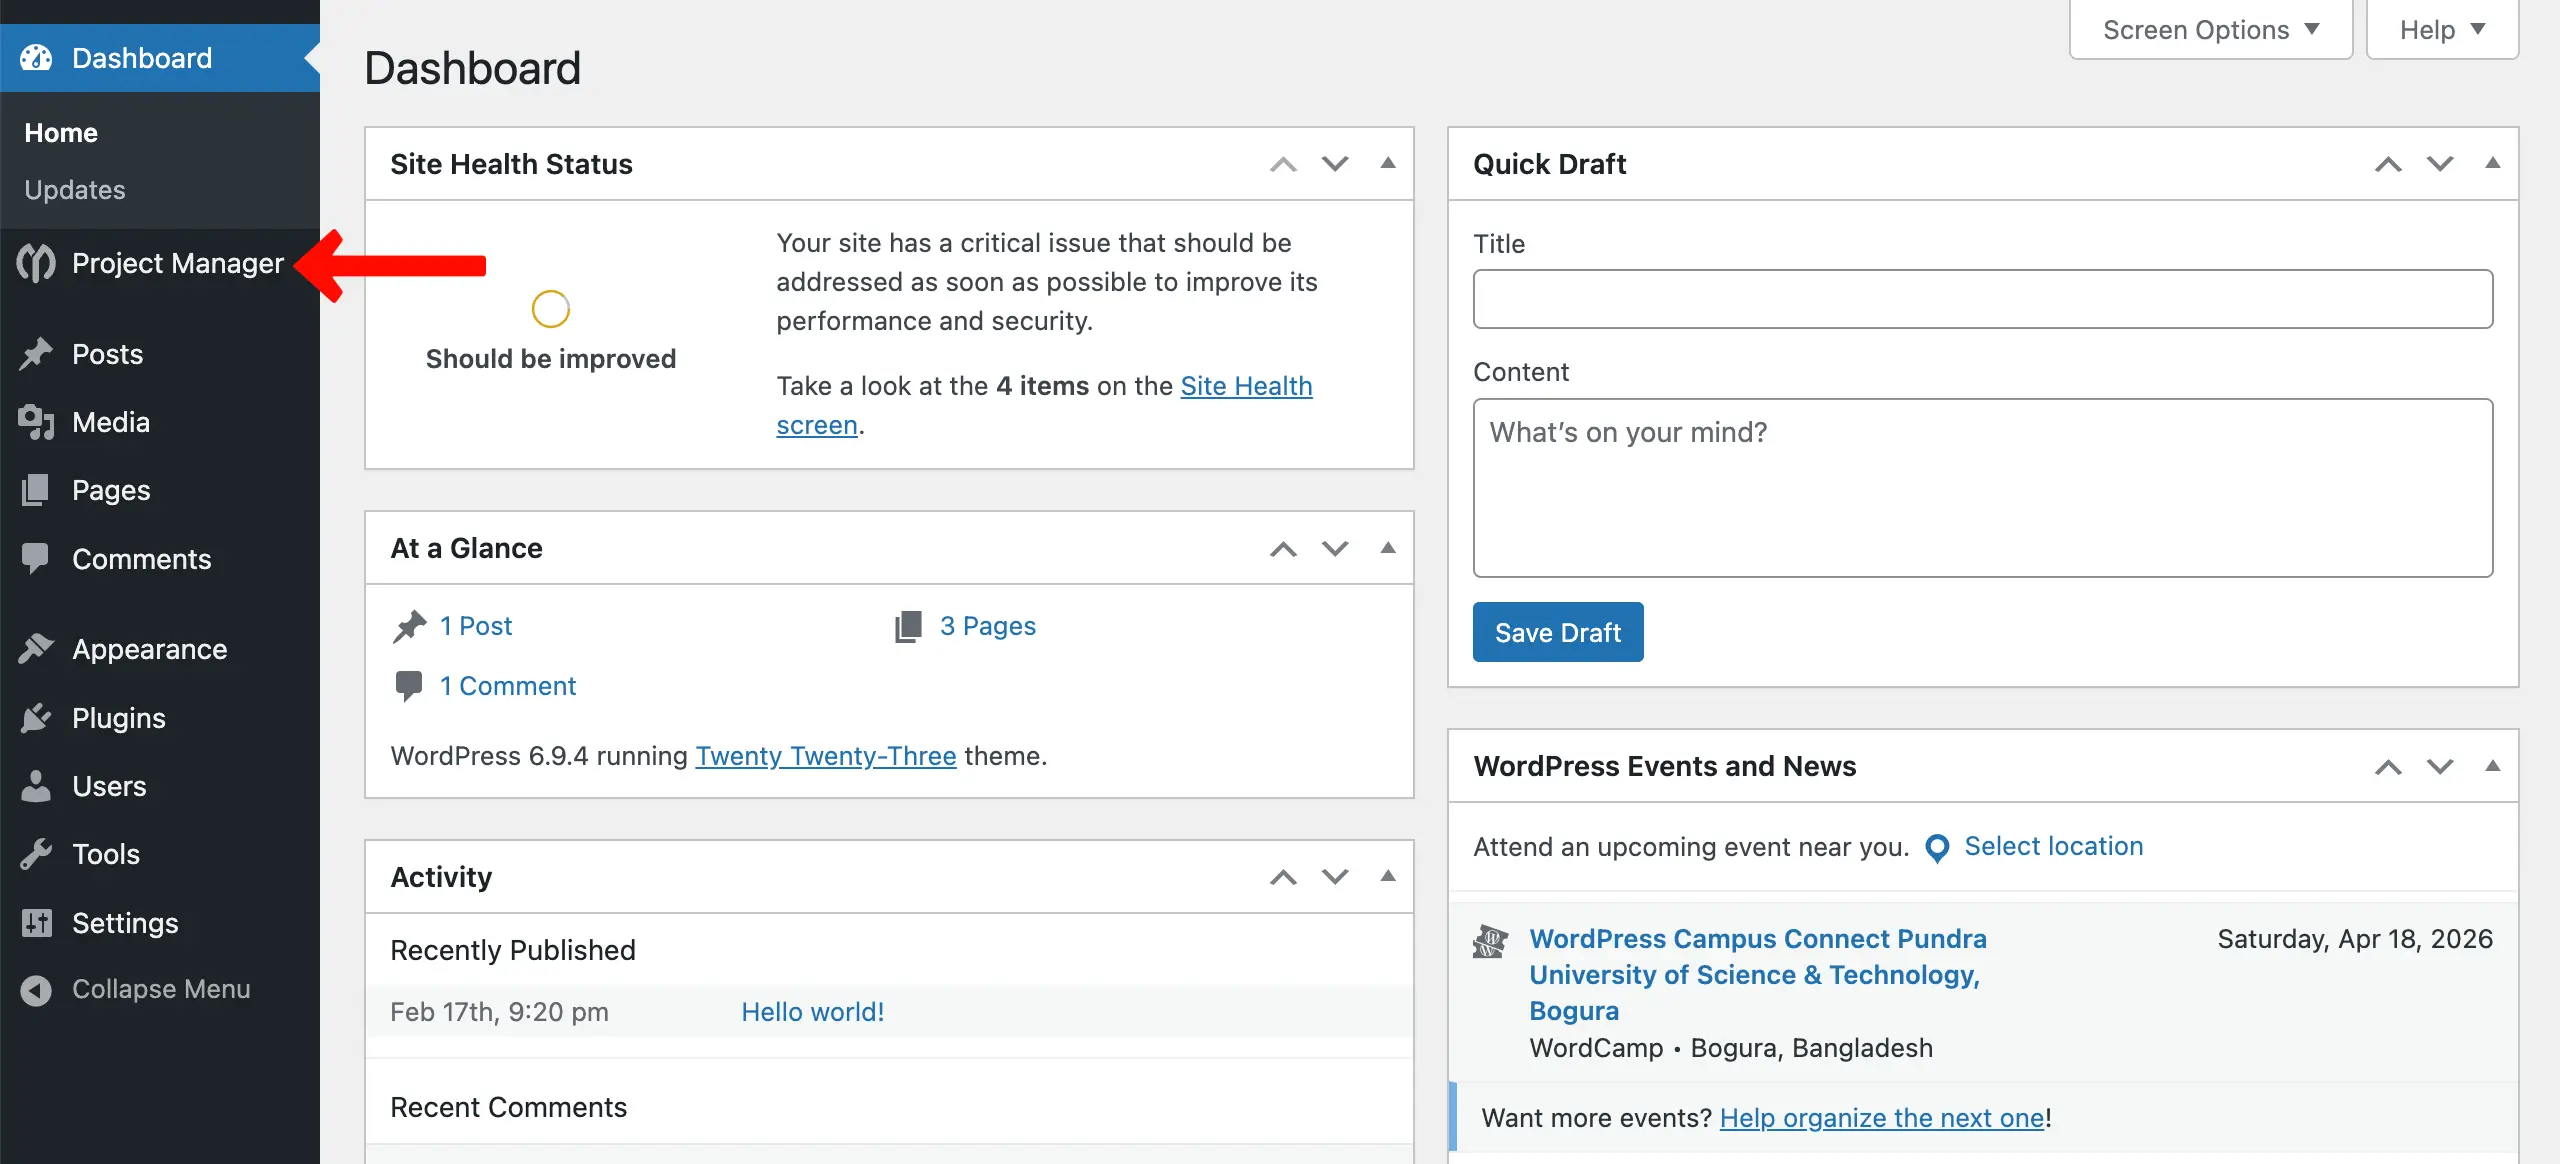
To create a new project category, navigate to WP-Admin → Project Manager. You'll be taken to a new interface.
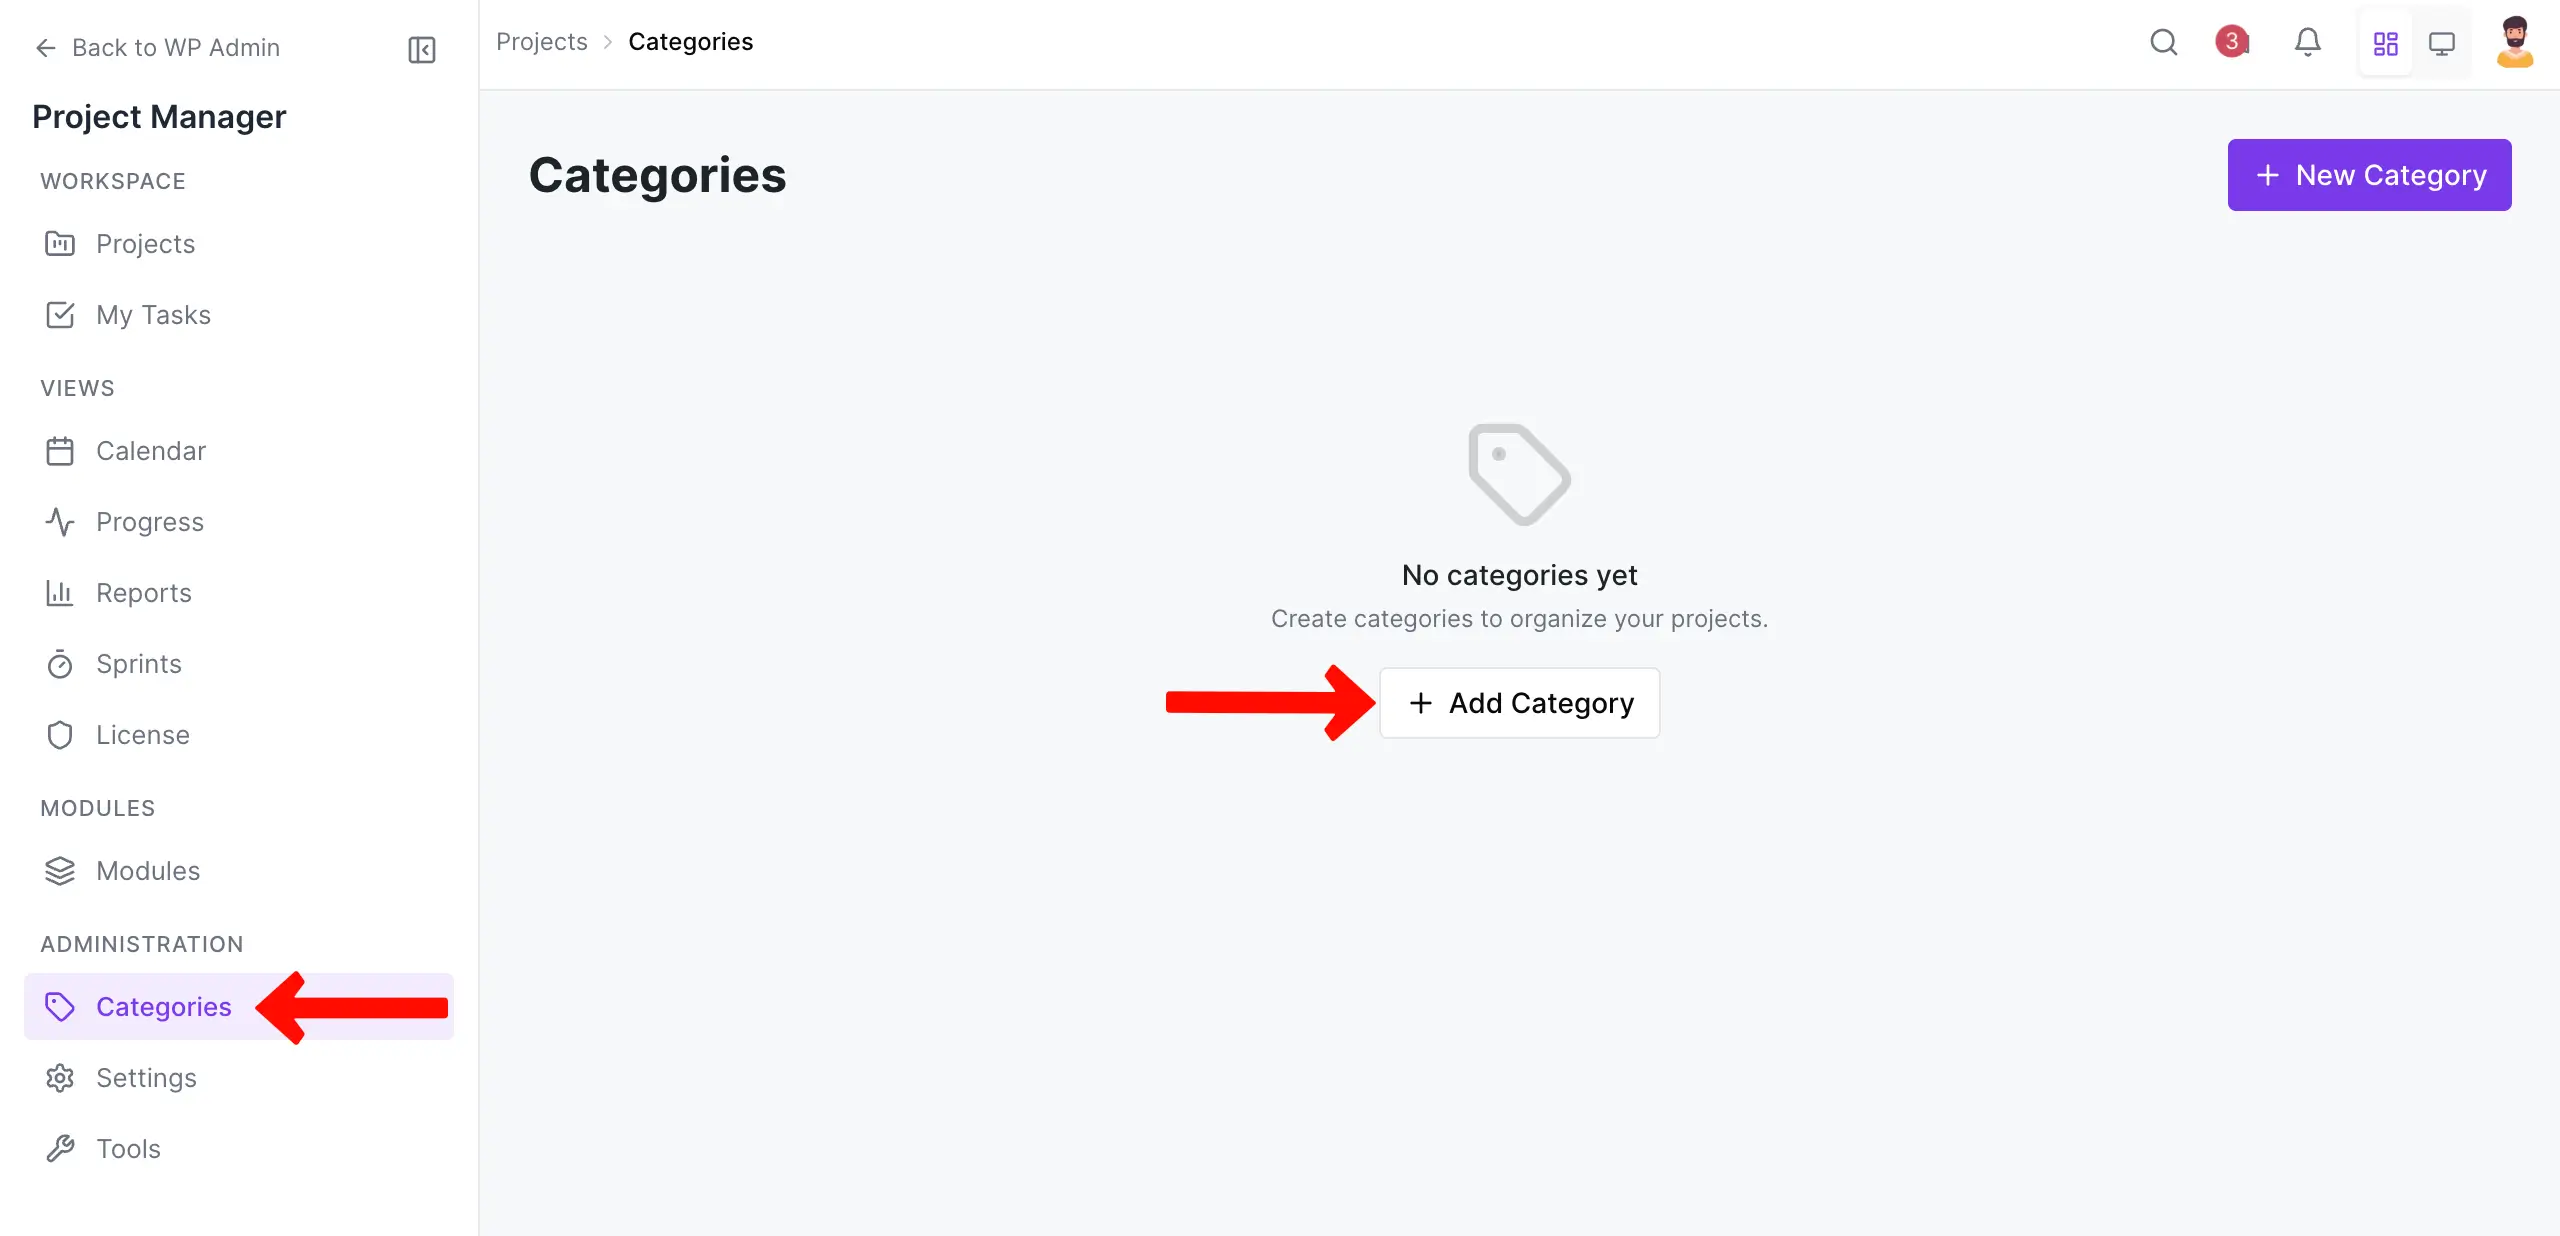
Scrolling down the left sidebar, come to the Categories option. Then, hit the + Add Category.
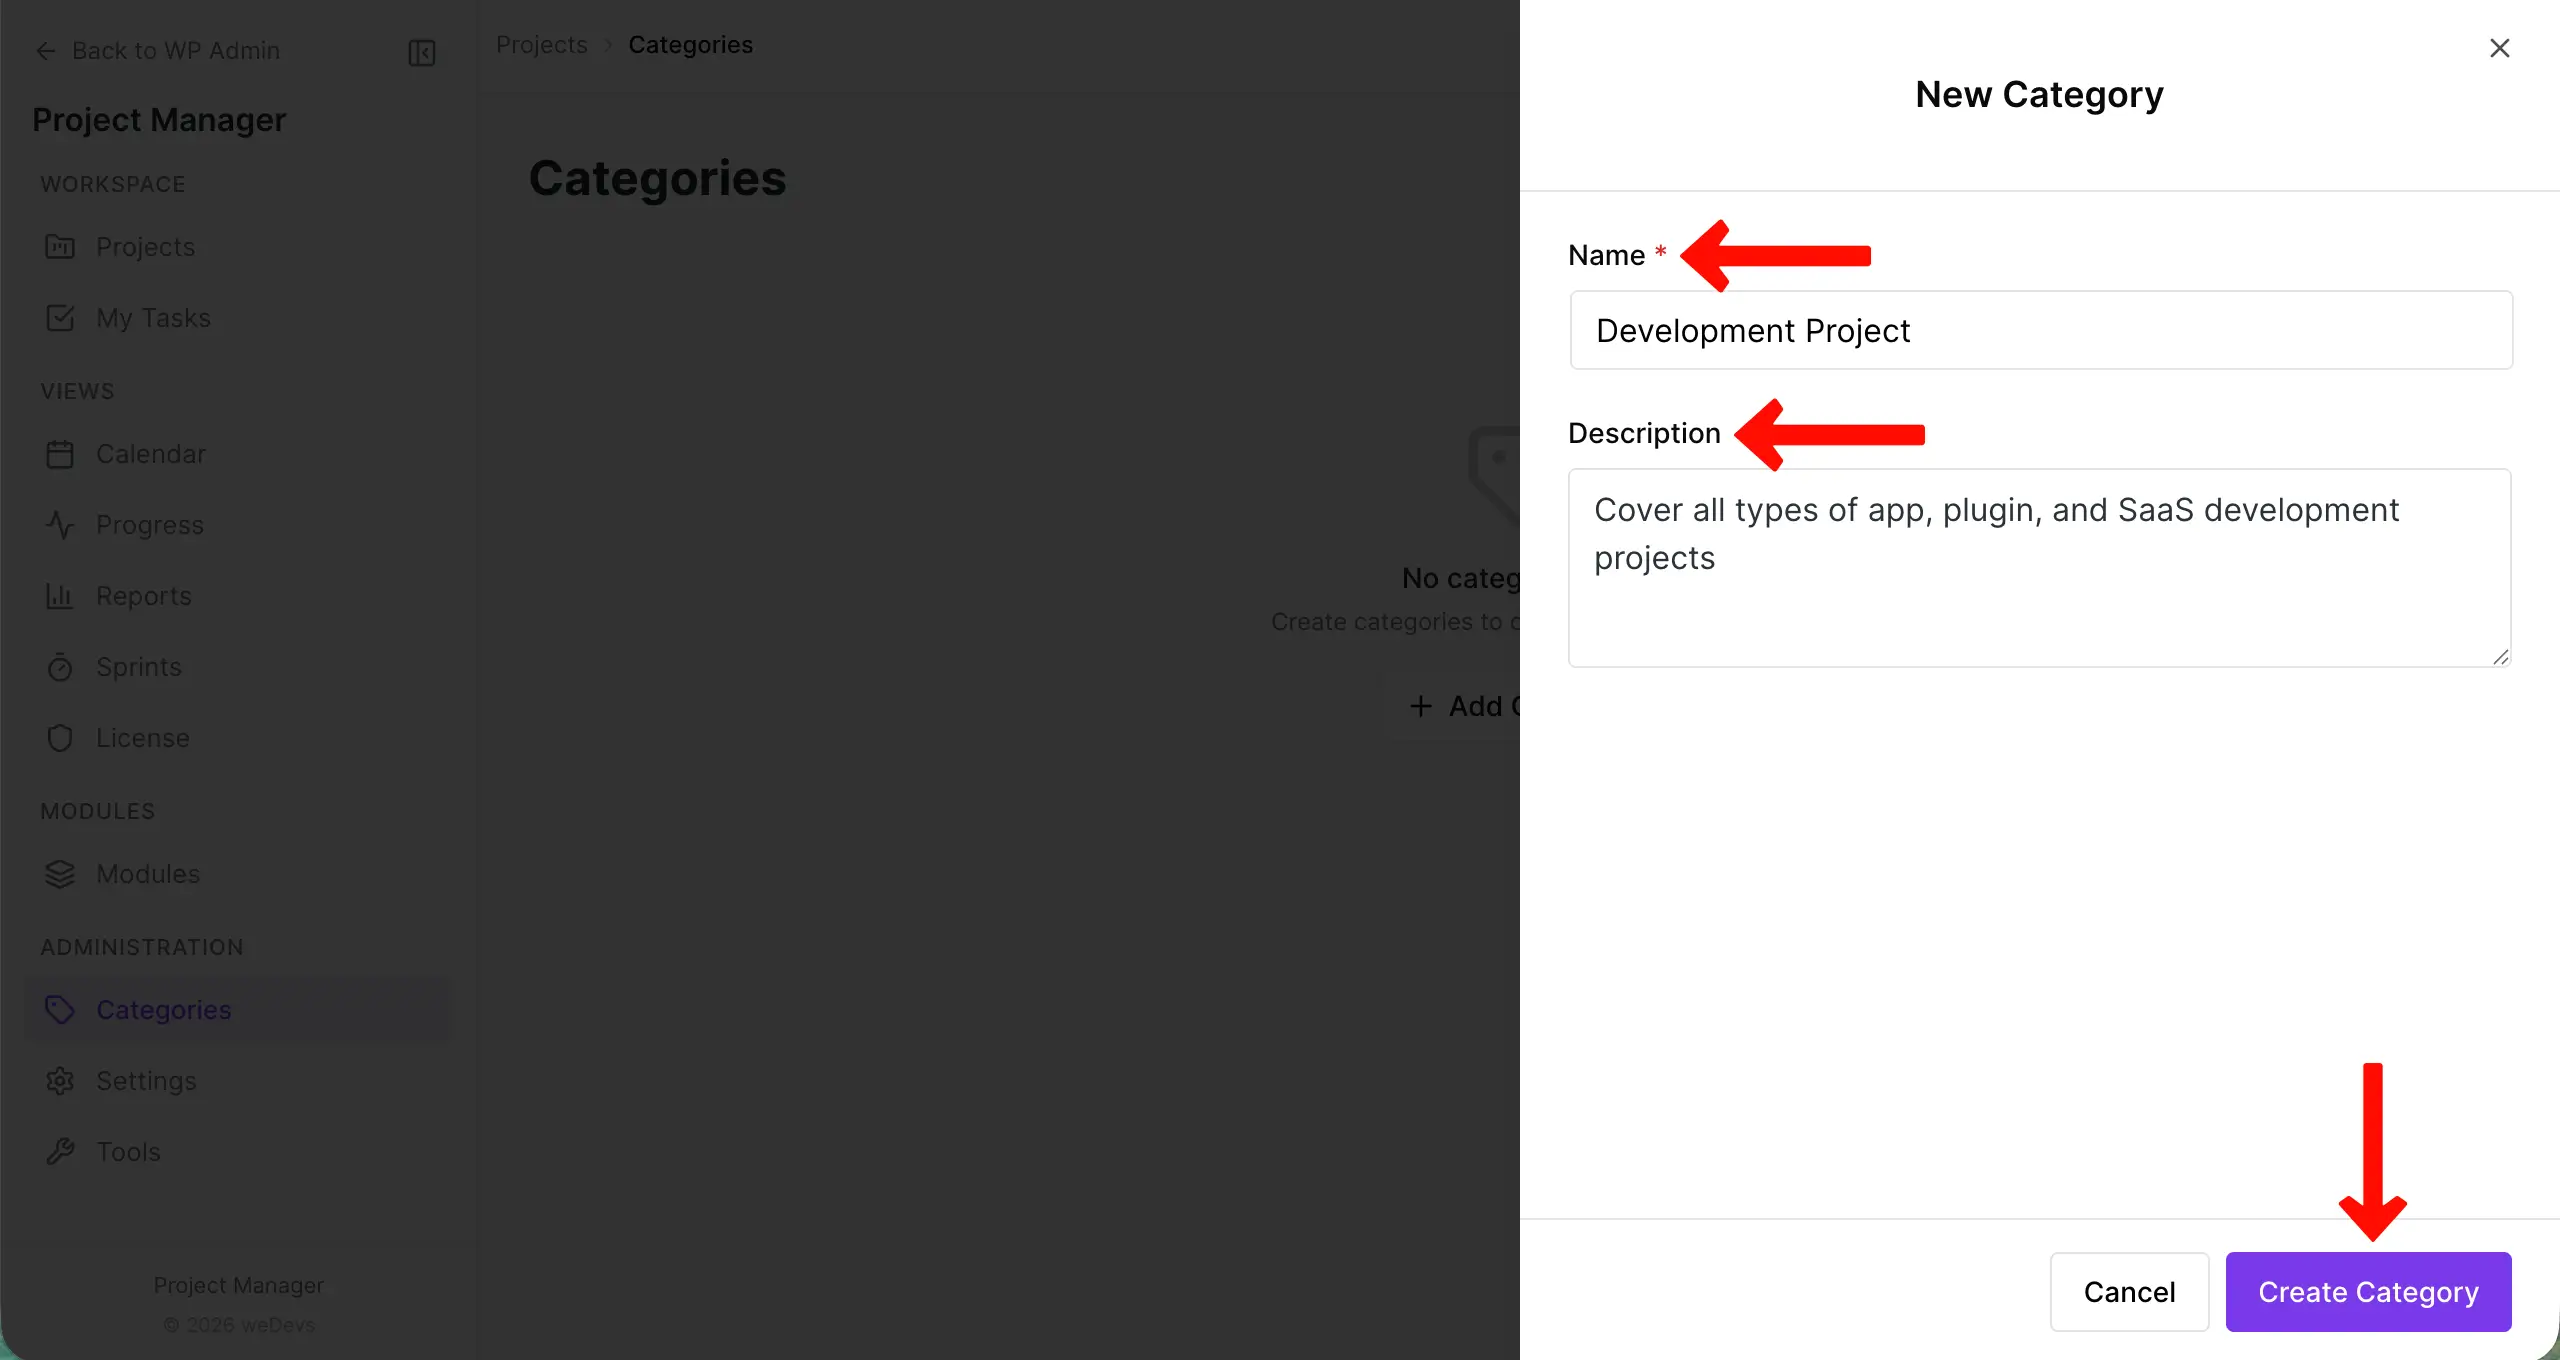
A sidebar will open up on the right side. Write a name for the project and a short description. Hit the Create Category button in the end.
In the same way, you can create as many categories as you want.
Editing Project Categories
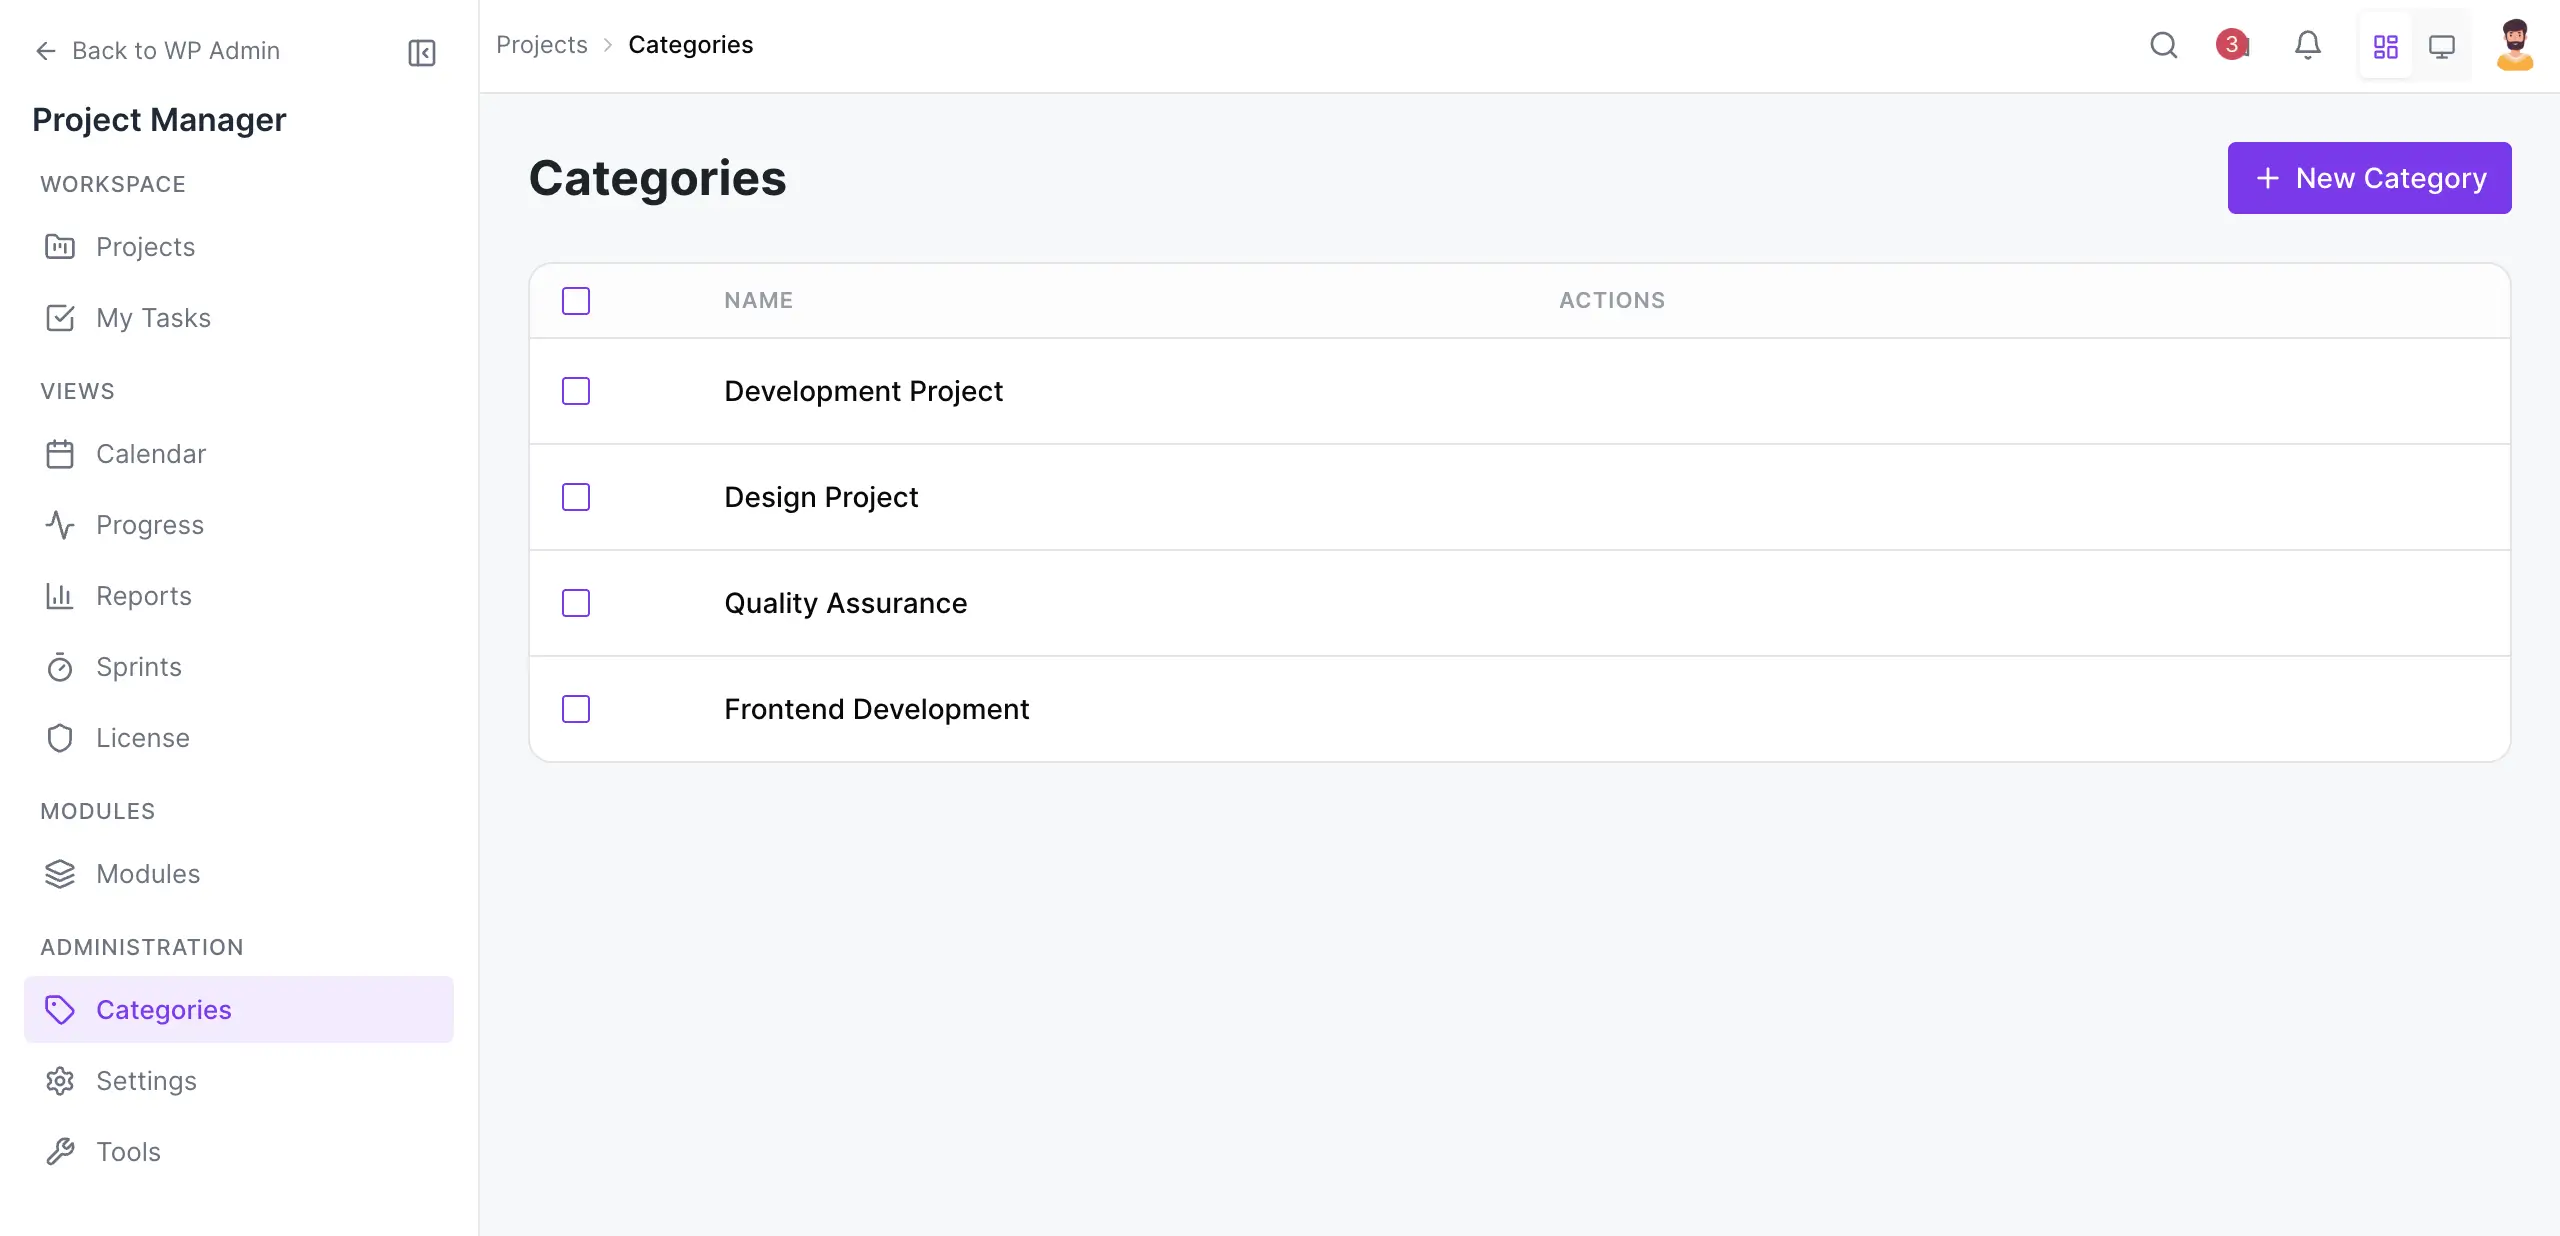
You can also customize project categories if needed. To do so, navigate to WP-Admin → Project Manager → Categories.
Hovering the cursor on the project will show a three-dot icon.
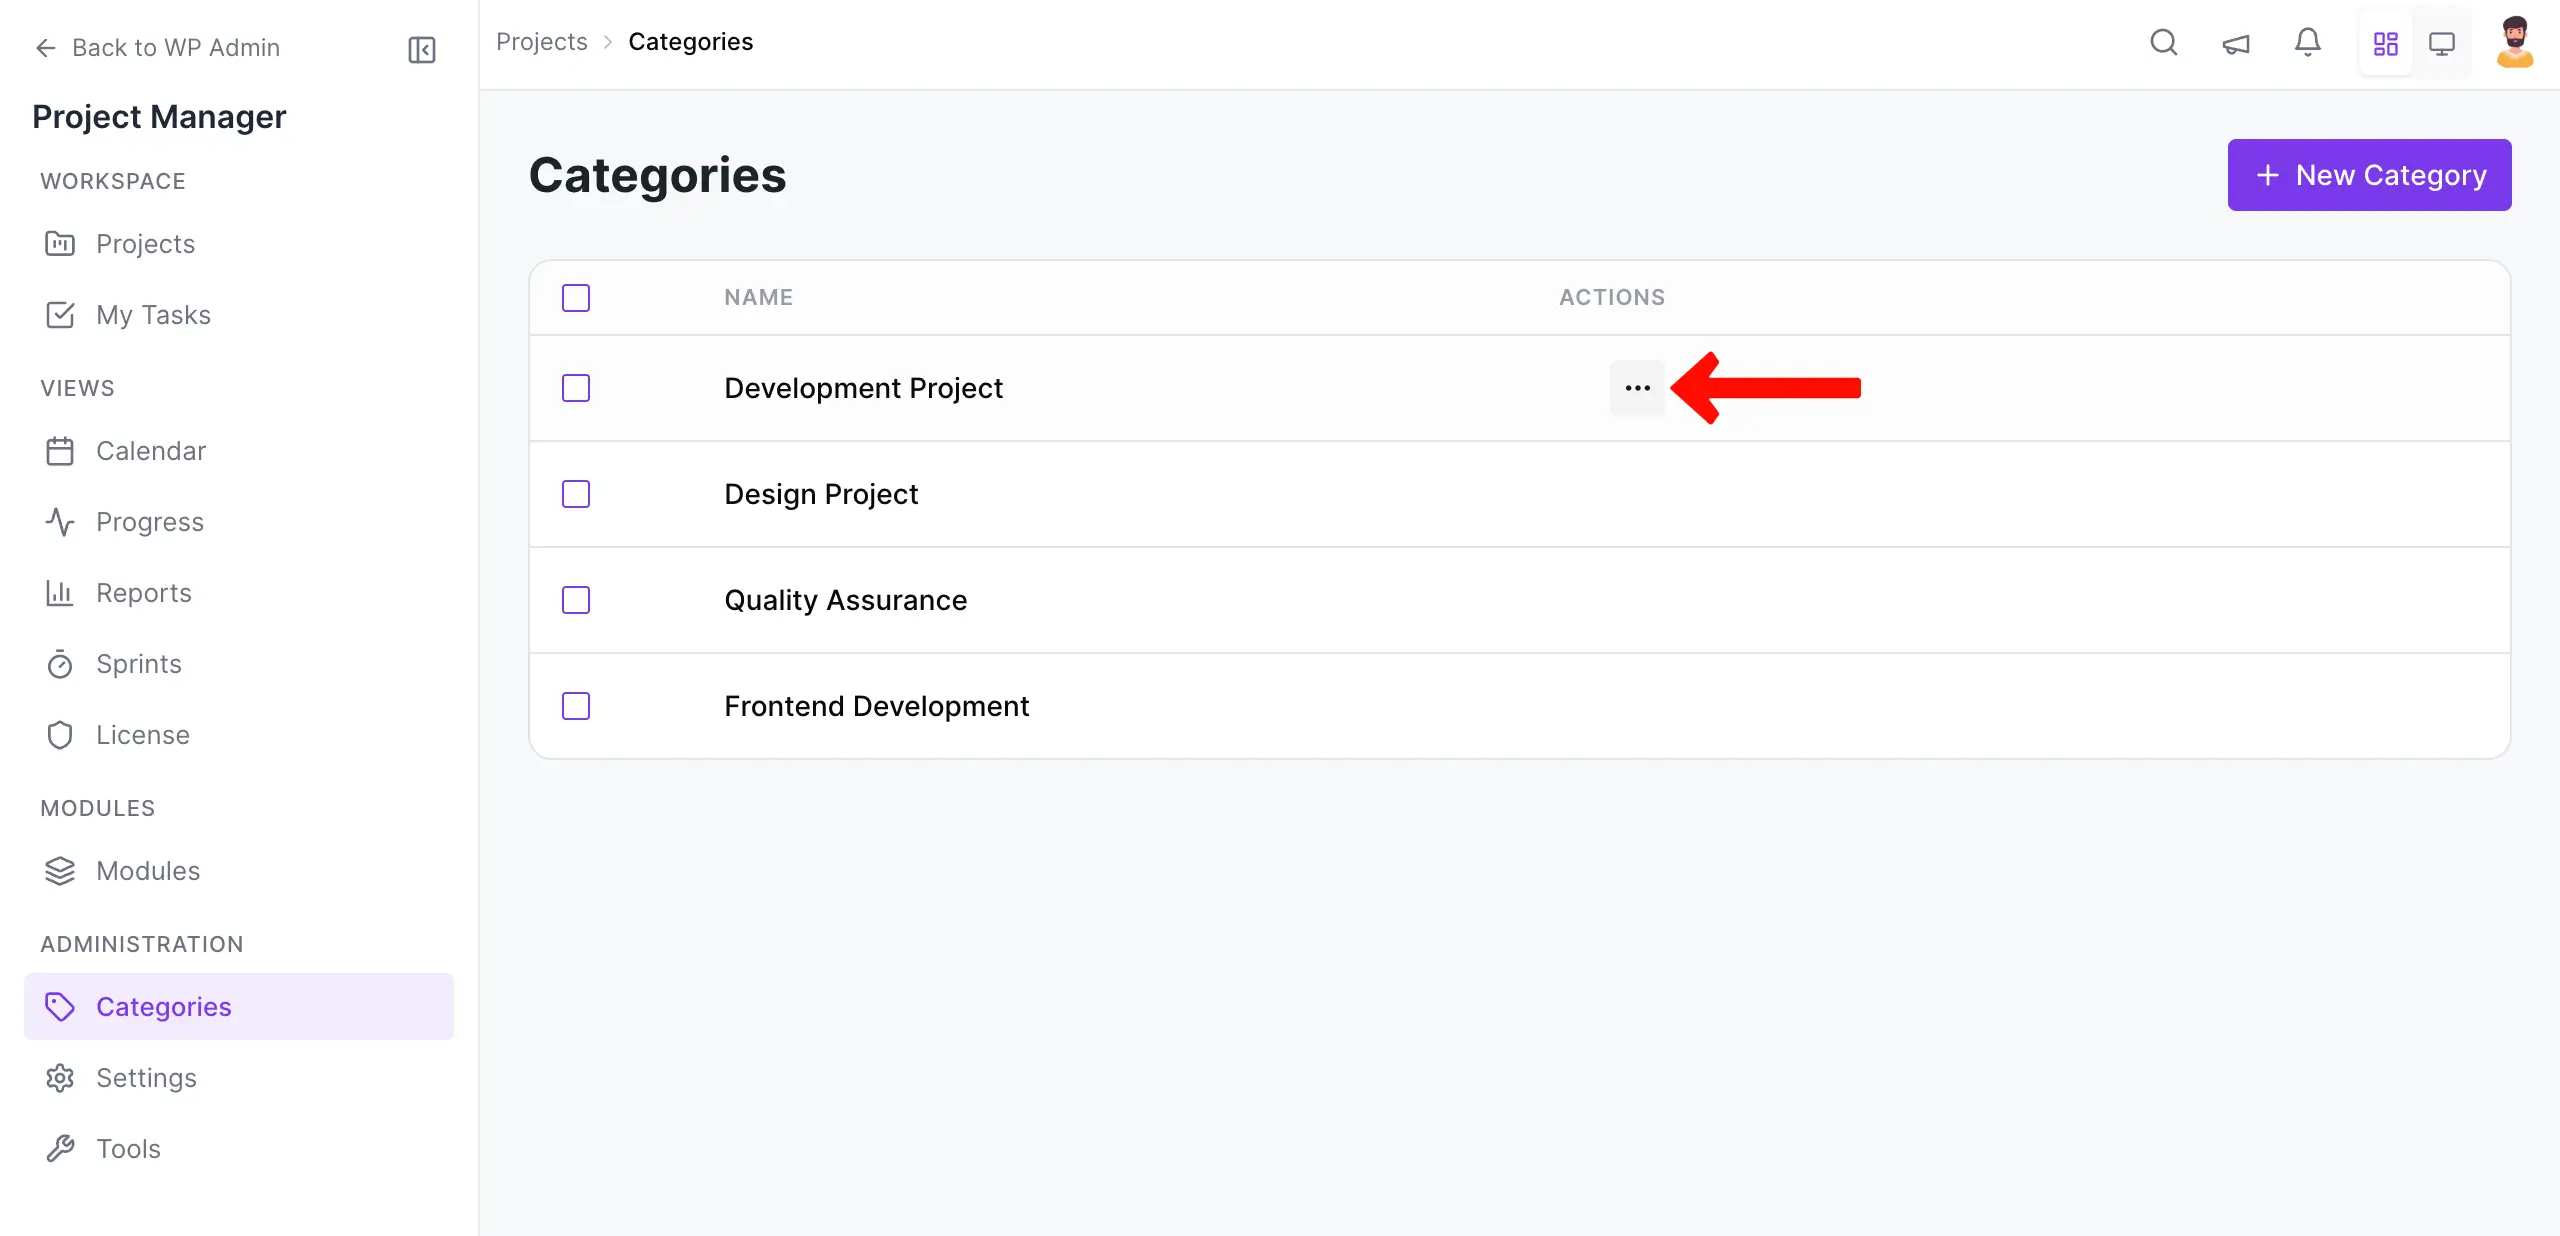
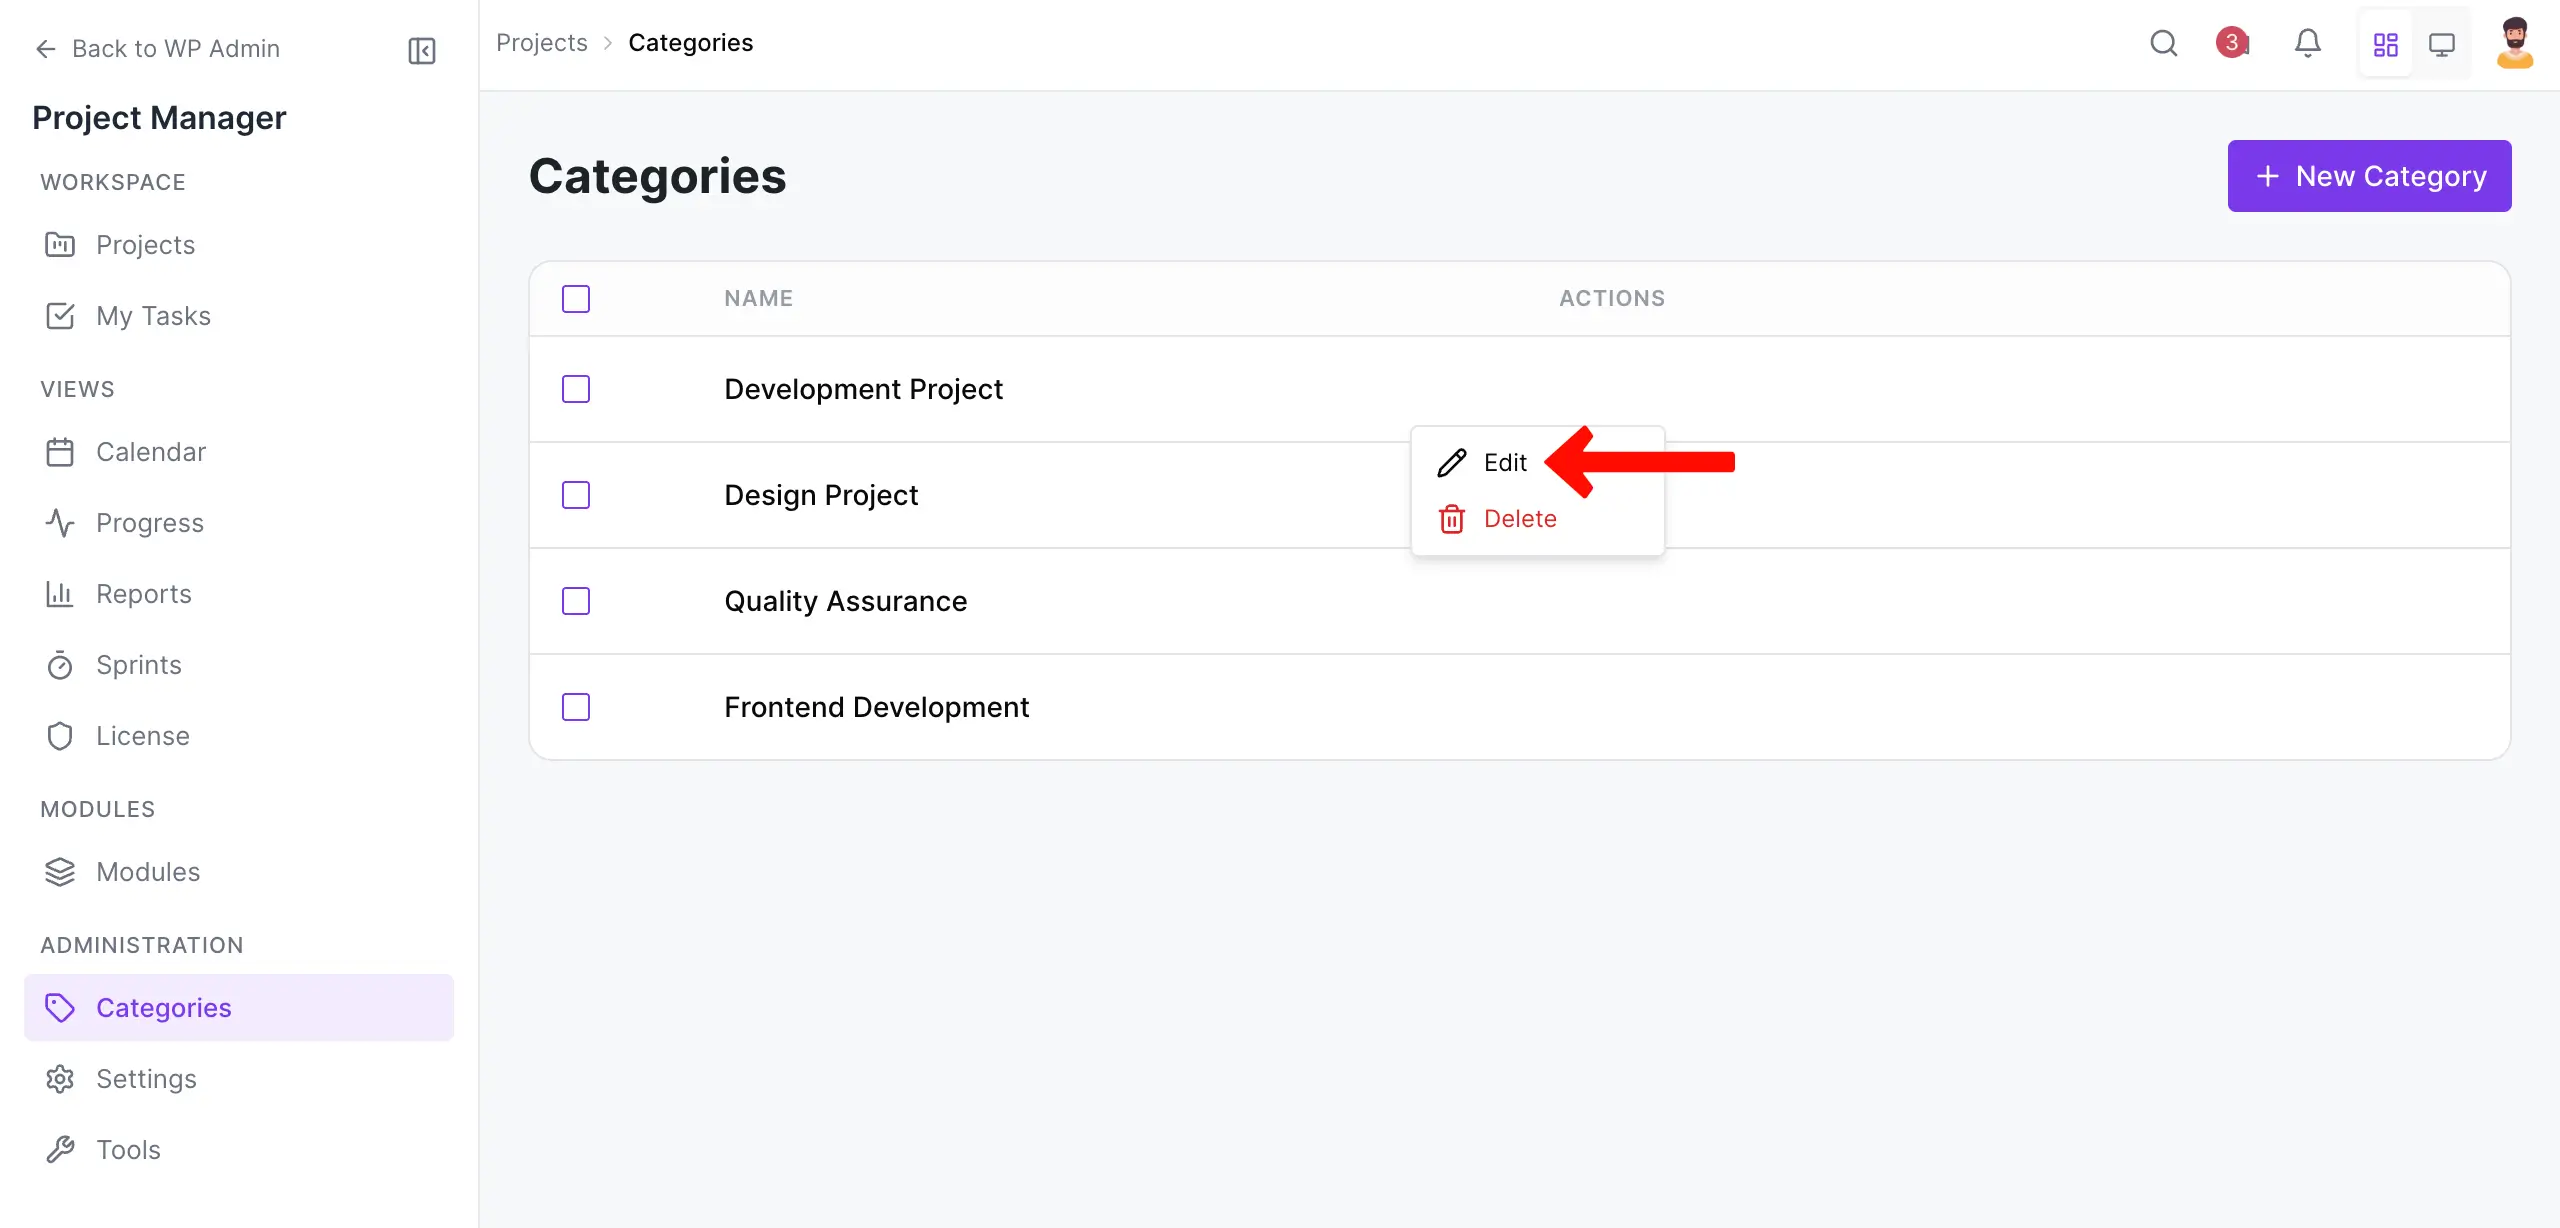
Clicking the three-dot icon will show you the Edit option. Click on Edit.
Hover over the project you want to edit and click the ‘Edit' button.
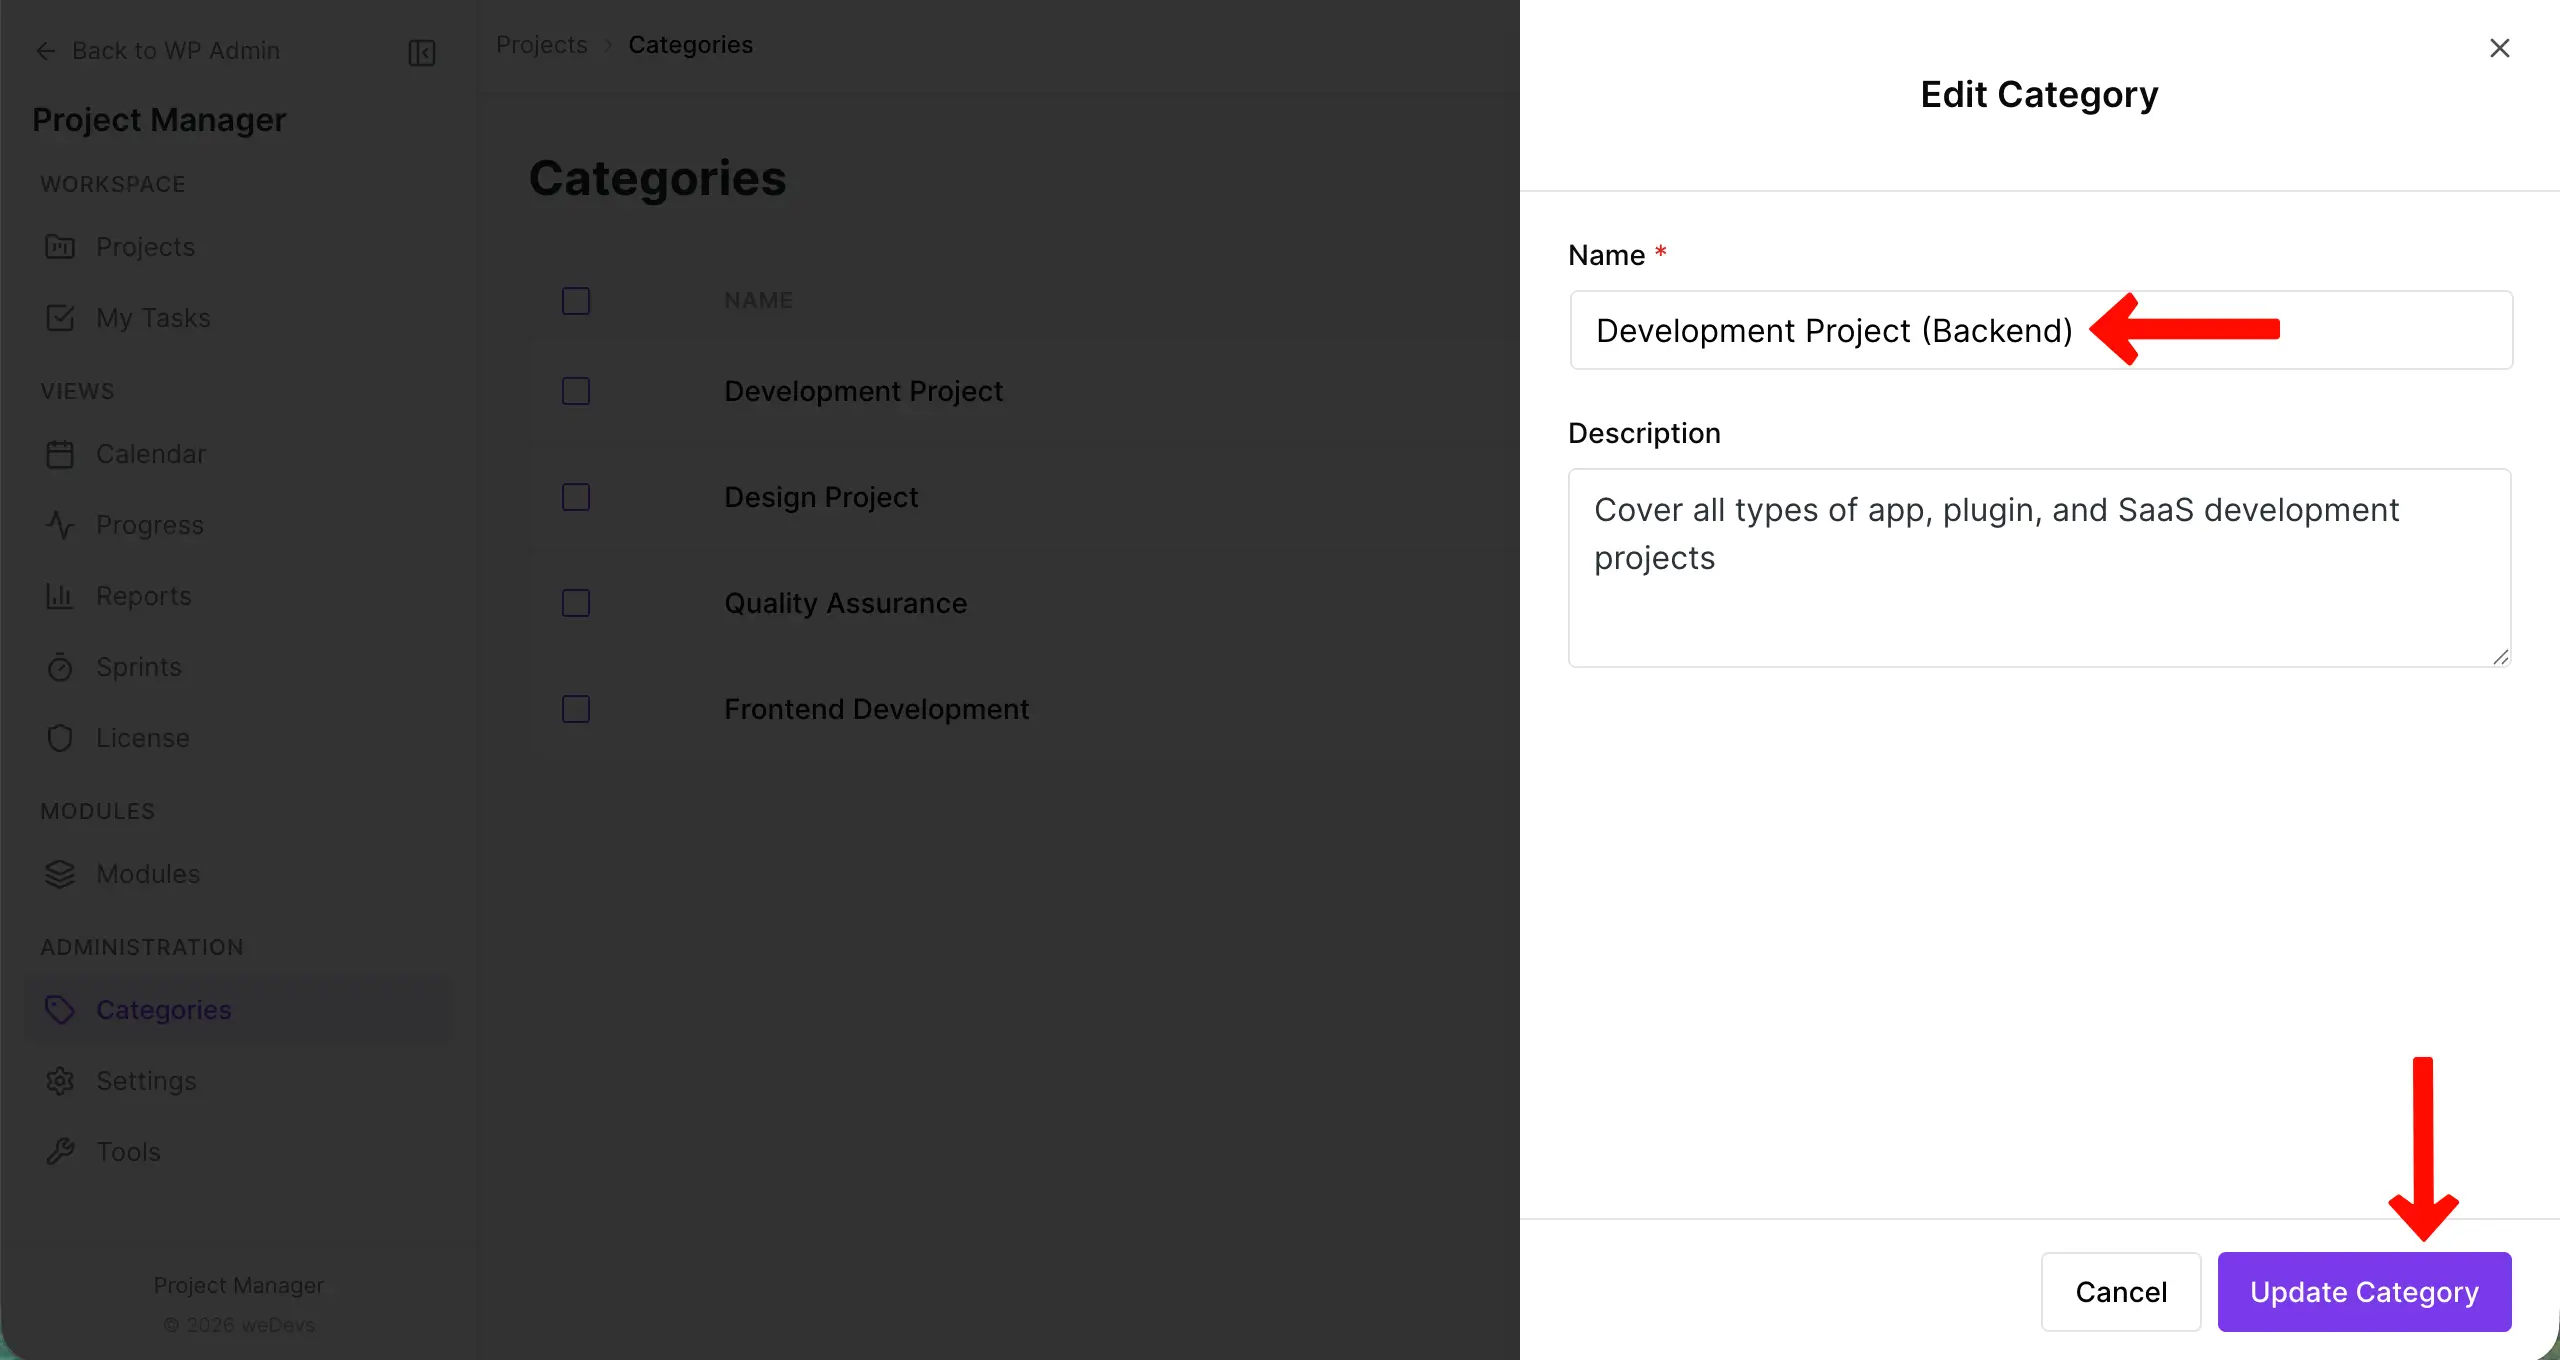
Now, you will find the Categories editing page. From here, you can edit the product name and the description. When you finish editing, click on the ‘Update Category' button. To cancel editing, click on the ‘Cancel' button.
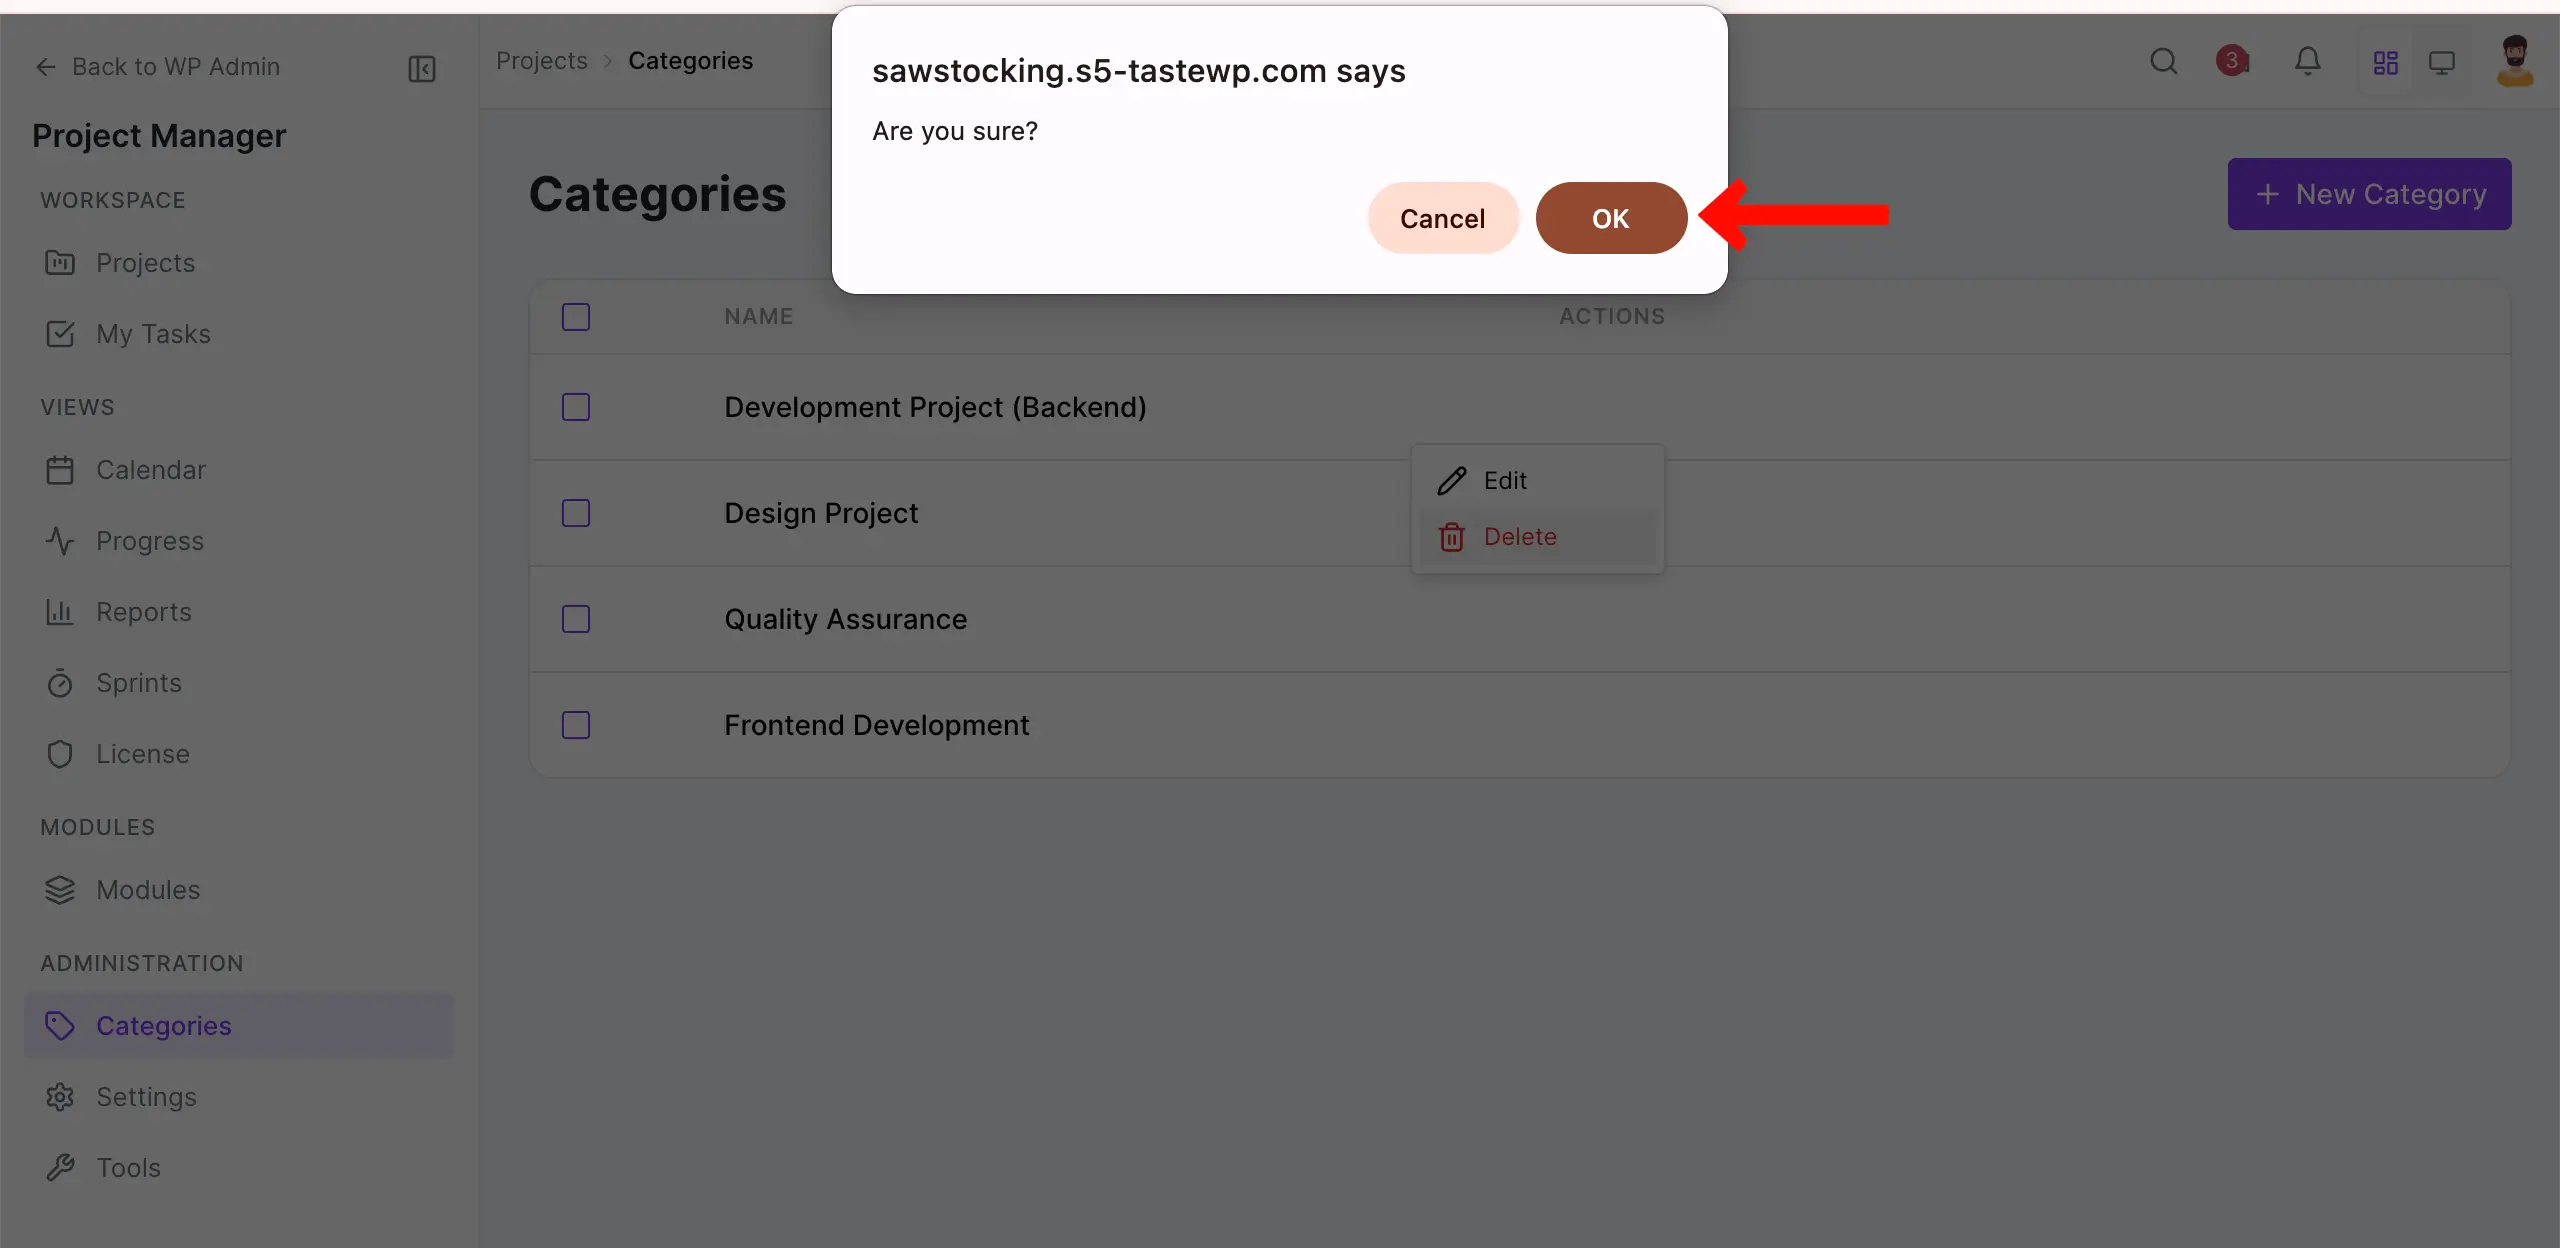
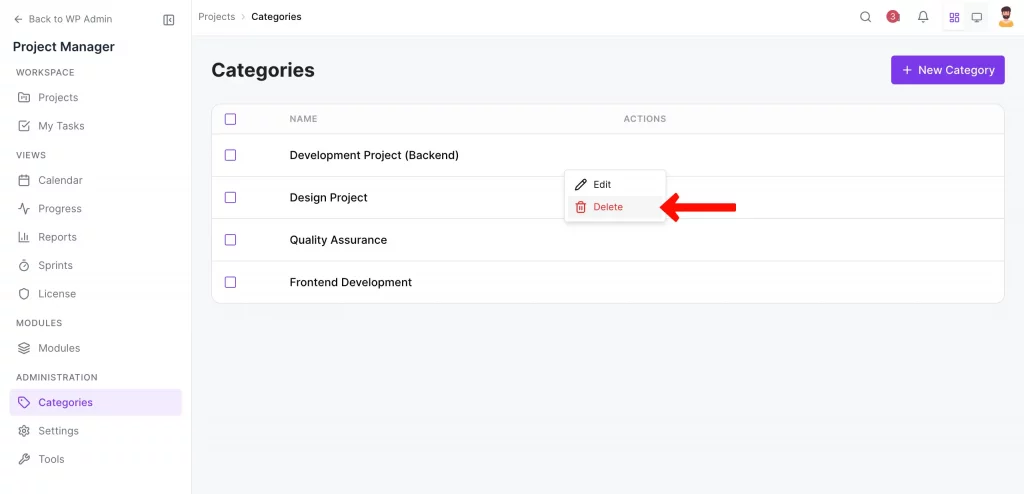
Deleting a Project Category
You can also delete the category if you want. To delete a category, click the three-dot icon on the project and choose the Delete option.
Next, click on the ‘Ok‘ button to delete the category.