Create Project with AI
The “Create with AI” feature in WP Project Manager allows users to generate an entire project, description, task lists, and individual tasks using AI in just a single click. This feature is designed to save time, improve productivity, and help users quickly structure projects without starting from a blank page.
With this tool, users only need to provide a short prompt or description of what they want to build, and the AI intelligently generates a complete, organized project plan.
Step 1: Configure AI Settings (Required Before Using “Create with AI” feature)
Before clicking Create with AI, users must set up their OpenAI/Anthropic/Google API credentials. This ensures the plugin can communicate with the AI model and generate project content. To configure this:
1. Go to Project Manager → Settings → AI Settings
First, go to WP Dashboard > Project Manager.
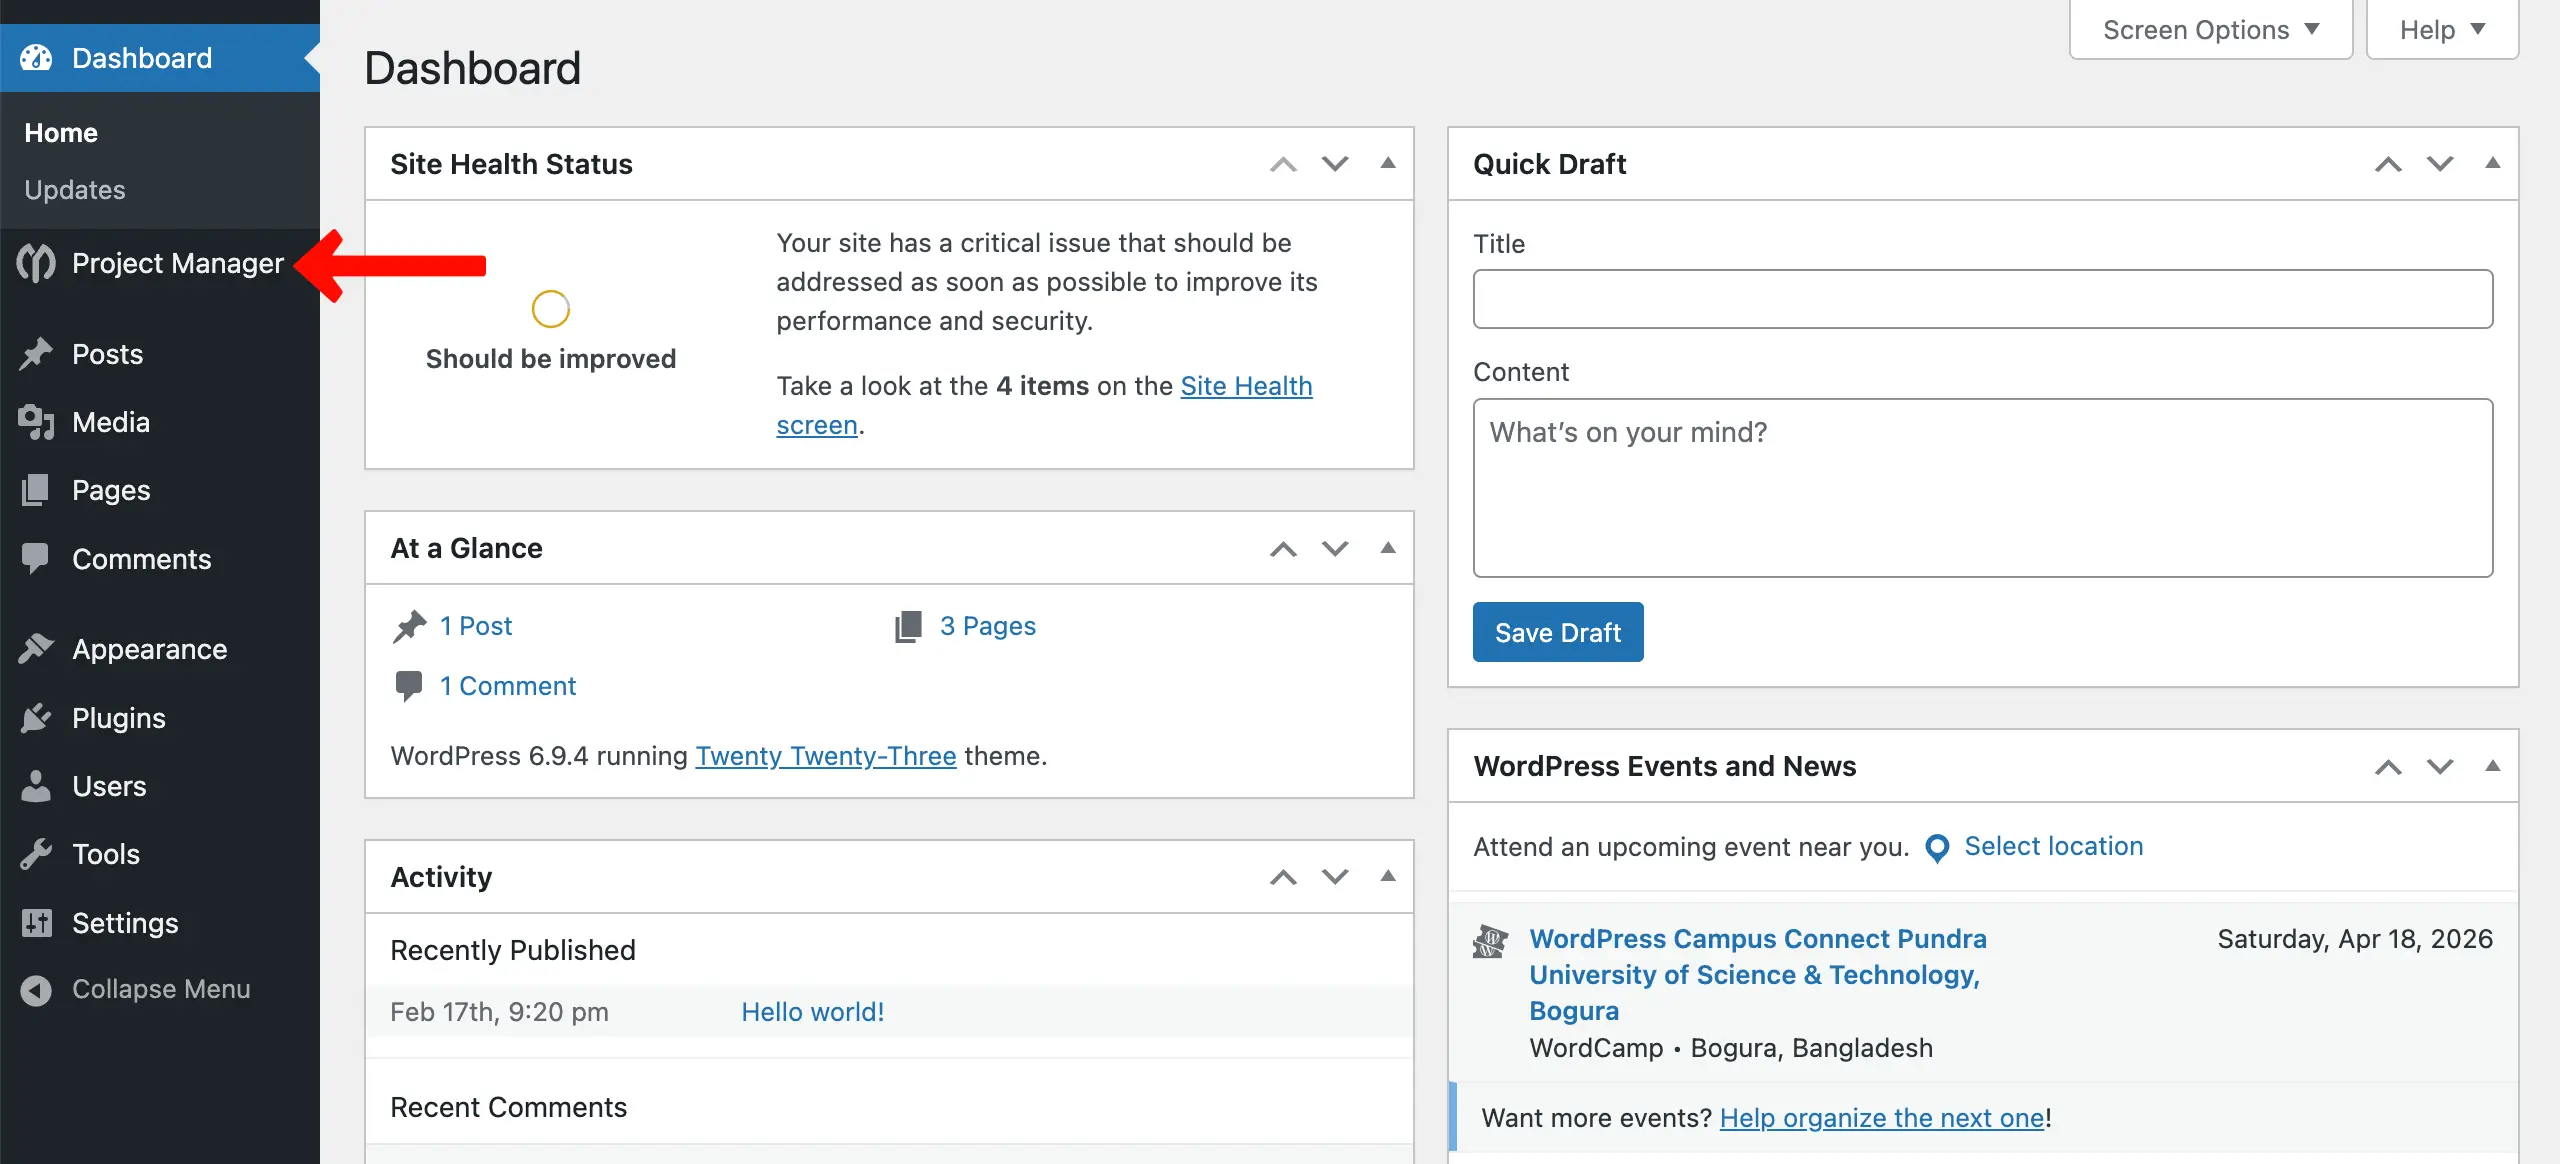
You'll come to the dashboard of the plugin with a new interface. Navigate to Settings > AI Settings from the left sidebar.
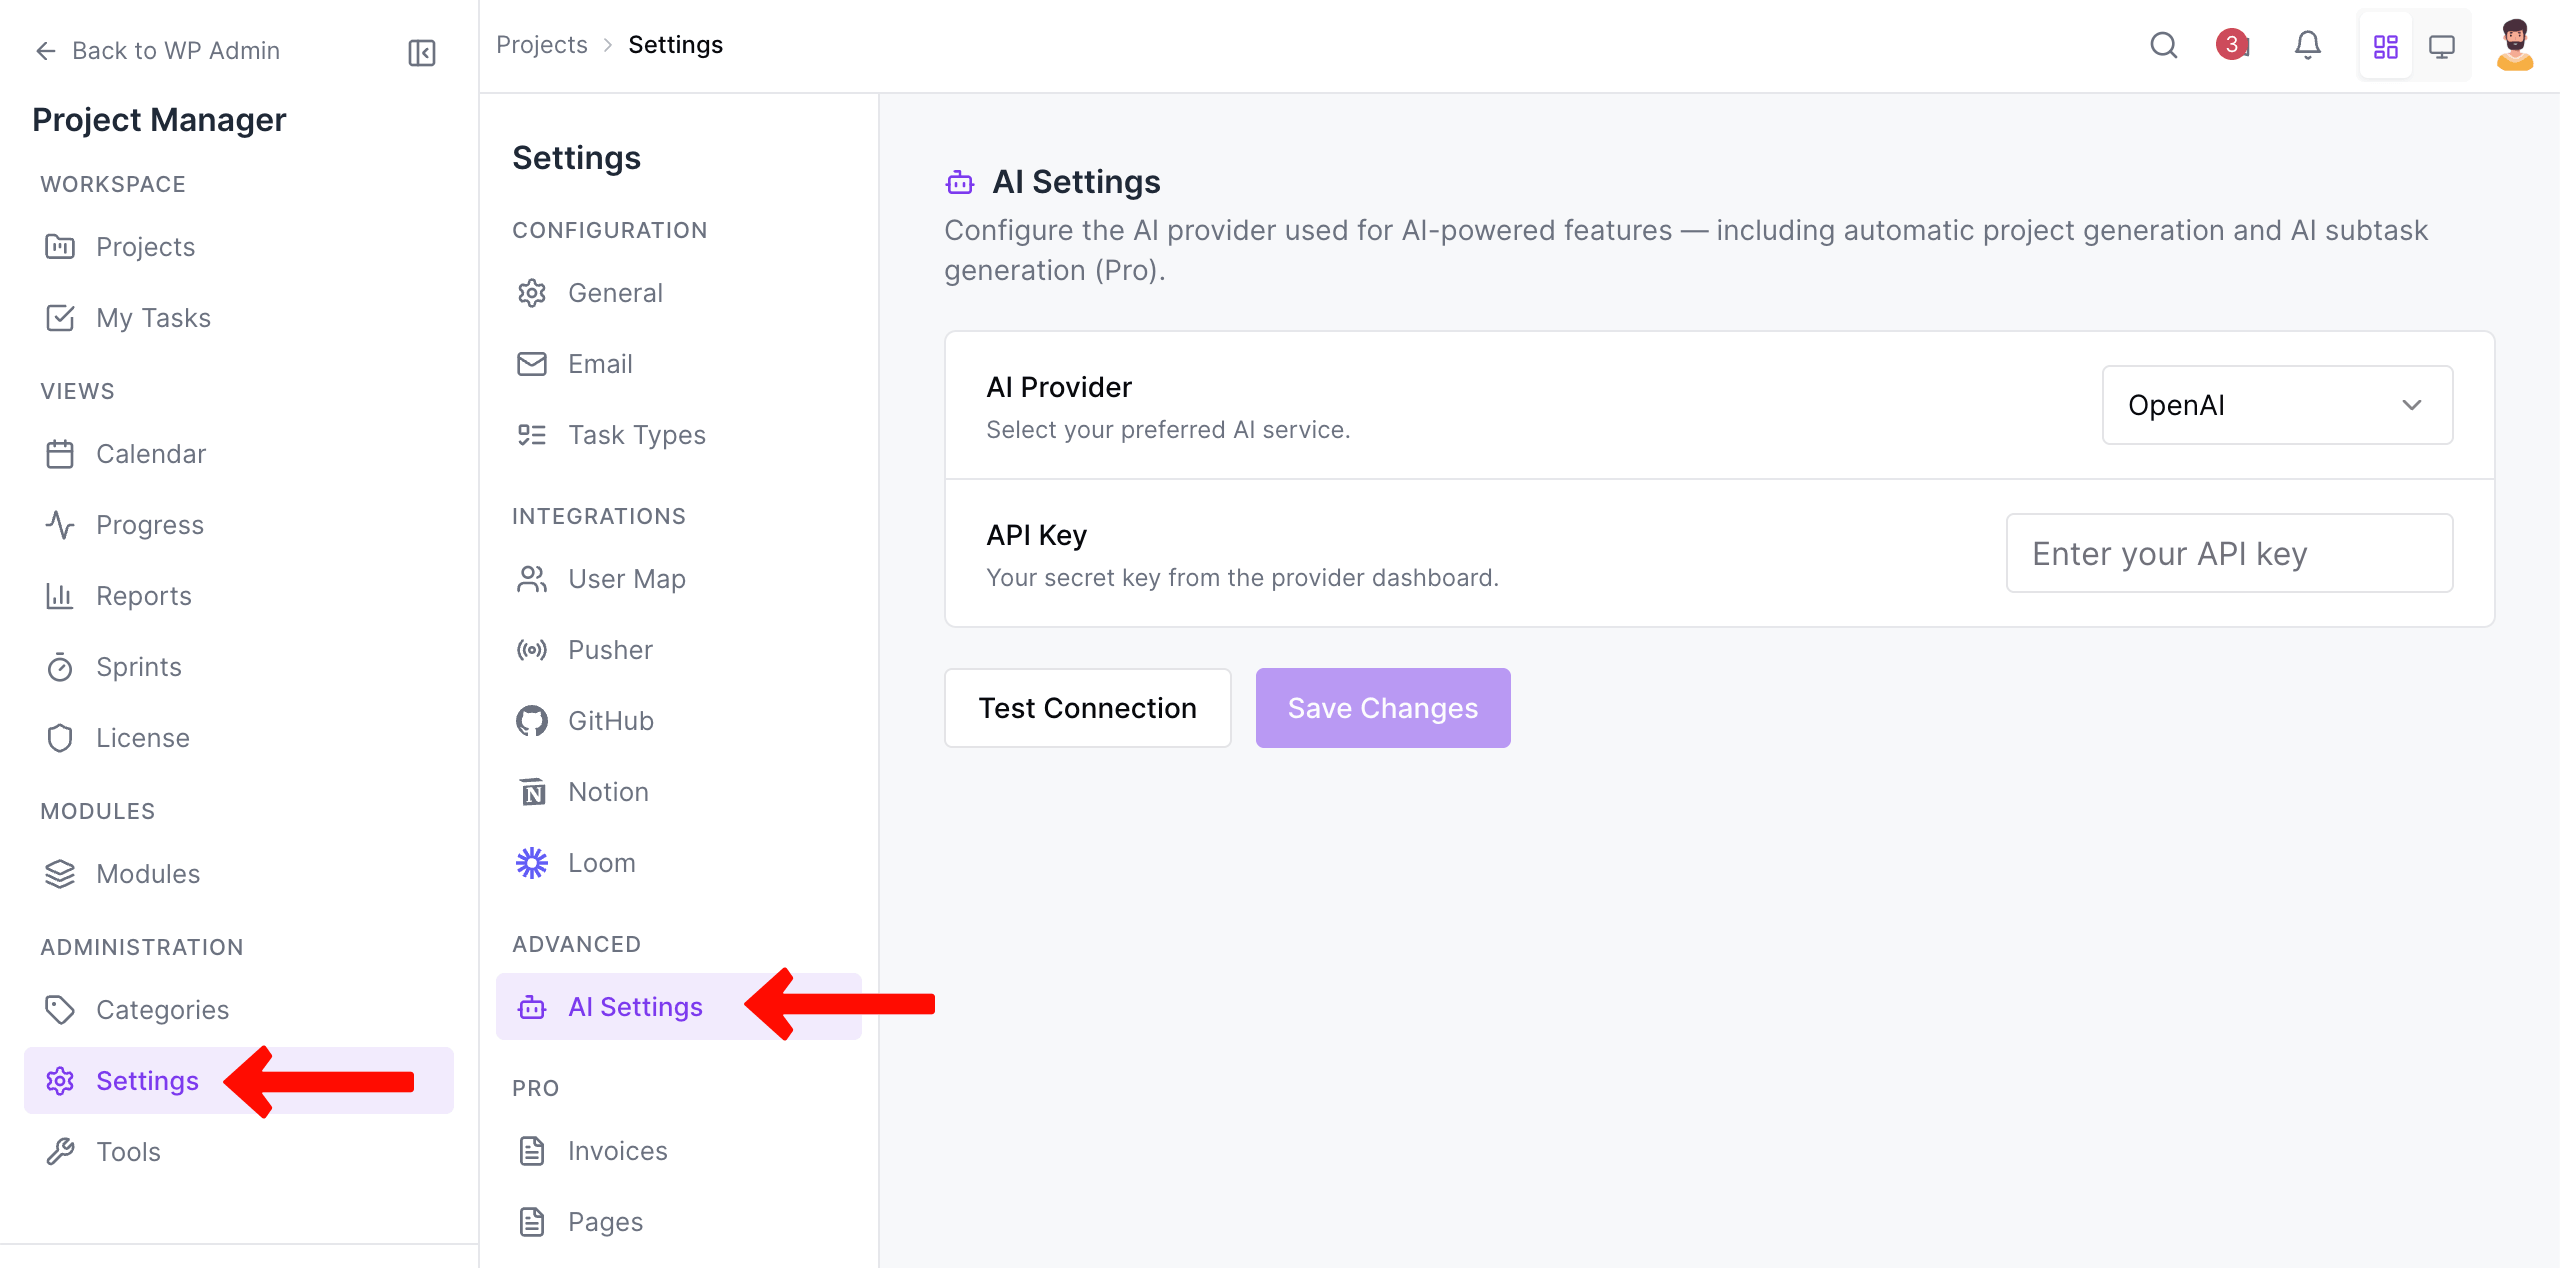
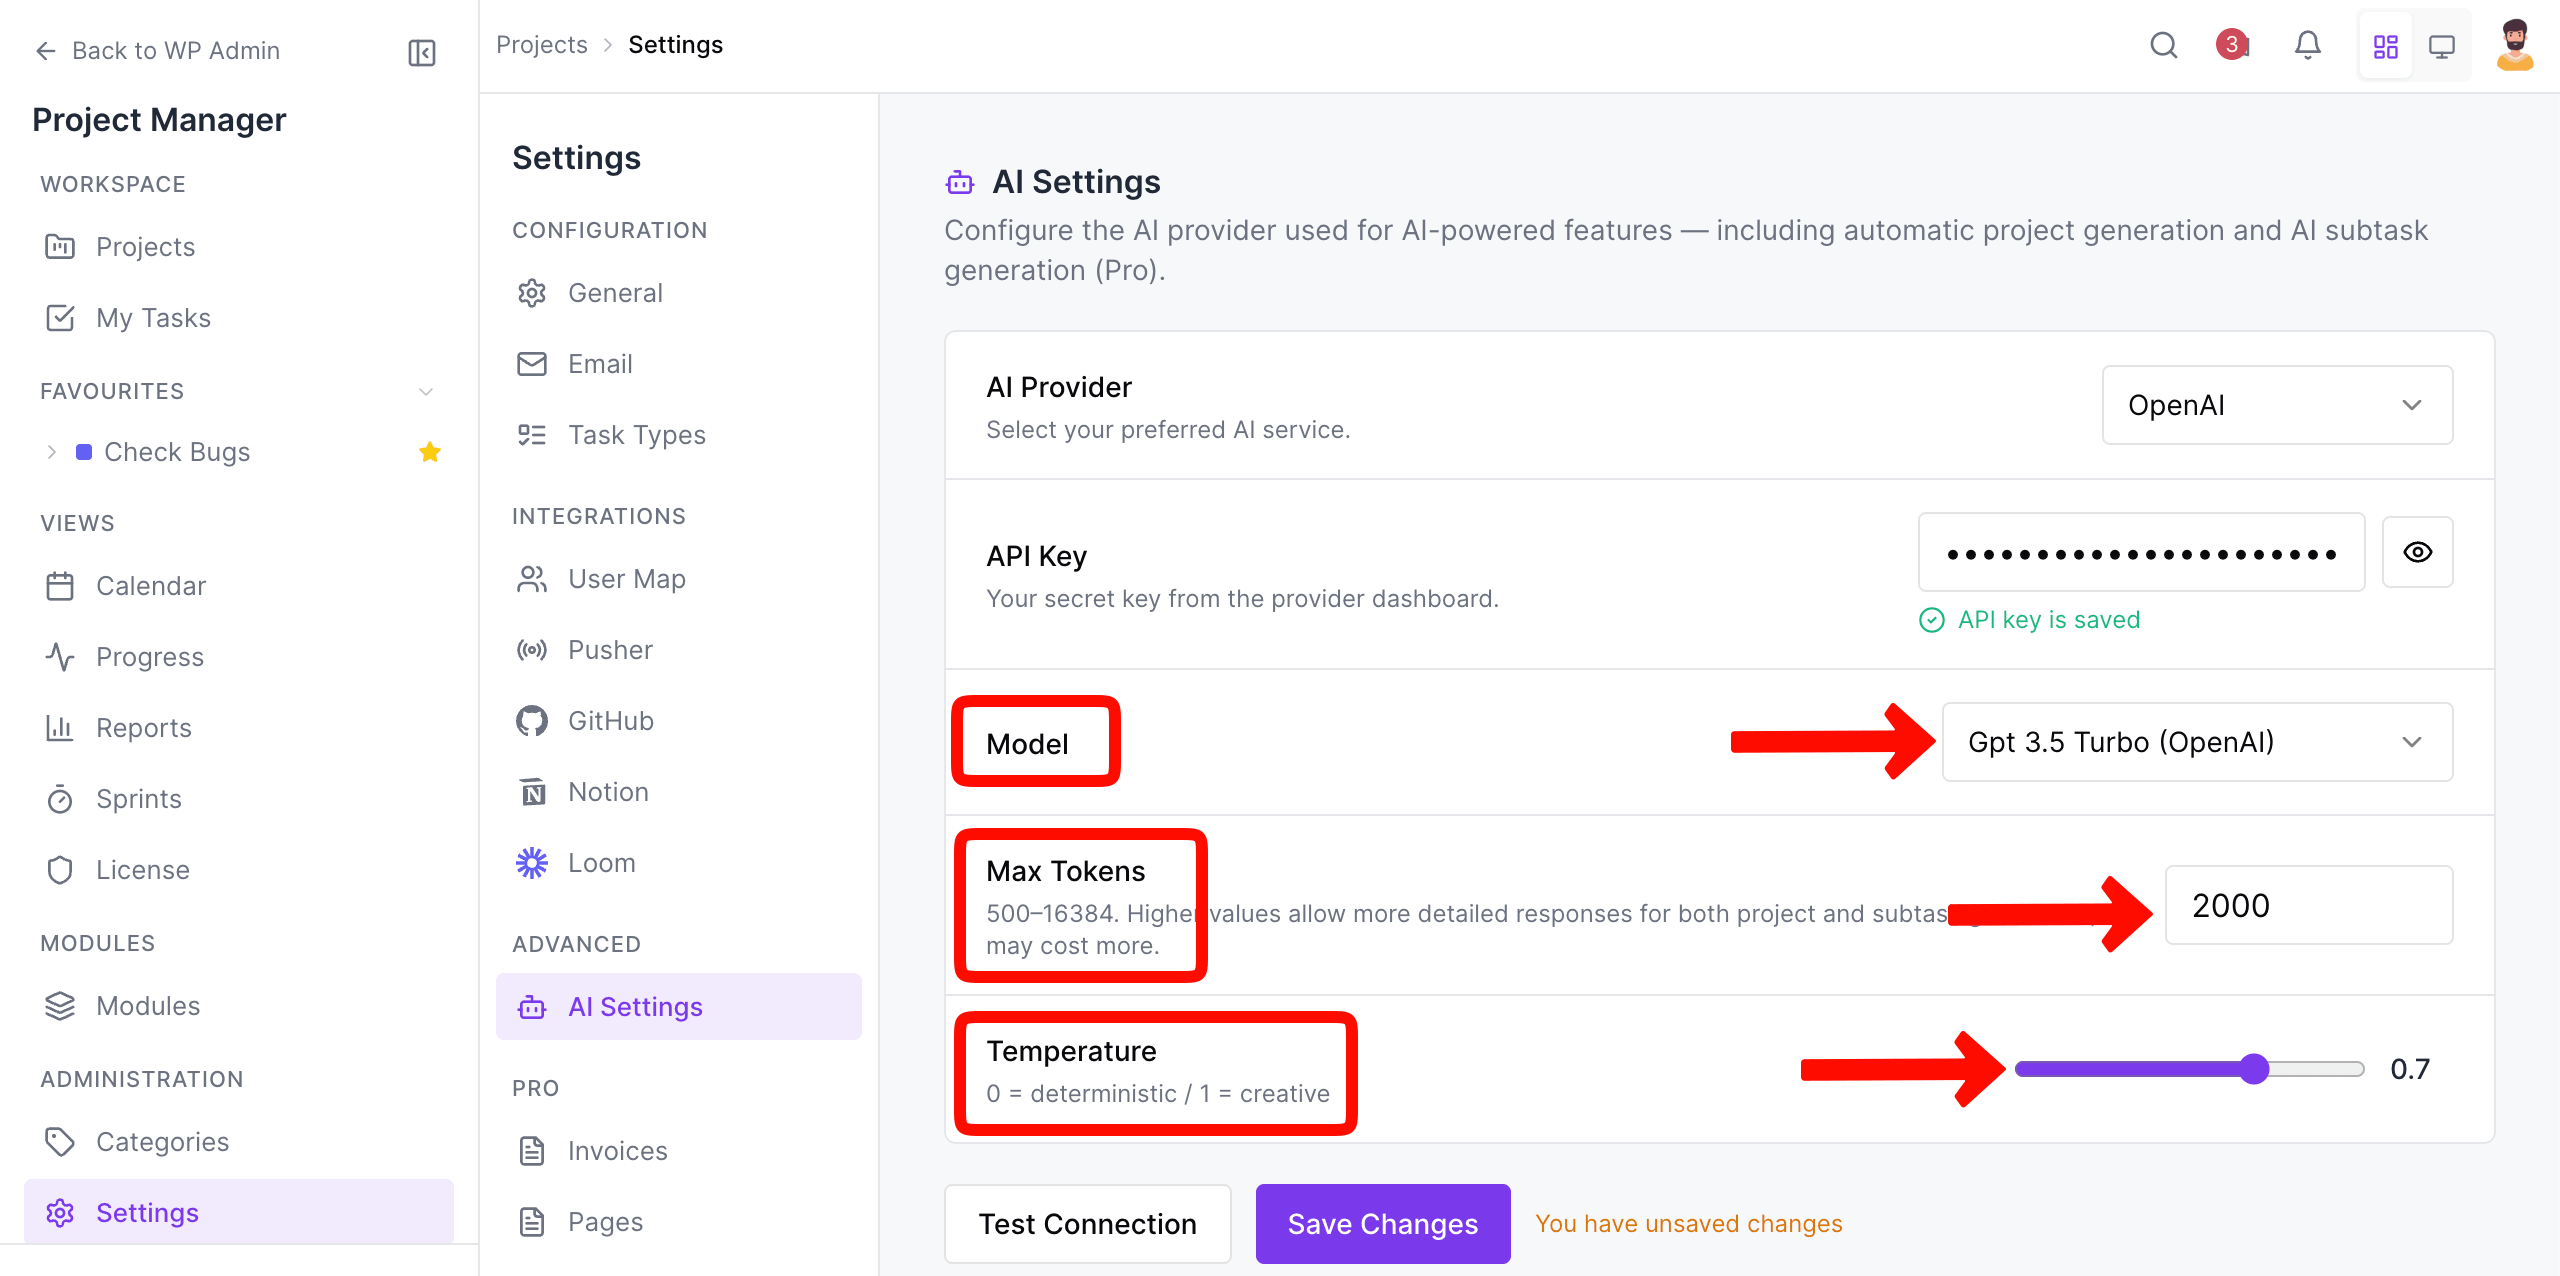
You will see the AI configuration panel like the screenshot below:
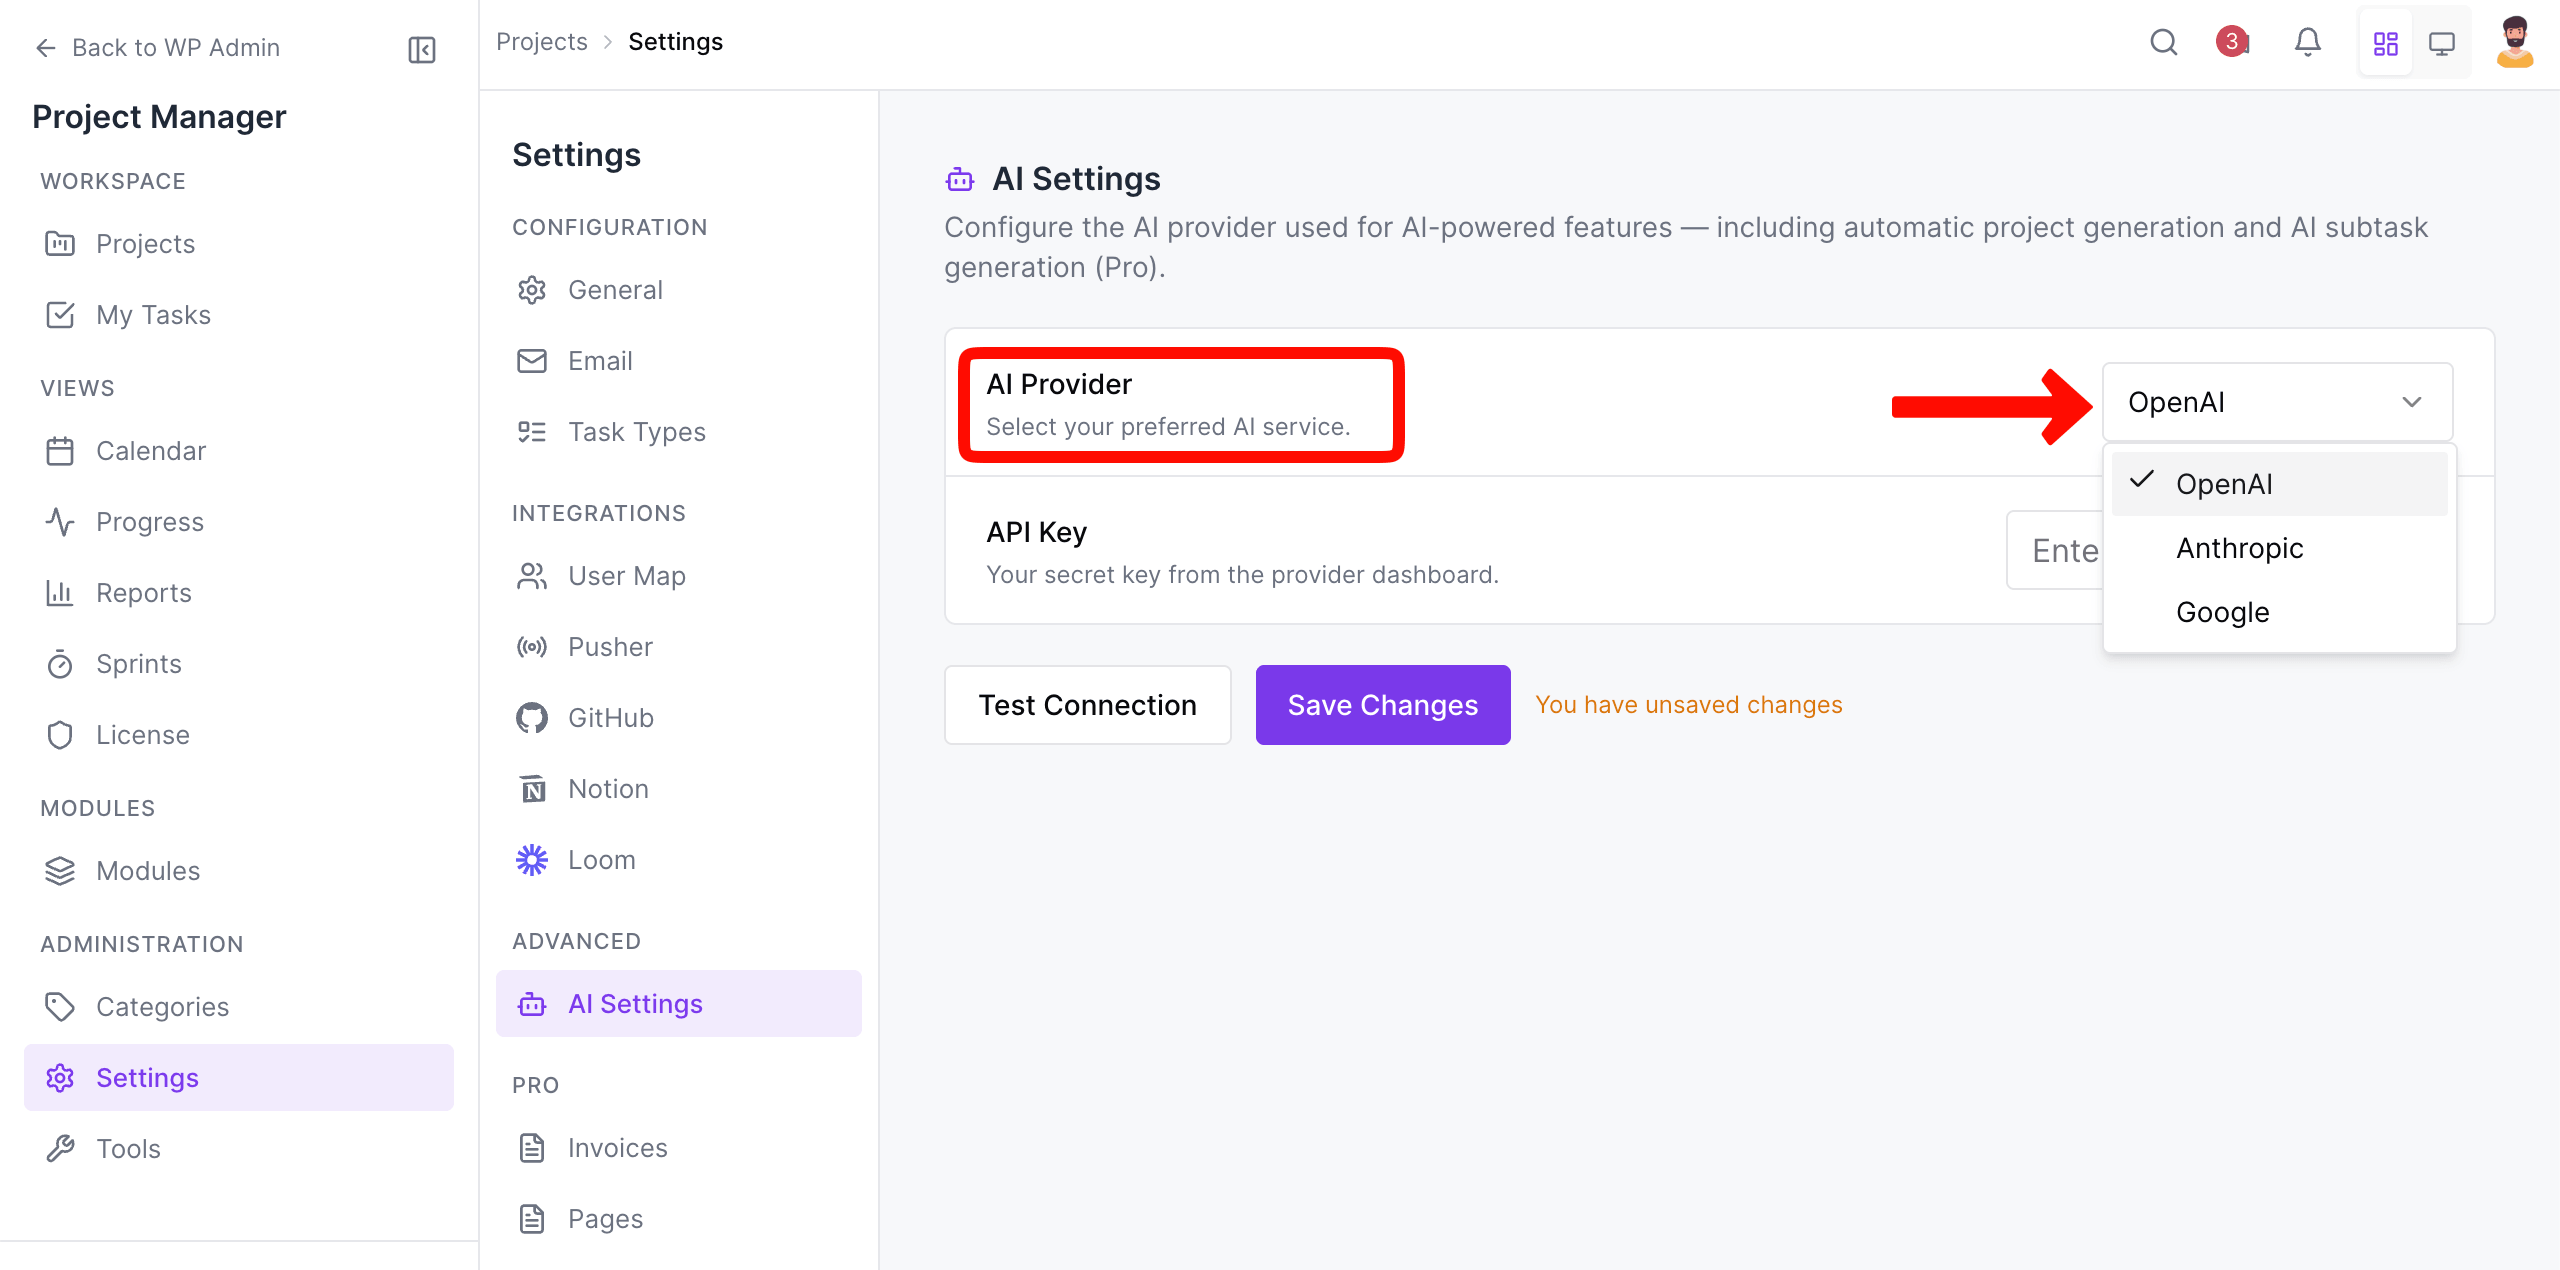
2. Choose an AI Service Provider
- Currently supports: OpenAI, Anthropic, Google
- Select the provider from the dropdown menu.
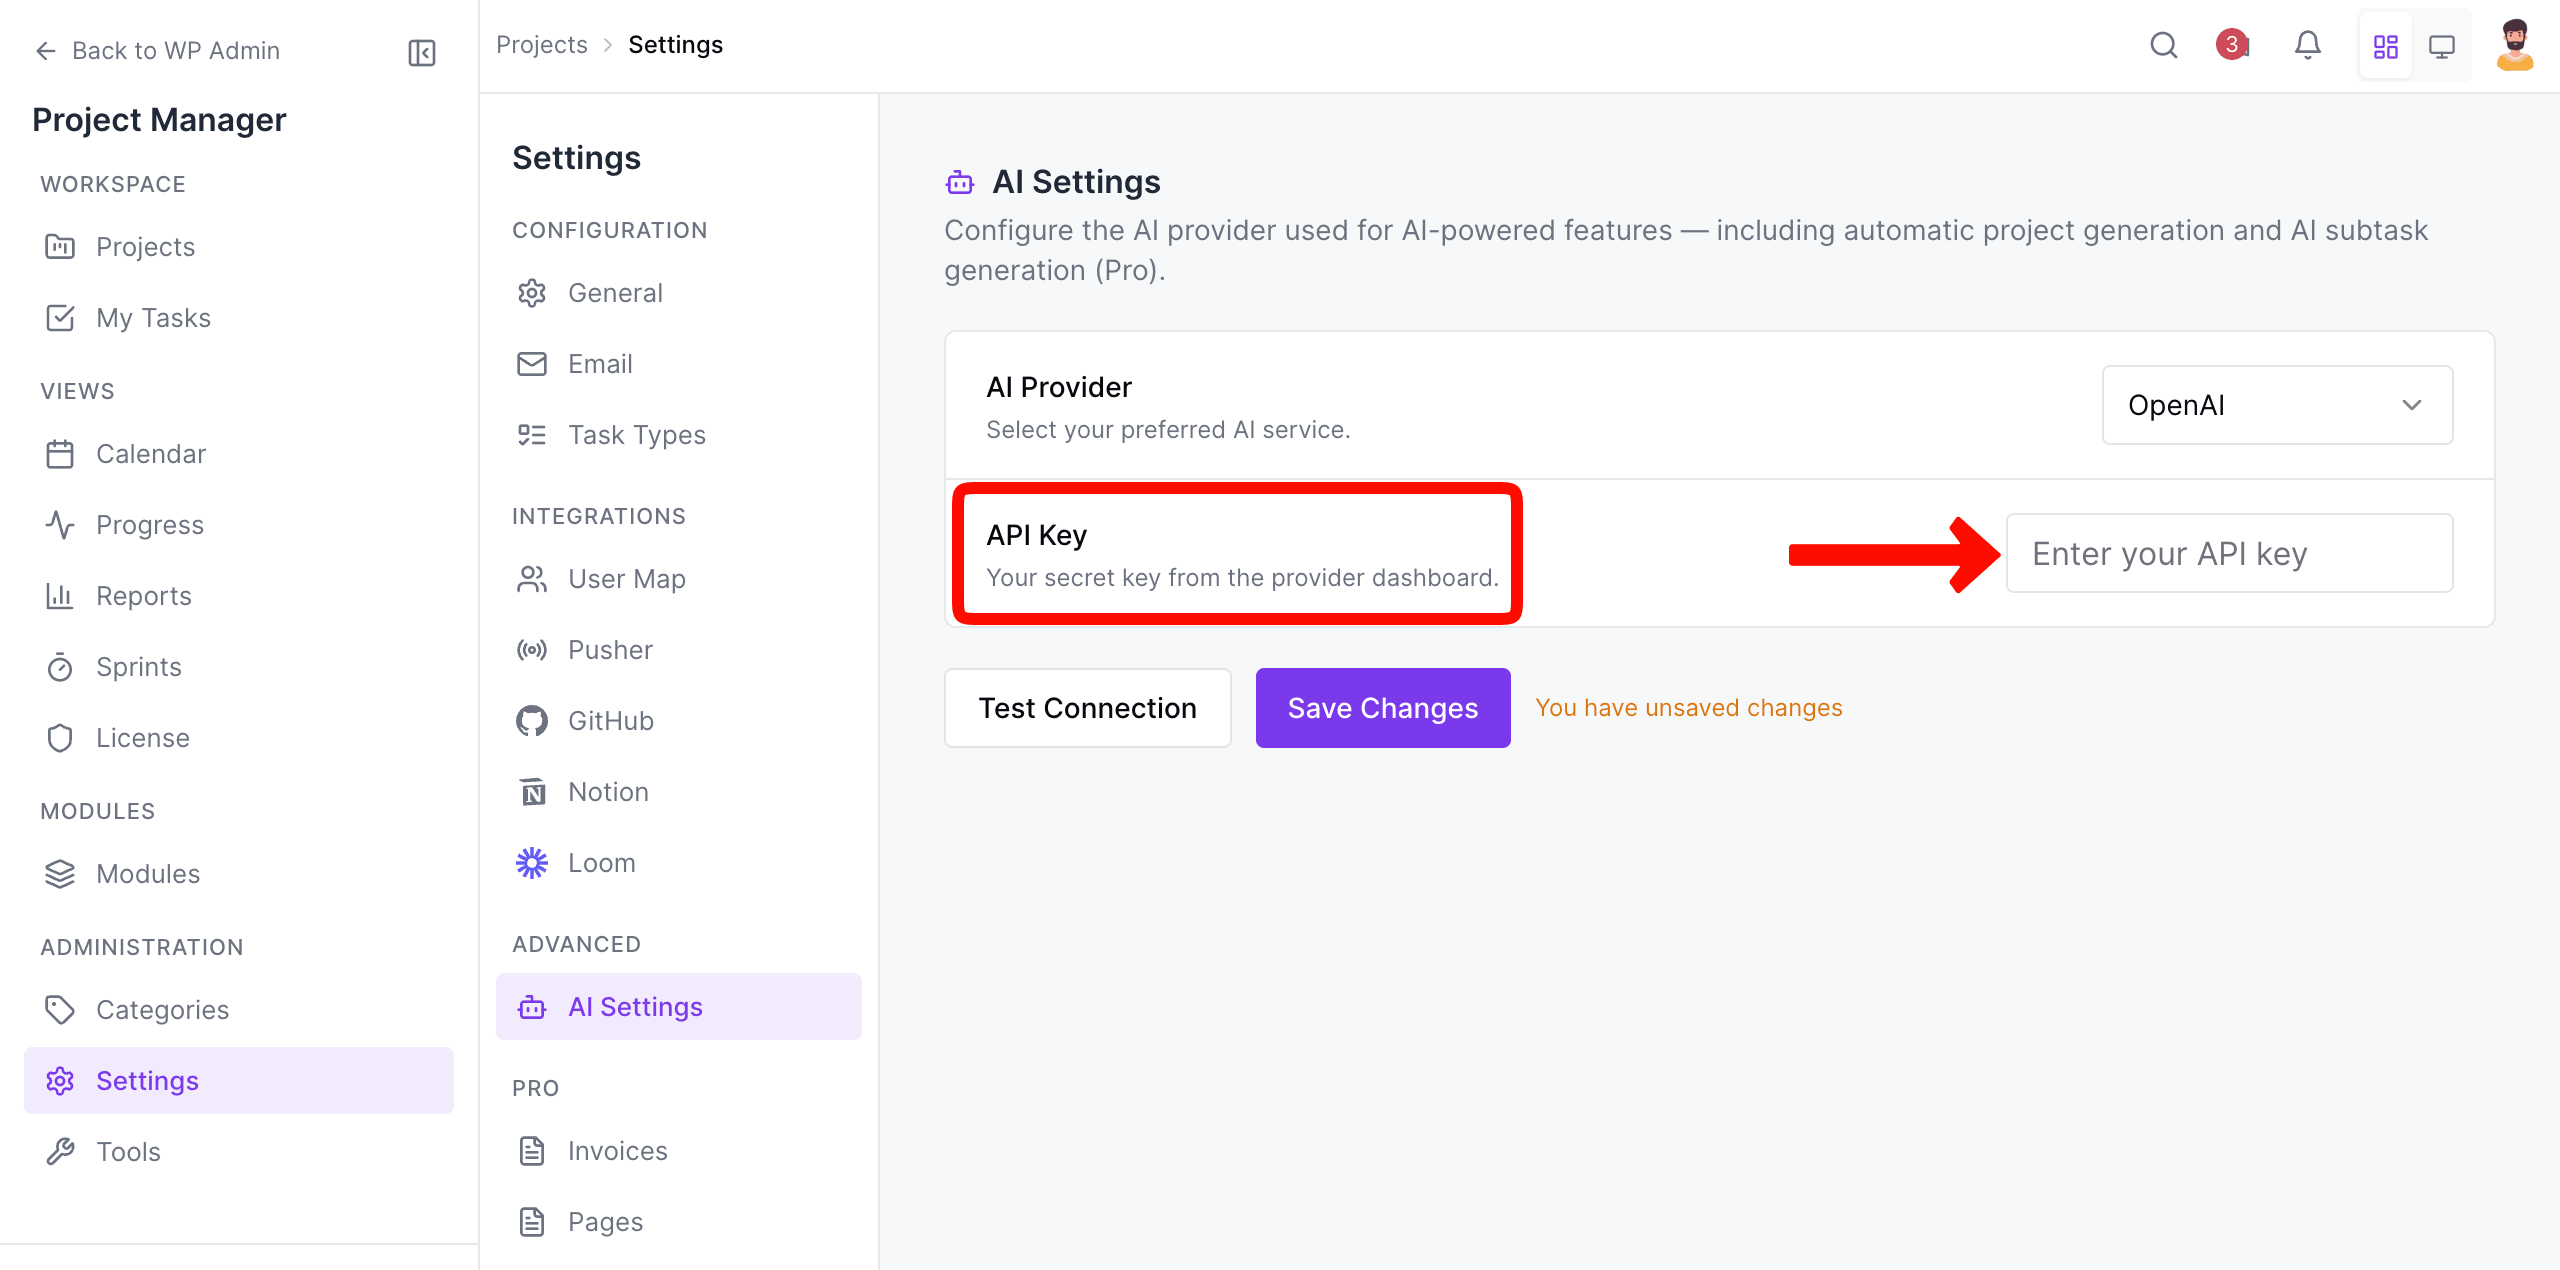
3. Enter API Key
- Paste your OpenAI API key into the API Key field.
- The plugin masks the key for security.
- Once saved, you will see: “API key is saved” in green.
4. Select AI Model
Choose your preferred model from the dropdown:
- GPT-4.1 (Latest Flagship) – Recommended
- GPT-4 Turbo
- GPT-3.5 (if available)
Selecting a more capable model produces better project structure and descriptions.
5. Configure Max Tokens
- Default: 1000
- Range: 1 – 4096
- Higher tokens = Longer AI responses (more detailed tasks, descriptions)
6. Temperature Setting
- Controls the creativity level
- 0.0 – 0.3 → Stable, predictable outputs
- 0.4 – 0.7 → Balanced (recommended for project planning)
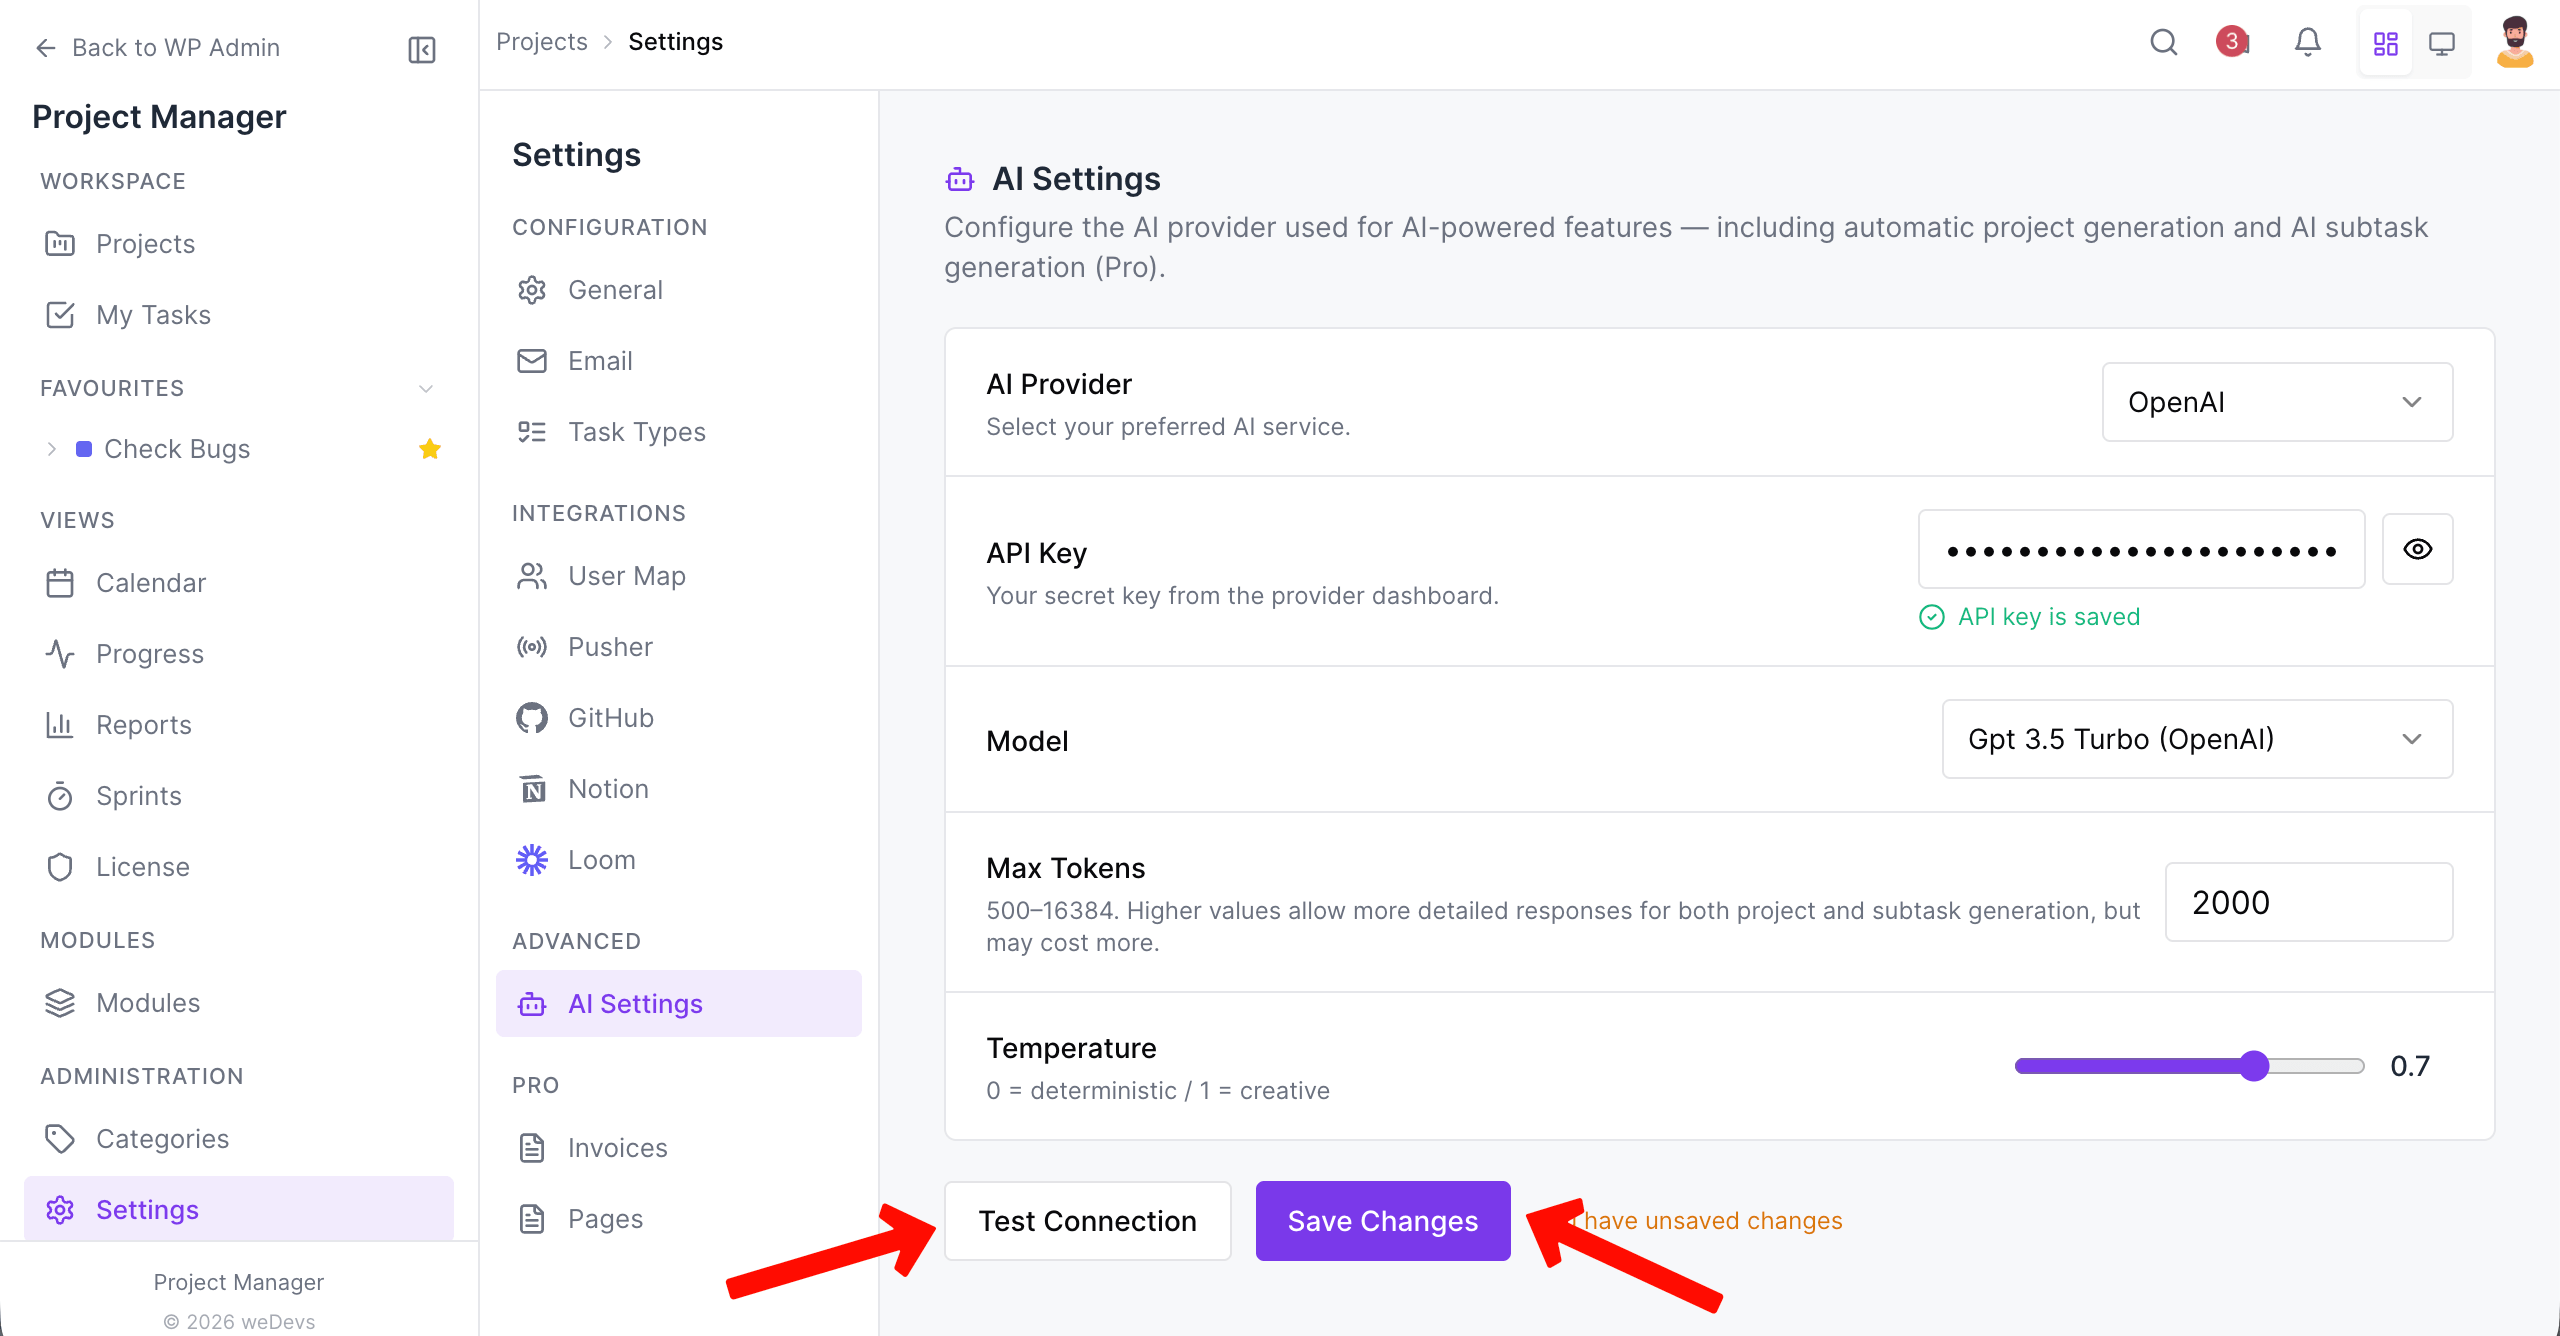
7. Test API Connection
Click the Test Connection button:
- If successful → It will show “Connection successful, your integration is ready” notice.
- If failed → Check API key, internet connection, billing status.
8. Click “Save Changes”
All AI settings must be saved before using the AI project generated.
Now, follow the steps below to create a new project using AI:
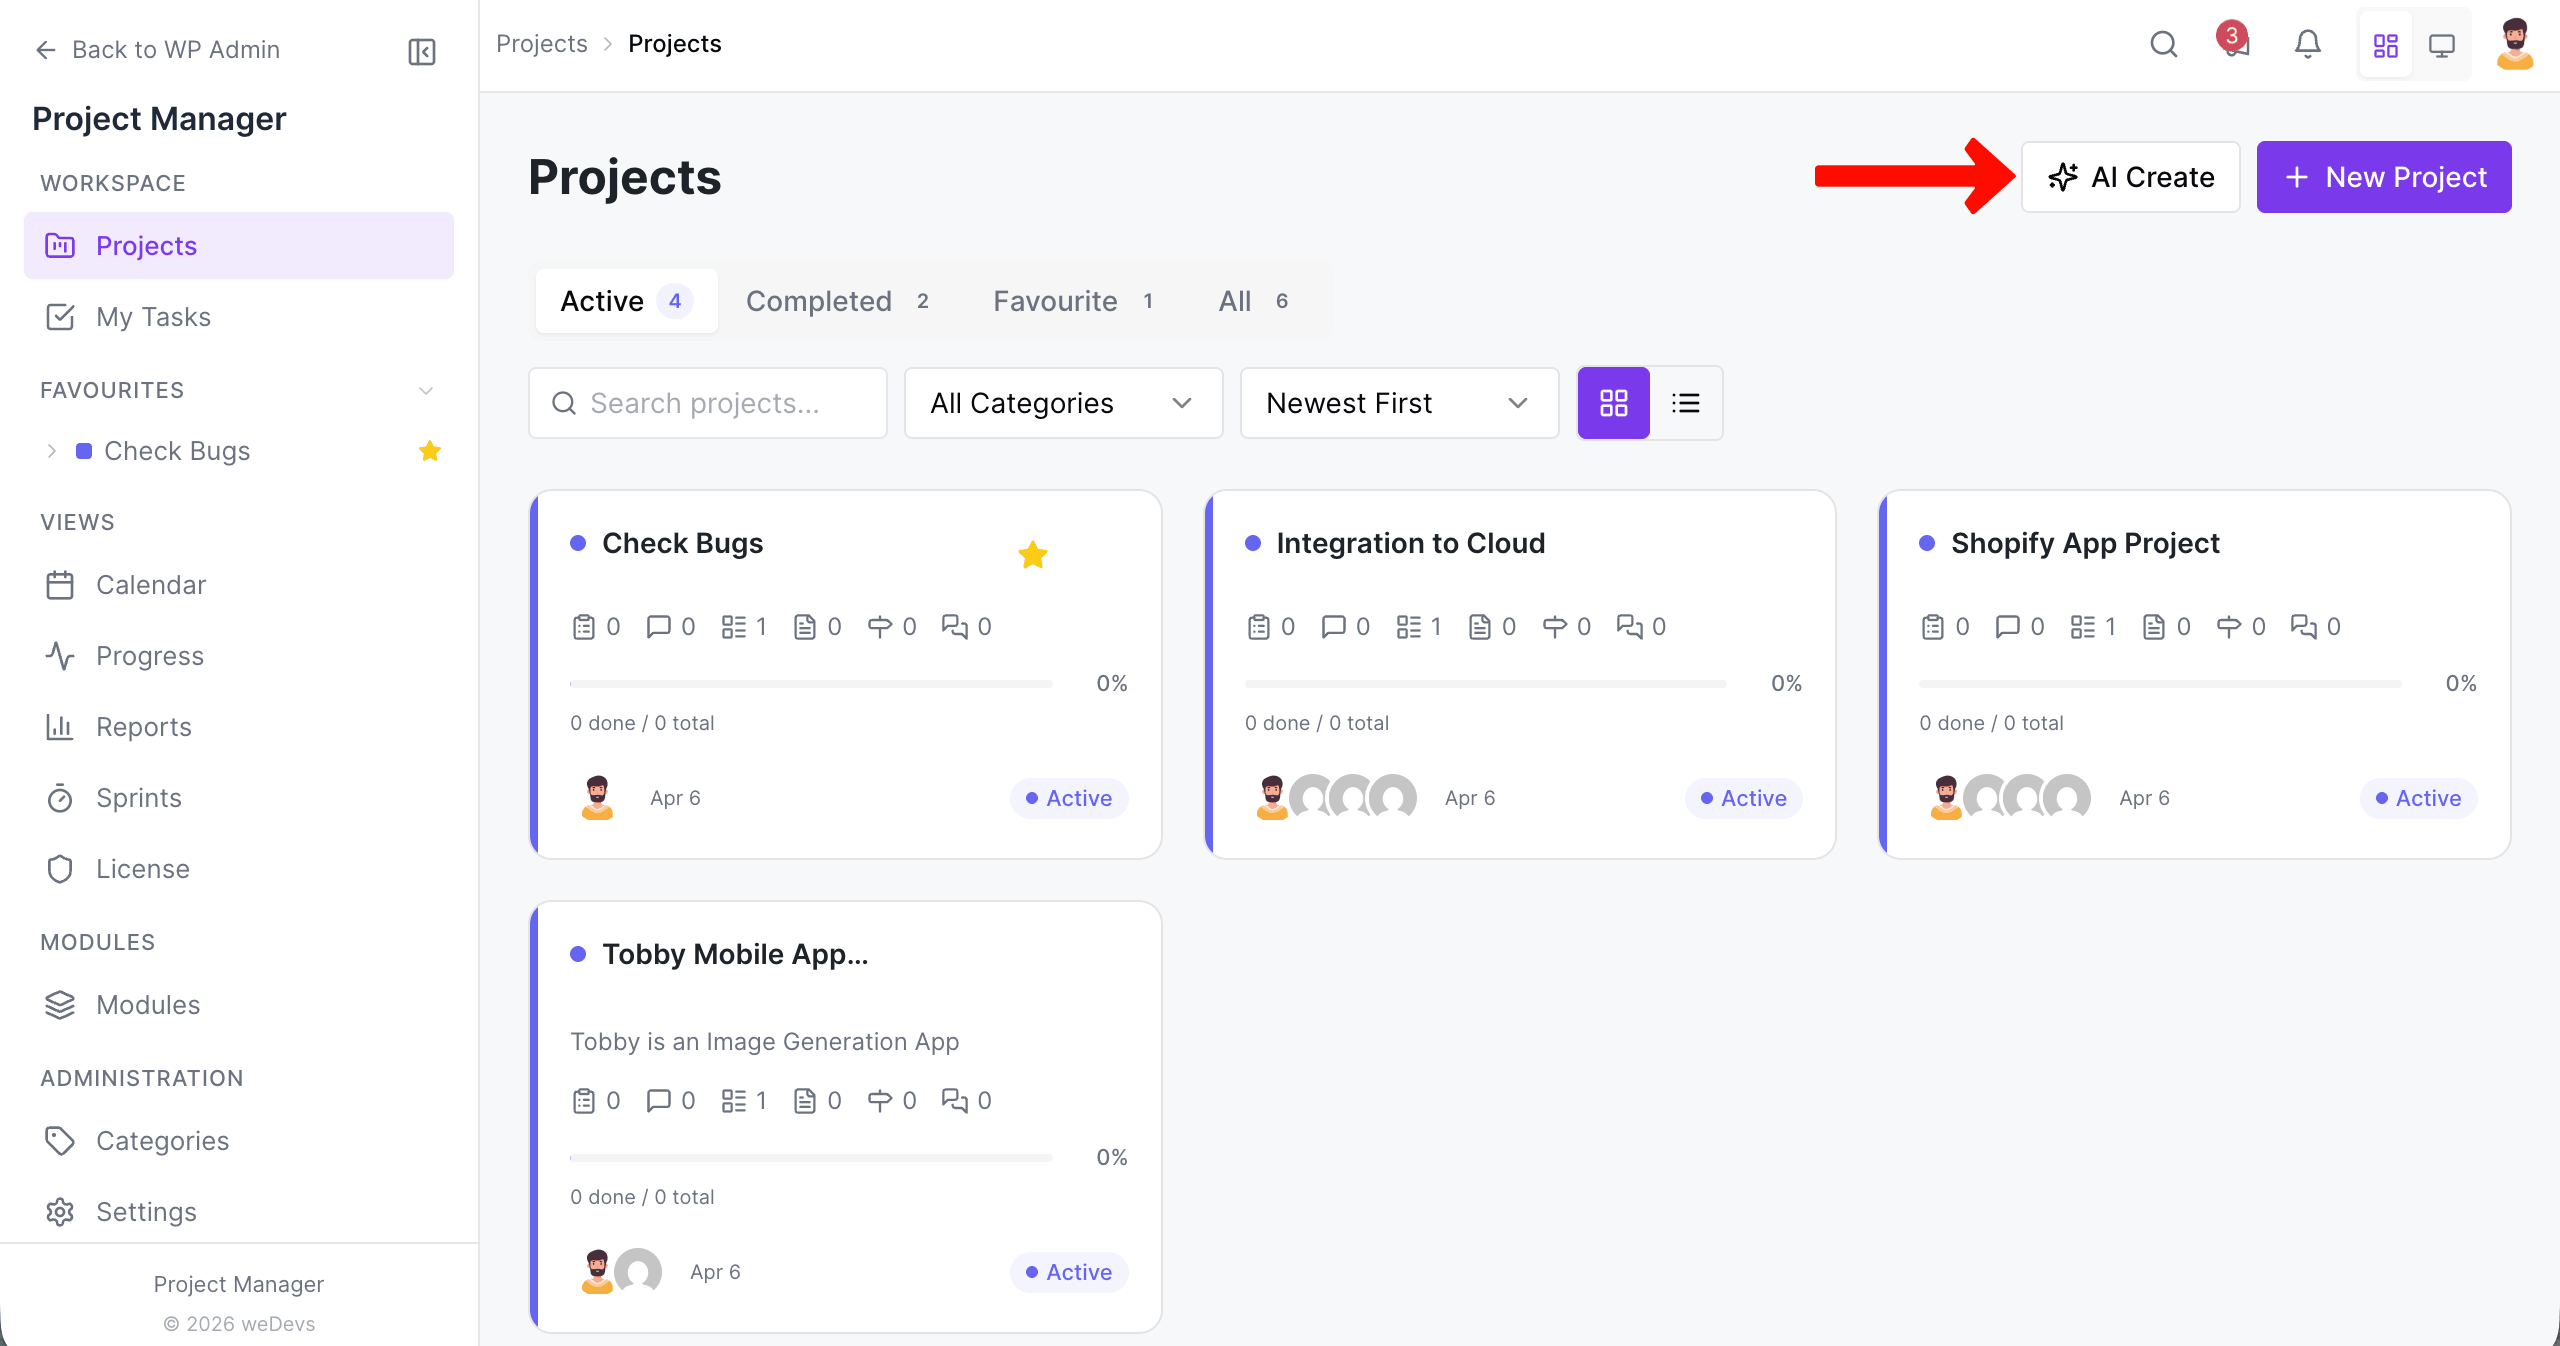
Step 2: Navigate to Project Manager → Projects
Inside your WordPress dashboard, go to: Project Manager → Projects, Here you will see the list of projects and the toolbar at the top. At the top-right section of the Projects page, click the button: Create with AI (as shown in the screenshot below)
Step 3: Using the “Create with AI” Sidebar
When you click the Create with AI button, a pop-up (modal window) appears where you can describe your project and click on the Generate button.
Below is the screen you will see:
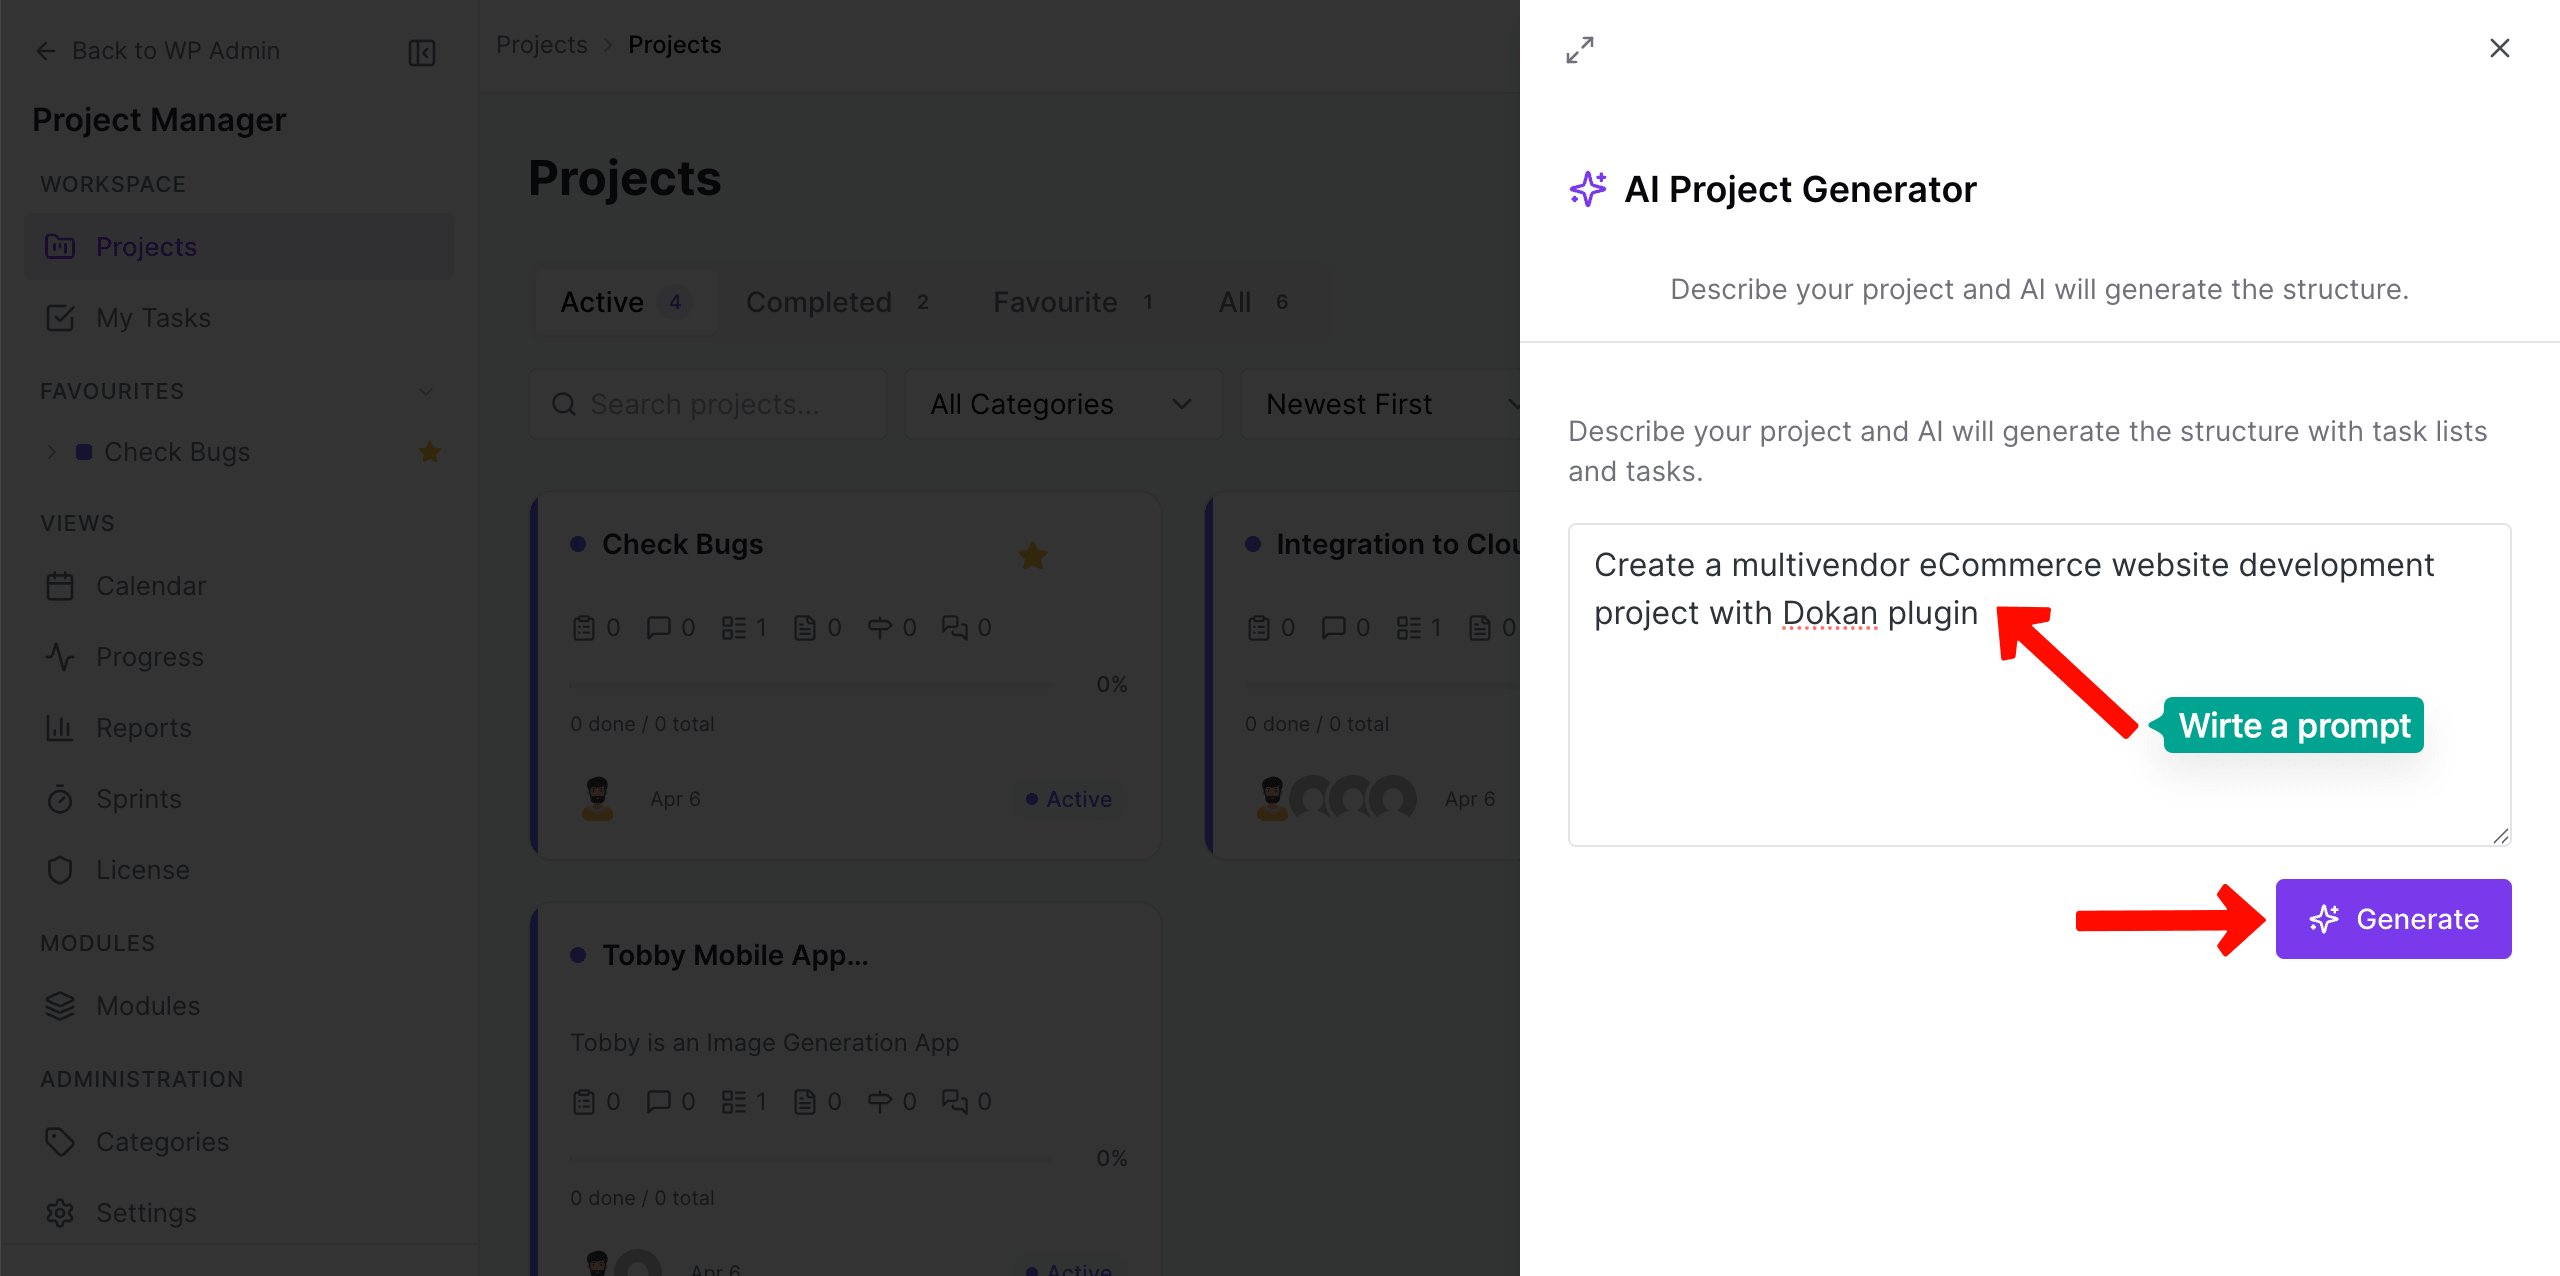
4. Click “Generate”
After writing the description, click the Generate button. It will take some time to generate the projects according to your prompt. The processing screen will be like this:
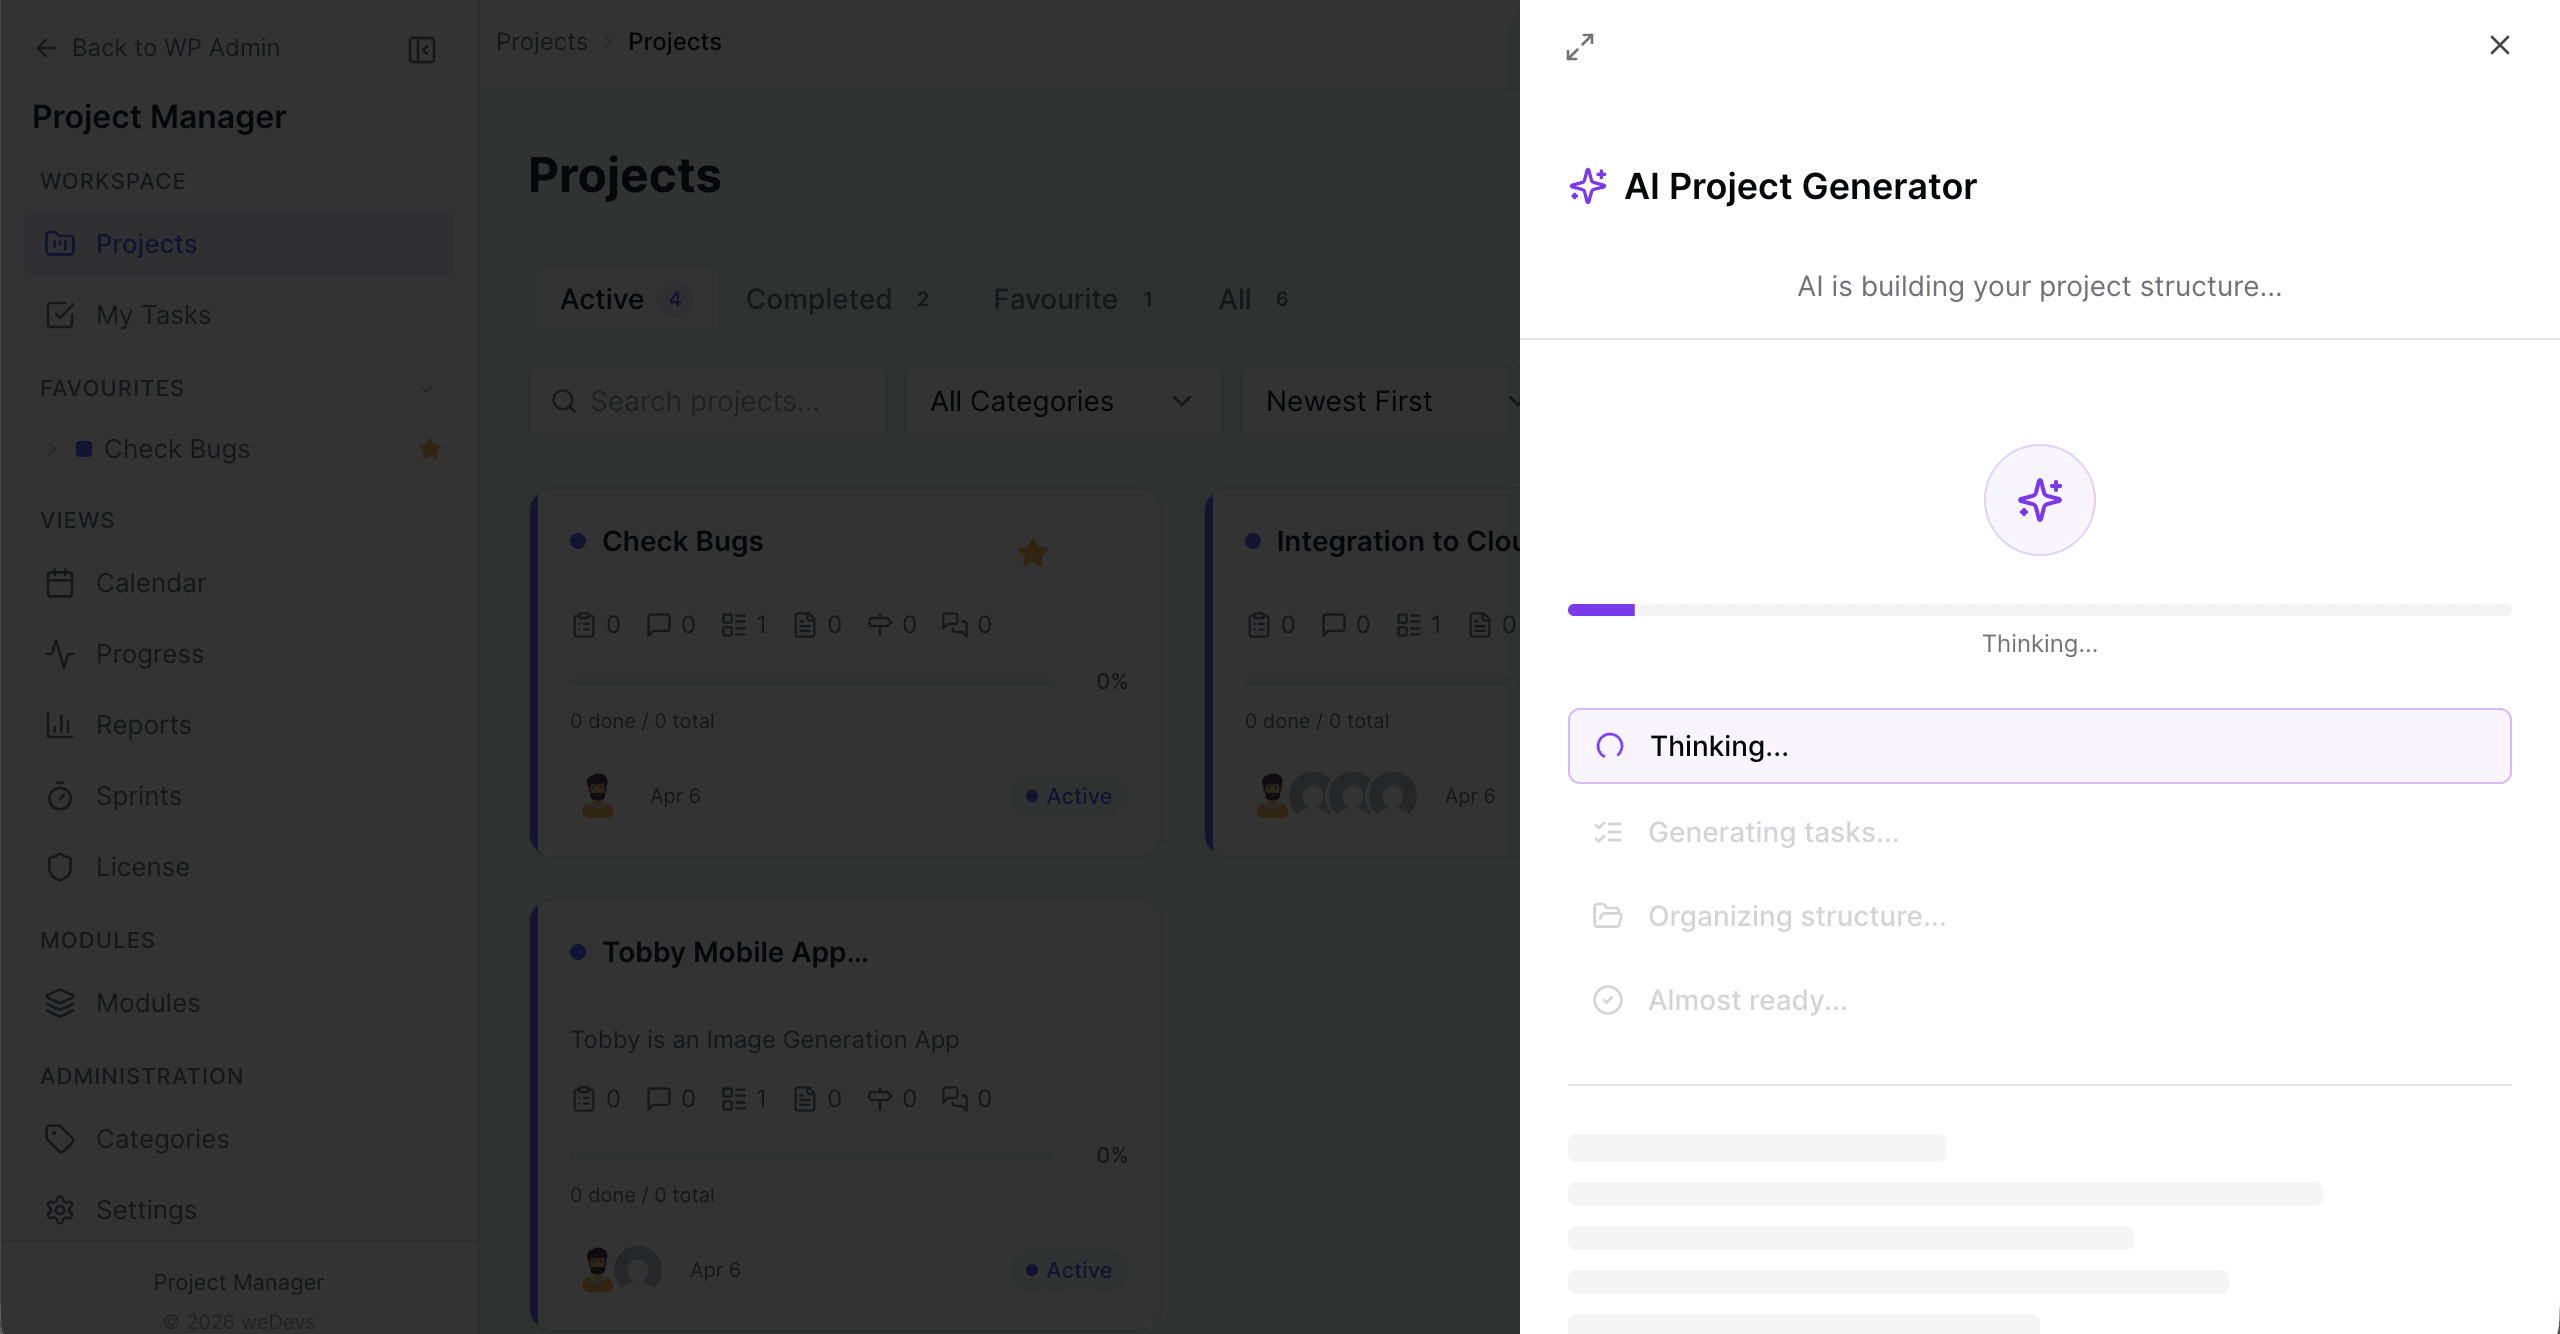
An entire project with various task lists will be generated in a few minutes.
To sum up:
- Send your prompt to the AI provider you configured
- Wait for the AI to generate the project structure
- Show you a completely generated project (title, description, task lists, tasks)
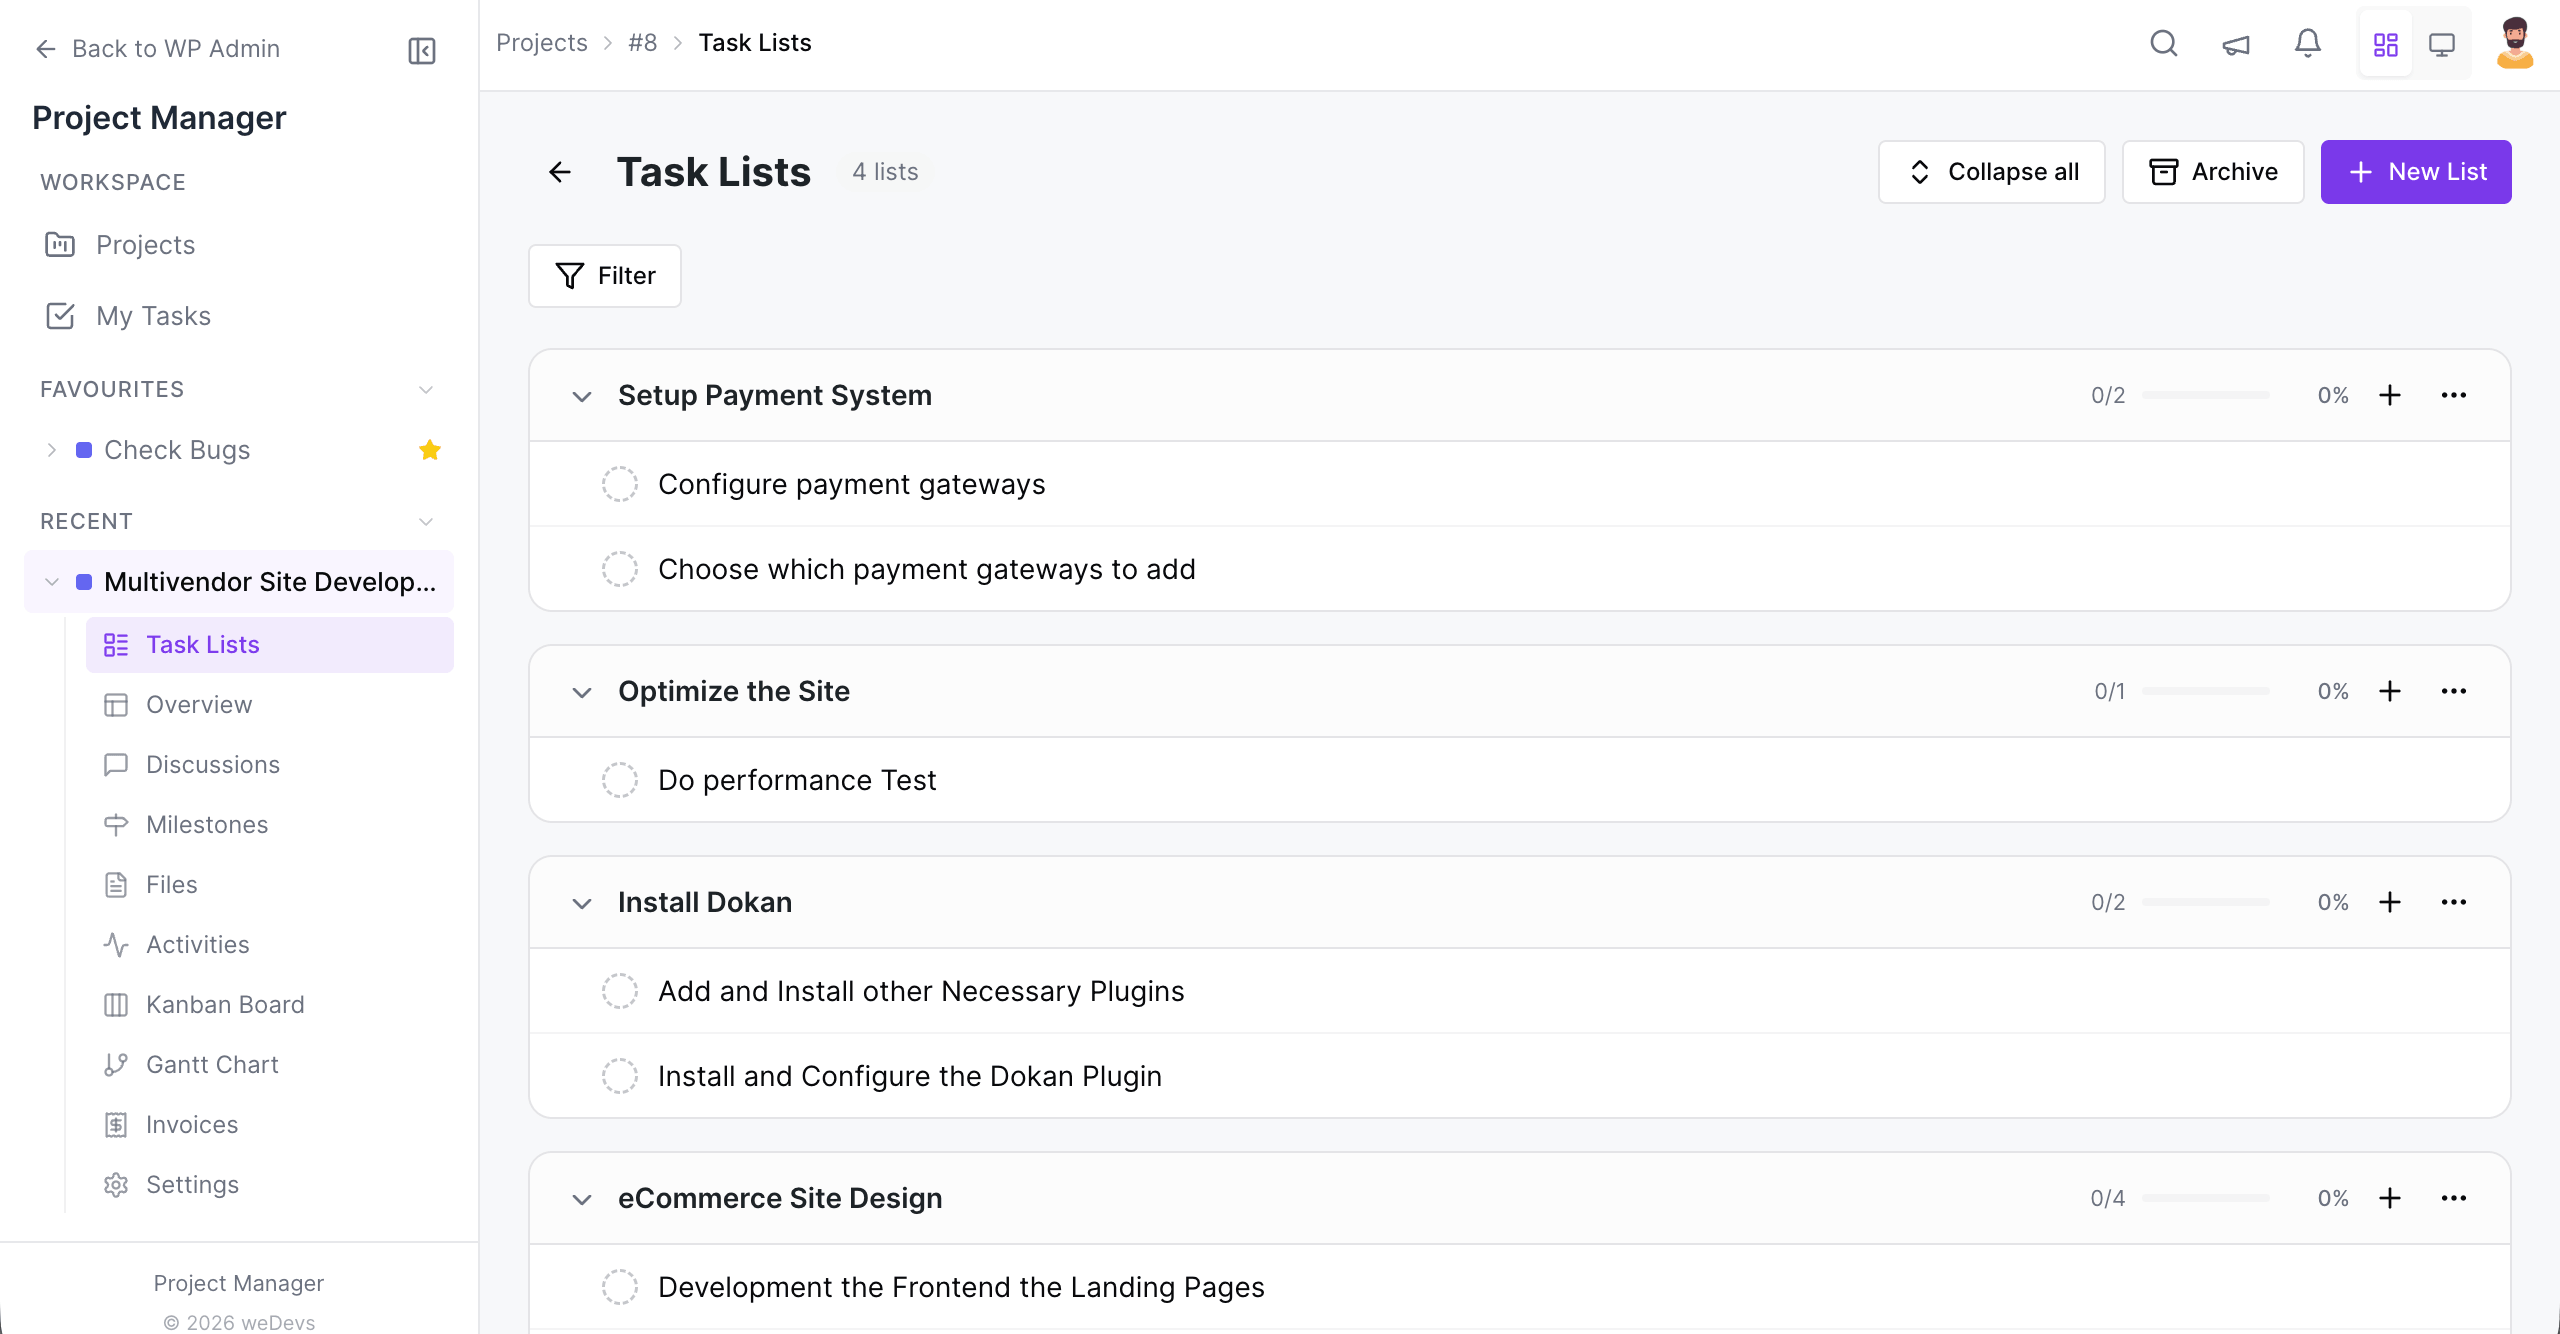
Once the AI has finished generating the content, WP Project Manager automatically displays a complete project draft, including a suggested project title, a detailed project description, organized task lists, and the individual tasks within each list.
All elements created by the AI are fully editable, allowing you to refine the project according to your needs. You can rename any section, add or remove tasks, rearrange task lists, modify the description, and adjust the overall structure to match your workflow before saving the final project.
That's it.