

How to Create a Project Invoice
Creating a project invoice is easy and fast in WP Project Manager Pro. You can avail of this module if you are using a professional and business plan. You can create invoices under every project you have.
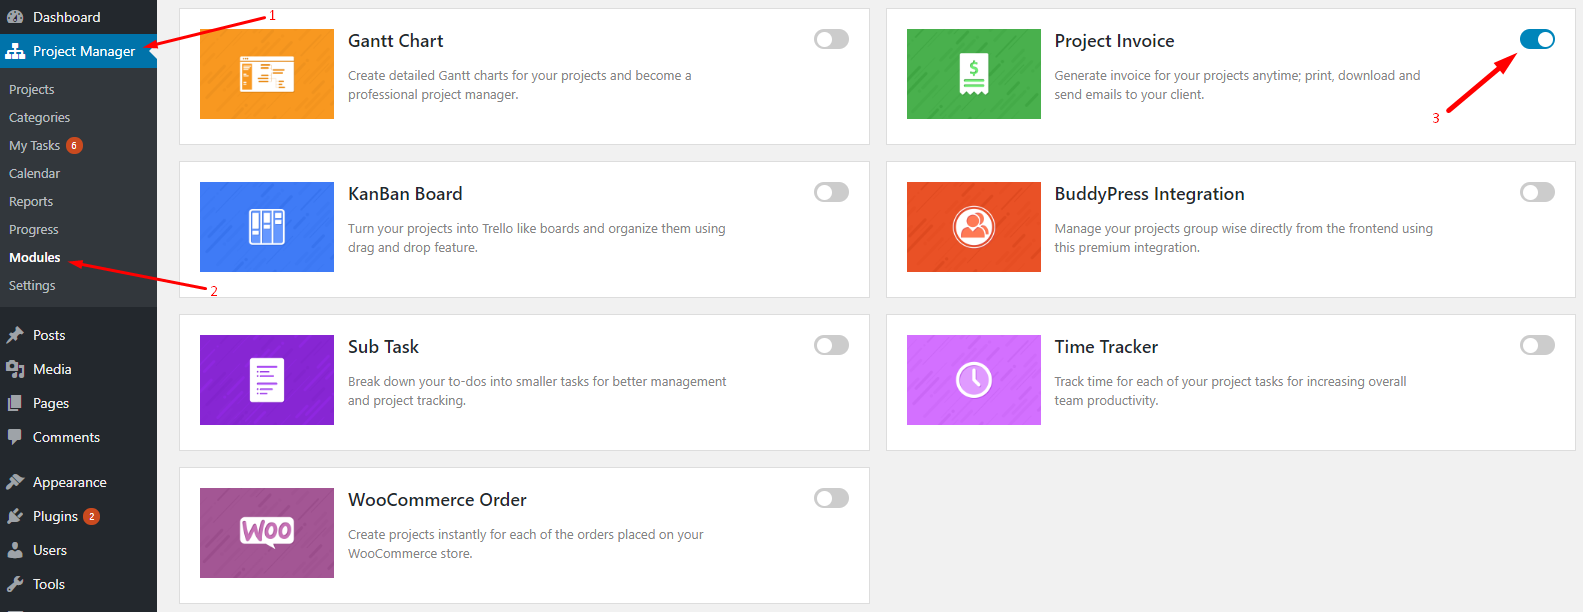
Activation
Navigate to WP Admin Dashboard → Project Manager → Modules. Next, Activate the “Project Invoice” module by clicking on the toggle button as denoted by the red arrow:
Configure Invoice Settings
After activating the Project Invoice module, you will be able to configure some settings related to Project Invoice. You can go to settings from Project Manager → Settings → Invoice.
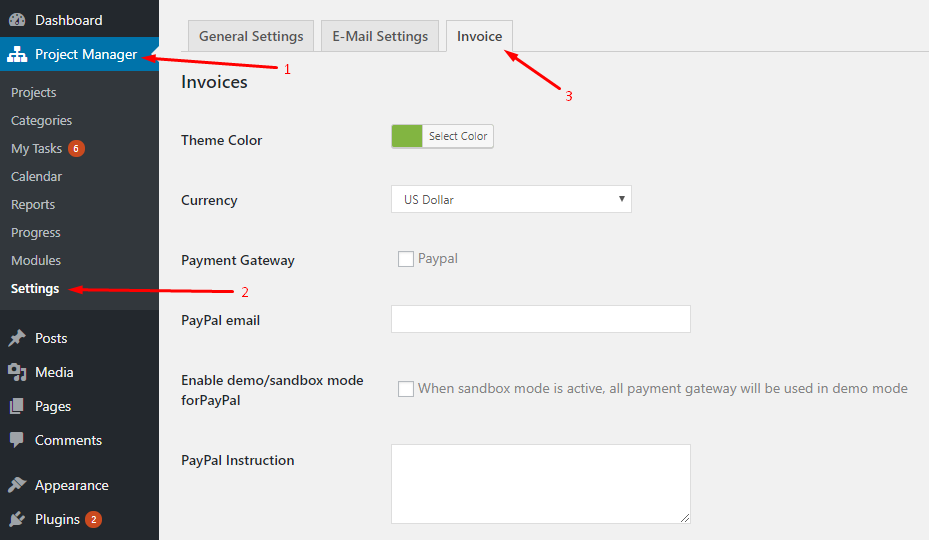
An overview of settings
Theme Color
Use the Theme Color option to customize the color of your theme.
Currency
You can set the currency you want to charge your users in.
Payment Gateway
Choose the payment gateway you want to use. By default only PayPal is available. You can optionally add Stripe as a payment gateway by getting the Stripe add-on.
PayPal Email
Enter your PayPal email address to receive payment to.
Enable Demo/Sandbox Mode for PayPal
The PayPal sandbox mode is for programmers to test payment software before running real transactions. You can test it out by marking the checkbox here.
PayPal Instruction
Instructions you type in here will show up to your clients along with the PayPal pay button.
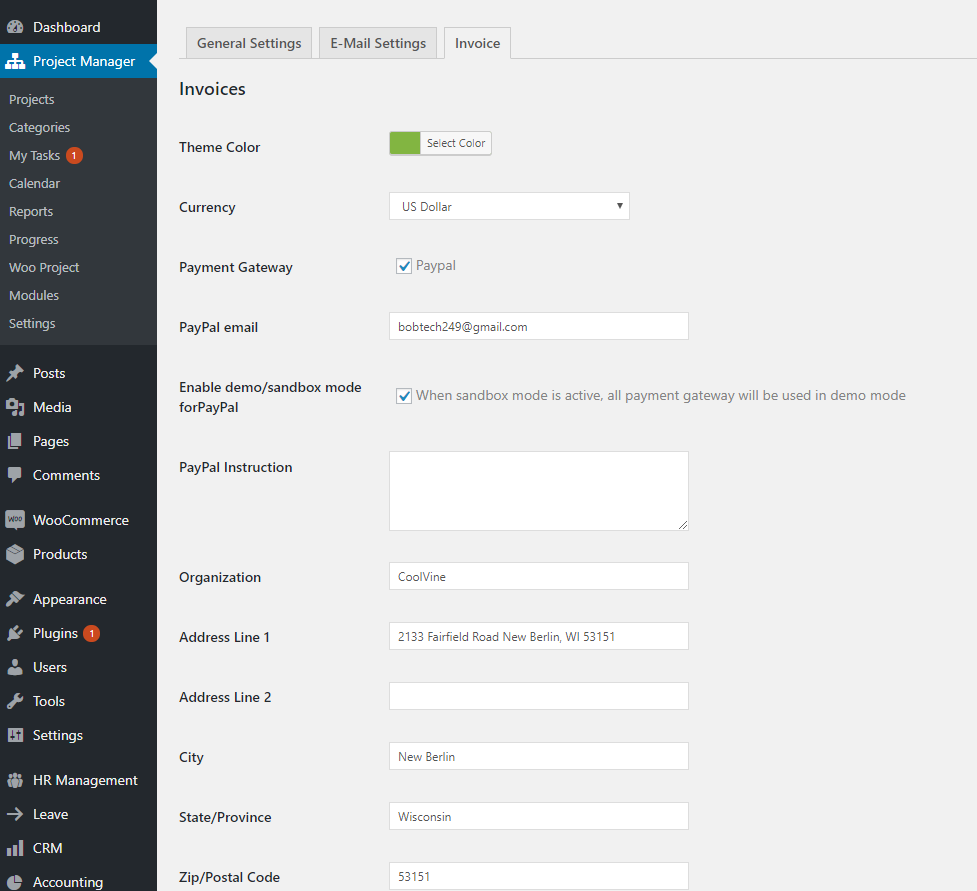
Organization and Address
The following forms will let you fill in your company name and address. If you fill it in, your company address will be automatically added to all invoices you create. You can add or edit your company address when you create an invoice, but adding your company address here makes the process faster for you.
Make sure to click the “Save Changes” button to confirm and save your settings.
How to create an invoice
Here's how to create an invoice for your client. First, you need to navigate to the project under which you want to create your invoice.
- Choose a project you want to create an invoice for.
- Click the Invoices tab.
- Click the Add New button to create an Invoice.
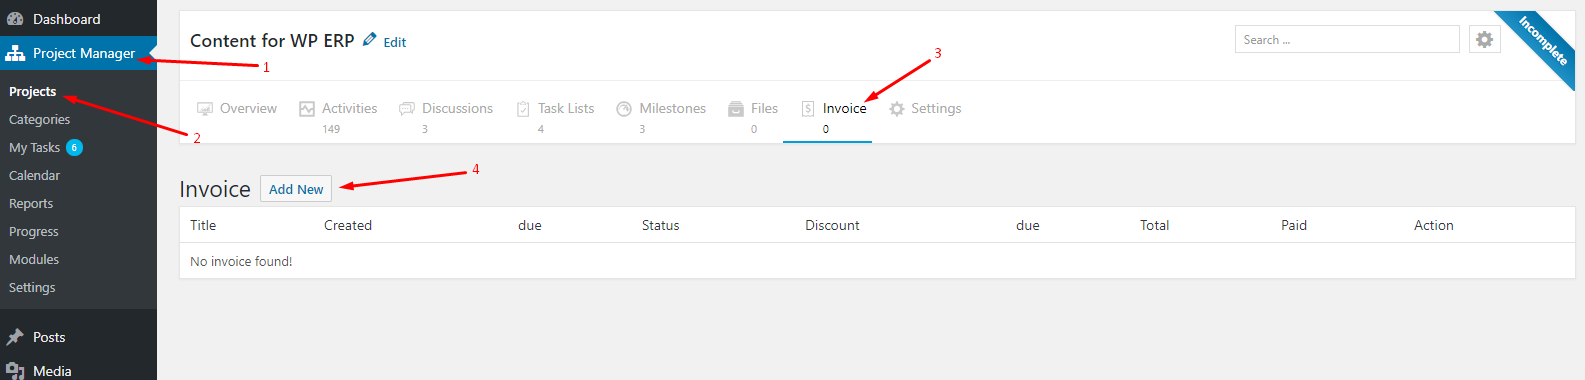
- You will see an invoice creation form like the image above.
After clicking on the “Add New” button, you will see an invoice creation form. Here is a screenshot:
Below is a short explanation of what each of the fields does in the Invoice form.
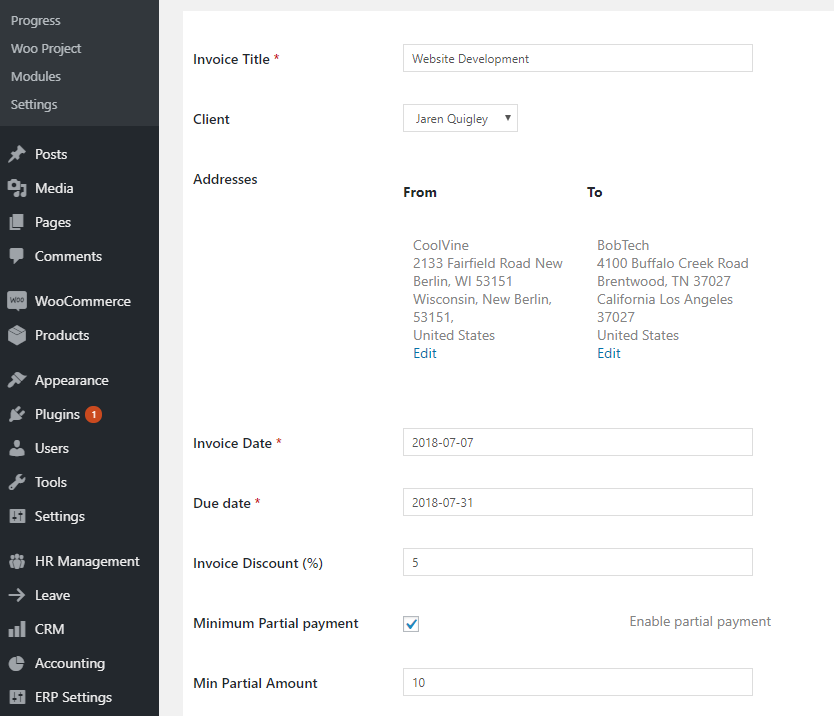
Invoice Title
Give your invoice a title that will show up on as the header of your invoice.
Client
Choose which client you're going to issue the invoice to. If you select a client here, he or she will see this invoice issued to him/her when they log in.
Addresses
Here you will find two address fields for To and From placement. “From” will list your company address by default if you have set it in the settings. You can update the address anyway. The “To” field will have the address of your client which you can manually enter here. Both addresses will show up on the invoice.
Due Date
This field is self-explanatory. You can input a due date for the invoice.
Invoice Discount
If you want to offer a discount to your client, you can type in the amount here.
Minimum Partial Payment
You can enable partial payment for the invoice by checking this option. Checking this option will enable a new field where you can type in the amount of partial payment.
Initial Invoice Entry
This is where you enter all the items/hours for which you will be charging your clients. This has two parts.
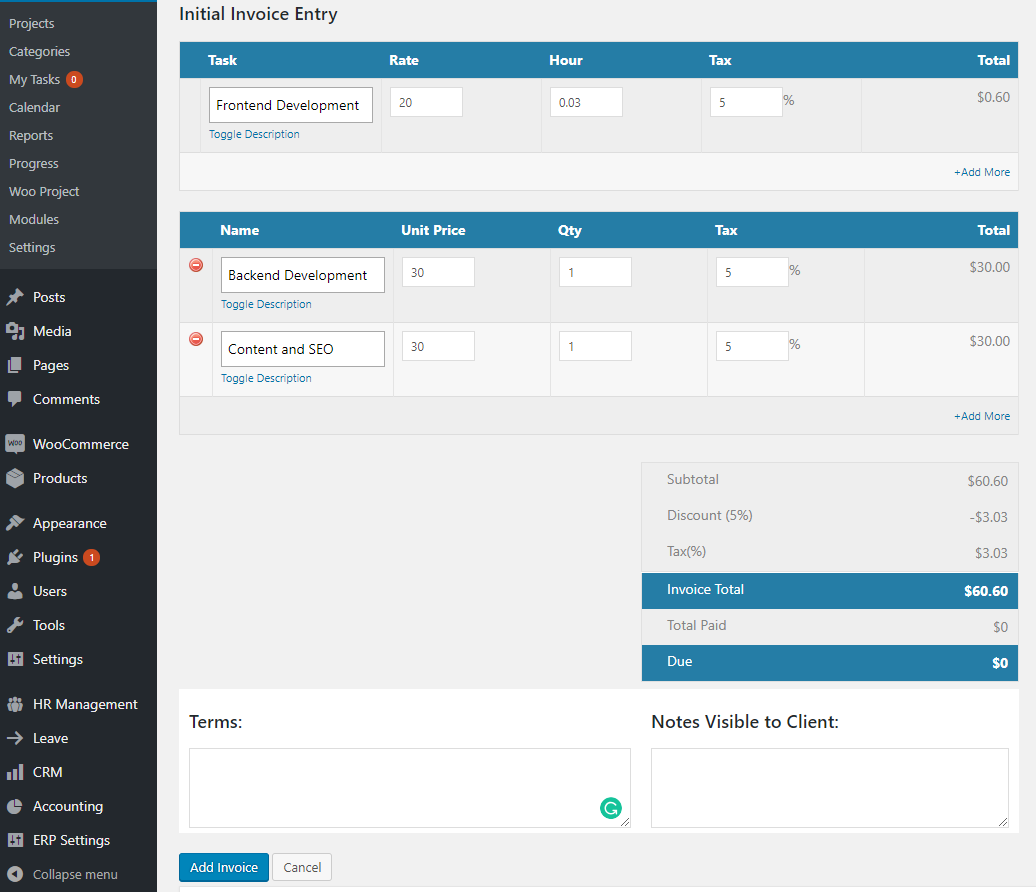
- Task: If you want to charge your client by the hour, or for hourly tasks, this is where you will enter your tasks. You can create multiple tasks, give them a name and a description, add an hourly rate and put in the number of hours you're charging. Invoices will automatically calculate the charges.
- Name: On the second part, you can add items for which you are going to charge your client. You can add as many items as you want, add unit price and quantity. You can also put in Tax charges should it apply. Invoices will automatically calculate and show the total amount at the bottom. You can delete tasks using the red buttons before the task items.
Please note that you can delete Tasks or Names using the red buttons and add items using the “+ Add More” option.
Terms
You can add terms and conditions at the bottom of the invoice. The text you enter into this field will show up in the invoice.
Notes Visible to Client
Just like Terms, you can optionally add custom notes for your clients which will be shown at the bottom of the invoice. You can add those text in this field Notes Visible to Client.
When you're done, you should click the Add Invoice button and that will save the invoice. The client, when logged in, can see the invoices issued to them from the front-end. See how to show invoices on the site to your clients.
Show Invoices on Front-End
You can let your clients see the invoices issued to them on the front-end of your site. All you have to do is follow through:
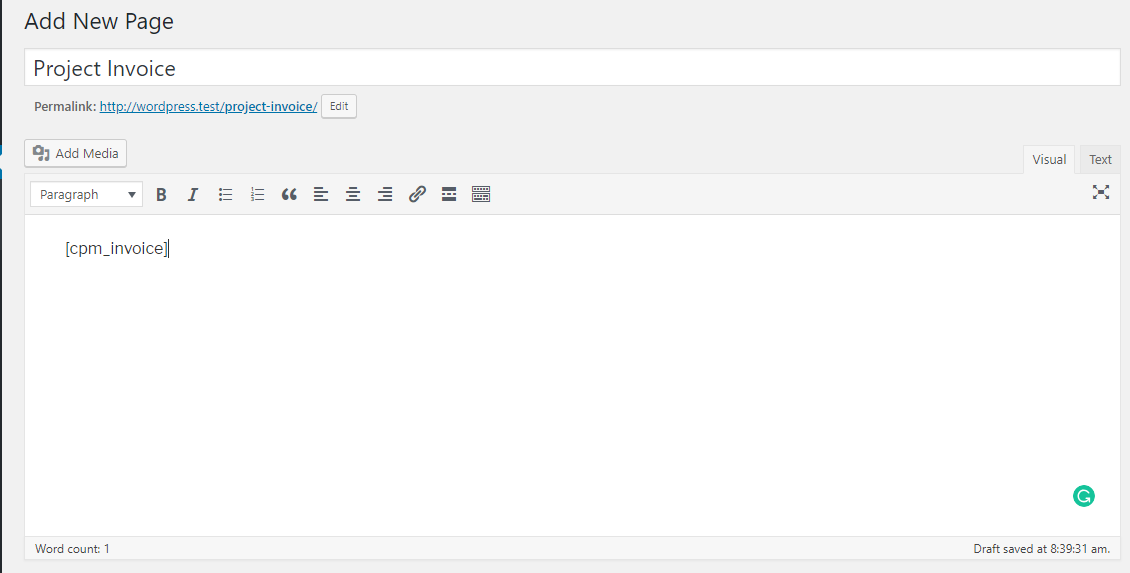
- Create a new page. Name it Invoices.
- In the new page, just type in the shortcode
[pm_invoice] - Publish the page.
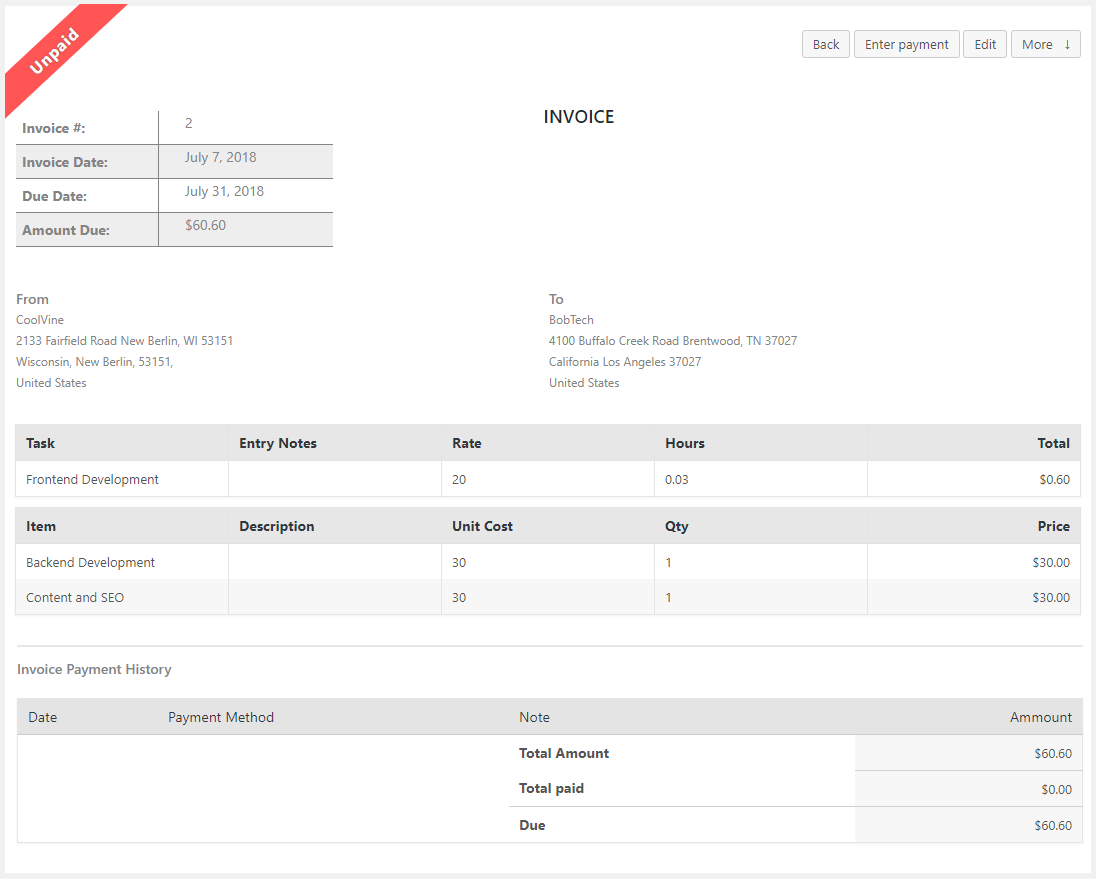
Now when your clients are logged in, you can direct them to the Invoices page. They'll see all the invoices you issue to them there. Here is how your client will be able to view the invoice:
Please note that you need to choose a client when creating a new invoice. Otherwise, they will not see it there.
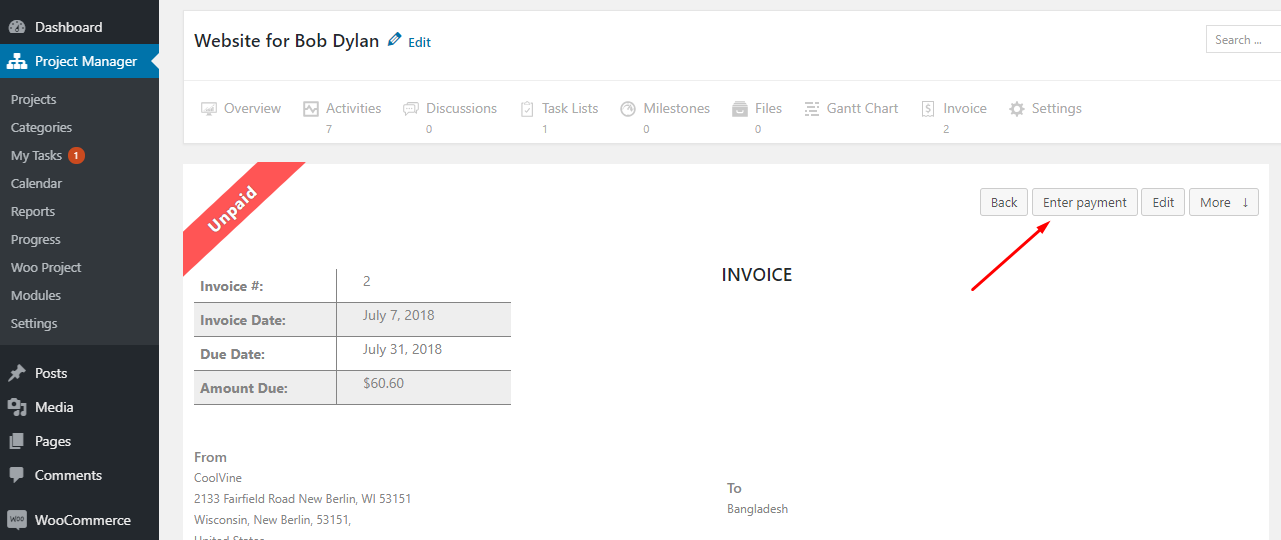
Mark An Invoice As Paid
By default, when a client pays against an invoice via PayPal, that invoice gets marked as paid. But if you received payment via an alternative way and need to mark an invoice manually, here's how to do it.
- Go to Projects and select the project for which you want to mark the invoice as paid
- Go to Invoices tab.
- From the list, click the correct invoice that you want to mark as paid.
- The full invoice will be shown. Click “Enter Payment” button.
Entering the Payment
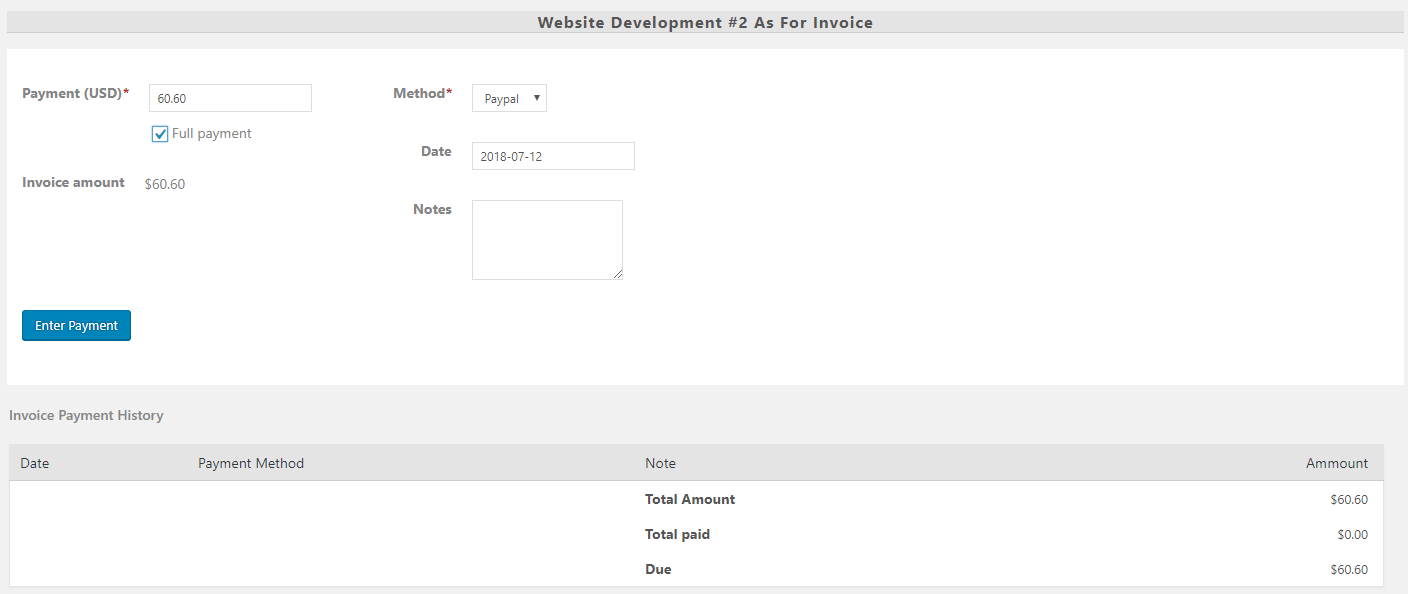
Here you can enter the payment amount or click the Full Payment check box to enter the full invoice amount. You can also add a payment method, date, and some notes.
When done, click “Enter Payment” button and the invoice will be marked as paid.