

How to Use Time Tracker
Time Tracking is a much-needed feature for someone who is a part of a project management team. With the Time Tracker module of the WP Project Manager module, it's super easy to track time. This module is available in the Professional and Business packages of WP Project Manager.
Activation
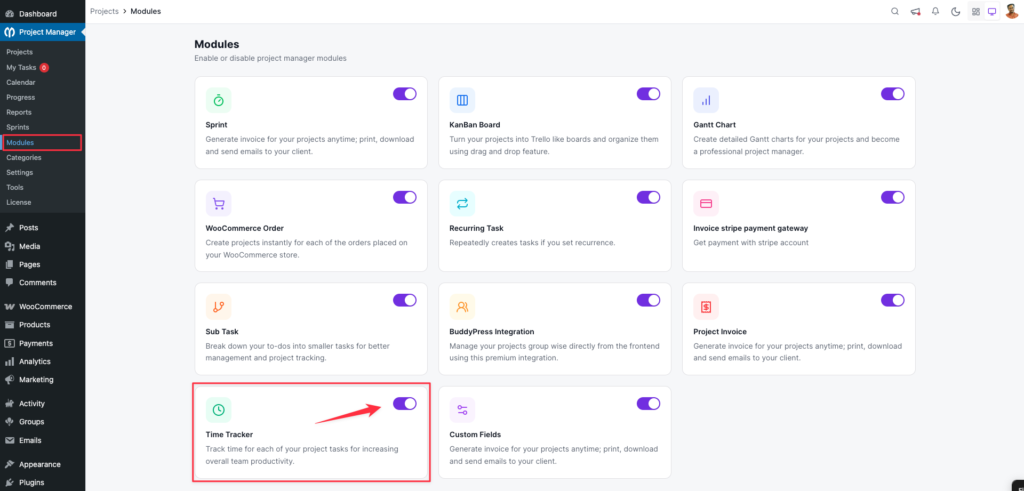
Activating the Time Tracker add-on for WP Project Manager plugin is a matter of a few clicks. All you need to do is navigate to WP Admin Dashboard → Project Manager → Modules. Next, Activate the “Time Tracker” module by clicking on the toggle button as denoted by the red arrow:
Configuring Time Tracker
The Time Tracker module lets you track how much time you spend on each task inside of a Task Lists Tab. To start tracking time on your Projects, follow this:
Start Time Tracking
- To start tracking time of a task, go to the Projects menu and click the relevant project.
- Click on the Task Lists tab.
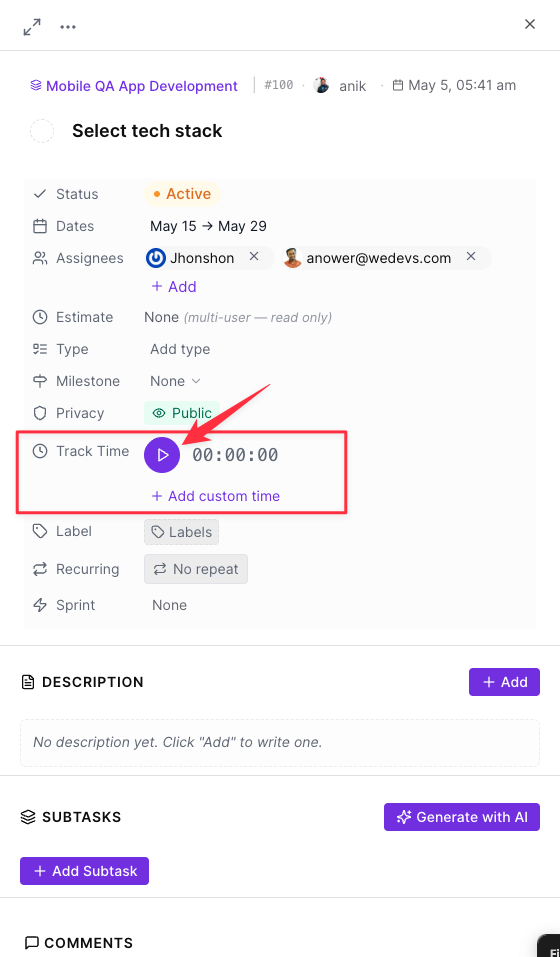
- Here, if you have a task or tasks created from all along, click on the task. Now, you need to assign a logged-in member. Then you will see the Time Tracker option.
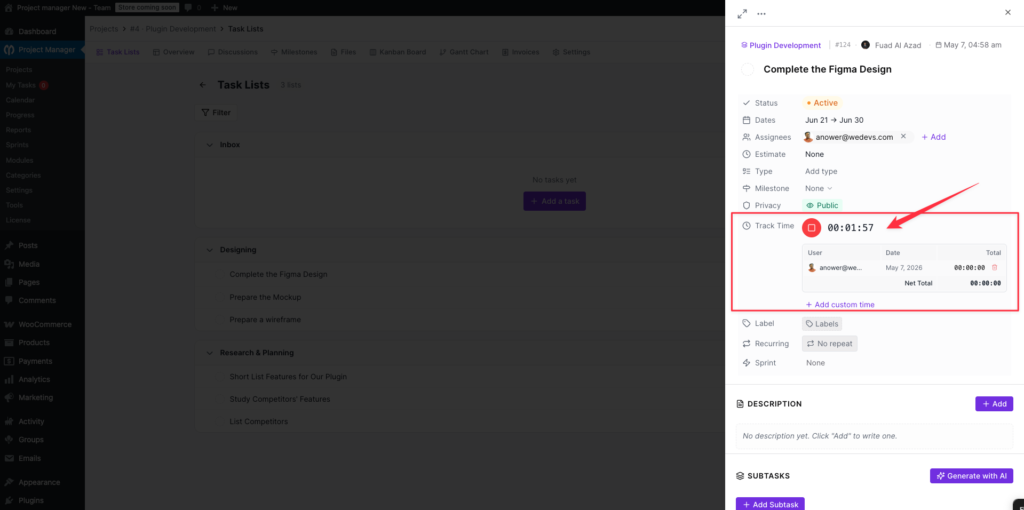
- Click the Marked icon to start tracking time for that task. You will see the clock start tracking your time.
- To stop the Time Tracker from tracking time, simply click the Stop option while the time tracker is active. On doing that, you will see the clock will stop and show you the amount of the tracked time.
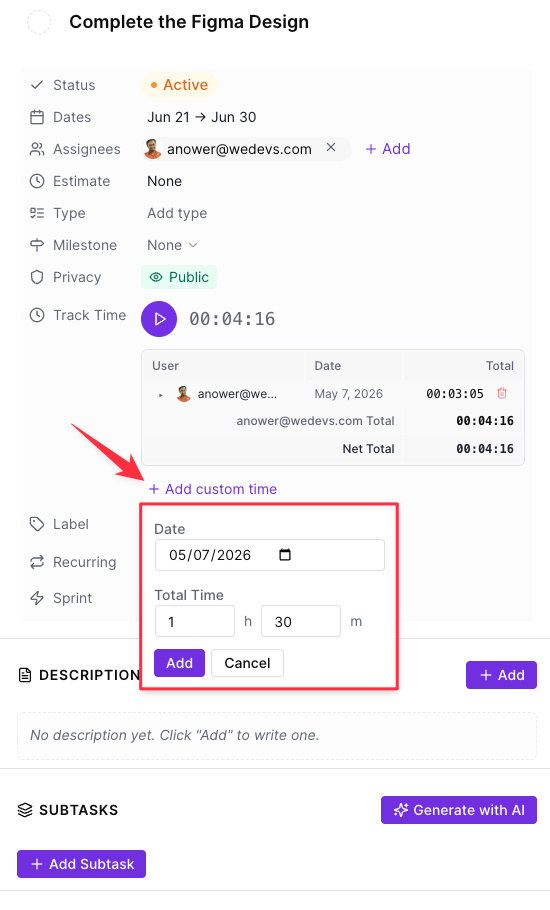
Add Custom Time
You can add custom time to Time Tracker. Follow the steps below to add manual time to your tasks.
- Simply click on the Custom Time option for a task.
After that, you will get options to insert the start time and end time manually:
- Finally, click on the Add button to save the manually tracked time.
Estimation Field:
With the release of the WP Project Manager Pro version 2.3.1, make sure you do the following:
- Turn on the Time Tracking Module.
- Assign only one user to each task or subtask.
Adding Estimated Time for a Task
- To set an estimated time for a task, go to the Projects menu and click on a relevant project.
- Click on the Task Lists tab.
- Now, give a task name and assign a user to it.
- Next, you will get a clock-like icon to set the estimated time:
- Set the estimated time for the assigned user in the Hours : Minutes format:
- Now, click on the ‘tick' mark to add the task.
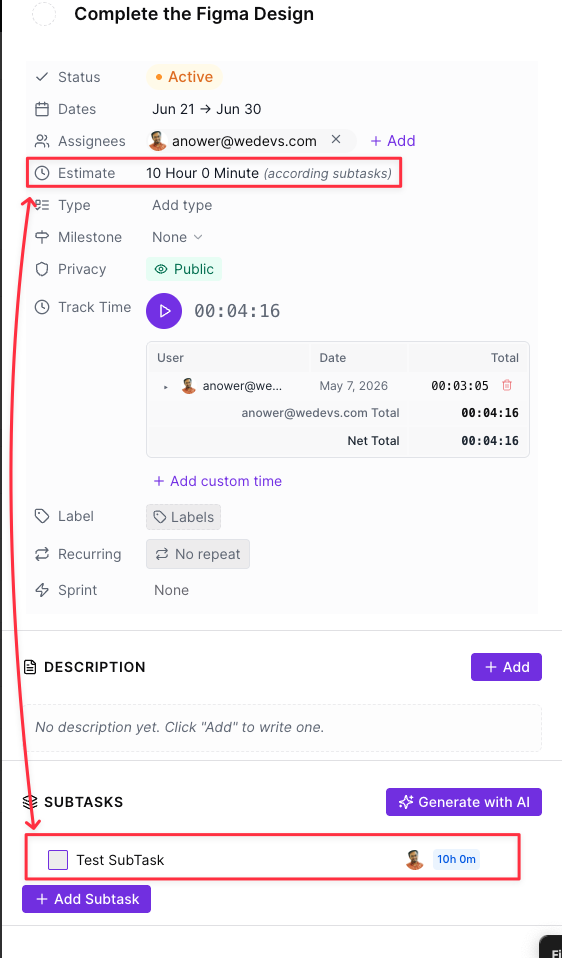
Adding Estimated Time for a Sub Task
- To set an estimated time for a task, go to the Projects menu and click on a relevant project.
- Click on a Task Lists tab.
- Create a task.
- Now, click on the task and create subtasks. Now, assign users for the subtask.
- Now, you should see the clock-like icon on the subtask editor.
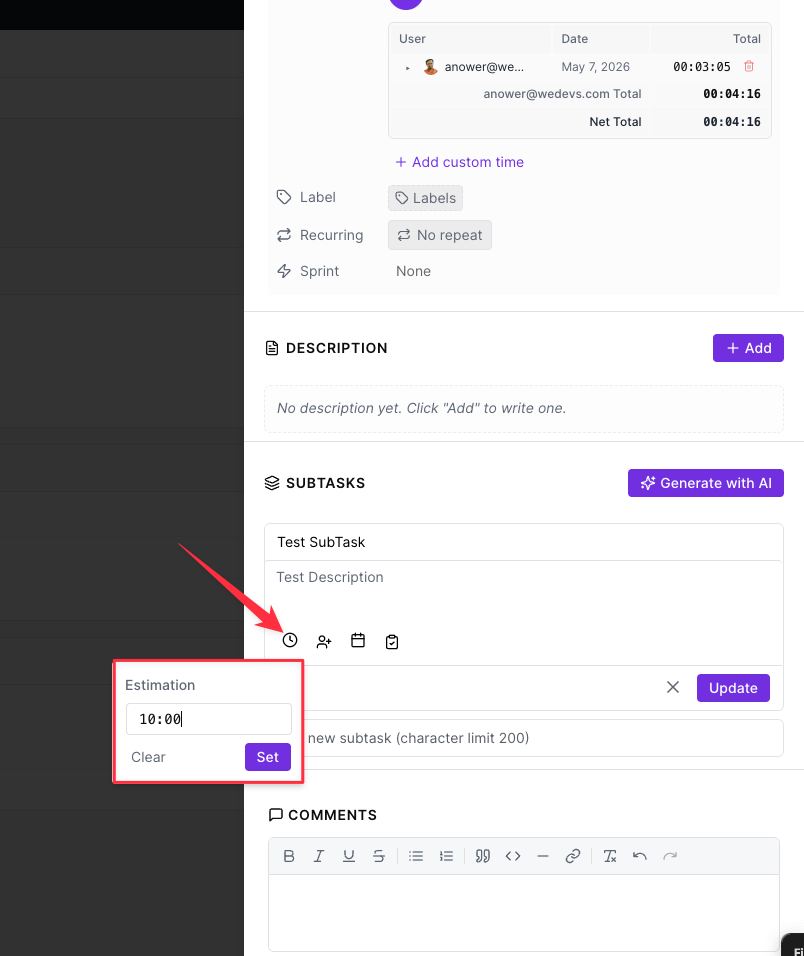
- Set the estimated time for the subtask and click on the ‘tick' mark to add the subtask.
That's all about Time Tracker module of the WP Project Manager.
Note 1: One must be assigned to a certain task to track his/her time for that task.
Note 2: One can track only one task at a time.