How to Set WP Project Manager Custom Field
You can add Custom Field to the tasks with the WordPress Project Manager Pro Business Package. WP Project Manager custom field lets you differentiate tasks by adding customized fields or tags to the tasks.
Let's see the steps on how you can add custom fields. The process is very simple.
Step 1: Go to WP Project Manager.
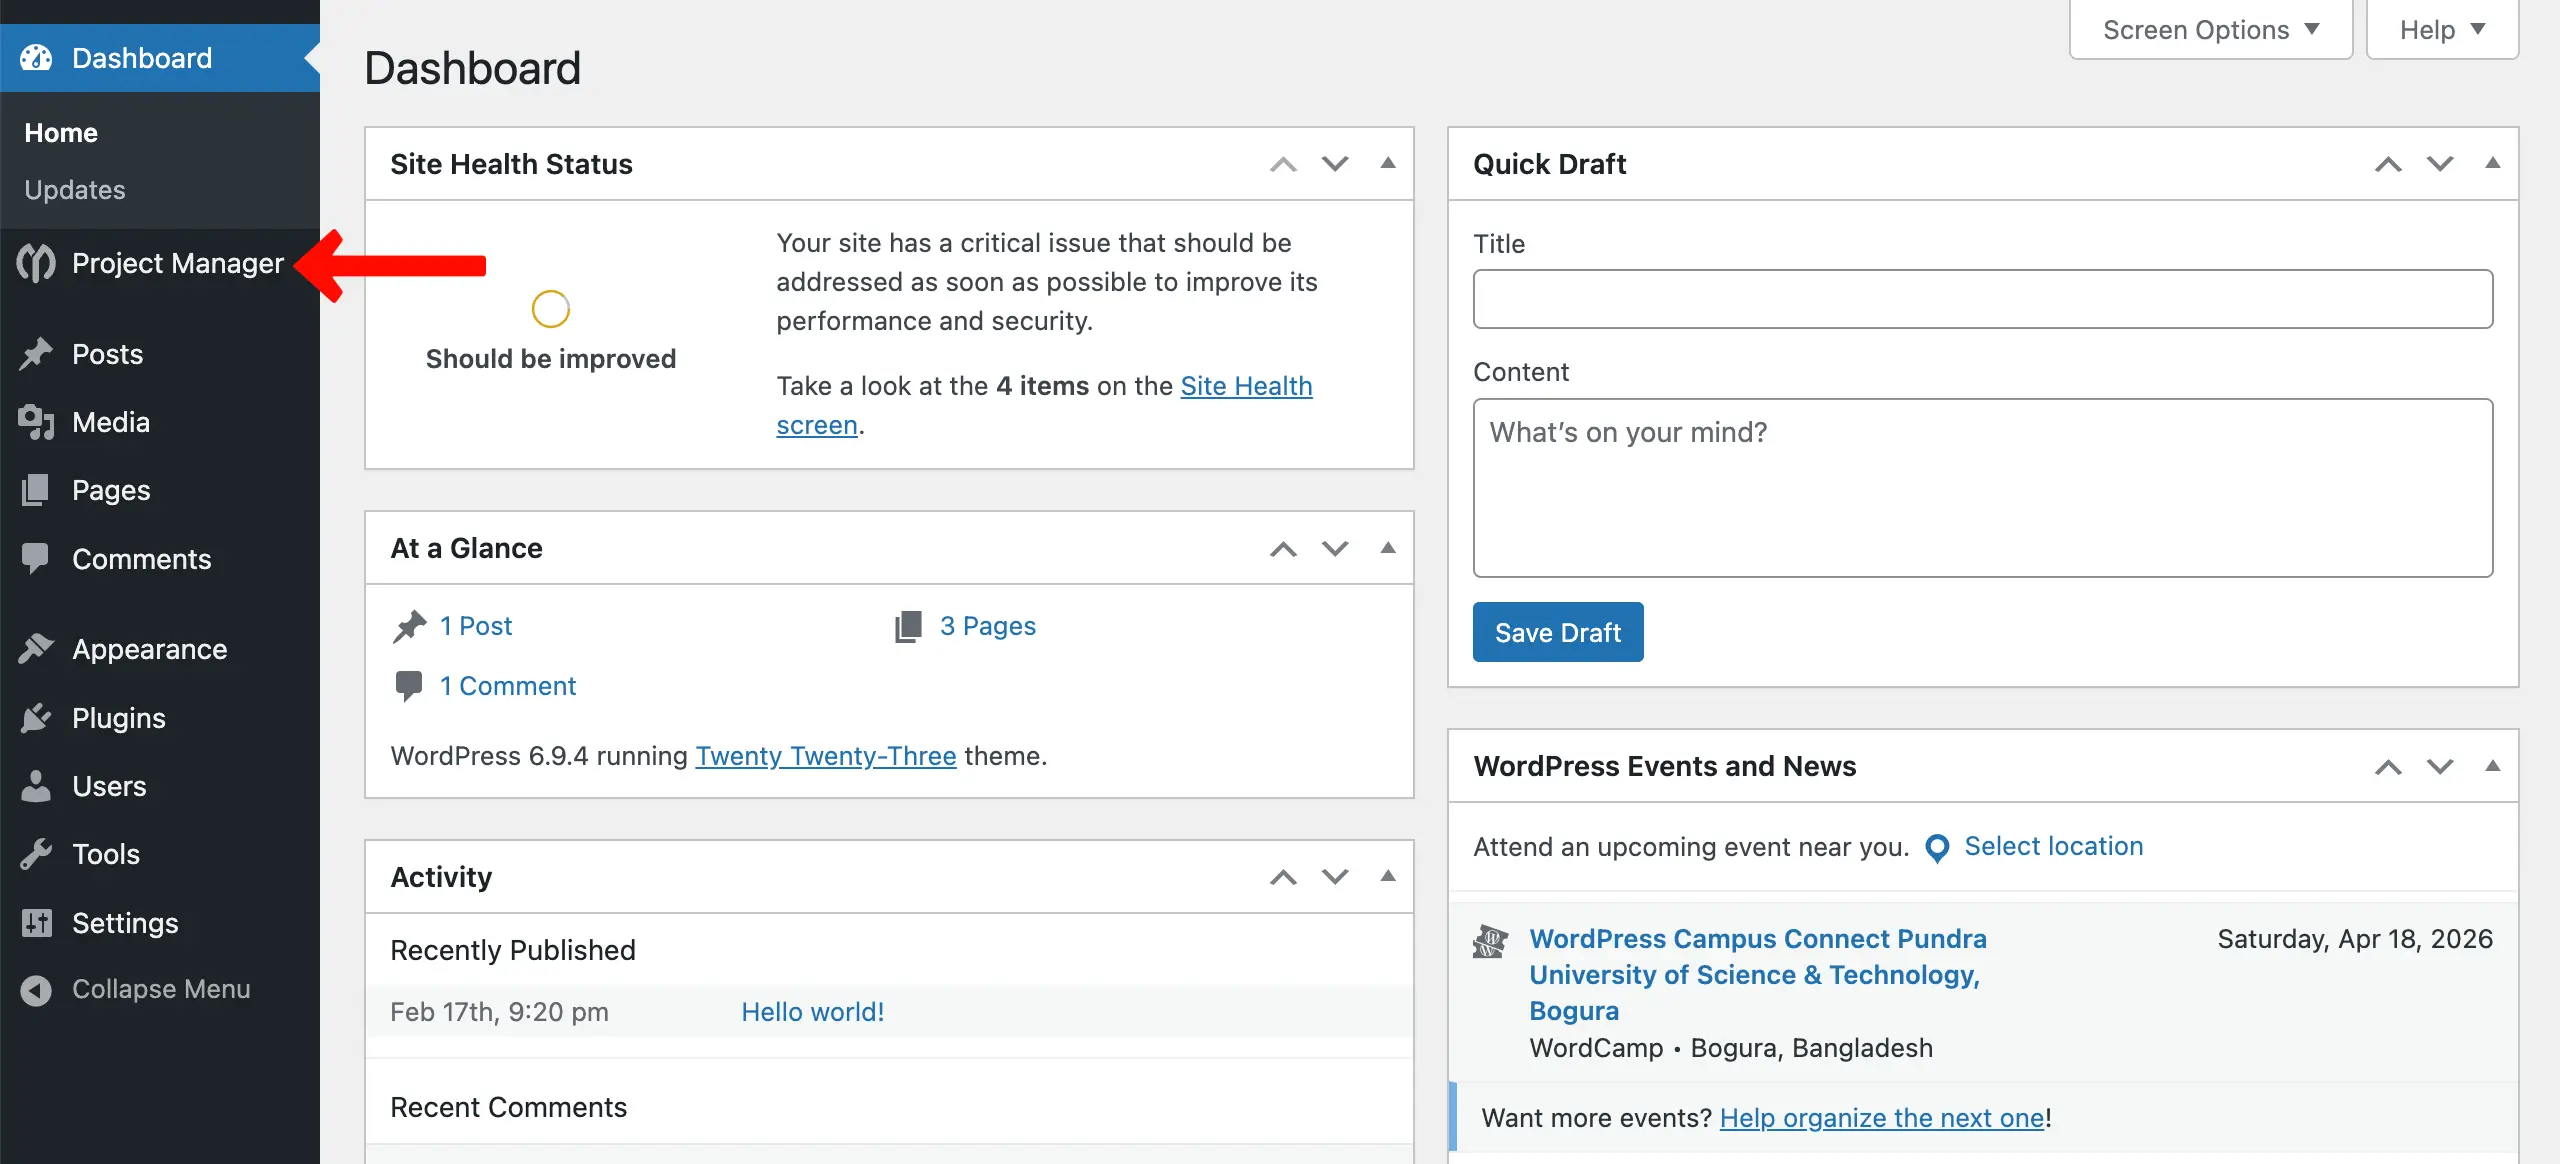
Select any project. Navigate to Settings > Custom Field.
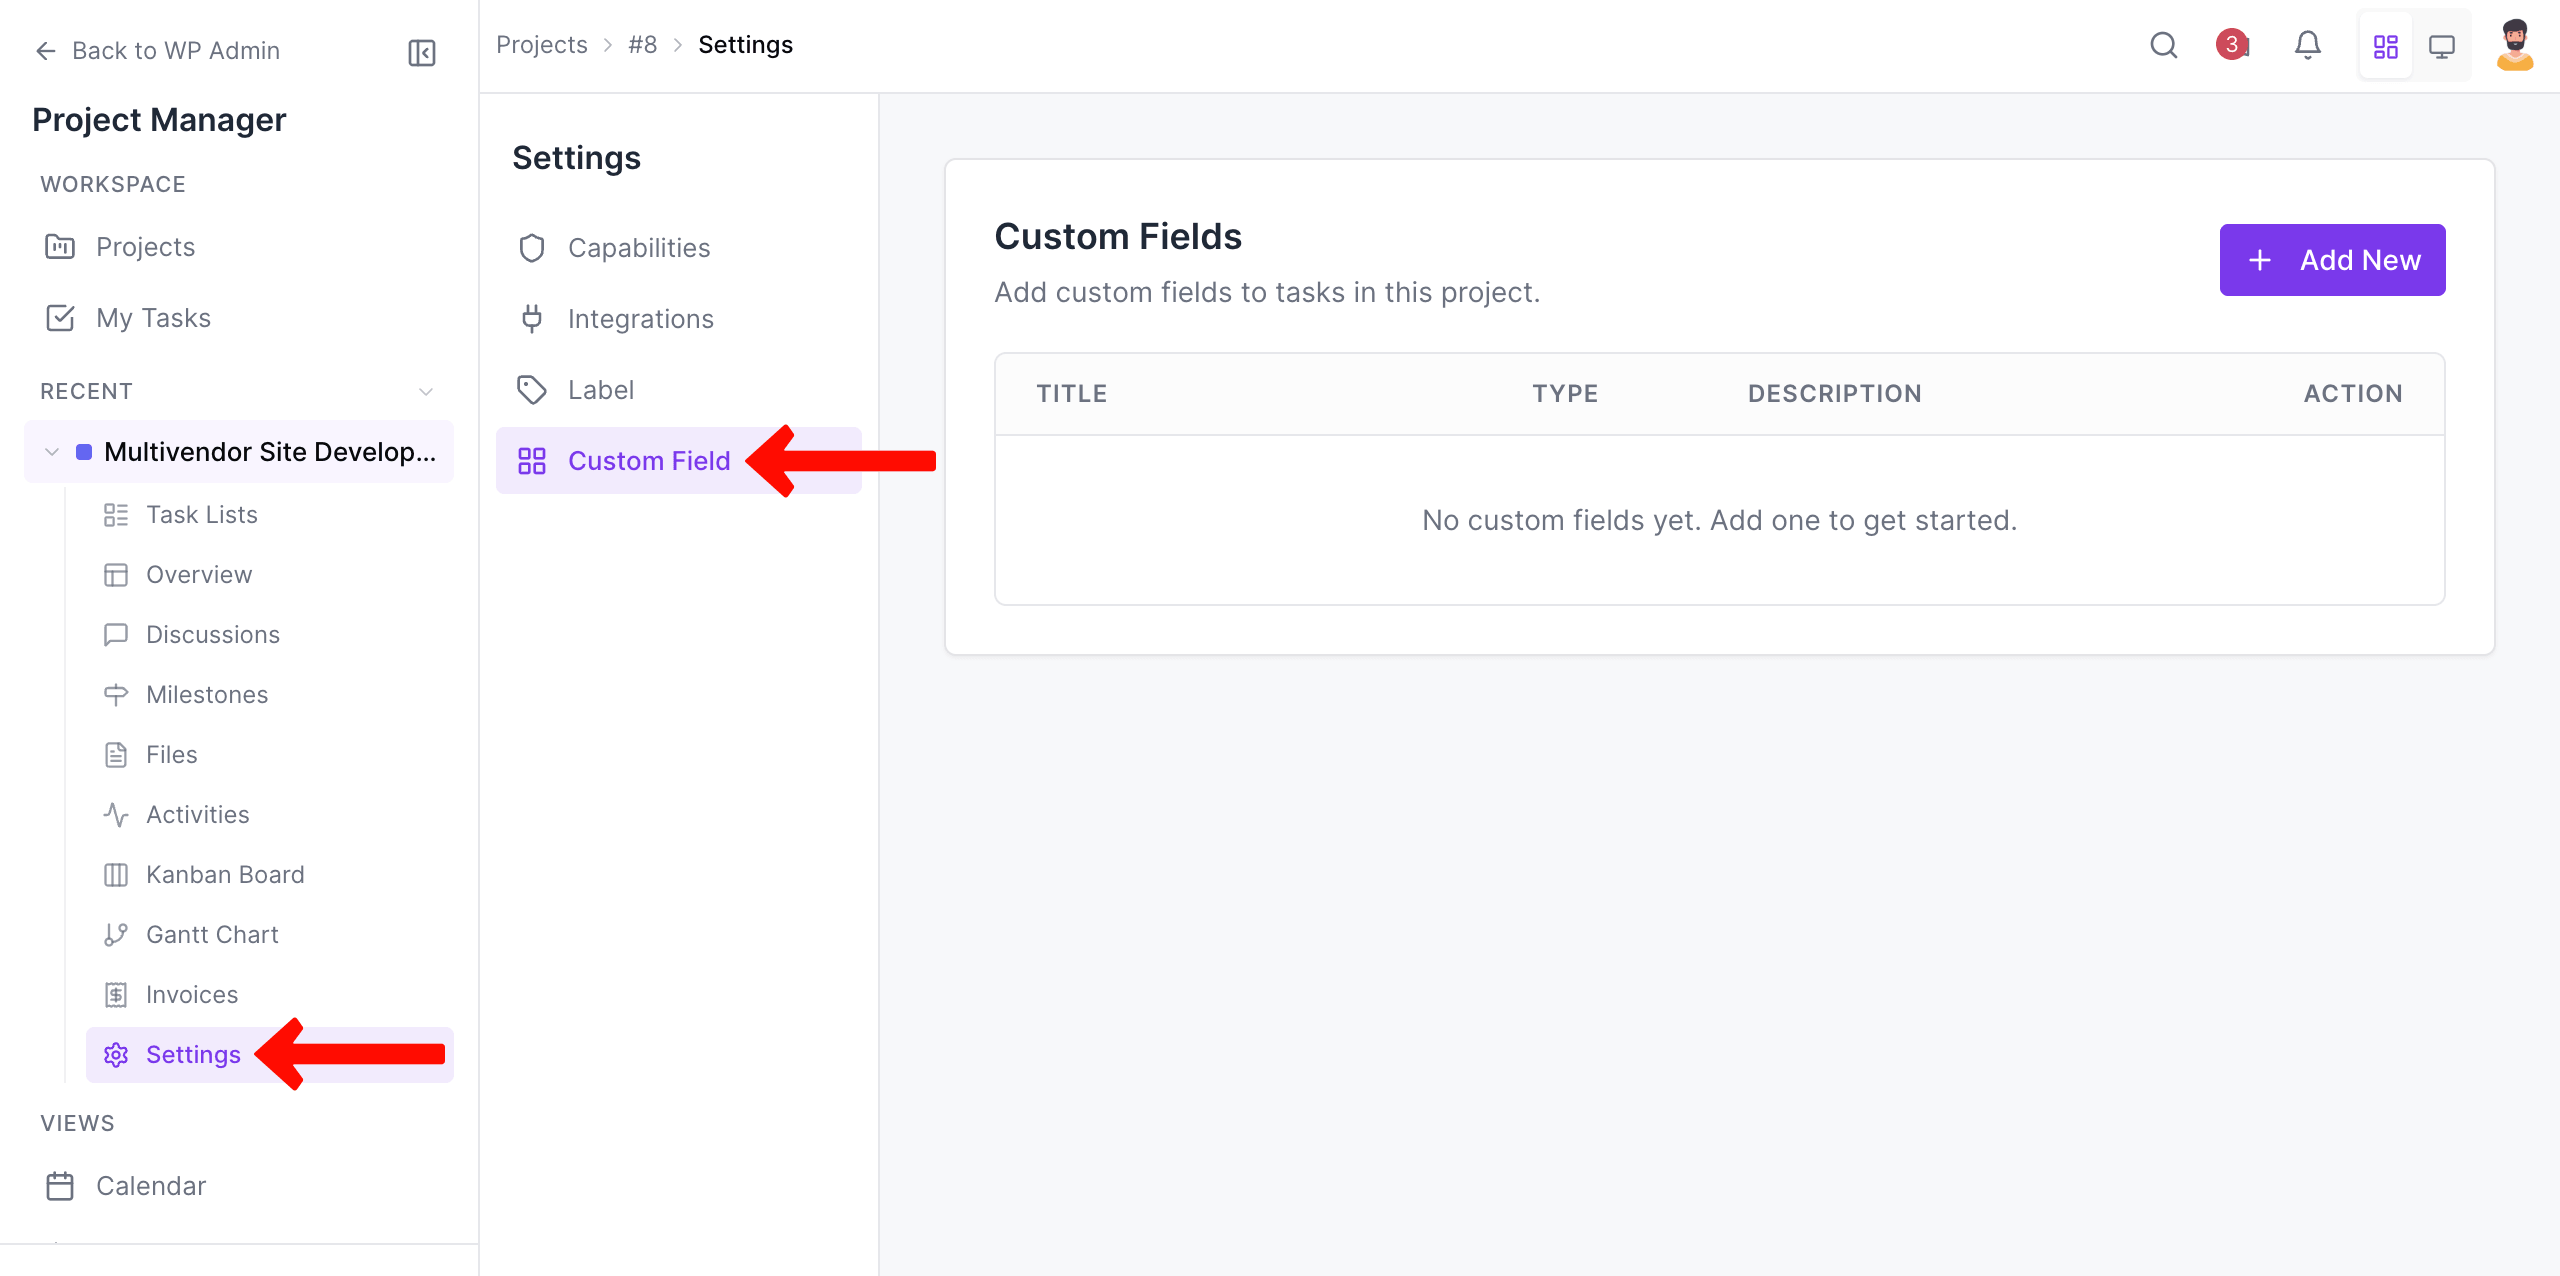
Step 2: Click on the Add New button.

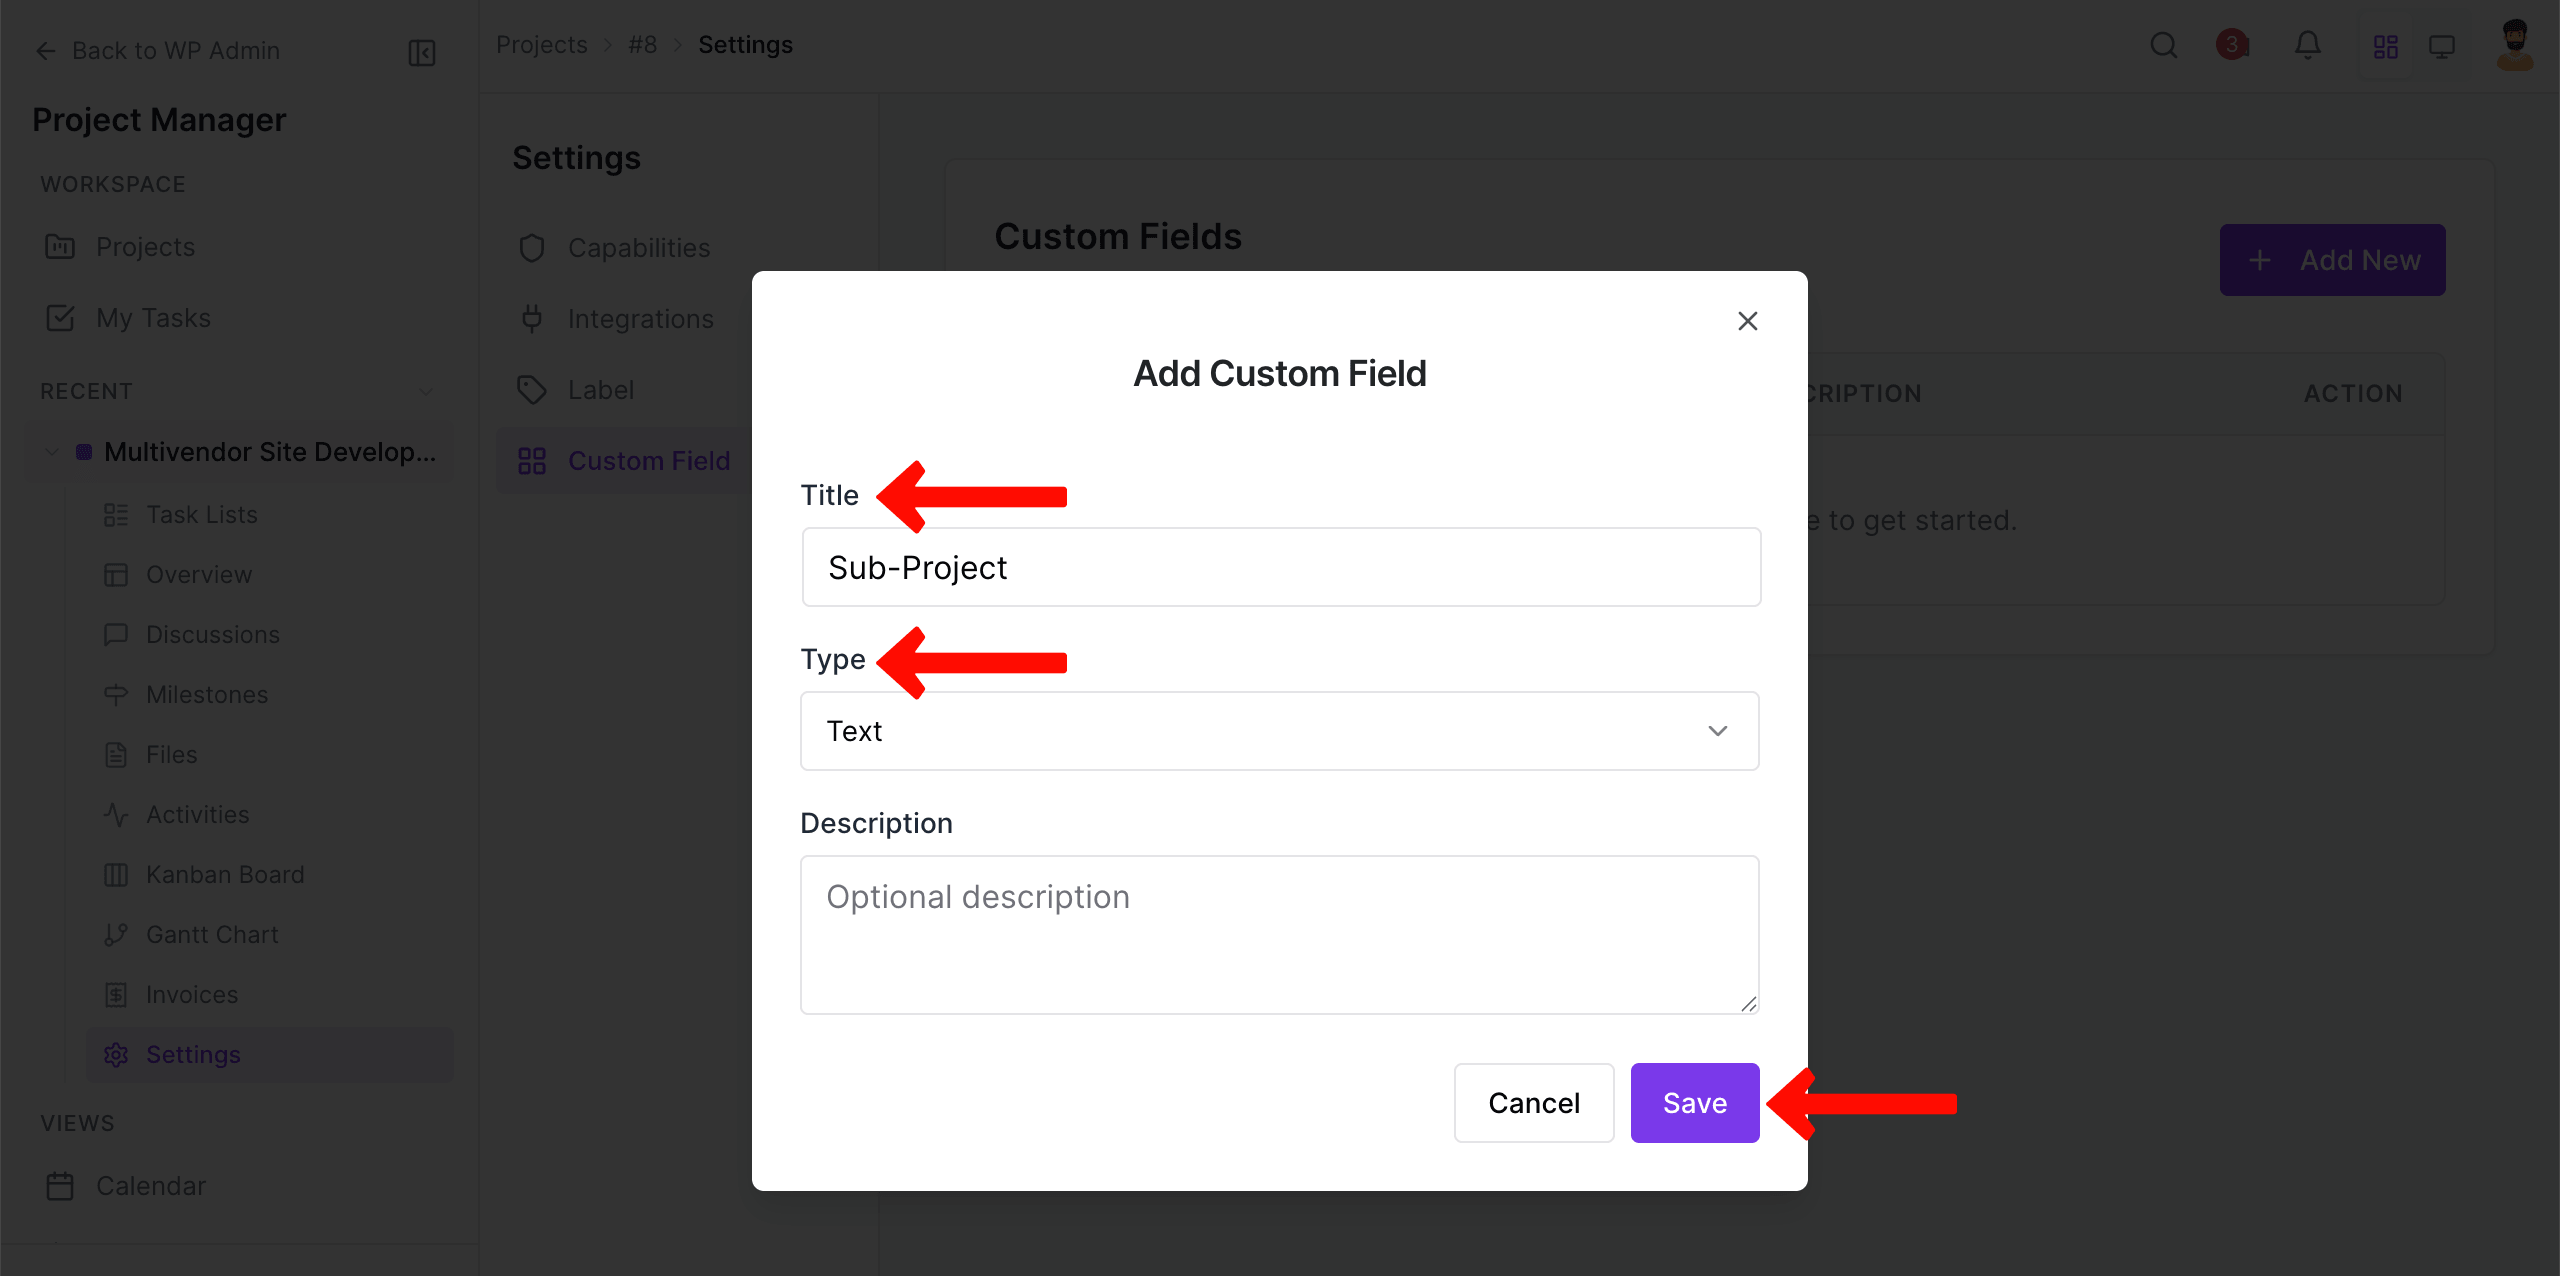
Step 3: A pop-up will appear. Add a title and a type you want. Then, save all the changes.
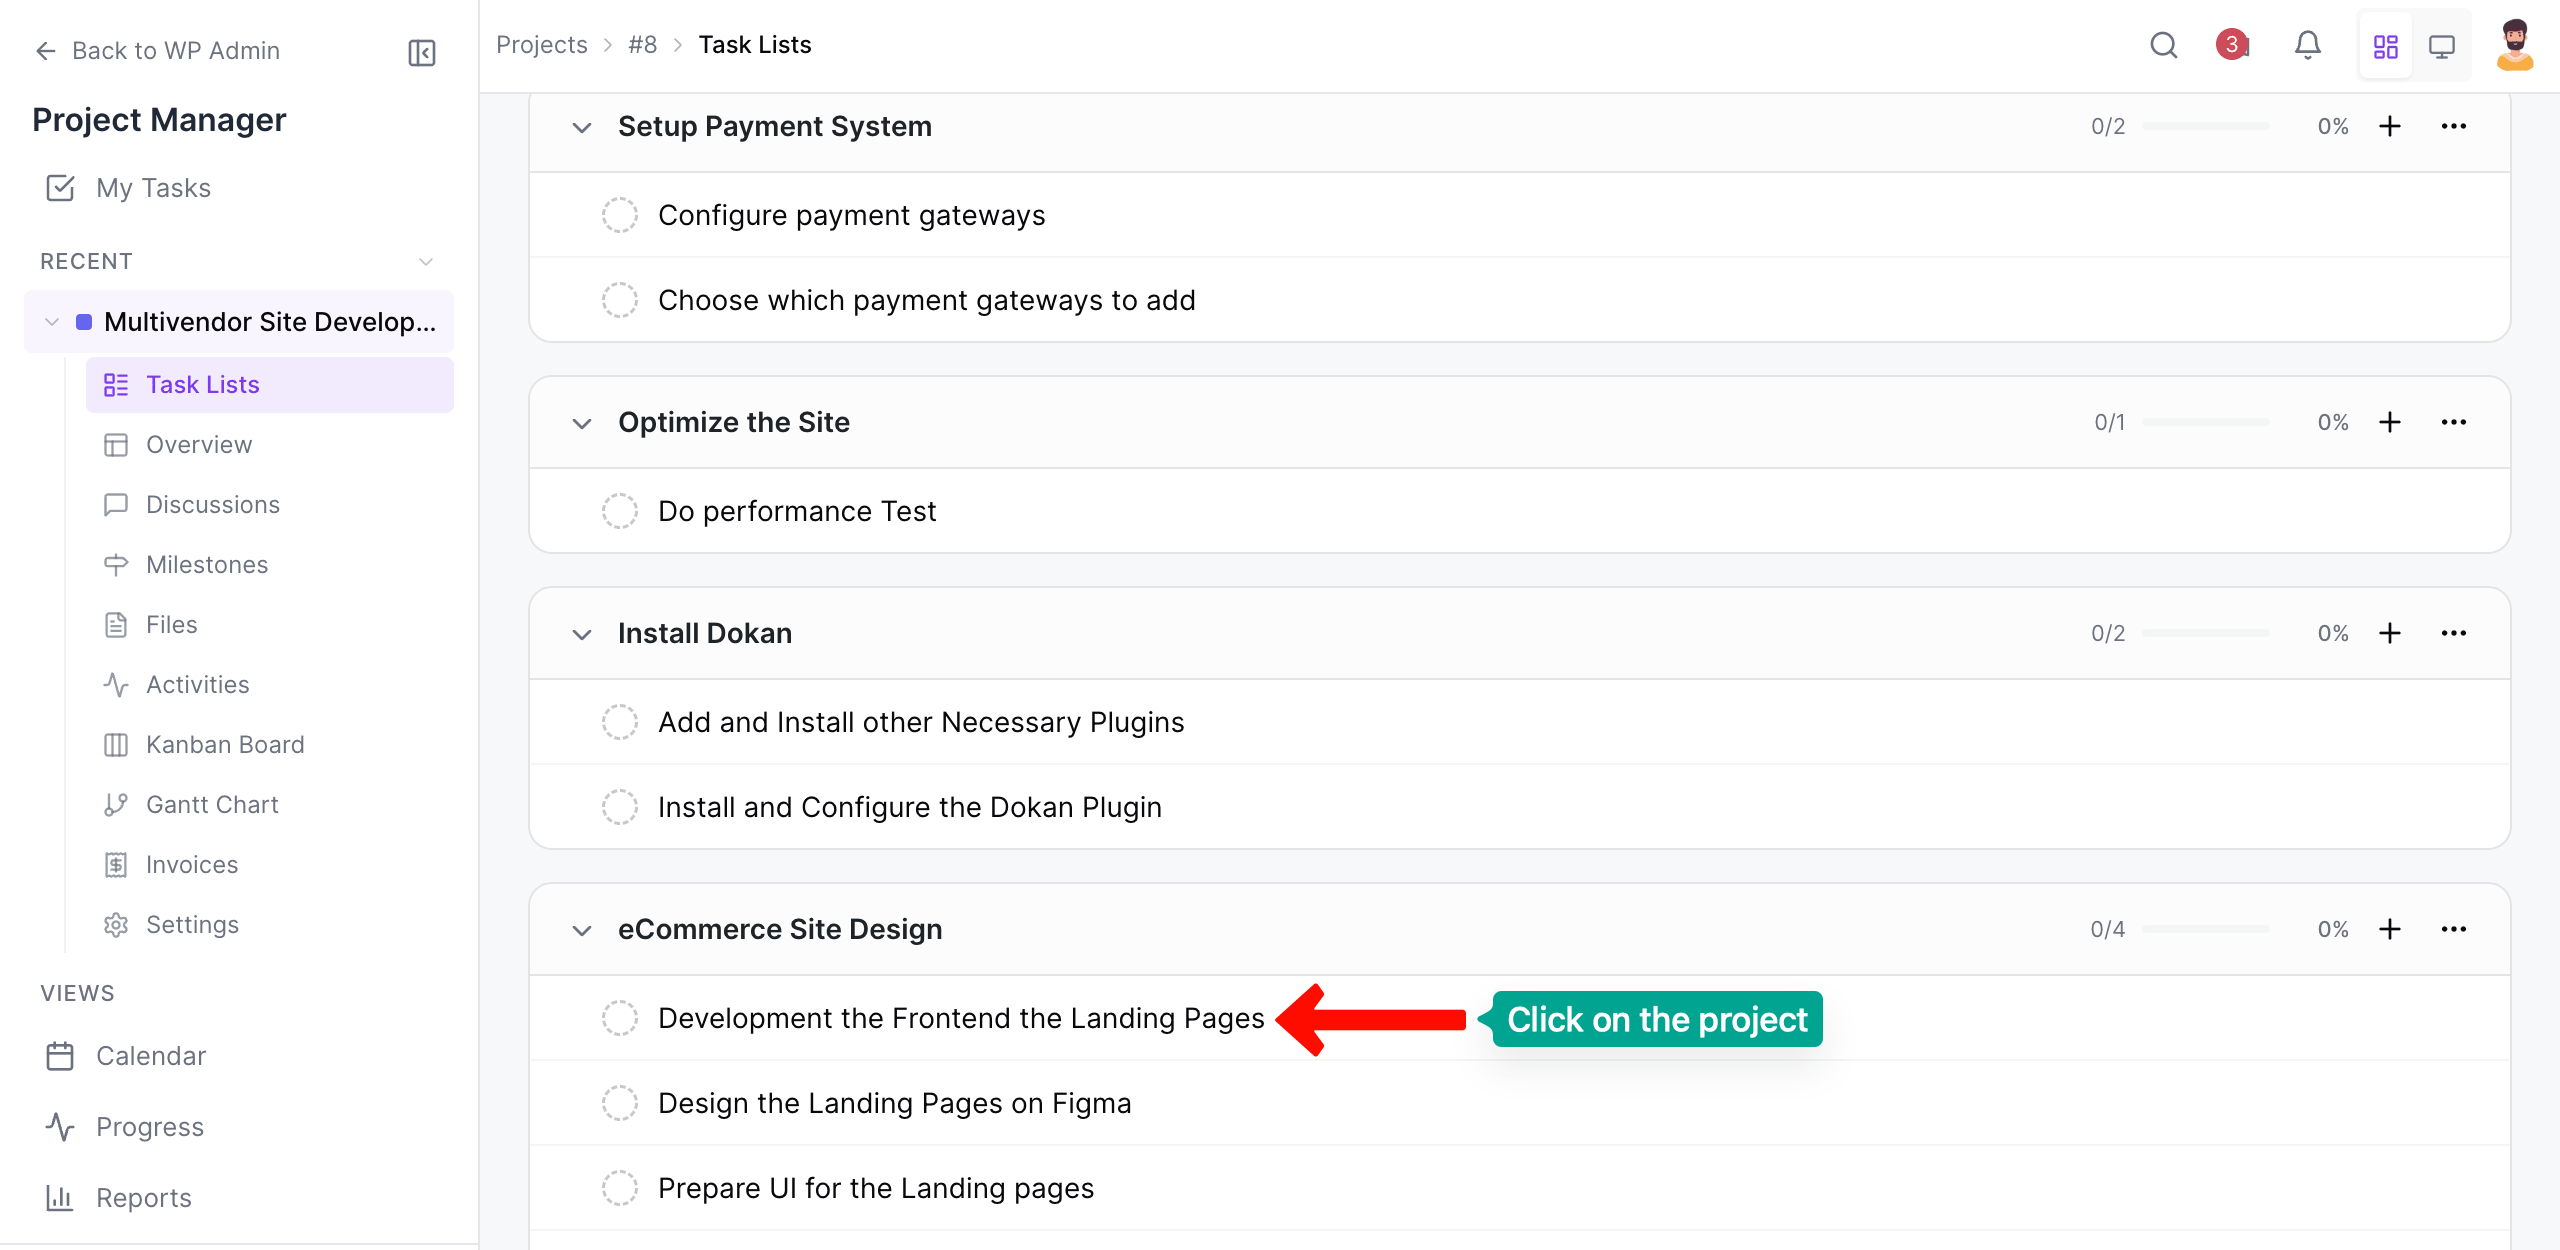
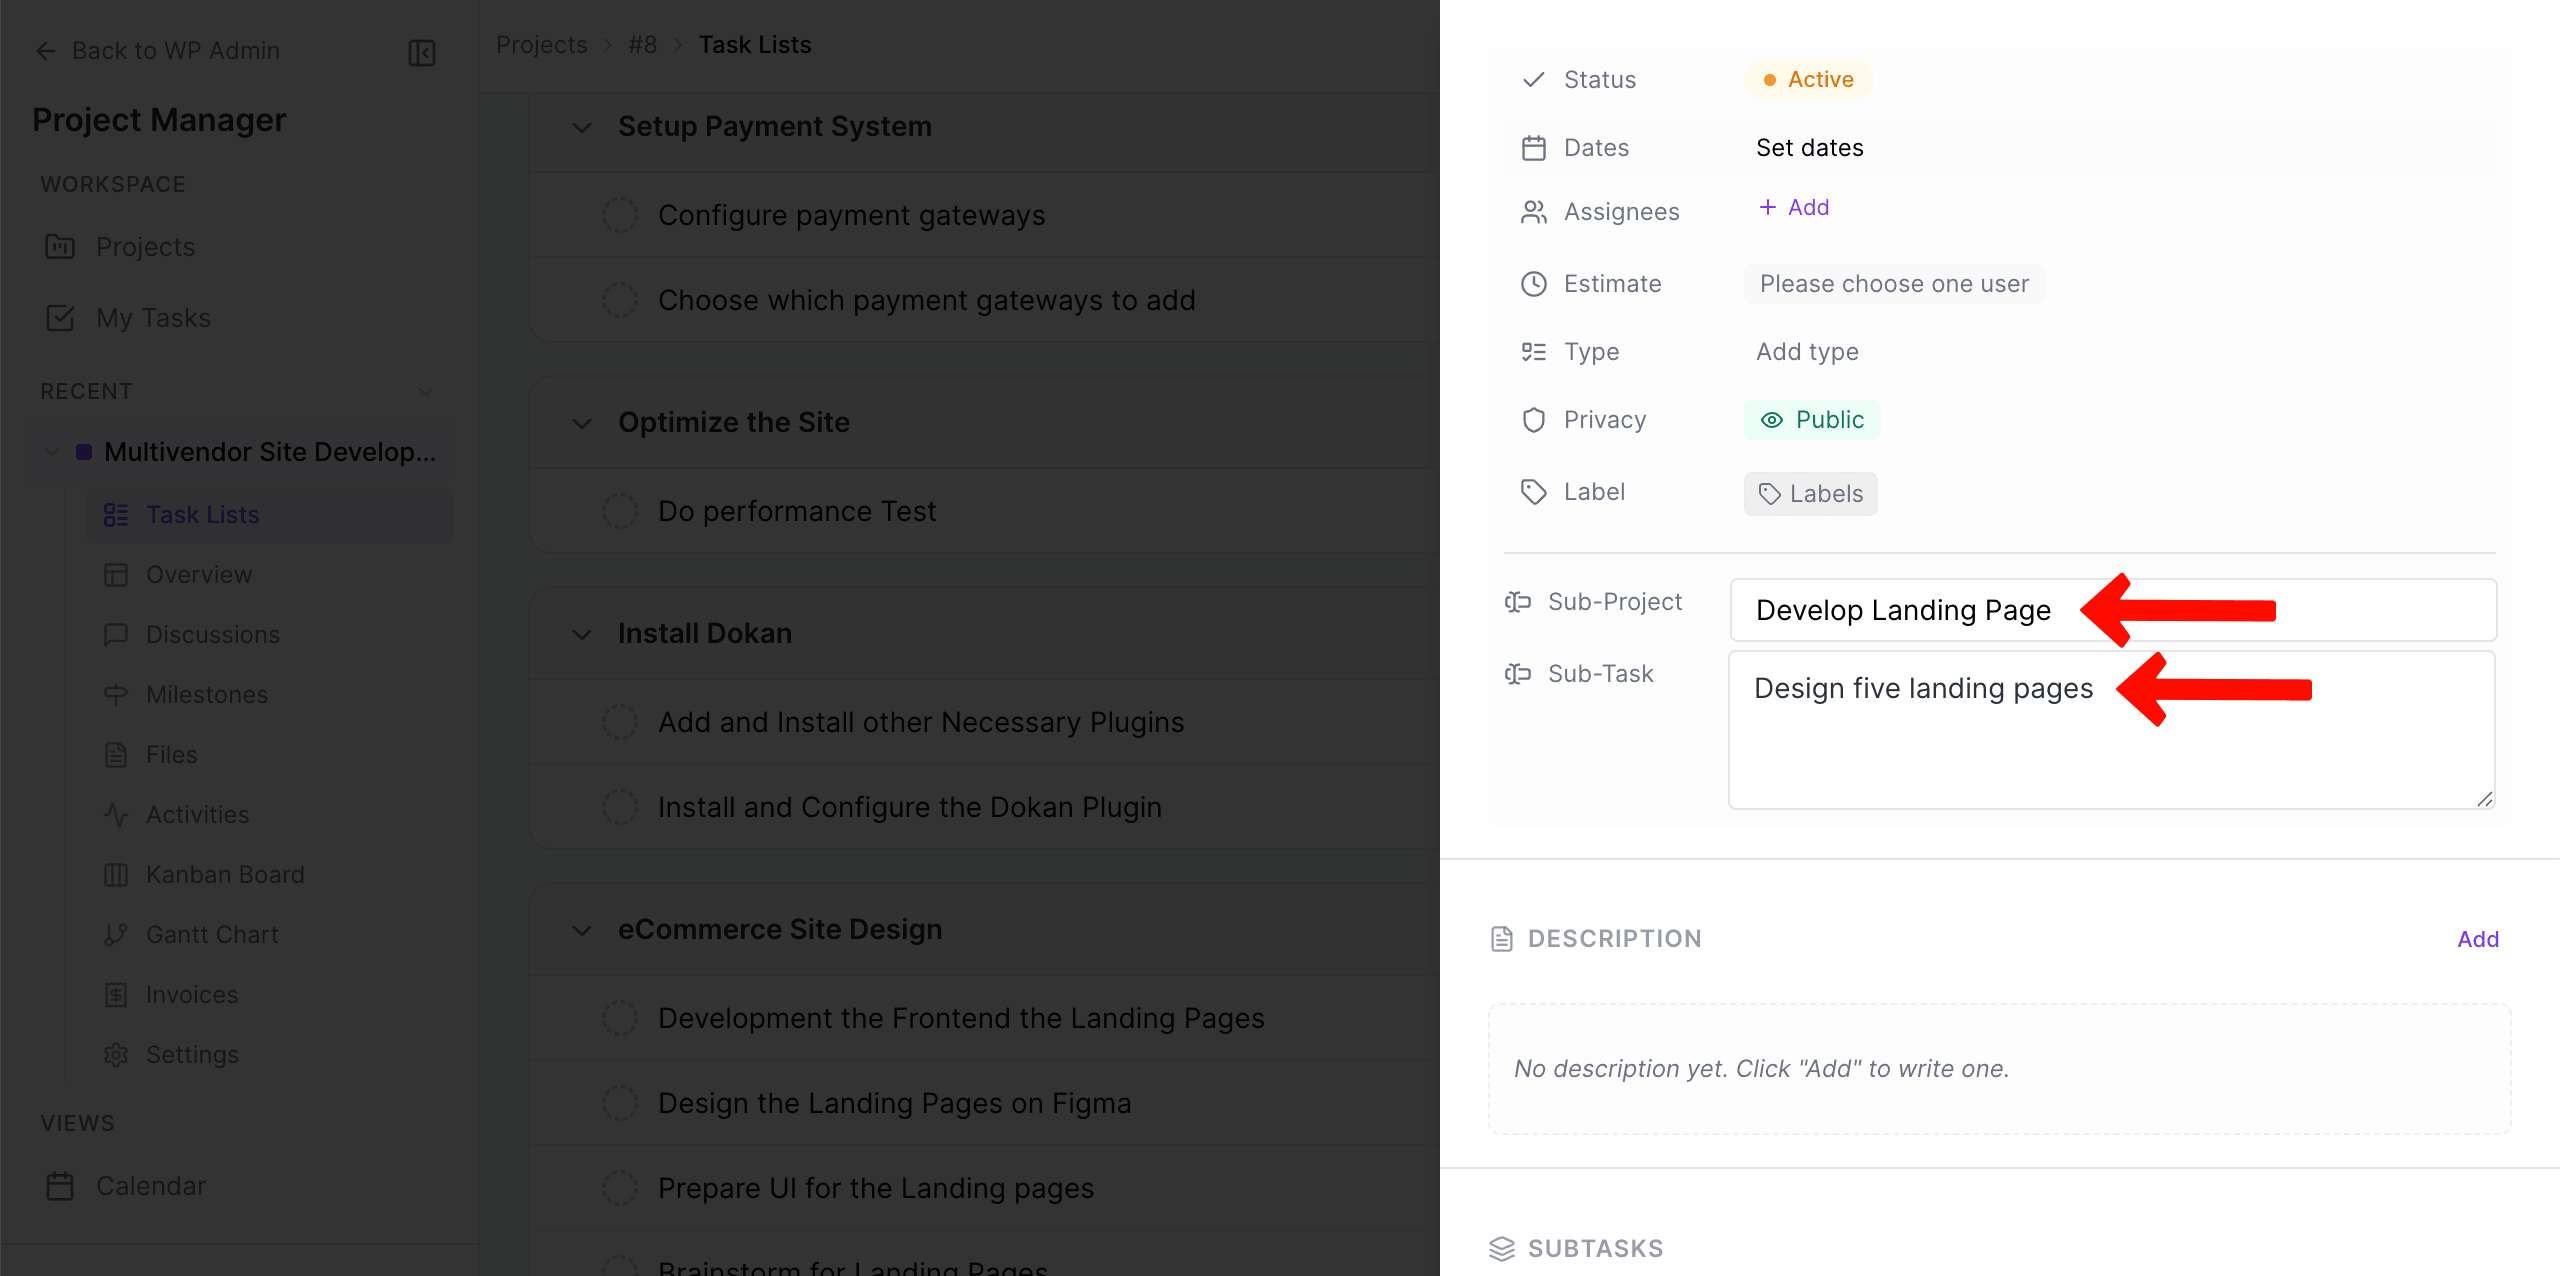
Step 4: Just open a task by clicking on it.
Step 5: Now, go to the right sidebar. Scrolling down the tab, come to the custom fields you have added. Add your desired texts to these.
That is how you can create a custom field with WP Project Manager Pro.