

Stripe Payment
This add-on allows your customers to pay using Stripe for your subscriptions and posts.
Installation
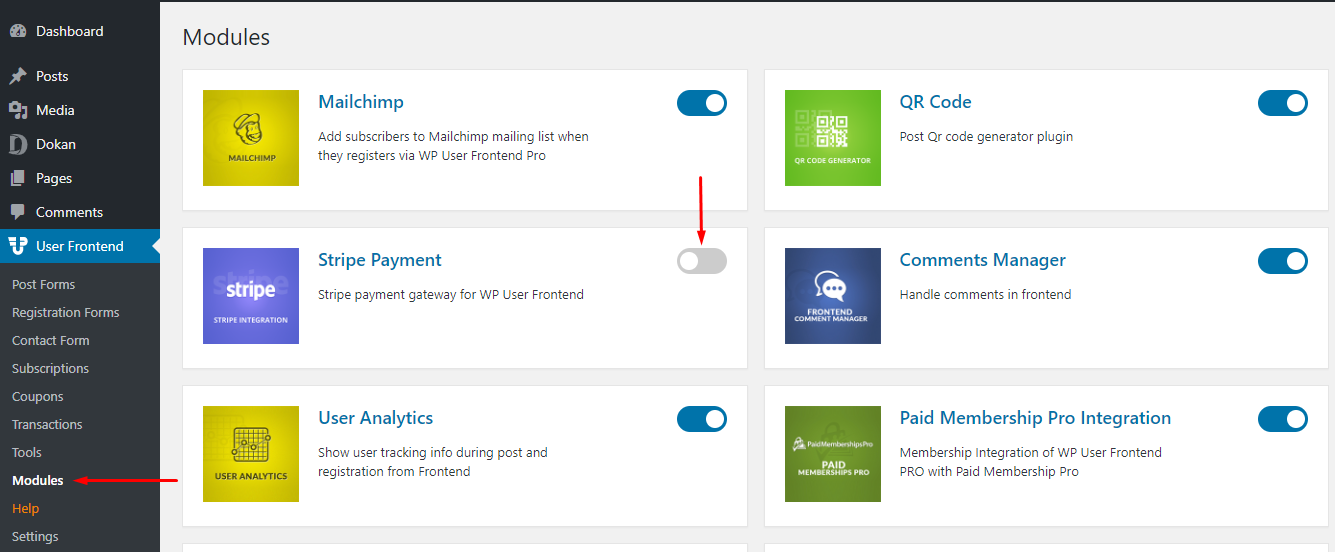
Navigate to your WP dashboard, User Frontend, and Modules. Find Stripe and turn on the toggle button on the top right to activate this module.
Stripe settings
After installing and activating the Stripe add-on, navigate to the WP-Admin Dashboard > User Frontend > Settings > Payment
Now, check the bottom of the page and enter the Stripe Secret Key, Publishable Key, and Stripe Signing Secret Key.
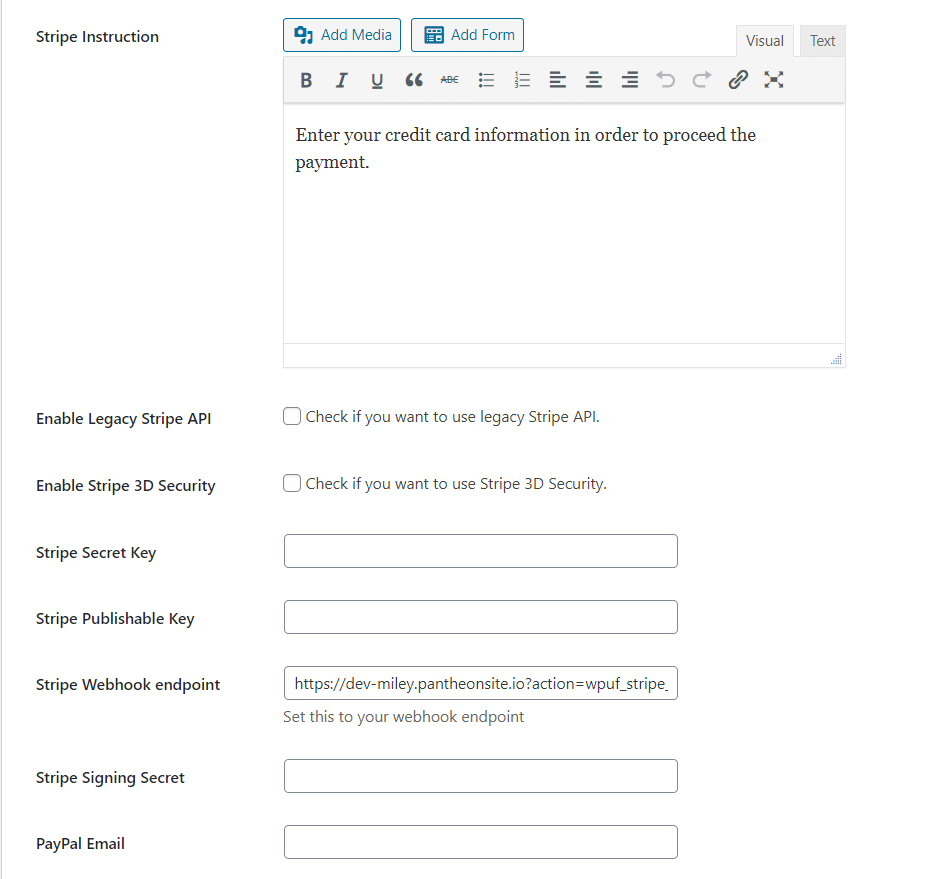
Copy the Stripe Webhook endpoint.
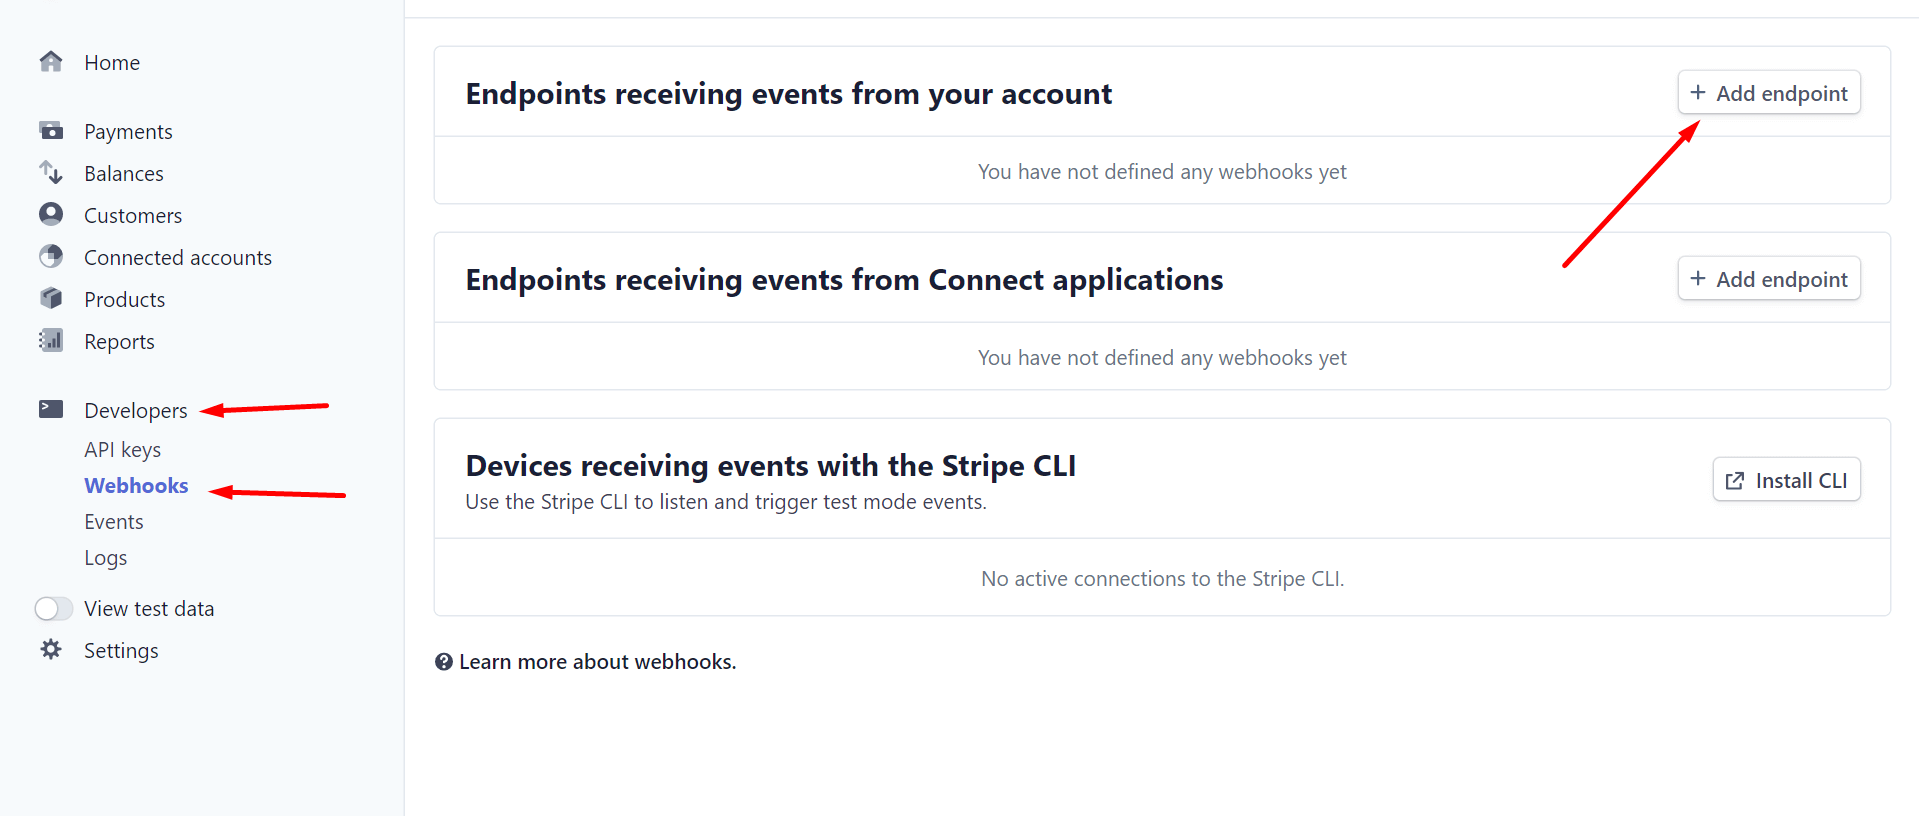
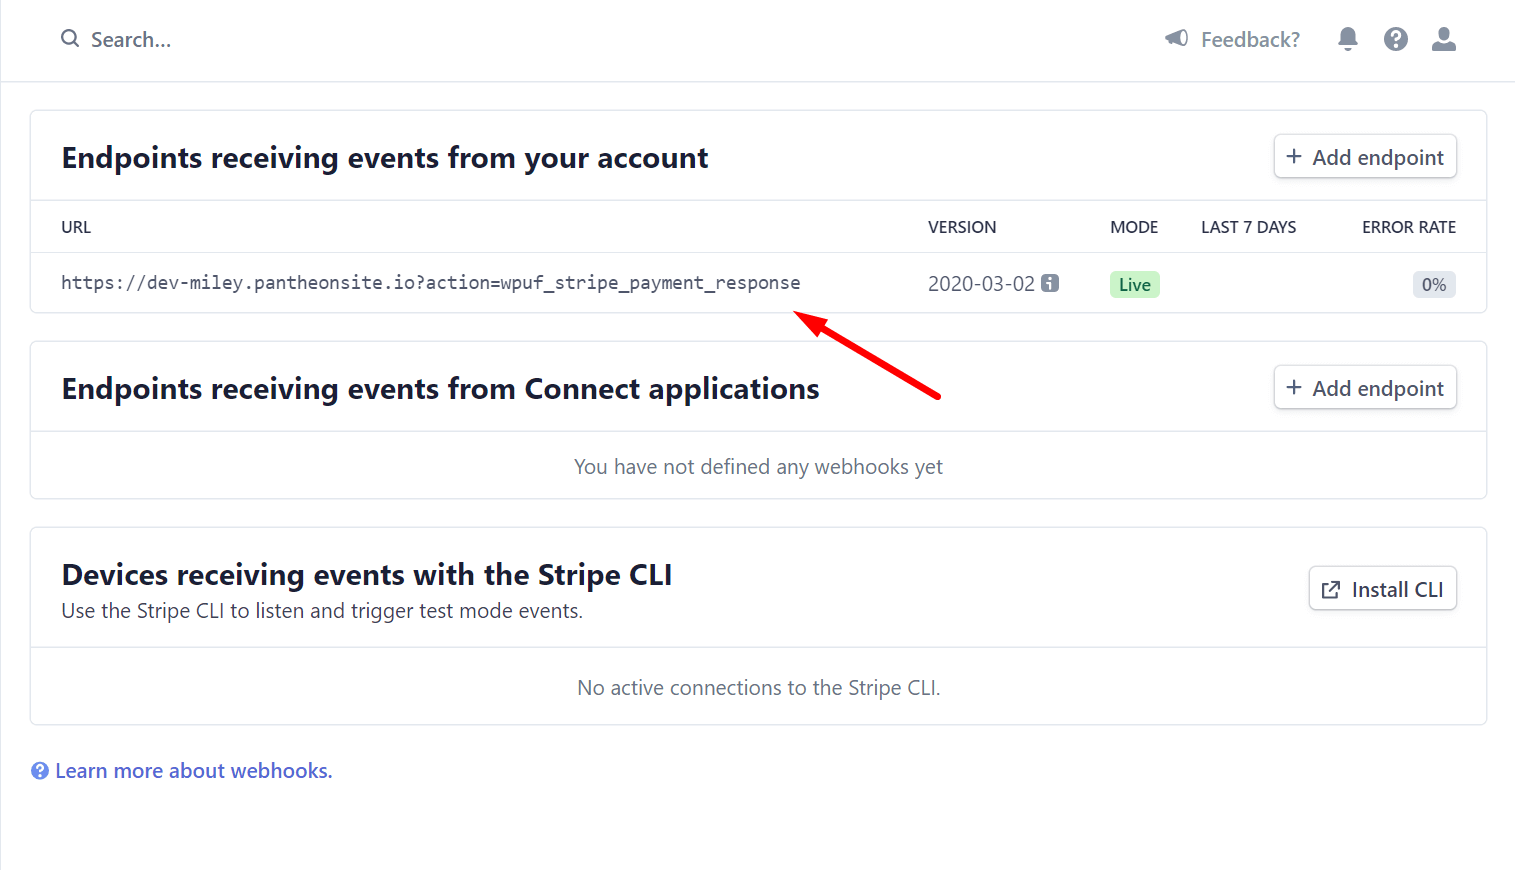
Now, go to your Stripe account and navigate to Developers > Webhooks. Click on Add endpoints.
Now select the necessary credentials and follow the screenshot (select all the authorization types as the event)
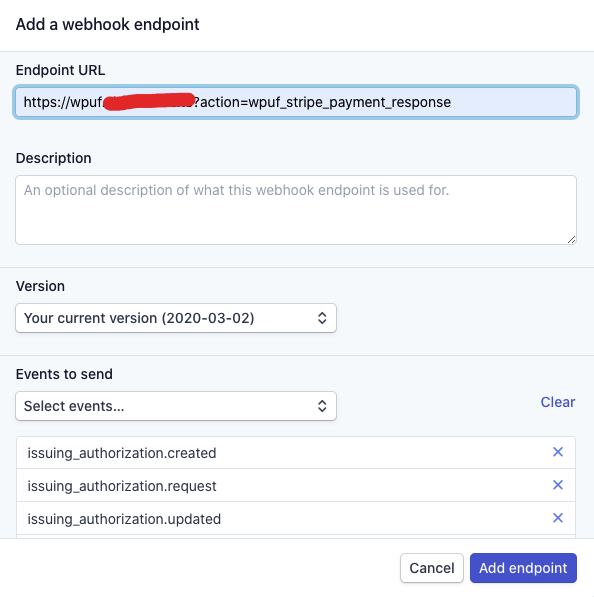
Just paste the Stripe webhook endpoint.
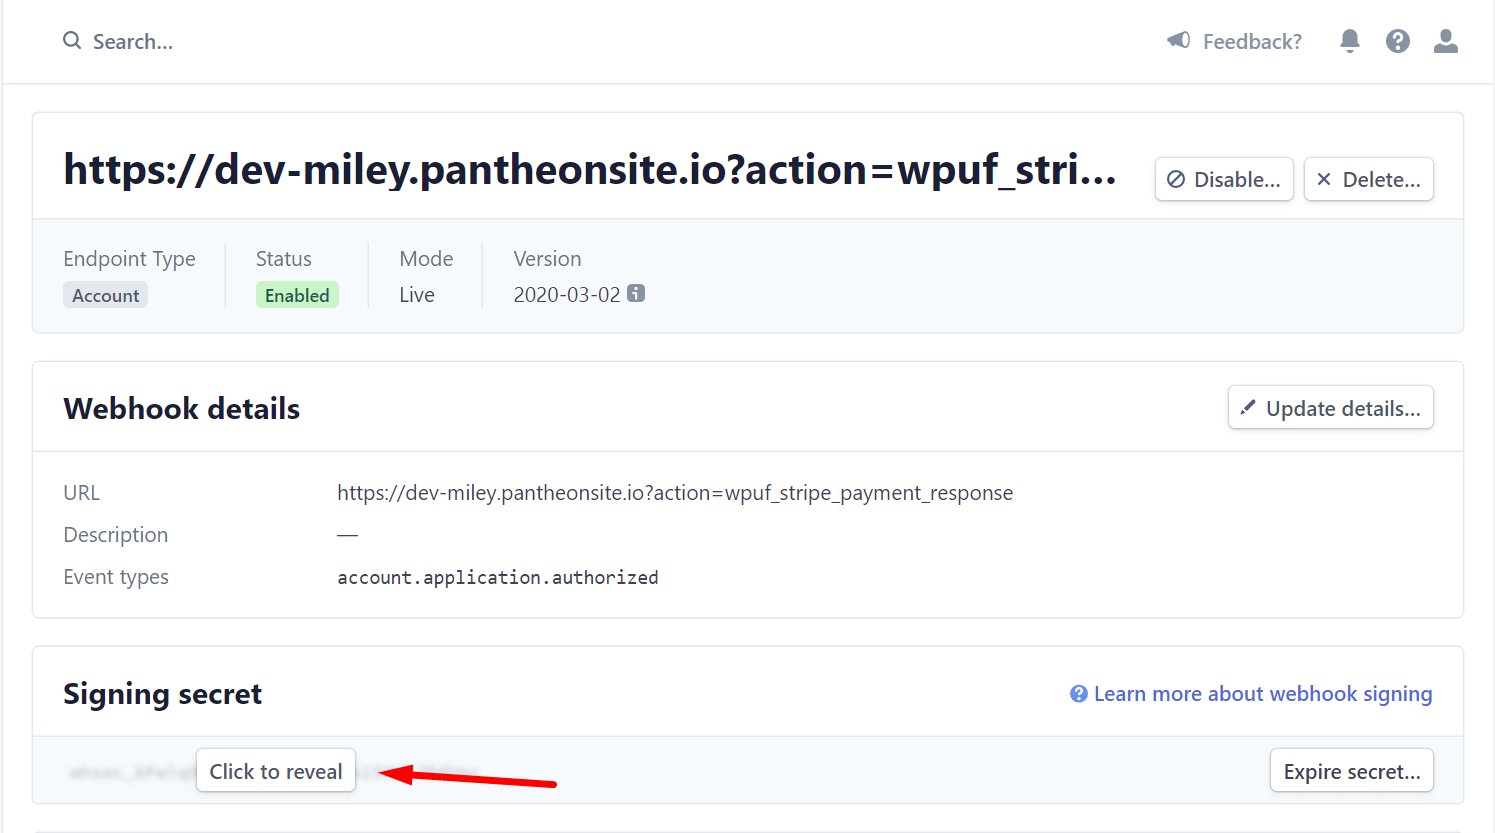
When you click on the endpoint, you will get the Stripe Signing Secret Key.
Please note:
Stripe endpoints are used to receive notifications about various events, ensuring that your WordPress backend and user dashboard stay synchronized with Stripe's payment system.
Here are the steps to set up Stripe endpoints:
'payment_intent.succeeded',
'customer.subscription.created',
'customer.subscription.deleted',
'invoice.payment_failed',
To do this, you need to log in to your Stripe account and navigate to Developers > Webhooks > Add endpoints. You need to click the “+ Select Events” button and add the ‘payment_intent.succeeded’ endpoint.
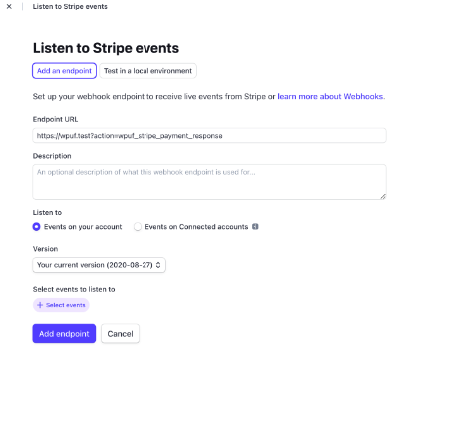
To ensure complete support for recurring payments, make sure to select the following events:
'payment_intent.succeeded'
'customer.subscription.created'
'customer.subscription.deleted'
'Invoice.payment_failed'
How to get the Stripe secret and publishable key
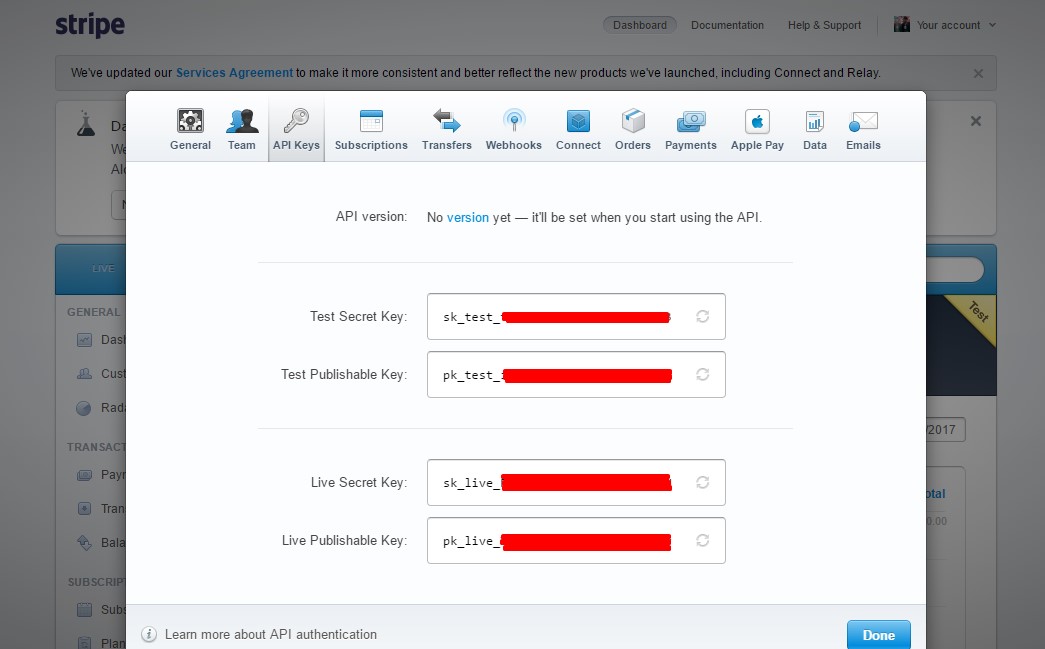
To get the Stripe keys, visit this link. If you already have a Stripe account, you will get the keys instantly after logging in. Otherwise, create a new account to get the secret and publishable key for Stripe.
Please Note that you have to use the Live keys to use Stripe with the WP User Frontend.
How Stripe works with WPUF
When a customer tries to buy one of your subscription packs or use the pay-per-post system, They will be asked to complete the payment. If you enable the Stripe payment gateway, they will be able to pay using their credit cards.
The following screenshots show what the payment process looks like using Stripe.

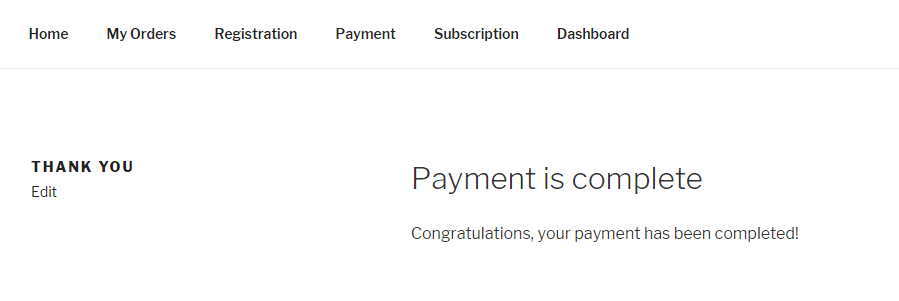
When your subscriber or customer provides their credit card information and hits the proceed button. Stripe will complete the payment, and a confirmation message will be shown.
The transaction does not need approval from the admin area.
You can view the transaction from WP Admin > User Frontend > Transaction.
How to design the Stripe card
Card Design is deprecated due to Stripe's latest security issue. We facilitated stripe element design through a filter. You can follow the stripe element design and enhance your custom design, which is available here.
One main difference is that you must format their designs as PHP arrays because you are calling filters, which are PHP. Besides this, all CSS properties are in PascalCase.
You can now customize the stripe card design using these steps.
You need to visit this link, where you will get the design codes for Stripe to build custom payment forms on the web.
However, the codes are in the JavaScript library. You need to convert it to PHP. And you also need to send the PHP code through the Array function.
Here is the code,
$css                 = [
            'style' =>
                [
                    'base'    =>
                        [
                            'backgroundColor' => 'transparent',
                            'color'           => '#32325D',
                            'fontWeight'      => 500,
                            'fontFamily'      => 'Inter UI, Open Sans, Segoe UI, sans-serif',
                            'fontSize'        => '16px',
                            'fontSmoothing'   => 'antialiased',
                            '::placeholder'   =>
                                [
                                    'color' => '#CFD7DF',
                                ],
                        ],
                    'invalid' =>
                        [
                            'color' => '#E25950',
                        ],
                ],
        ];
        $wpuf_stripe_css     = apply_filters( 'wpuf_stripe_custom_css', $css );
Now, the data in the CSS code is all dummy. You can alter them to match your theme.
All you need to do is call the “wpuf_stripe_custom_css” function from your child theme or your functions.php file in order to apply this CSS code and design your stripe card.