Setup Confirmation Message
WP User Frontend provides an easy-to-use dashboard for managing all front-end posting-related issues. With this feature, you can customize your users' submitted posts and let them know whether their posts have been successfully submitted or not. This will help you to effectively manage and streamline the posting process.
If you have previously utilized the WP User Frontend on your WordPress website, the submission process will be more familiar to you. If you are unsure about how to configure the submission confirmation message or related components, we can assist you with that.
Let's see how to set up a submission confirmation message on your WordPress site:
Setting Up Submission Confirmation Message
At first, login to WP Admin Dashboard > User Frontend > Post Forms
Now, create a new form or click on an existing form that you have created. To learn more about how to create a new form, you can read this doc.
After that, navigate to WP Dashboard > User Frontend > Post Forms > Your chosen form > Settings.
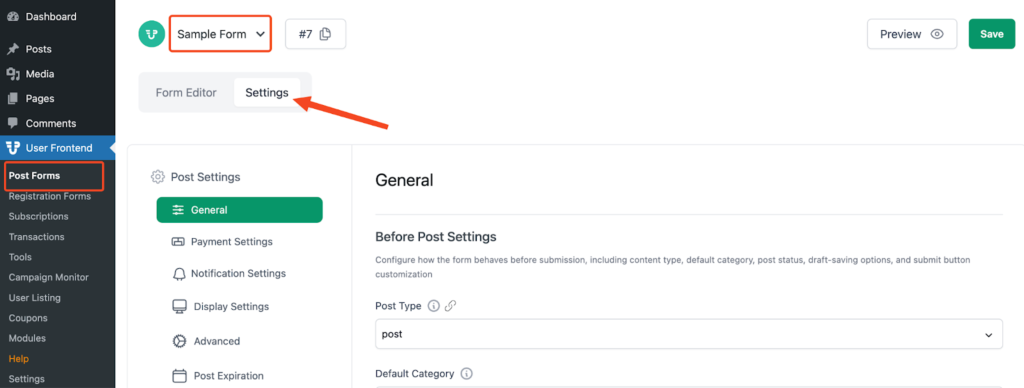
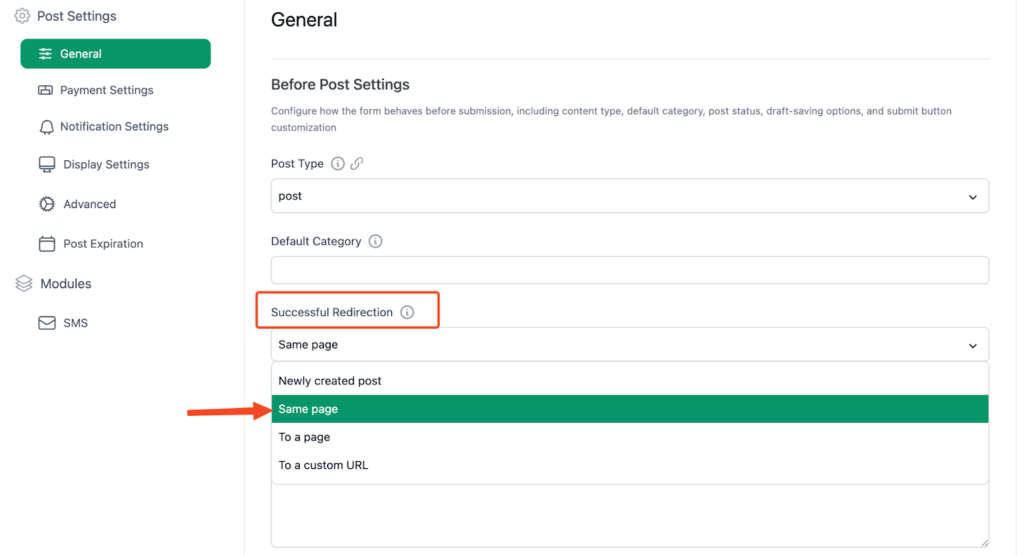
Here, you can see four options –
- Same page: The confirmation message will be shown on the same page
- Newly created post: The confirmation message will be shown in a newly created post
- To a page: The message will be displayed on another page of your website that you have specified
- To a custom URL: The message will be displayed to a custom URL where you want
Same Page: Show the successful confirmation message redirecting from the same page where the posting form exists. For this purpose, select the Same Page option from the Dropdown Menu.
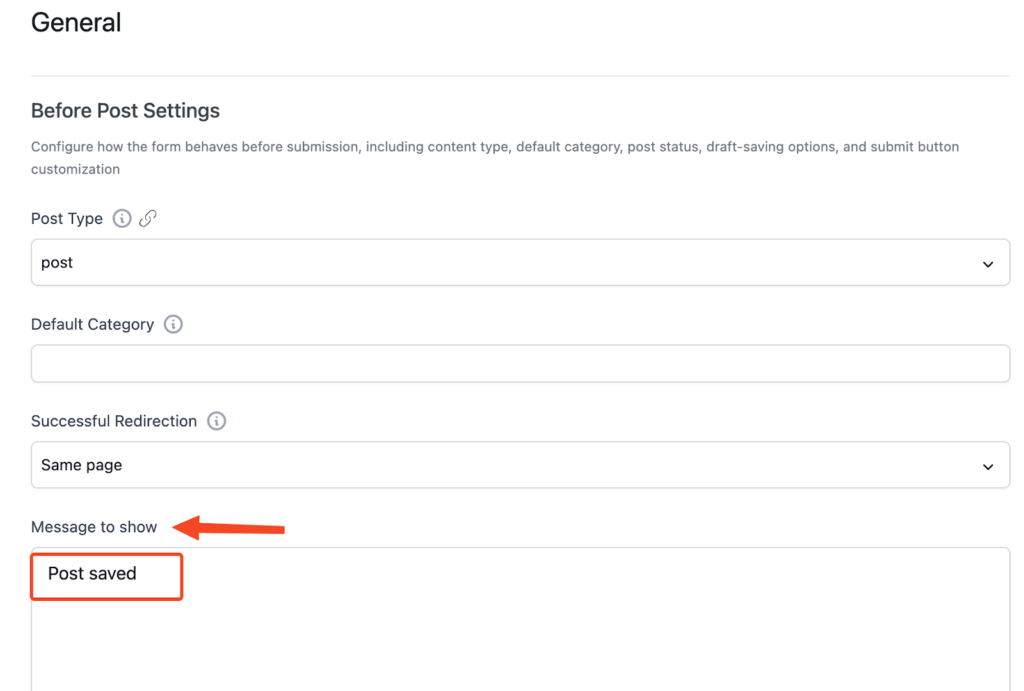
In the Message to Show field, type in whatever text you want to show the user right after he or she submits any post on your website.
Here, we have typed in “Post saved”.
Hit the “Save Form” button to save the changes that you have made.
After submitting the form, your users will be able to see the following screen:

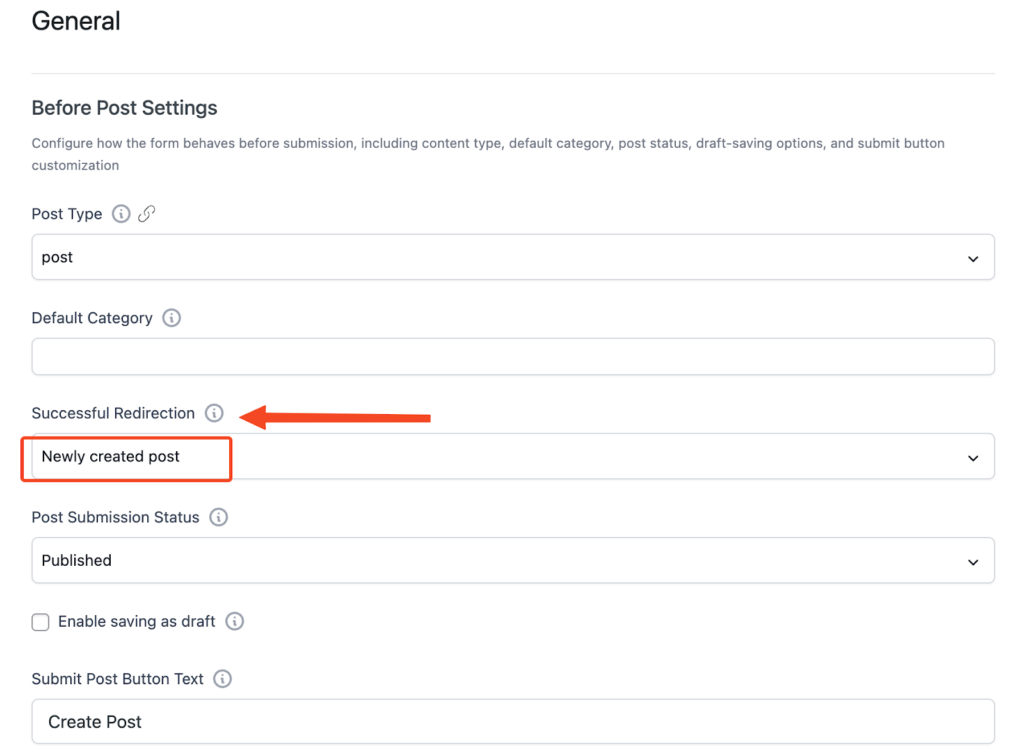
Newly created post: Use this method to show the successful confirmation message to your user redirecting from a single.php page. Select the Newly created post option from the Successful Redirection field. After that click on the Save Form button.
Now, when a user successfully submits any form then he/she will be able to see the following screen:

To a page: Simply add a new page and type in the message/text that you want to show each time a user successfully submits a form. See the following screenshot:
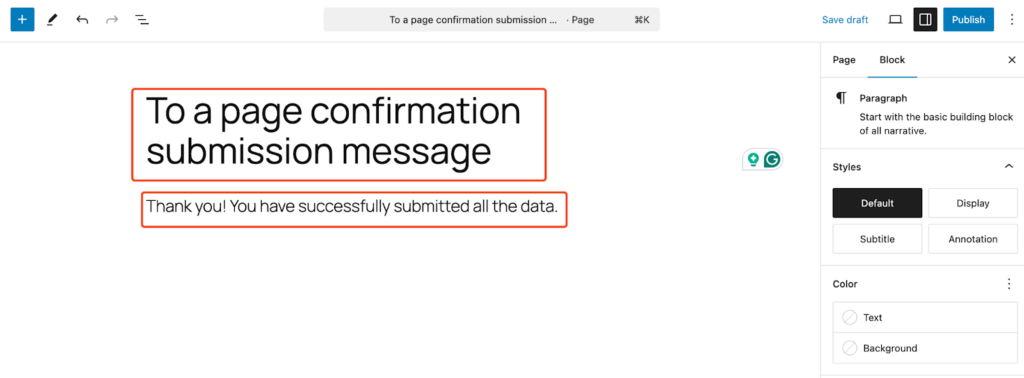
After creating and updating this page, go to the location: WP Admin Dashboard > User Frontend > Edit Form > Settings.
From the Successfuly Redirection drop-down menu, select the To a page option.
Now select the page that contains the successful confirmation message you created right away. After that, hit the Save Form button.
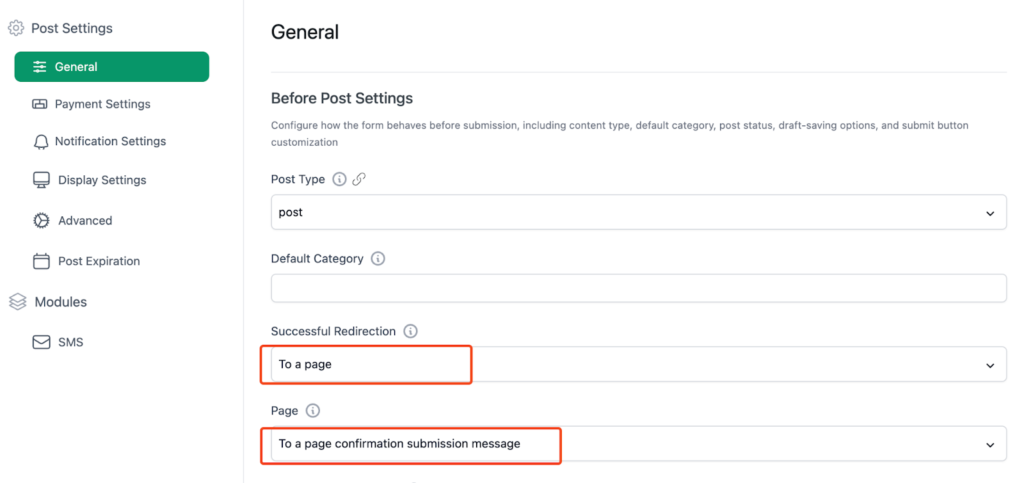
Now, when a user successfully submits the form after filling out all the required fields, he or she will be able to see the following screen:

To a custom URL: Select To use a custom URL option, if you have a page containing the successful confirmation message all along, just copy and paste the URL of that page into the following arrow-indicated field. See the screenshot:
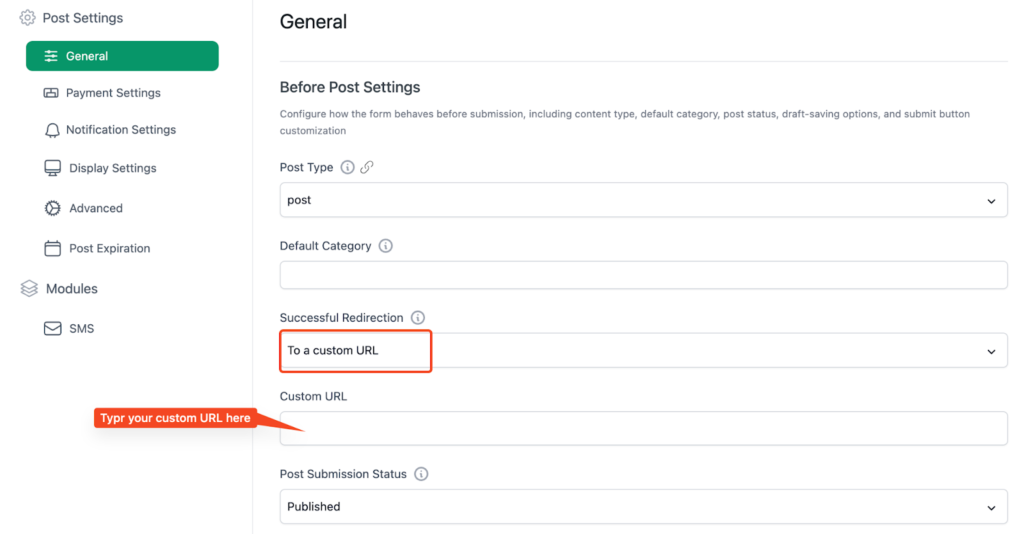
After using your preferred URL, your users will be redirected to that URL.
So that's how you can customize and set up submission confirmation messages.