

Image Watermark for WP UserFrontend
Many people asked us about the image watermark feature of the WP User Frontend PRO plugin. Well, there are a few plugins already out there that can do the job for you.
In this tutorial, I will show you how to use an image or text watermark with the WP UserFrotnend plugin.
I had a look at a couple of plugins: Transparent Image Watermark, Simple Watermark, Bulk Watermark, Easy Watermark, Image Watermark, and Watermark RELOADED. All these are free in the WordPress plugins repo, and at the end, I will recommend using a transparent Transparent Image Watermark. It works perfectly with WP UserFrotnend, and according to its author, it will suit any WordPress project.
Install and configure:
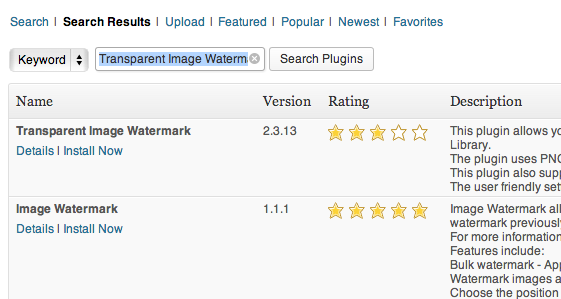
Using a transparent image watermark is pretty easy. Go to the admin area -> Plugins -> Add New. Now, search with the name “Transparent Image Watermark” (without the quotes), and you will get the plugin like the below image. Click on Install Now.
After installing the plugin, make sure to activate it. Afterward, you can configure the plugin. To do so, go to Settings -> Transparent Watermark:
- You can choose the watermark type (image or text).
- There are more options for updating versions, but the free version can do our job so it's up to you
- Images and Sizes: I will recommend you select all
- Under the Image Watermark tab, you have to insert your watermark image URL or relative path.
Things to consider:
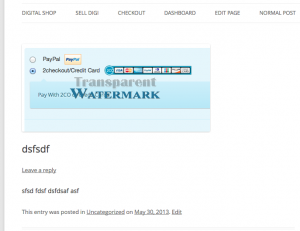
- If you use an Image as a watermark, make sure it's transparent and in PNG format
- Make sure you put the right image URL or relative path. You can check it under the Watermark Preview tab
Thats all. You are ready to use the watermark image feature.
If you have any questions, ask them in our Support Forum.