


How to Invoice a Client with WP Project Manager
Sending invoices can be stressful for many service providers. If you send your bill late or in the wrong format, it can delay payments and hurt your cash flow. So learning how to invoice a client in a clean and organized way is an important skill for every freelancer, agency, and company.
If you use WordPress for managing your projects, WP Project Manager makes this process easier. It helps you plan tasks, track progress, and also bill your clients without switching to other tools. This means your whole workflow stays under one roof.
It also reduces errors and keeps your project billing smoother. In this guide, we will show you how to invoice a client using WP Project Manager step by step. This tutorial will explain project billing, invoice creation, and sending bills to clients.
By the end, you will understand how to bill a client directly from your WordPress dashboard with less effort and more confidence. Let's get started!
What Is WP Project Manager?
WP Project Manager is a WordPress plugin that helps you organize and manage client projects from your dashboard. You can create projects, add tasks, assign team members, track progress, and monitor deadlines. It works as a full project management solution without needing an external platform.
This is useful for agencies, developers, content writers, and service-based teams who handle ongoing client work. Along with project tracking, the plugin also supports billing features. You can record project costs, create invoices, and send bills to clients.
So, if you are running an organization where your team has to work with many clients and maintain accuracy in billing, you can do it flawlessly with its built-in invoice generator. You won't need any additional tools to do this. This makes the workflow faster, cleaner, and less confusing.
How to Invoice a Client with WP Project Manager
WP Project Manager has a free and a premium version. The Invoice is a premium module. So, you need the premium version of the plugin to generate invoices with the plugin. You'll get the plugins from the links attached to the plugin names.
Once they are installed and activated, start following the tutorial as explained below.
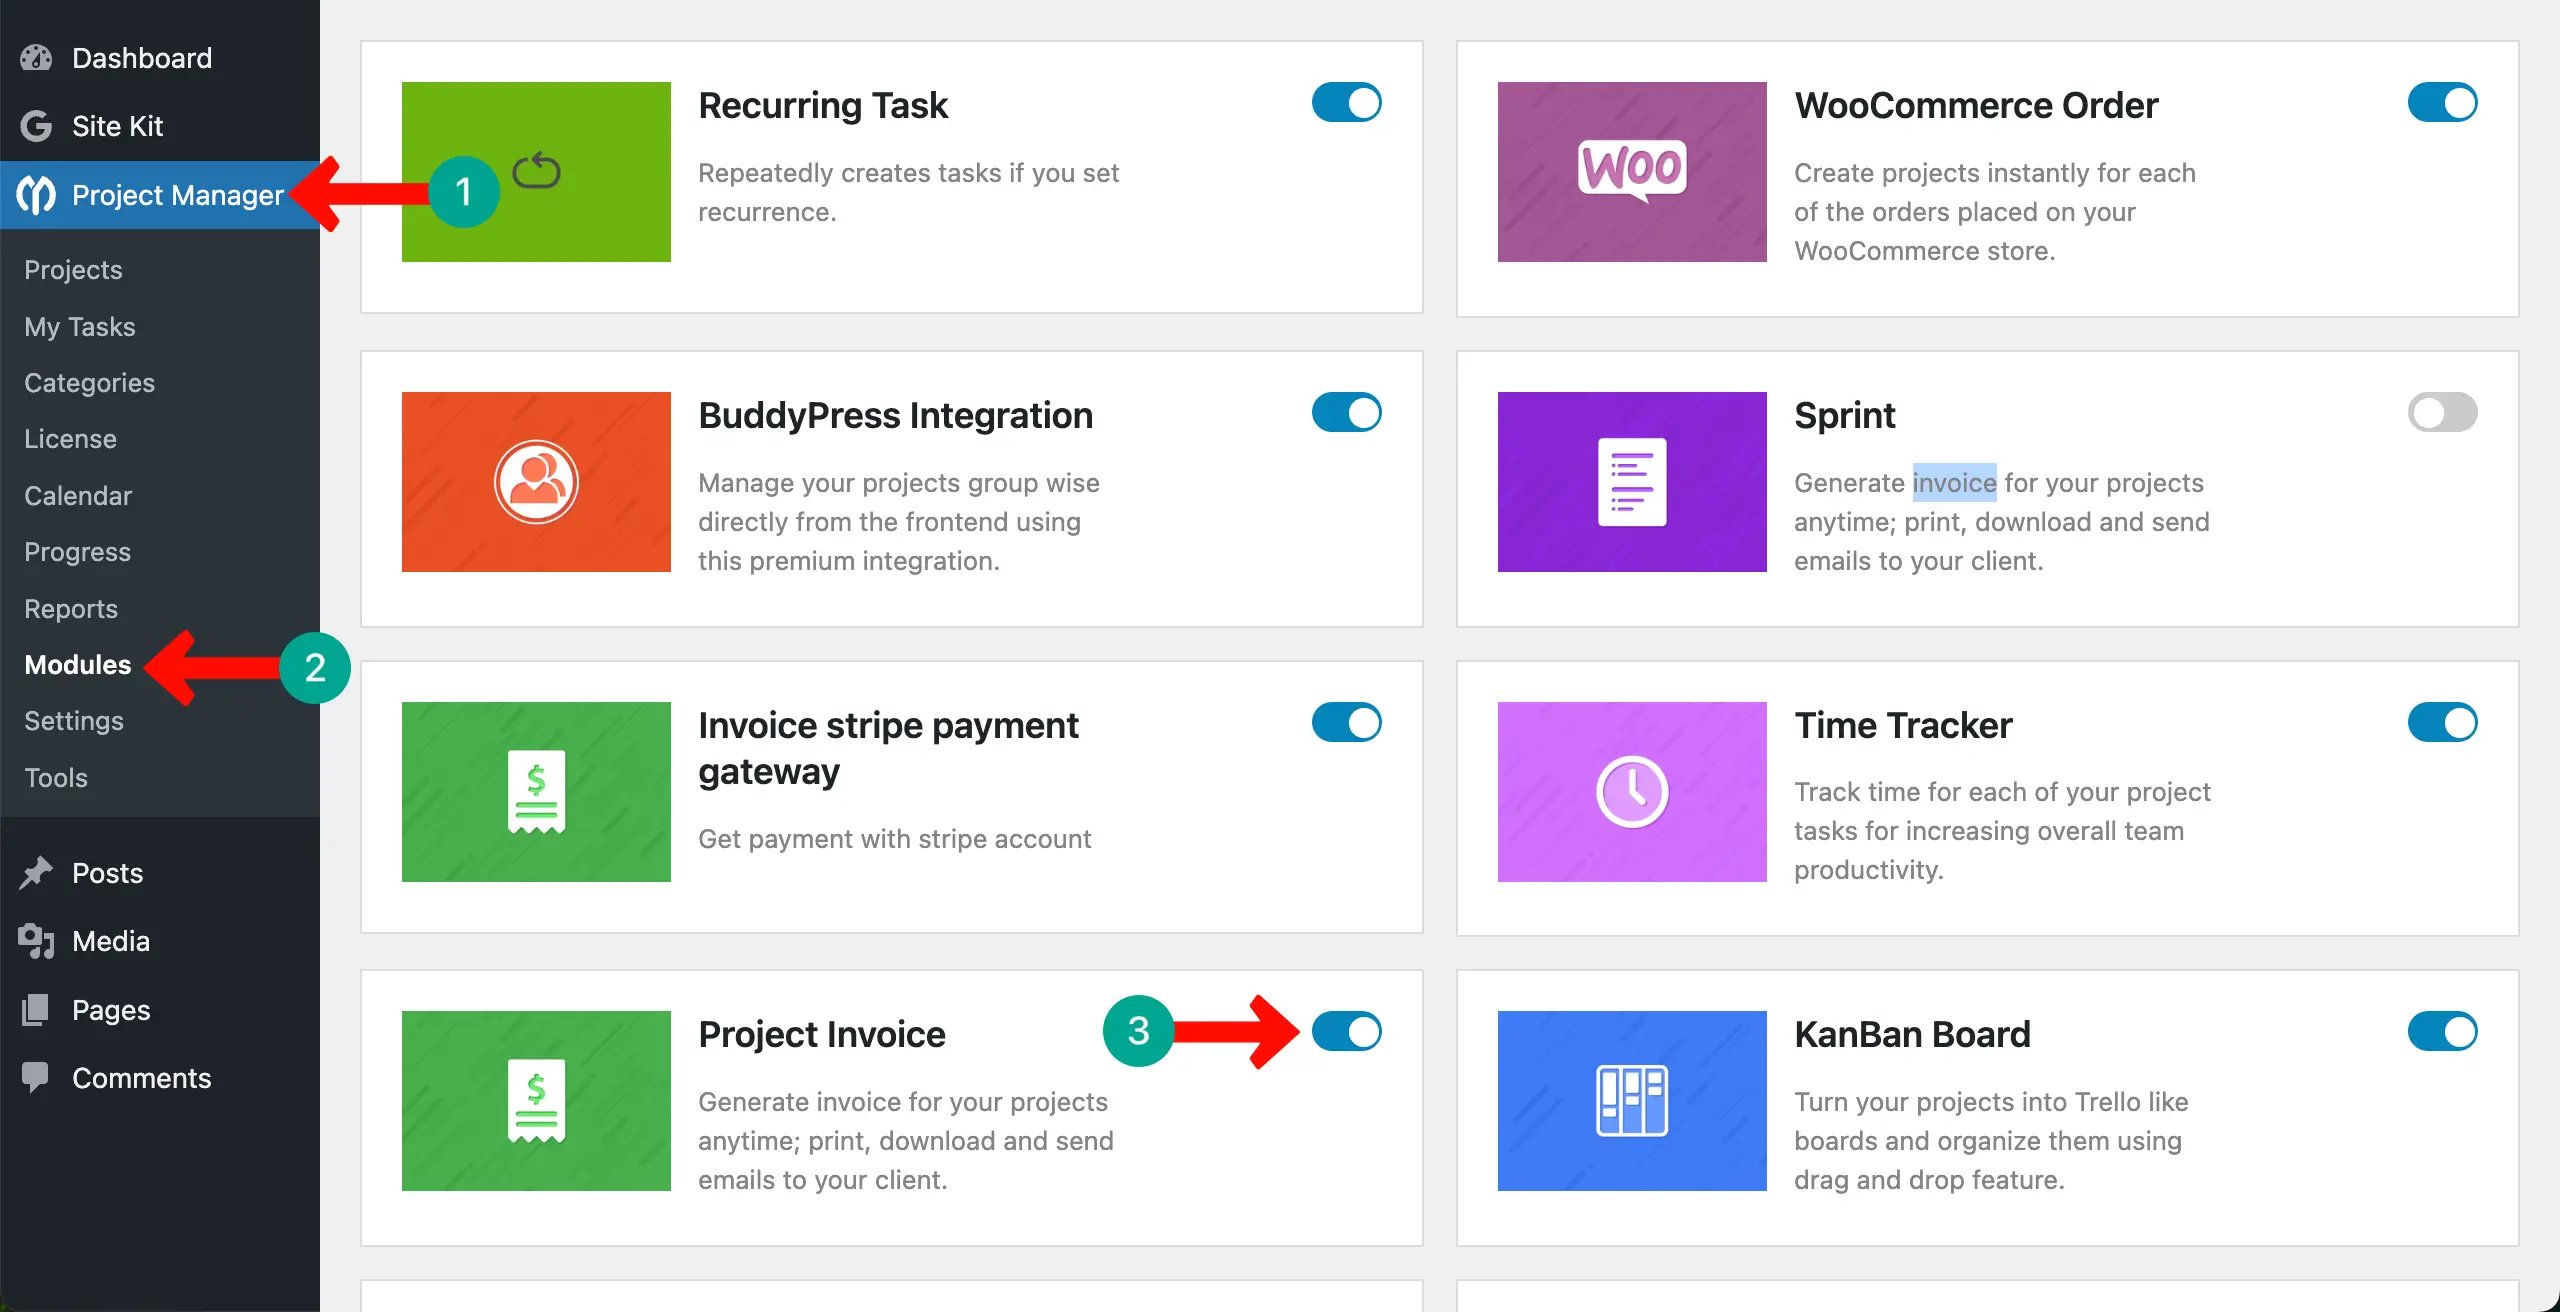
Activate the Invoice Module
To begin, first enable the module. Go to WP Admin Dashboard > Project Manager > Modules. Find the Project Invoice module and click the toggle to activate it. Without this step, the invoice feature will not appear inside your projects.
Configure Invoice Settings
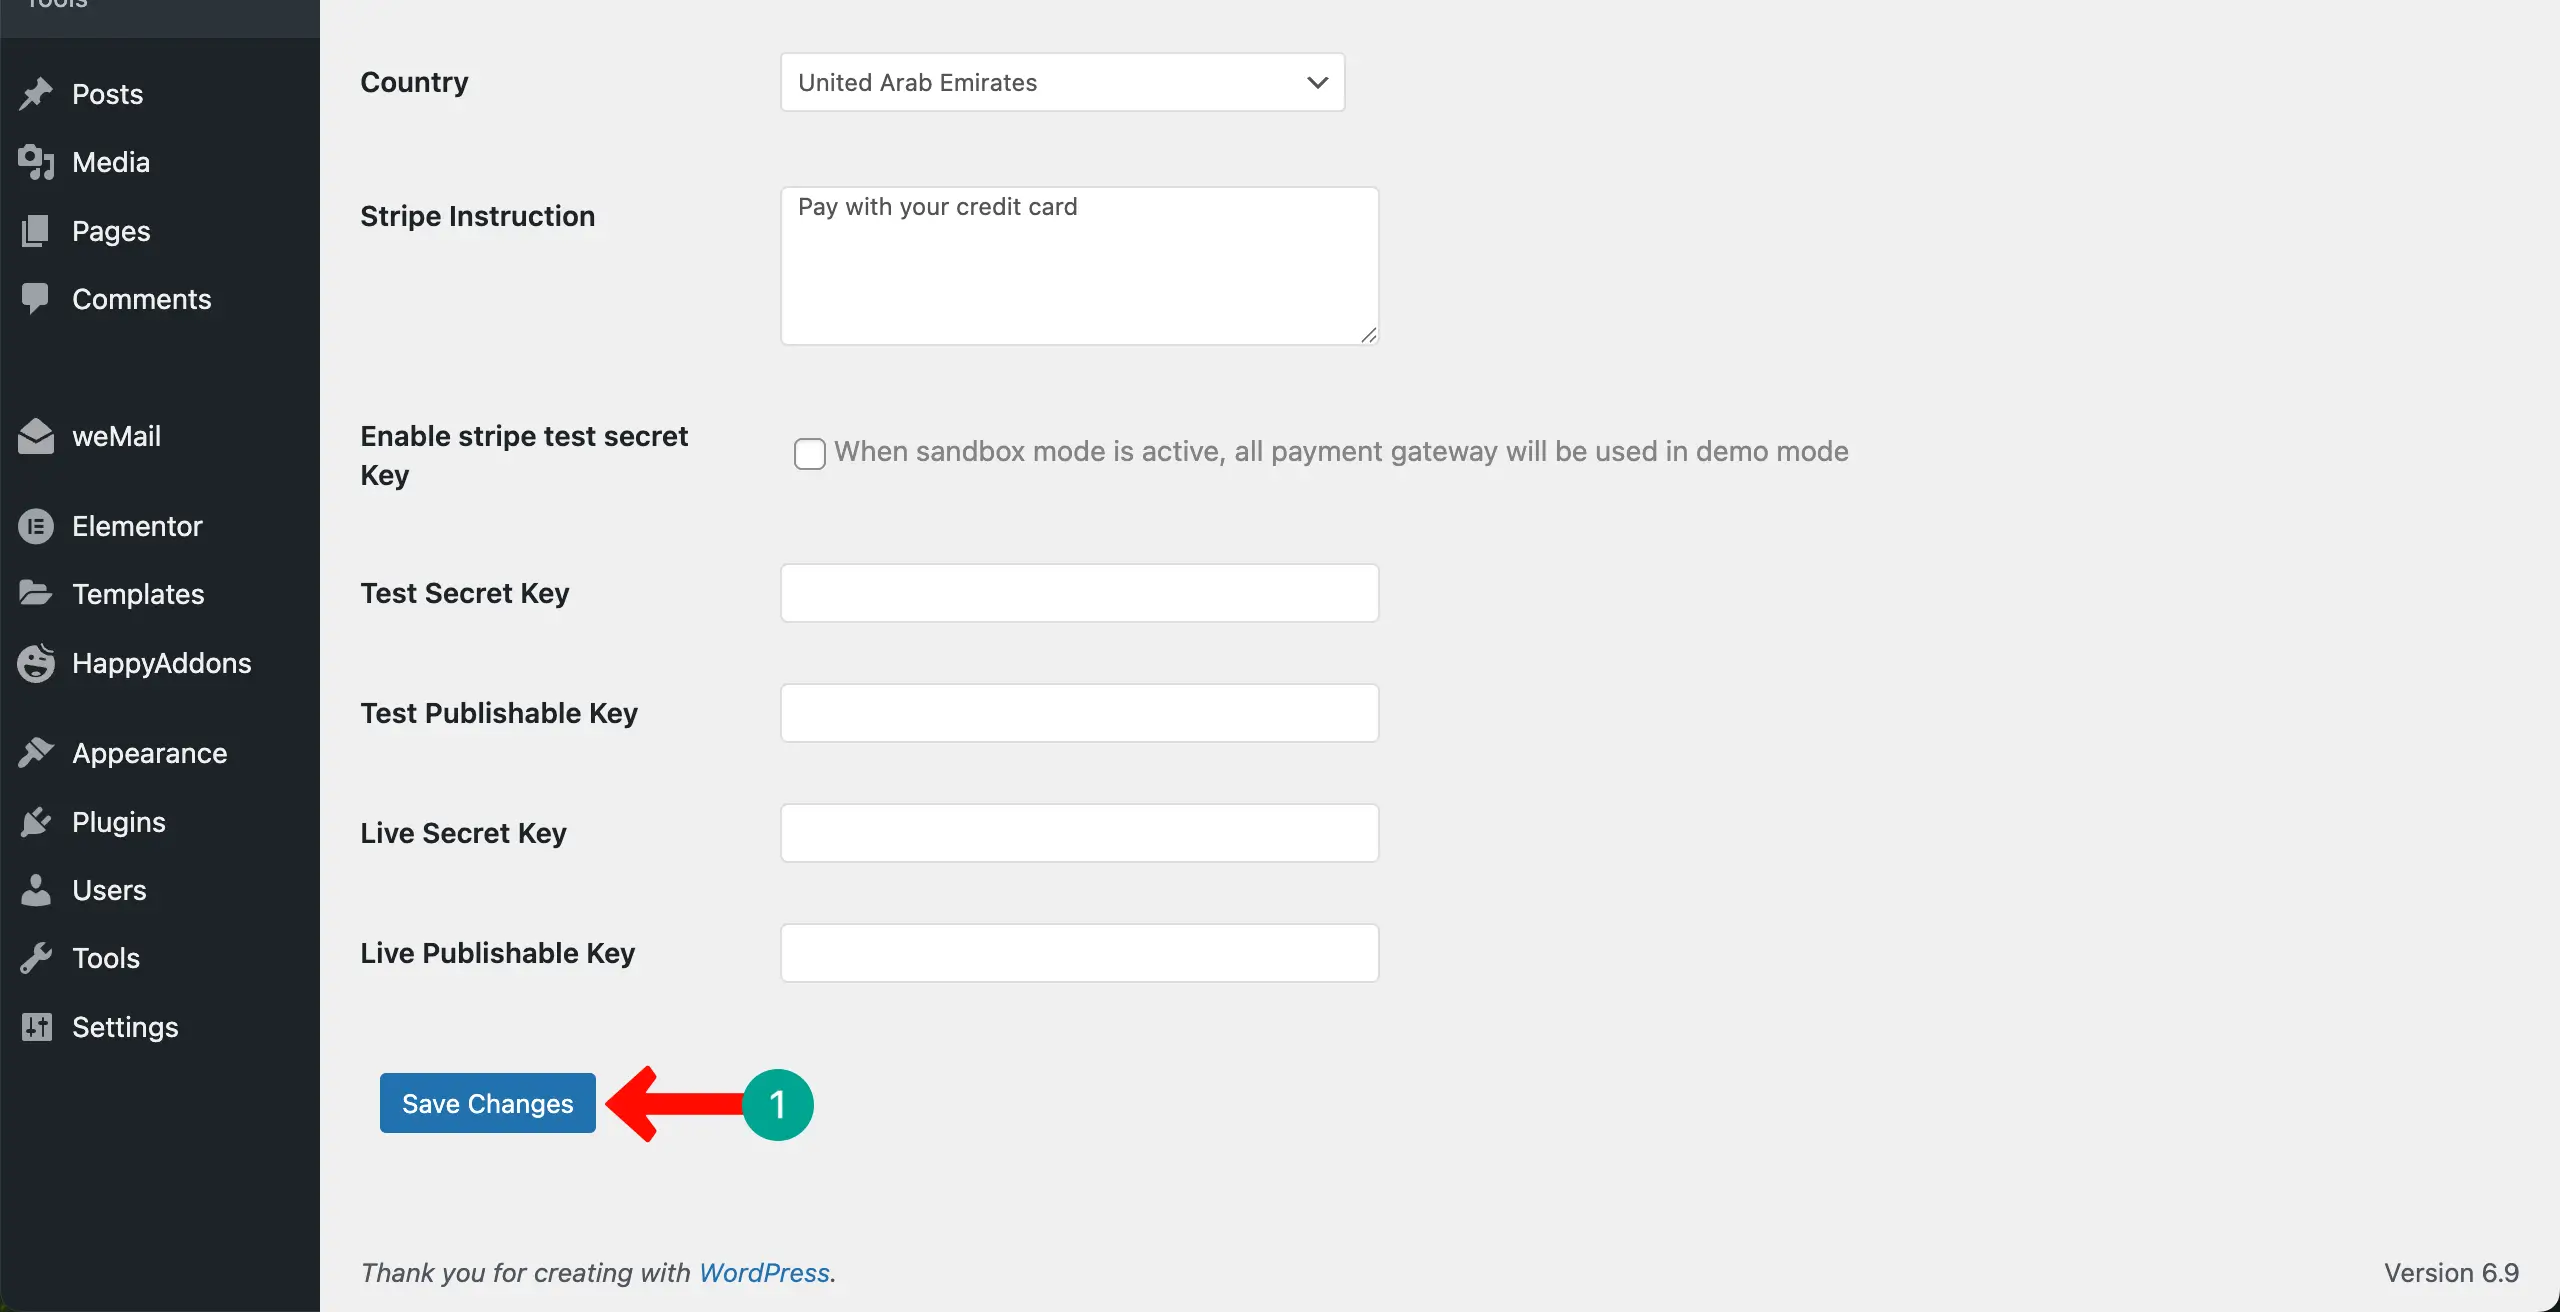
After activation, set up your billing preferences. You can access these from Project Manager > Settings > Invoice.
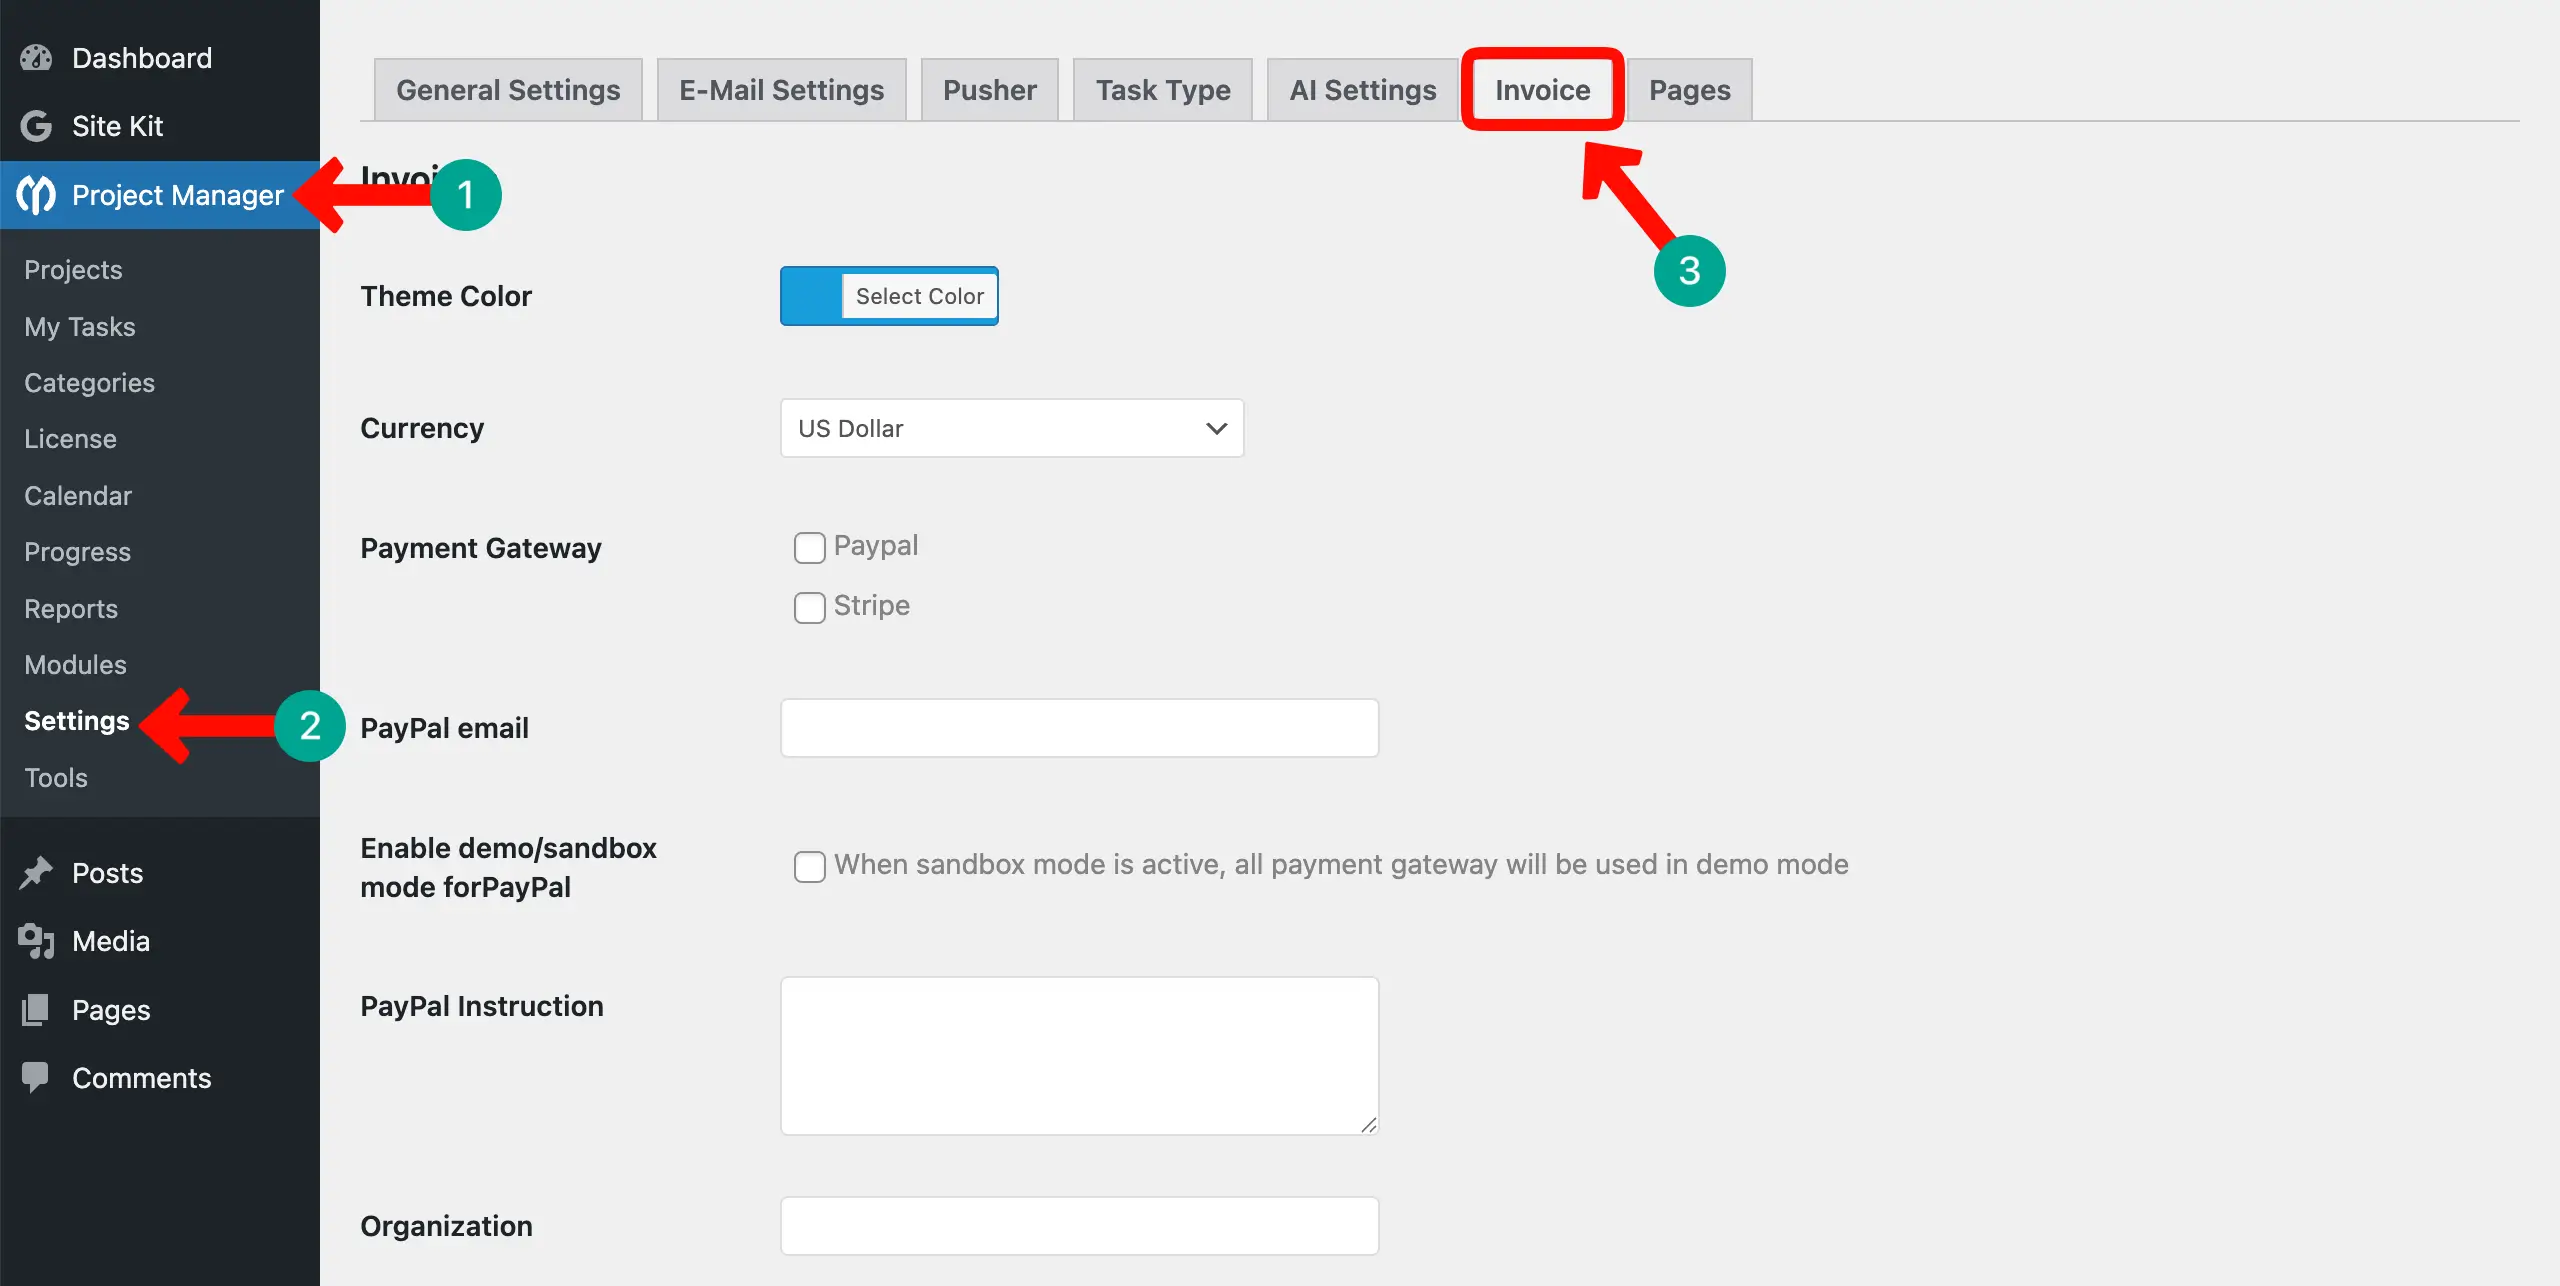
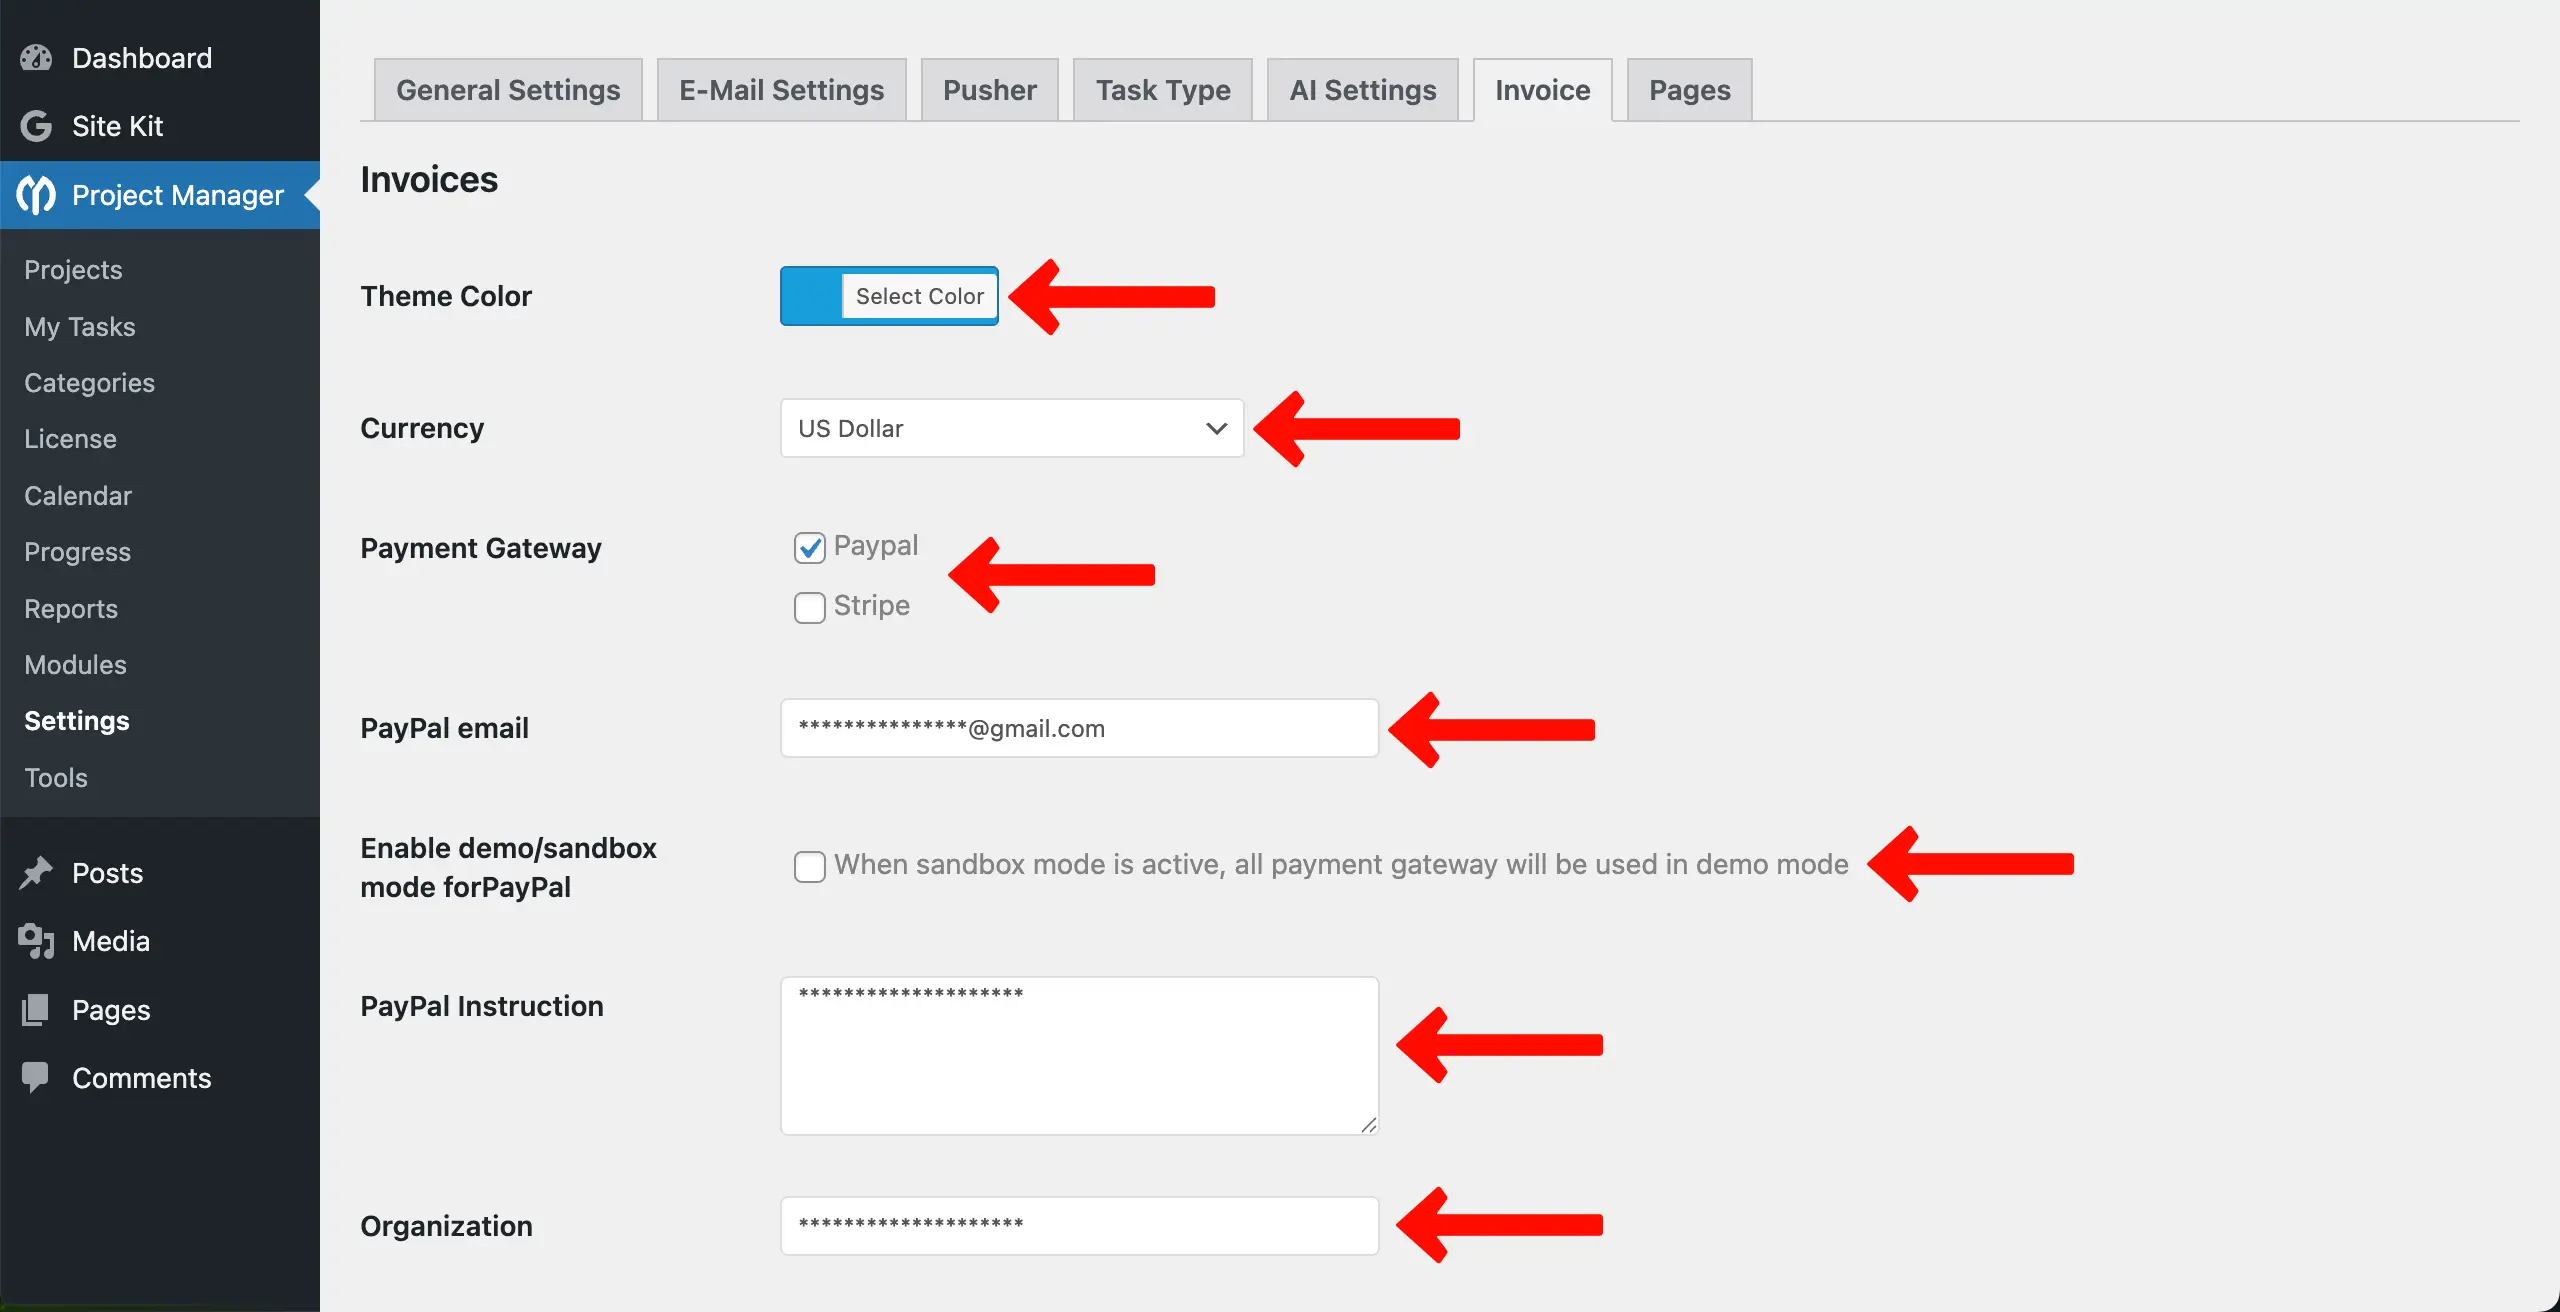
Inside this settings page, you will find some important configuration options:
- Theme Color: Pick a color style for your invoice template.
- Currency: Select the currency you use for charging clients.
- Payment Gateway: Choose your payment gateway. PayPal comes by default. You can also add Stripe with an addon.
- PayPal Email: Enter the PayPal email where payments will be deposited.
- Sandbox Mode: Enable test mode for PayPal if you want to test payments before going live.
- PayPal Instructions: Add notes that your client will see next to the Pay button.
- Organization & Address: Add your business name and address. If filled, this will auto-appear on all invoices.
Scrolling down the page, you'll get some more options. You may modify them if needed. After setting everything, click Save Changes to confirm.
Create a New Invoice
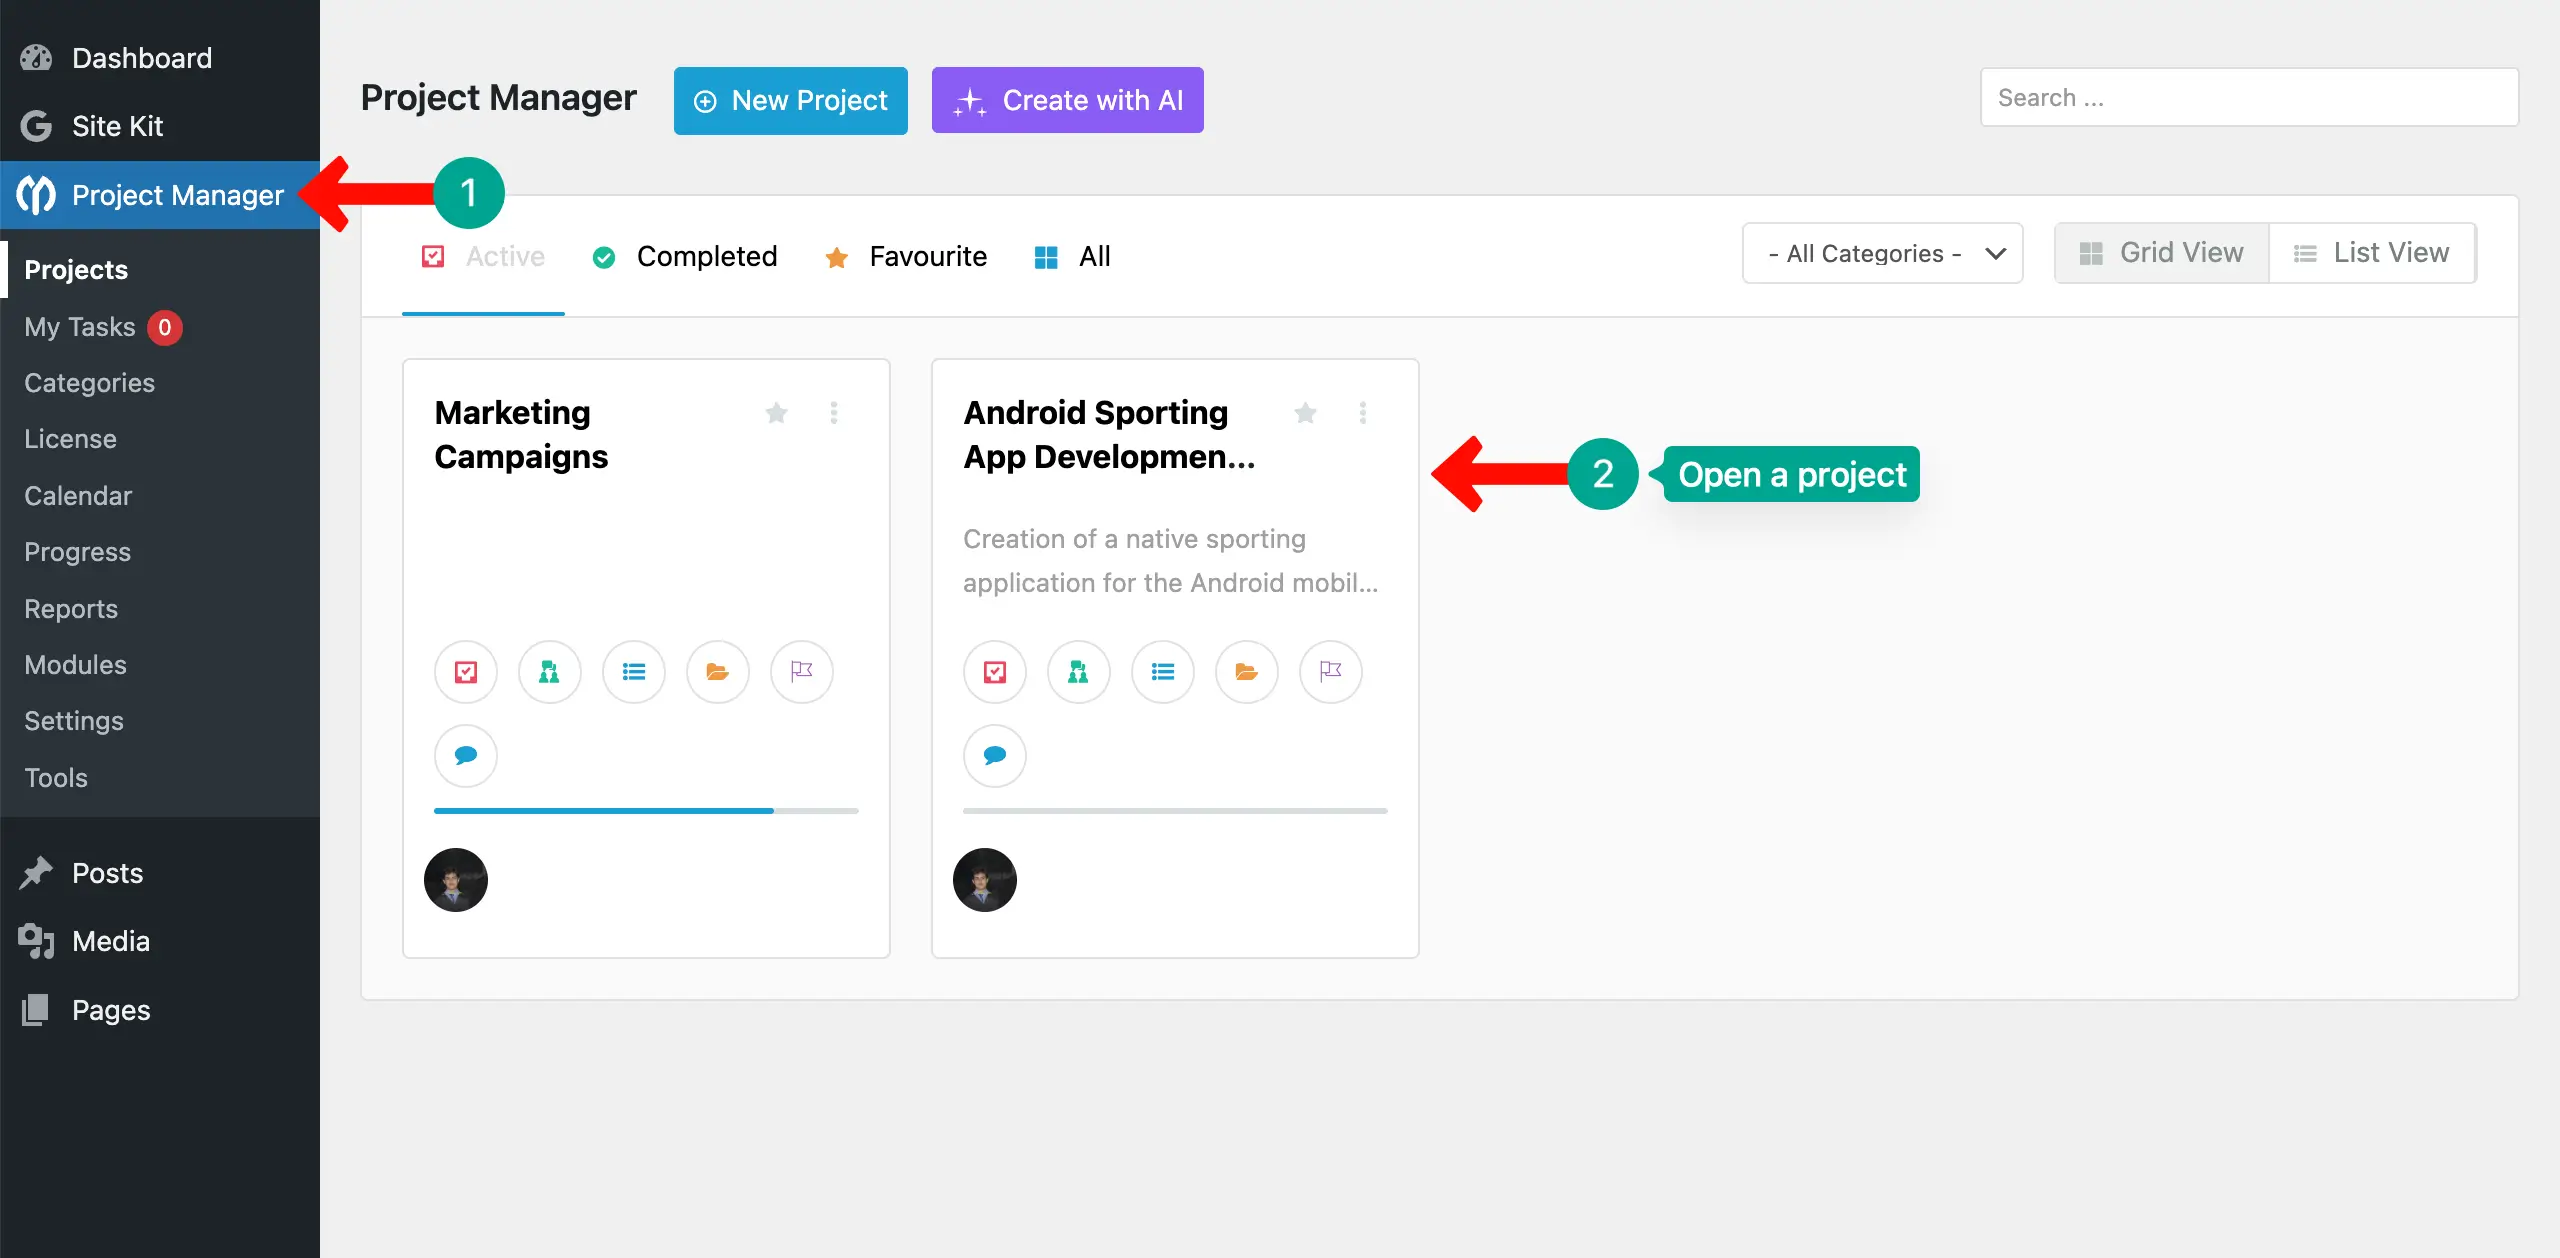
With the WP Project Manager plugin, you can create and manage as many projects as you want. But surely, you'll bill your clients for a specific project. So, open the particular project that you want to bill your client for.
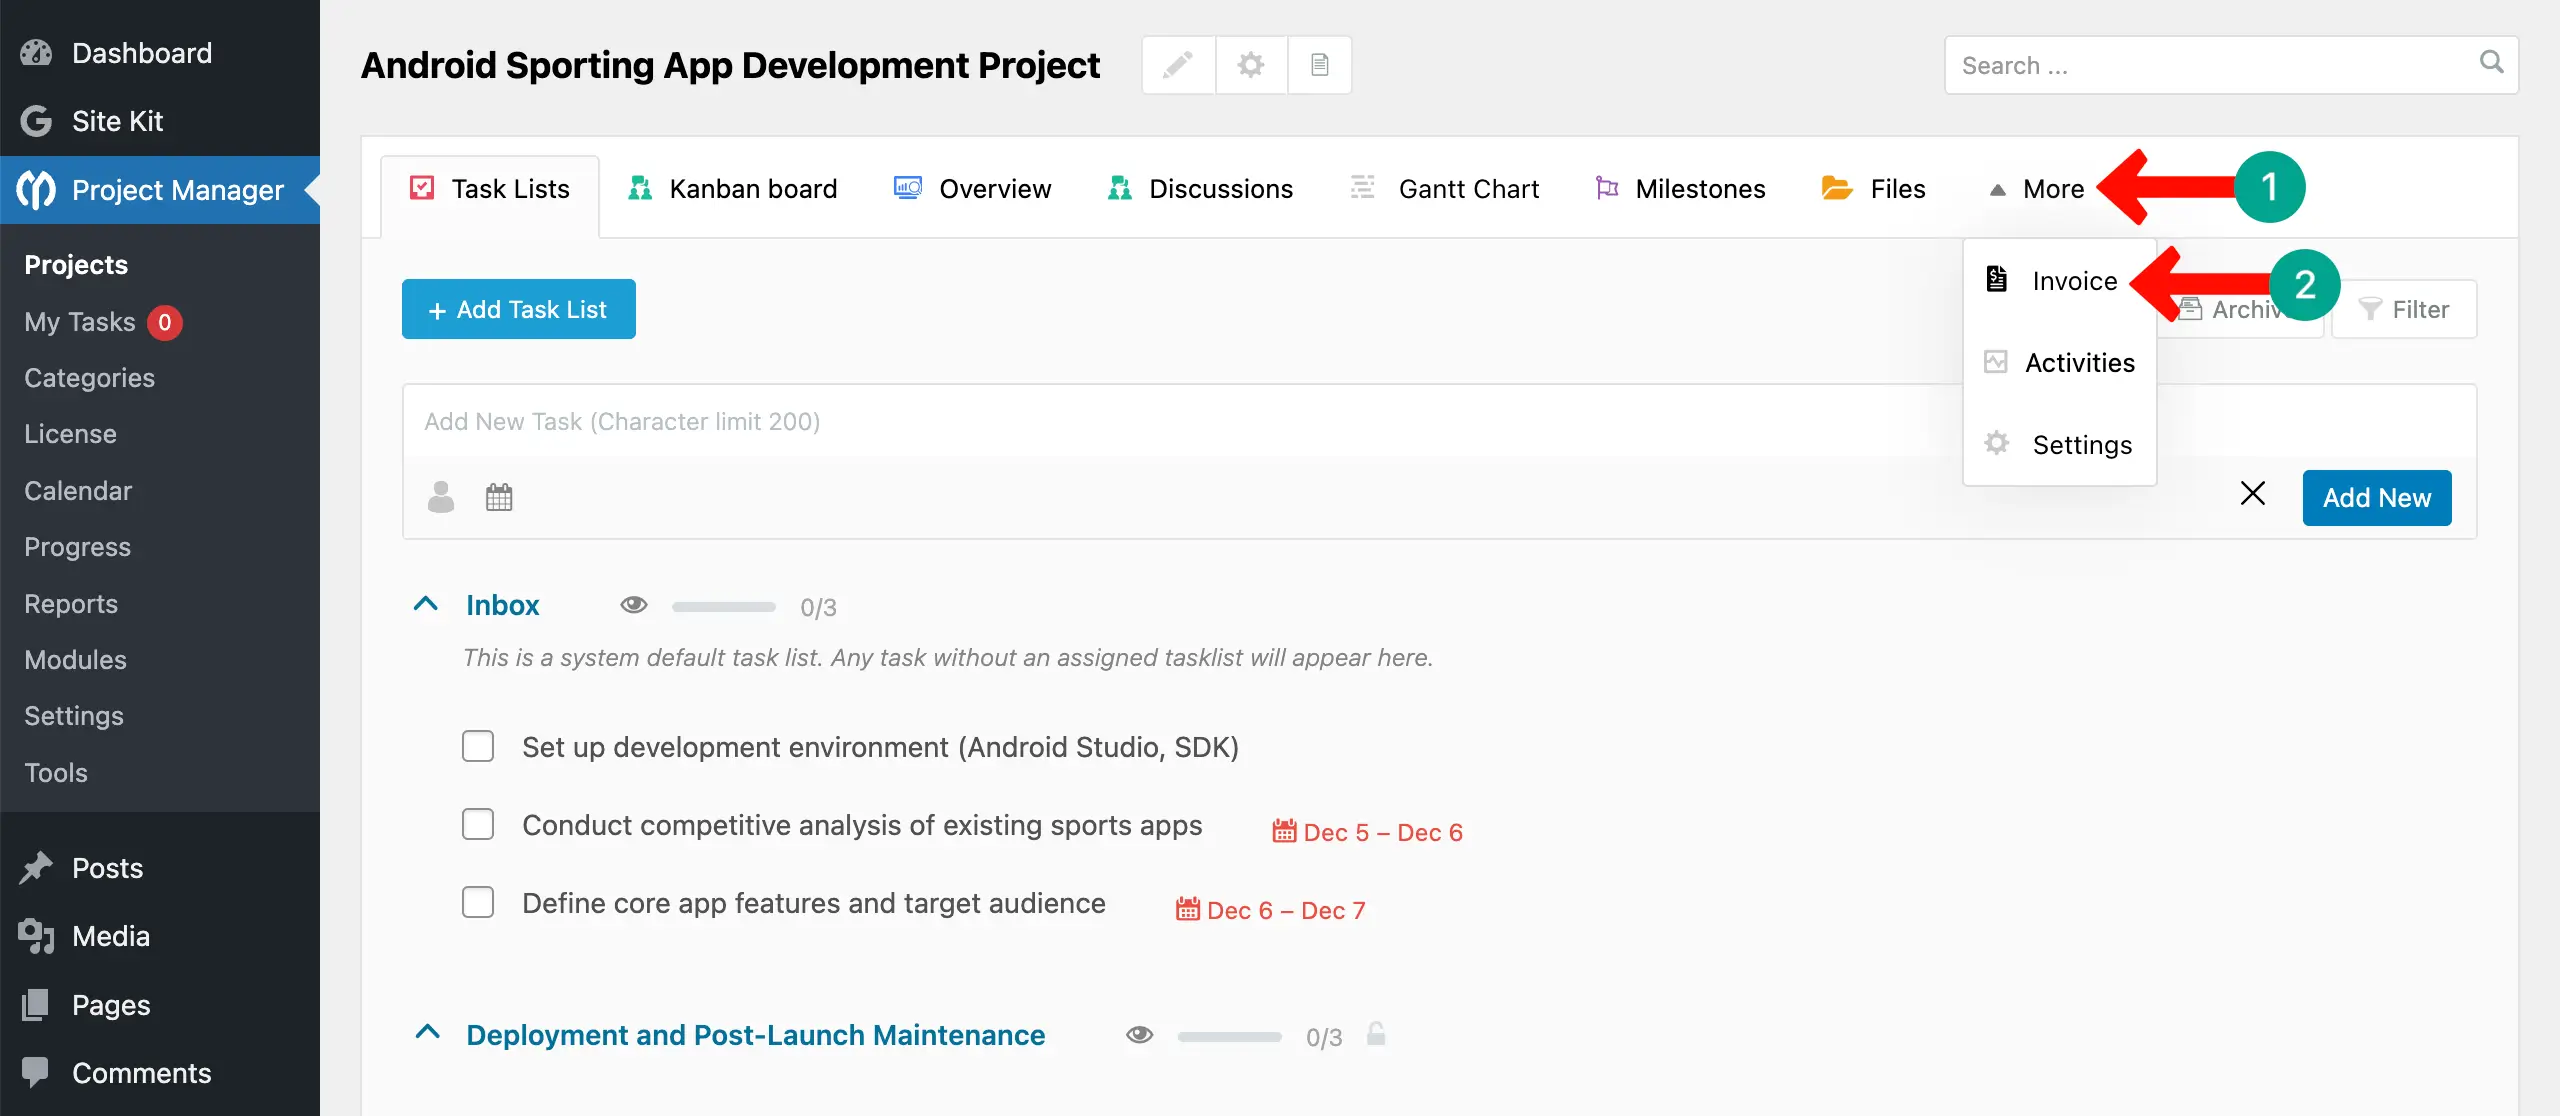
Once the project is opened, you'll see lots of options on top. Hovering your cursor on More will open up a list where you'll see the Invoice. Now, click the Invoice option.
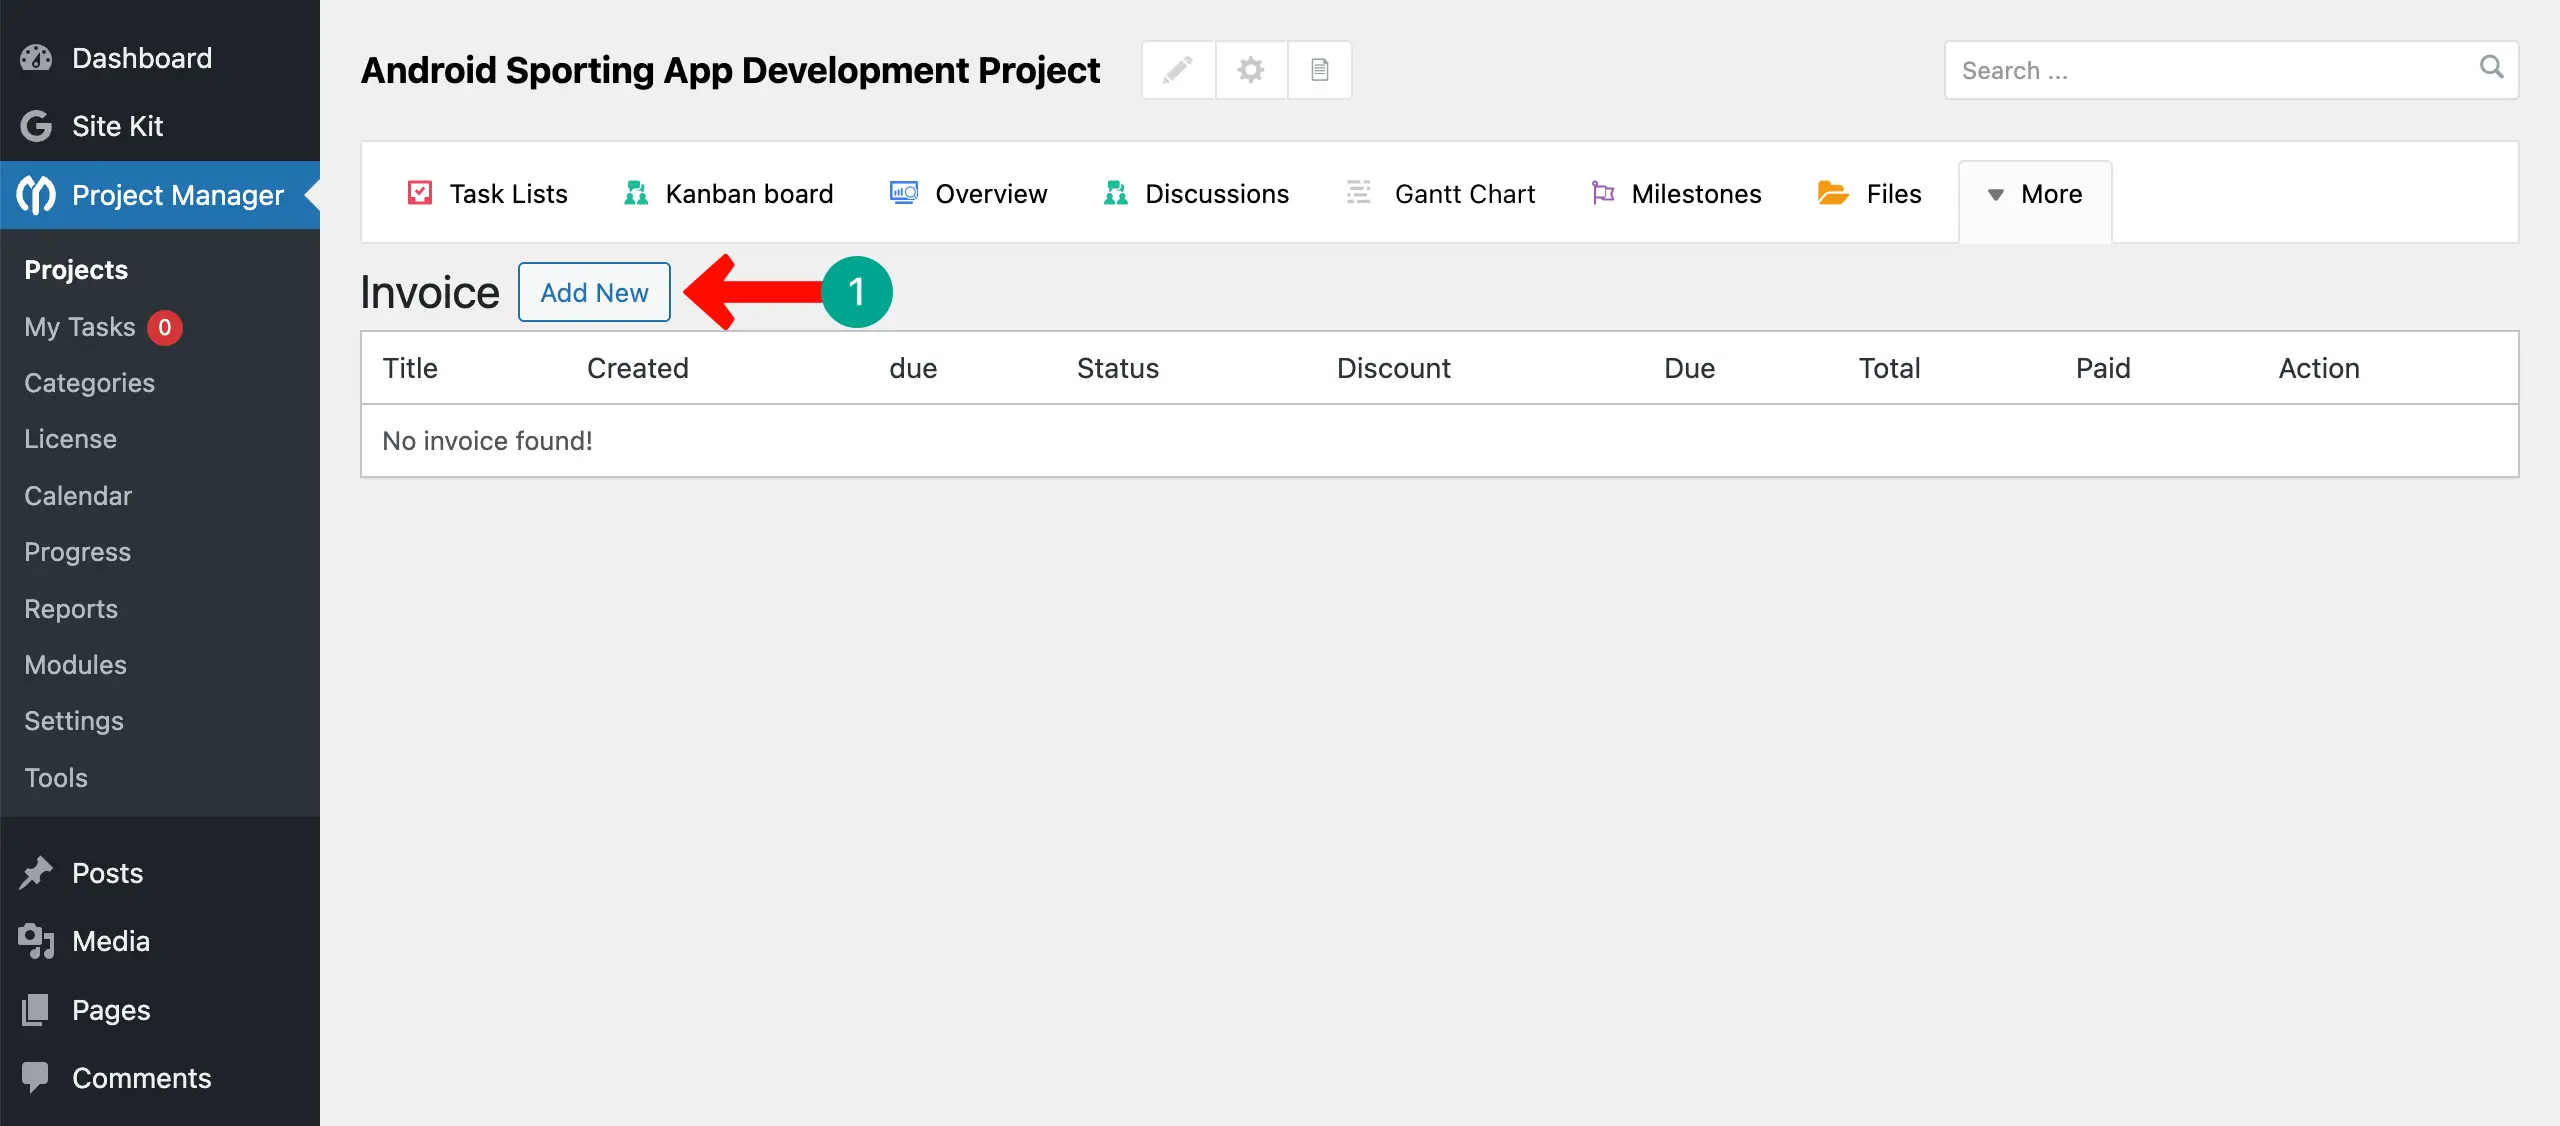
After entering into the Invoice tab, click the Add New button. This will open up a form where you will get options to create your project invoice.
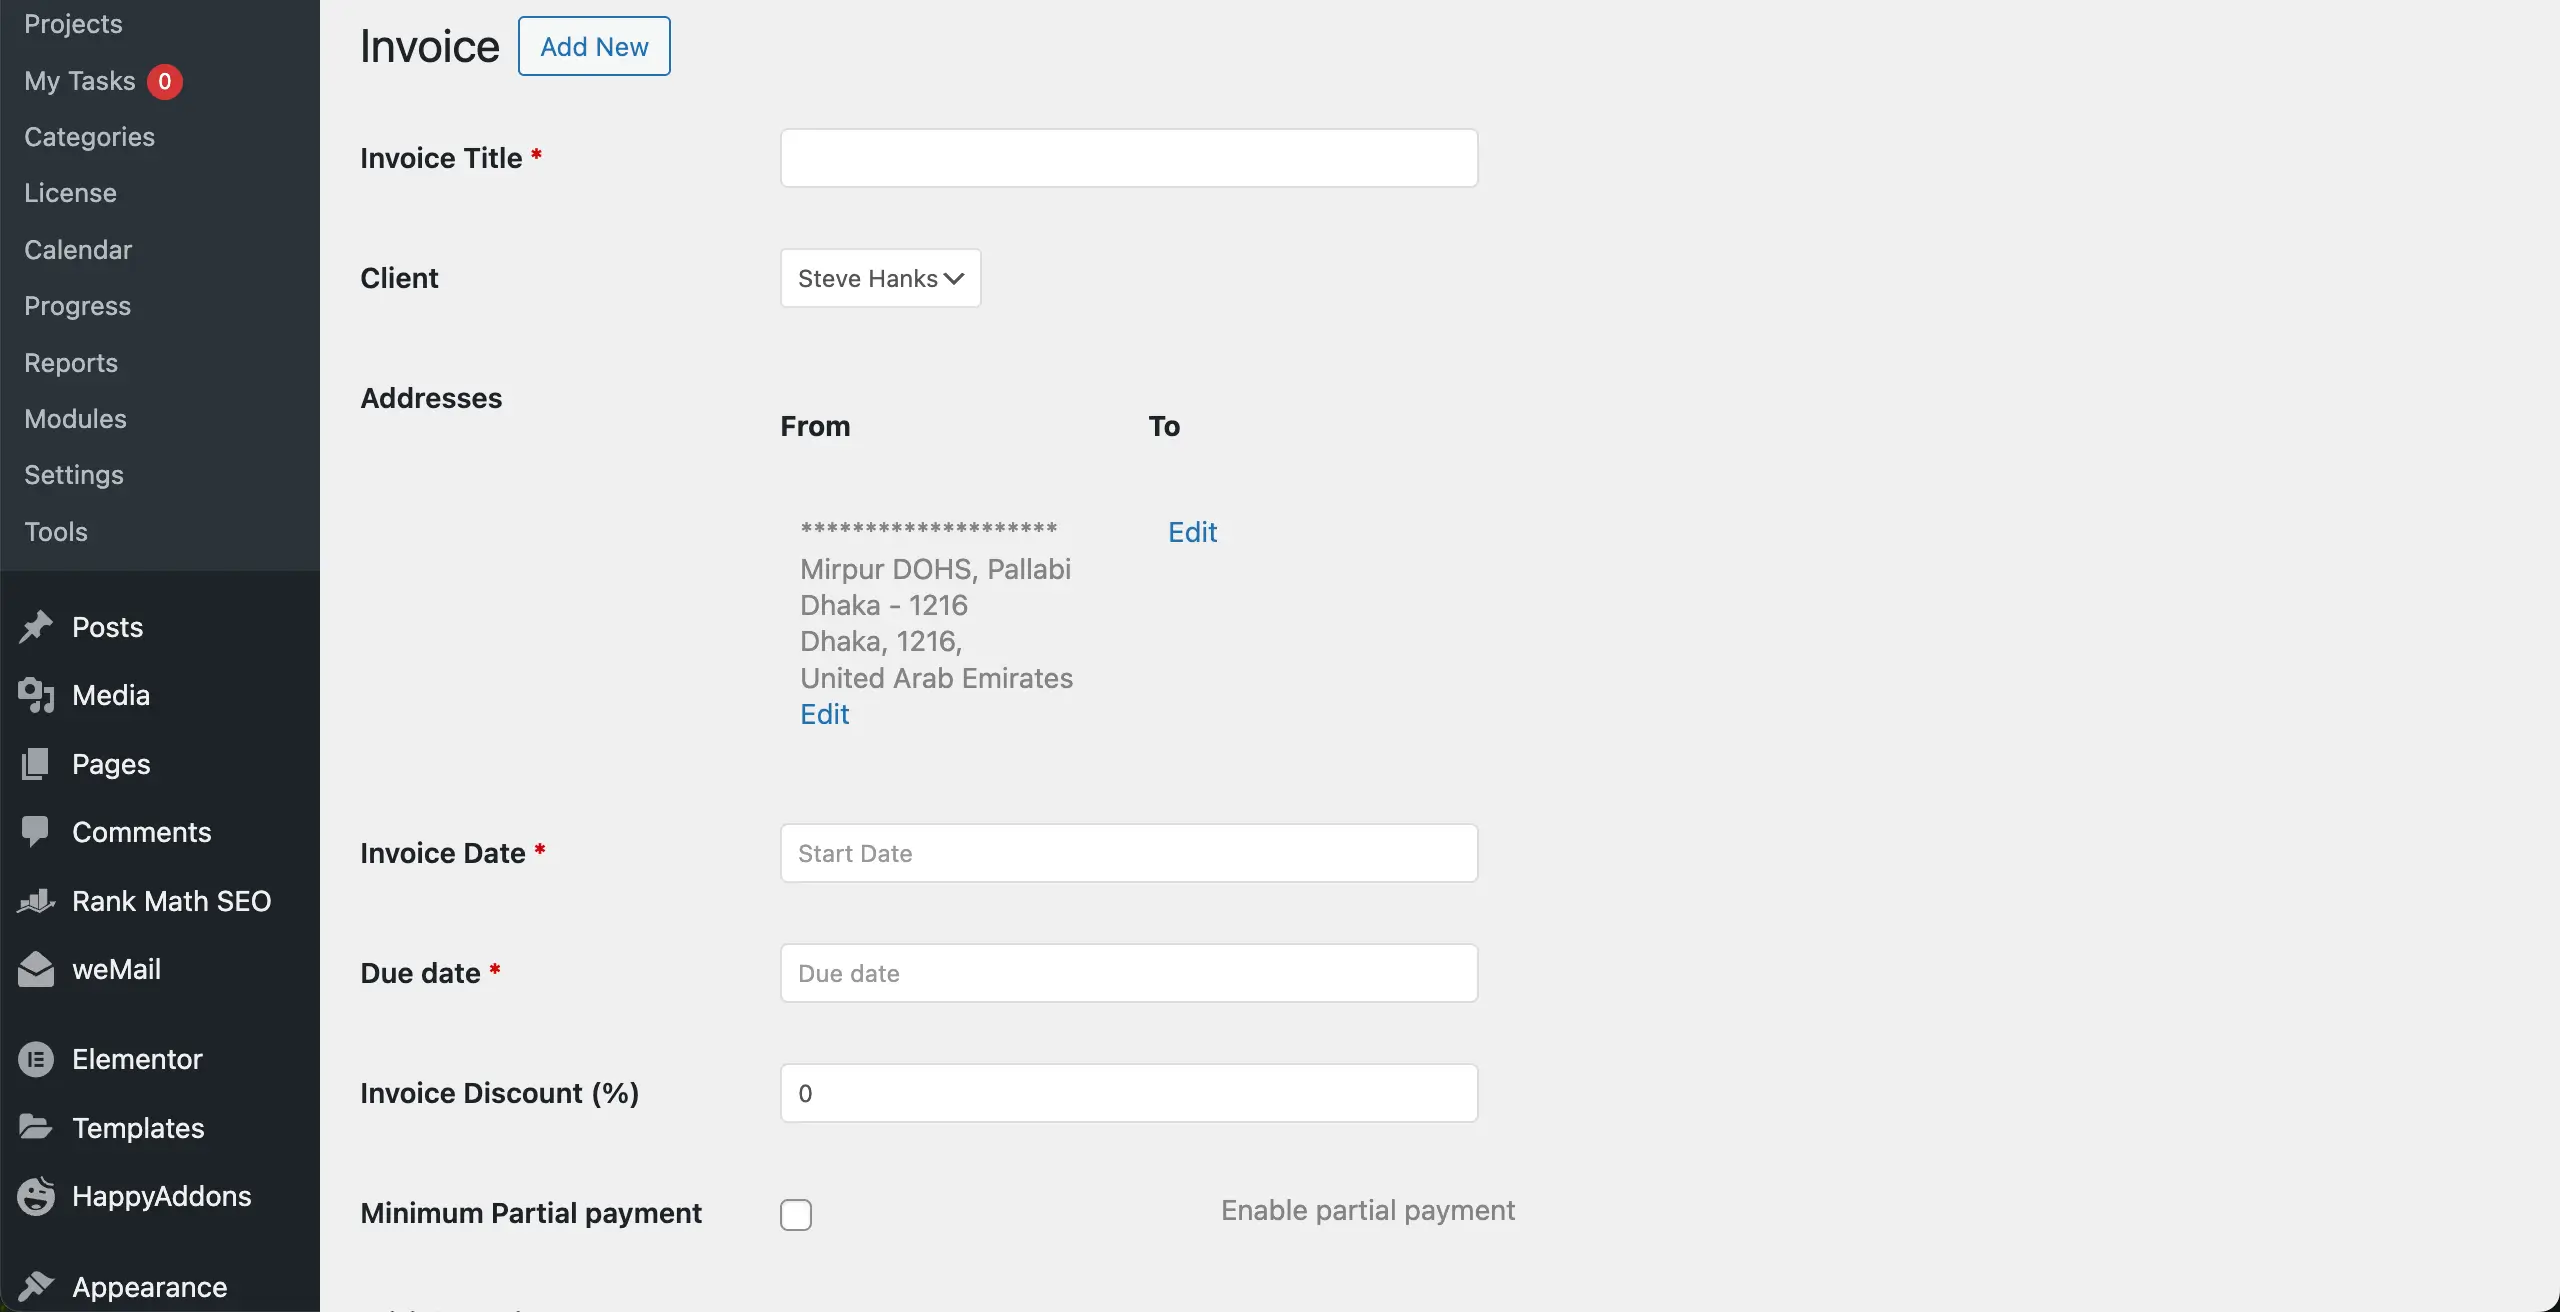
An invoice creation form will appear. Here you must fill in the following fields:
- Invoice Title: Write a clear title for the invoice.
- Client: Choose the client who will receive the invoice. The selected client can later view the invoice from the frontend.
- Addresses: Fill in ‘From' (your business) and ‘To' (your client). The From field auto-fills if you saved it earlier in settings.
- Due Date: Set the payment due date.
- Invoice Discount: Add a discount value if you want to reduce the final amount.
- Minimum Partial Payment: Enable partial payments if needed. This allows clients to pay in smaller portions.
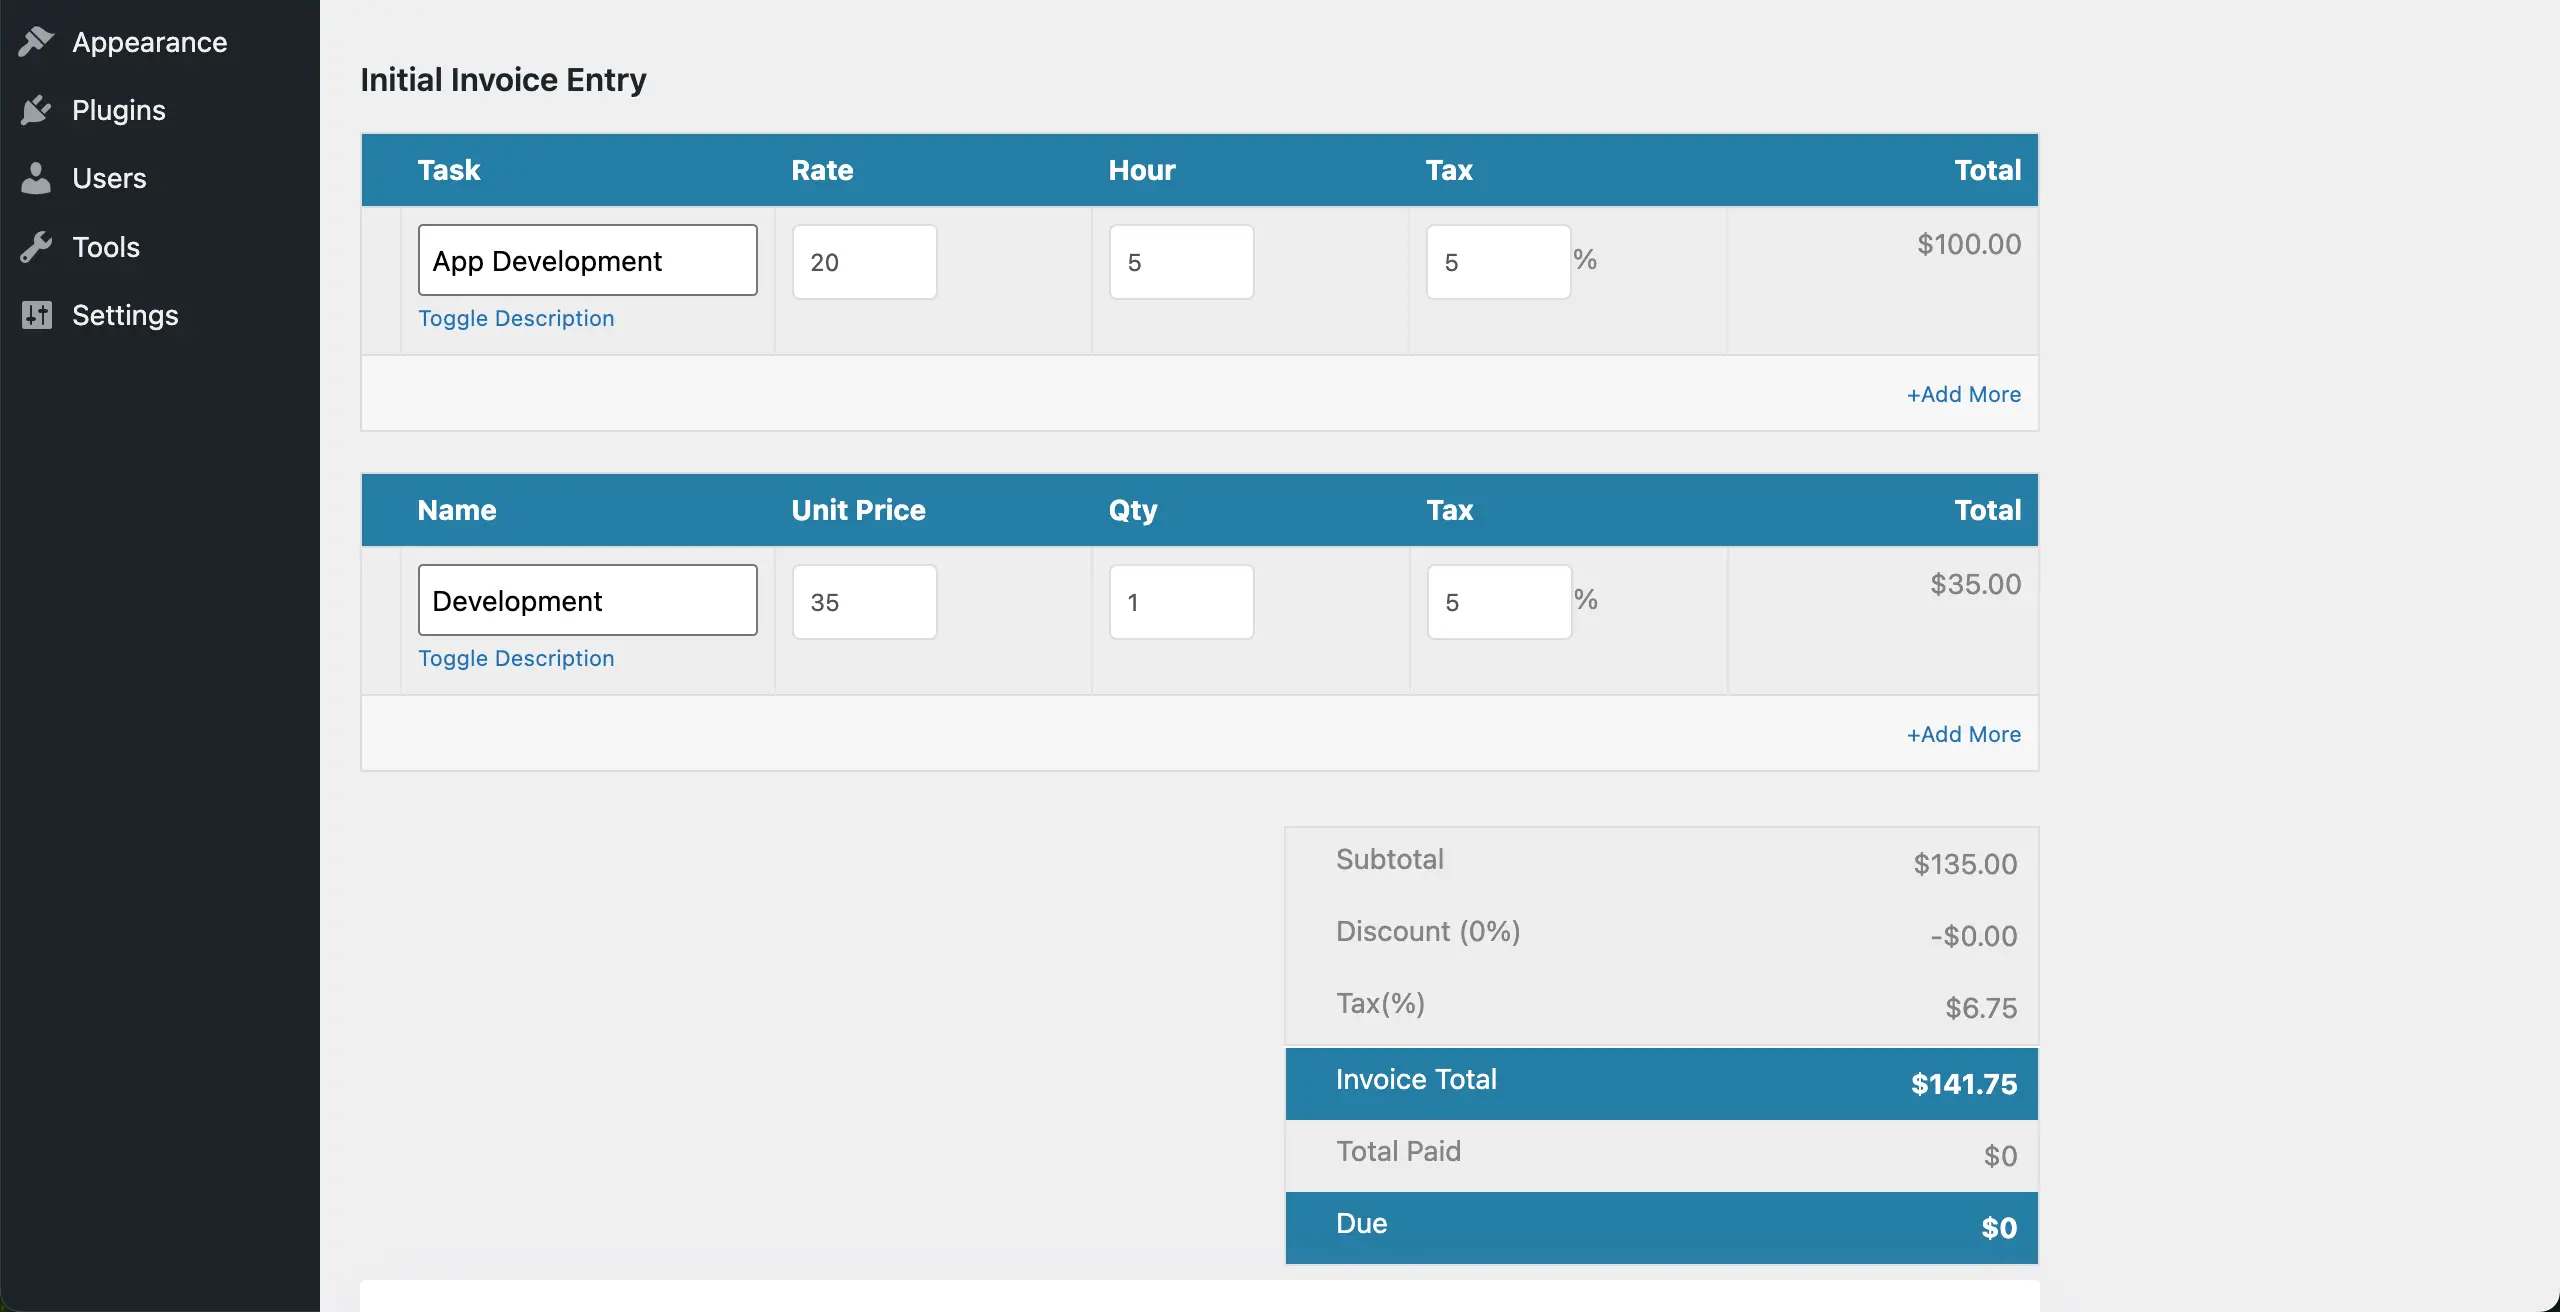
Add Billable Tasks or Items
Scrolling down the page a bit, you will find this section. This is where you add what you are charging for. There are two types of entries:
- Task (Hourly Work): For billable labor. Add the task name, write a short description, set an hourly rate, and add the number of hours. The system calculates the total automatically.
- Name (Unit-Based Items): For products, fixed services, or unit-priced deliverables. Add item name, unit price, quantity, and tax if needed. The invoice will show the final cost at the bottom.
Add Terms and Notes
Below the billing items, you will find two optional fields:
- Terms: Write terms and conditions for payment.
- Notes Visible to Client: Add personalized notes for the client.
When everything is ready, click the Add Invoice button to save.
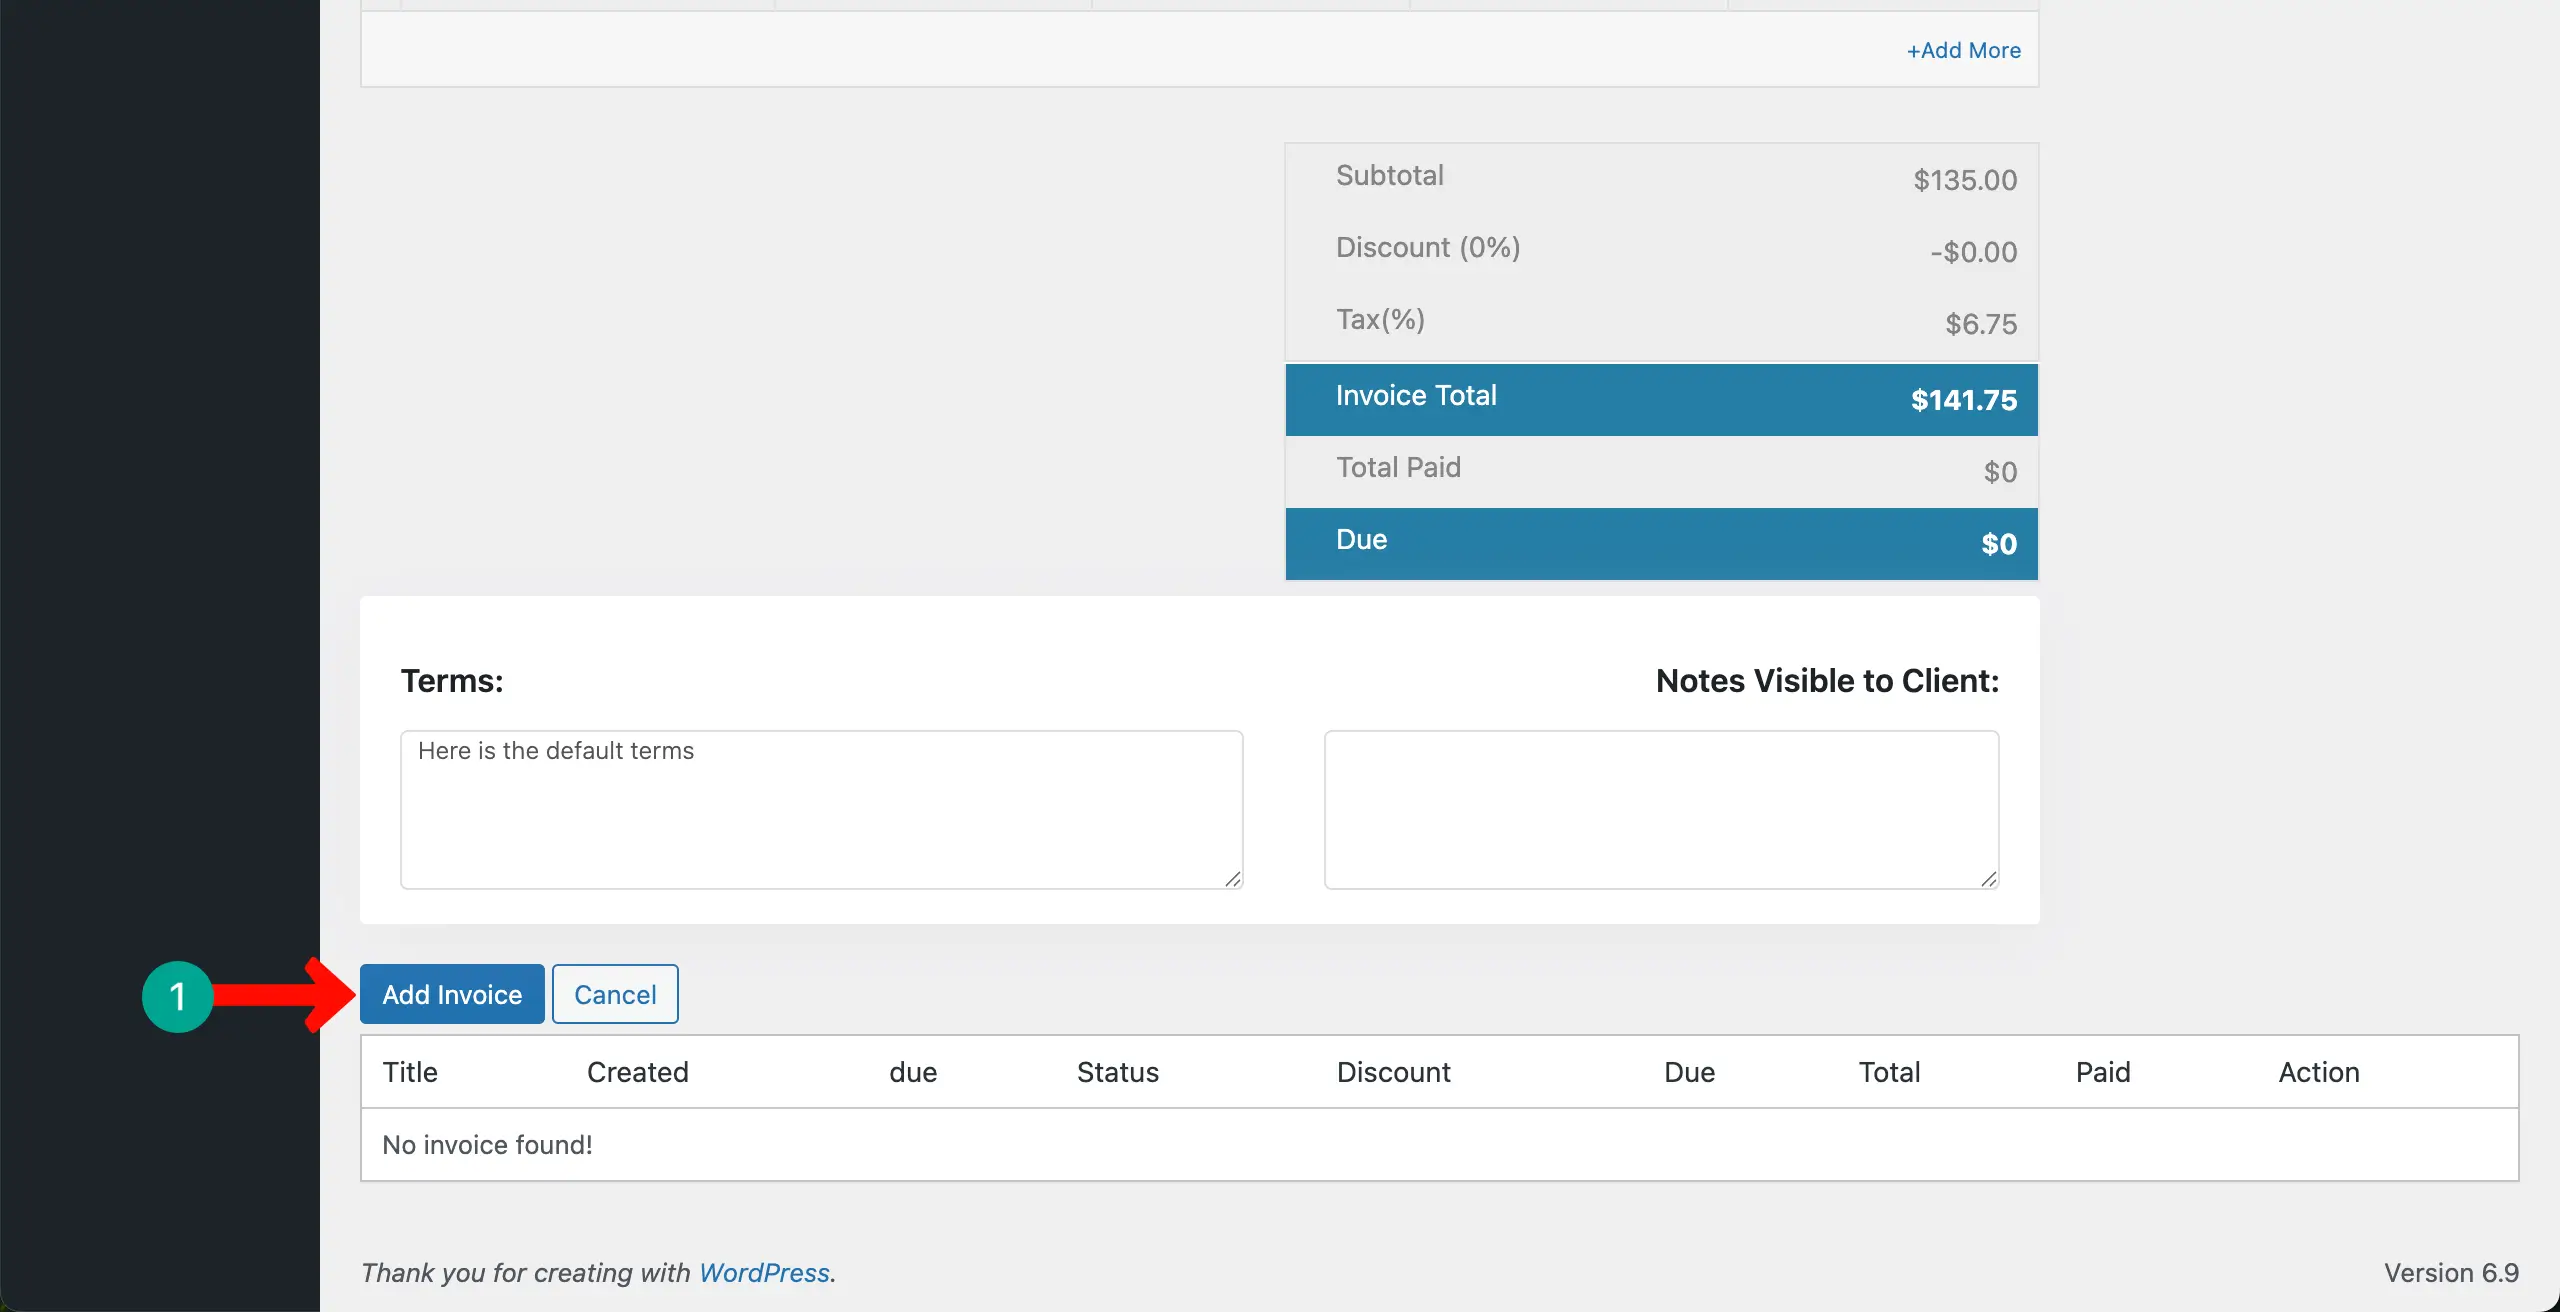
The project invoice will be created right away.
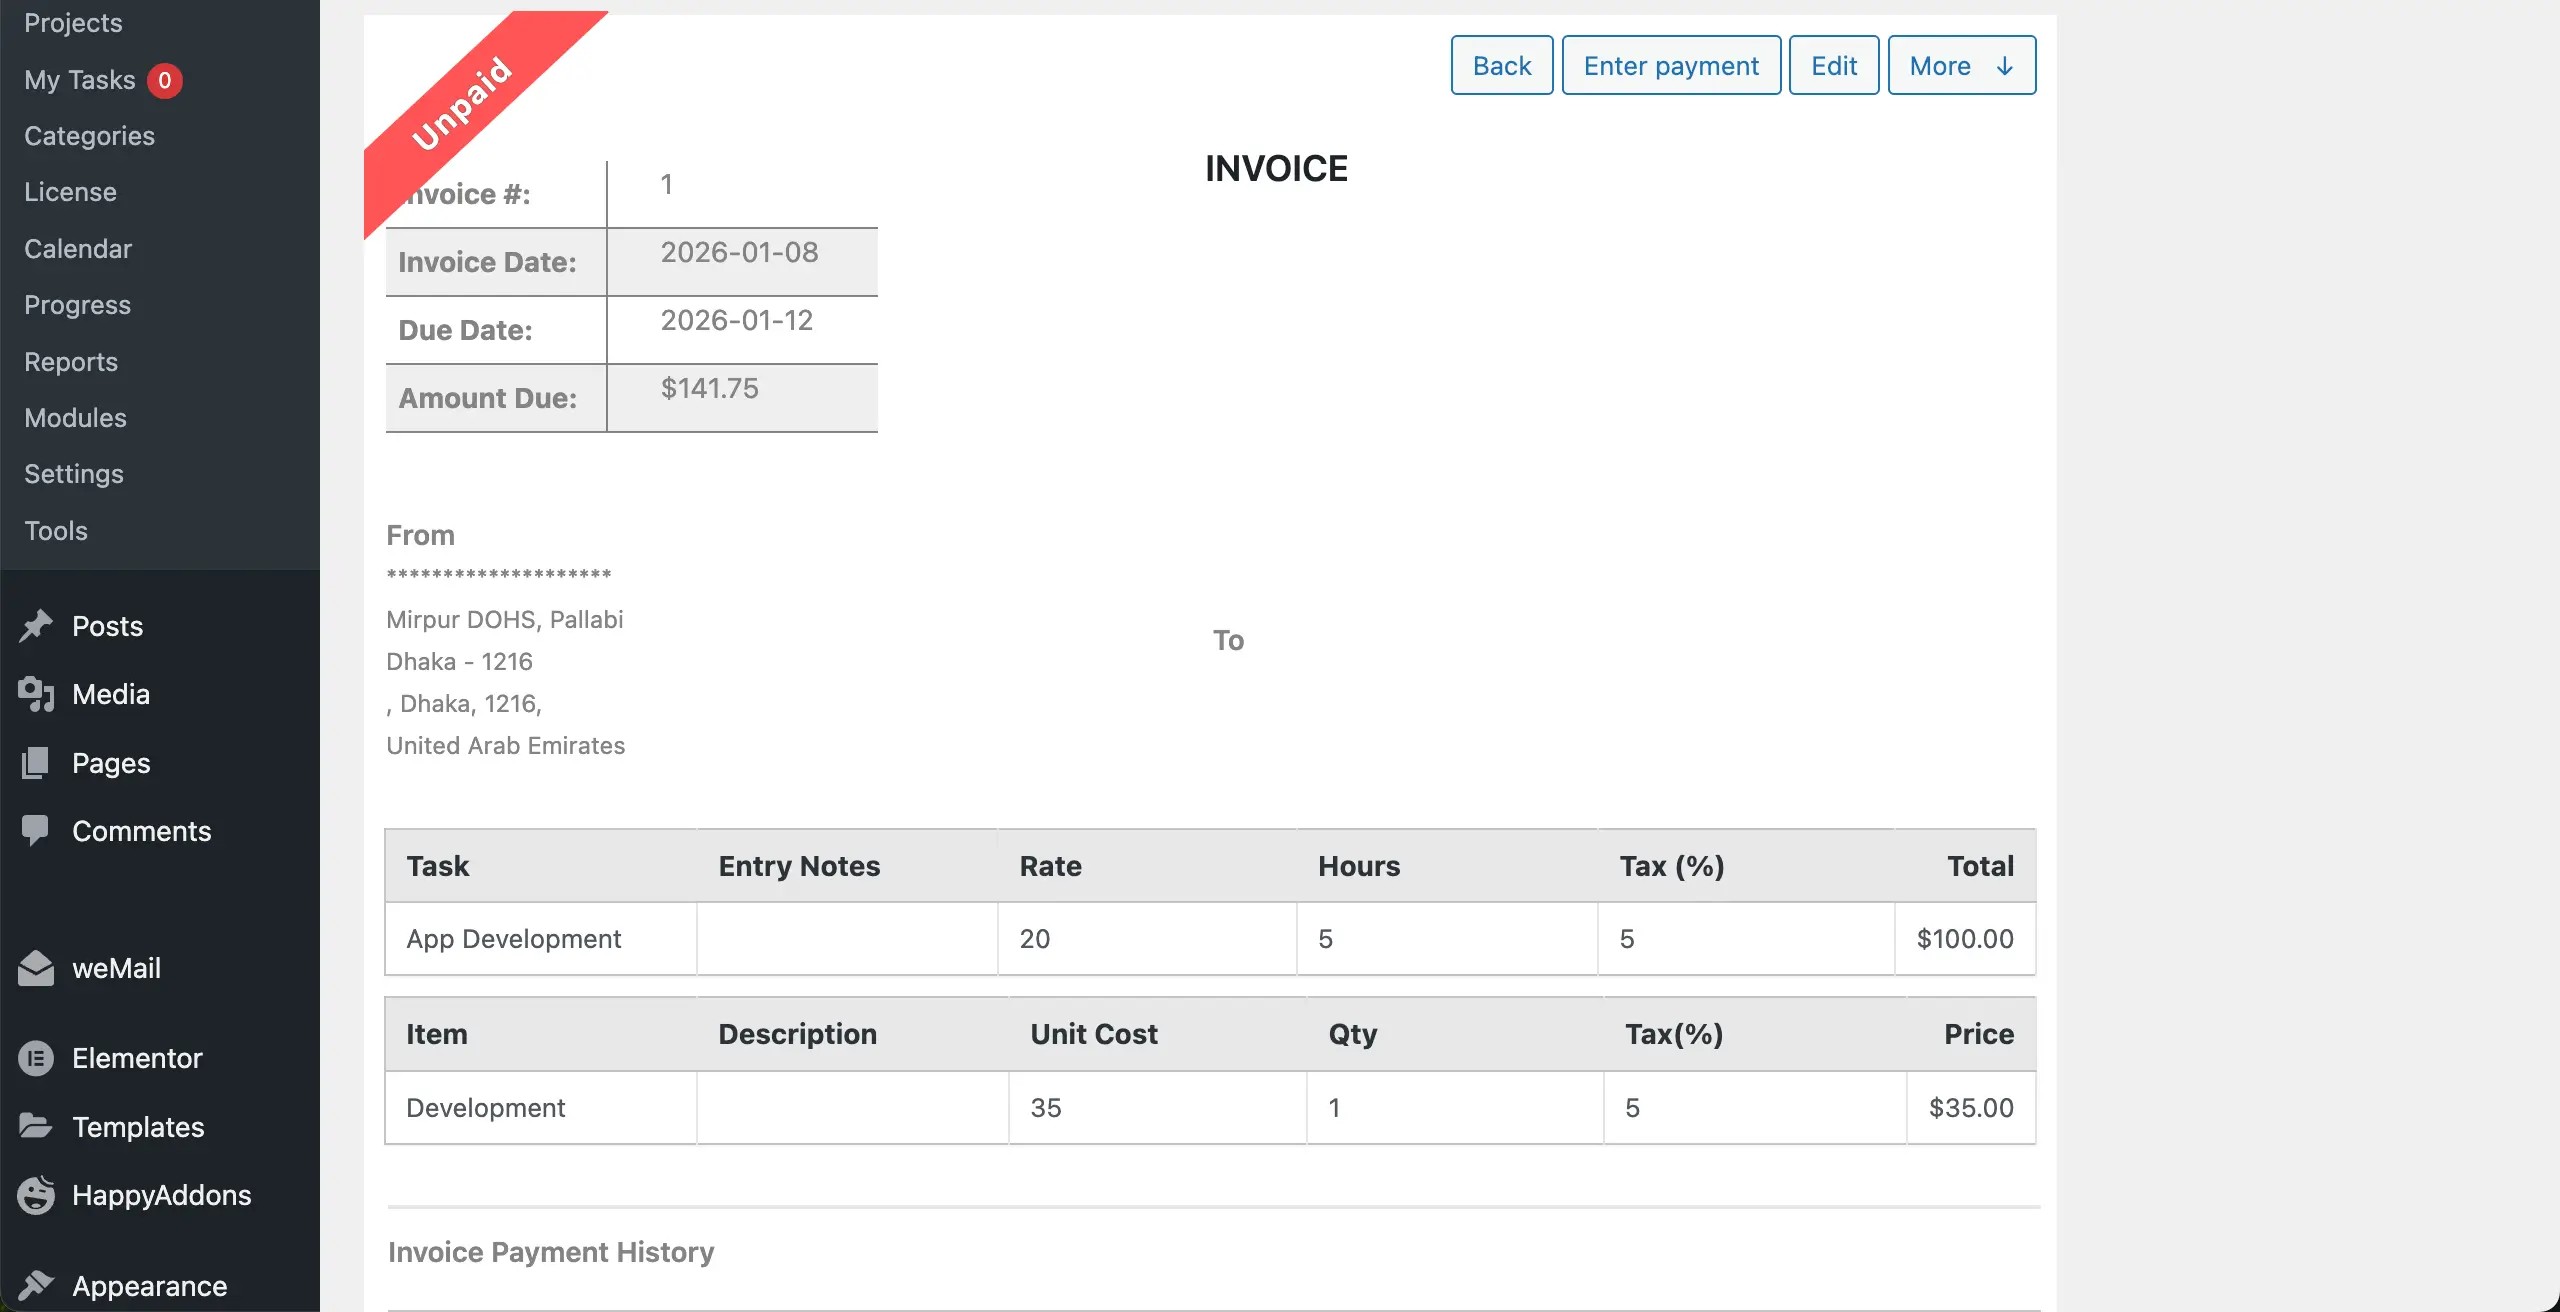
Thus, you can create an invoice and send it to your client directly from your project dashboard.
WP Project Manager allows you to showcase your entire project dashboard on the frontend. You can even publish the bill on the frontend so the respective client can view the invoice PDF and make payment right away.
For more guidance, visit this documentation on how to publish the project invoice on the frontend.
Common Use Cases for Invoicing Clients with WP Project Manager
So, now you know how to create invoices with WP Project Manager. Different types of professionals can use WP Project Manager to manage their client work. Since invoices sit inside each project, it becomes very easy to bill clients based on real activities and deliverables.
This can help you remove confusion and make the billing process fairer for both sides. Let's take a look at some usecases where WP Project Manager can be used to bill clients.

Freelancers Billing Hourly Tasks
Freelancers often charge based on time. By using the invoice module with the Time Tracker, they can log hours and convert them into billable tasks. This ensures that clients only pay for the exact time spent on the project. It also saves freelancers from manual calculation errors.
Agencies Billing Milestone-Based Work
Agencies usually break projects into milestones. For example, the design phase, the development phase, and the delivery phase. With WP Project Manager, agencies can issue invoices at each milestone. This helps maintain steady cash flow and keeps clients updated on the project's progress.
Explore how WP Project Manager makes managing project milestones very easy.
Content Writers Billing Per Project
Content writers and editors sometimes charge per article or per project. They can create a project for each writing job and then generate an invoice once the work is done. It makes the whole billing workflow simple, transparent, and less stressful.
Developers Billing Both Hours + Fixed Items
Developers often mix different billing models. For example, they may charge hourly for debugging and a fixed price for a feature. WP Project Manager supports both models in the same invoice. Tasks can be billed by hour, and additional items can be added with a unit price and quantity.
Tips for Faster Client Payments

Late payments can slow down your business and create stress. When you send a clear, clean invoice, clients make payments faster. WP Project Manager helps you do this by organizing items and keeping everything in one place. Here are some tips to speed up the payment process.
Set Clear Due Dates
Always set a due date when invoicing. Due dates tell clients when they should pay. It also helps you follow up without feeling awkward.
Use Partial Payments for Big Projects
Large projects can be expensive for clients. Allowing partial payments makes the cost easier to handle. It also keeps your cash flow healthy throughout the project instead of waiting until the end. Learn how to build client trust in project management.
Add Notes for Clarity
Notes help clients understand what they are paying for. You can explain instructions, specific conditions, or reminders. Clear notes reduce confusion and save time on back-and-forth messages.
Keep Invoice Items Descriptive
Write simple titles and descriptions for tasks or items. Clients should connect each cost to a real piece of work. This builds trust and reduces disputes.
Final Words!
Learning how to invoice a client inside WP Project Manager gives you full control over your project workflow. You can manage work, log hours, track progress, and bill your clients without switching platforms. This saves time and reduces billing mistakes.
It also keeps all project costs visible to both you and your client, which makes financial decisions more fair and transparent. When a tool helps you get paid on time, you can focus on producing better work instead of chasing overdue bills.
WP Project Manager supports different billing styles, from hourly work to milestone projects. So whether you are a freelancer, a writer, or an agency team, you can build a billing system that matches your process and keeps your business healthy.