Login/Registration
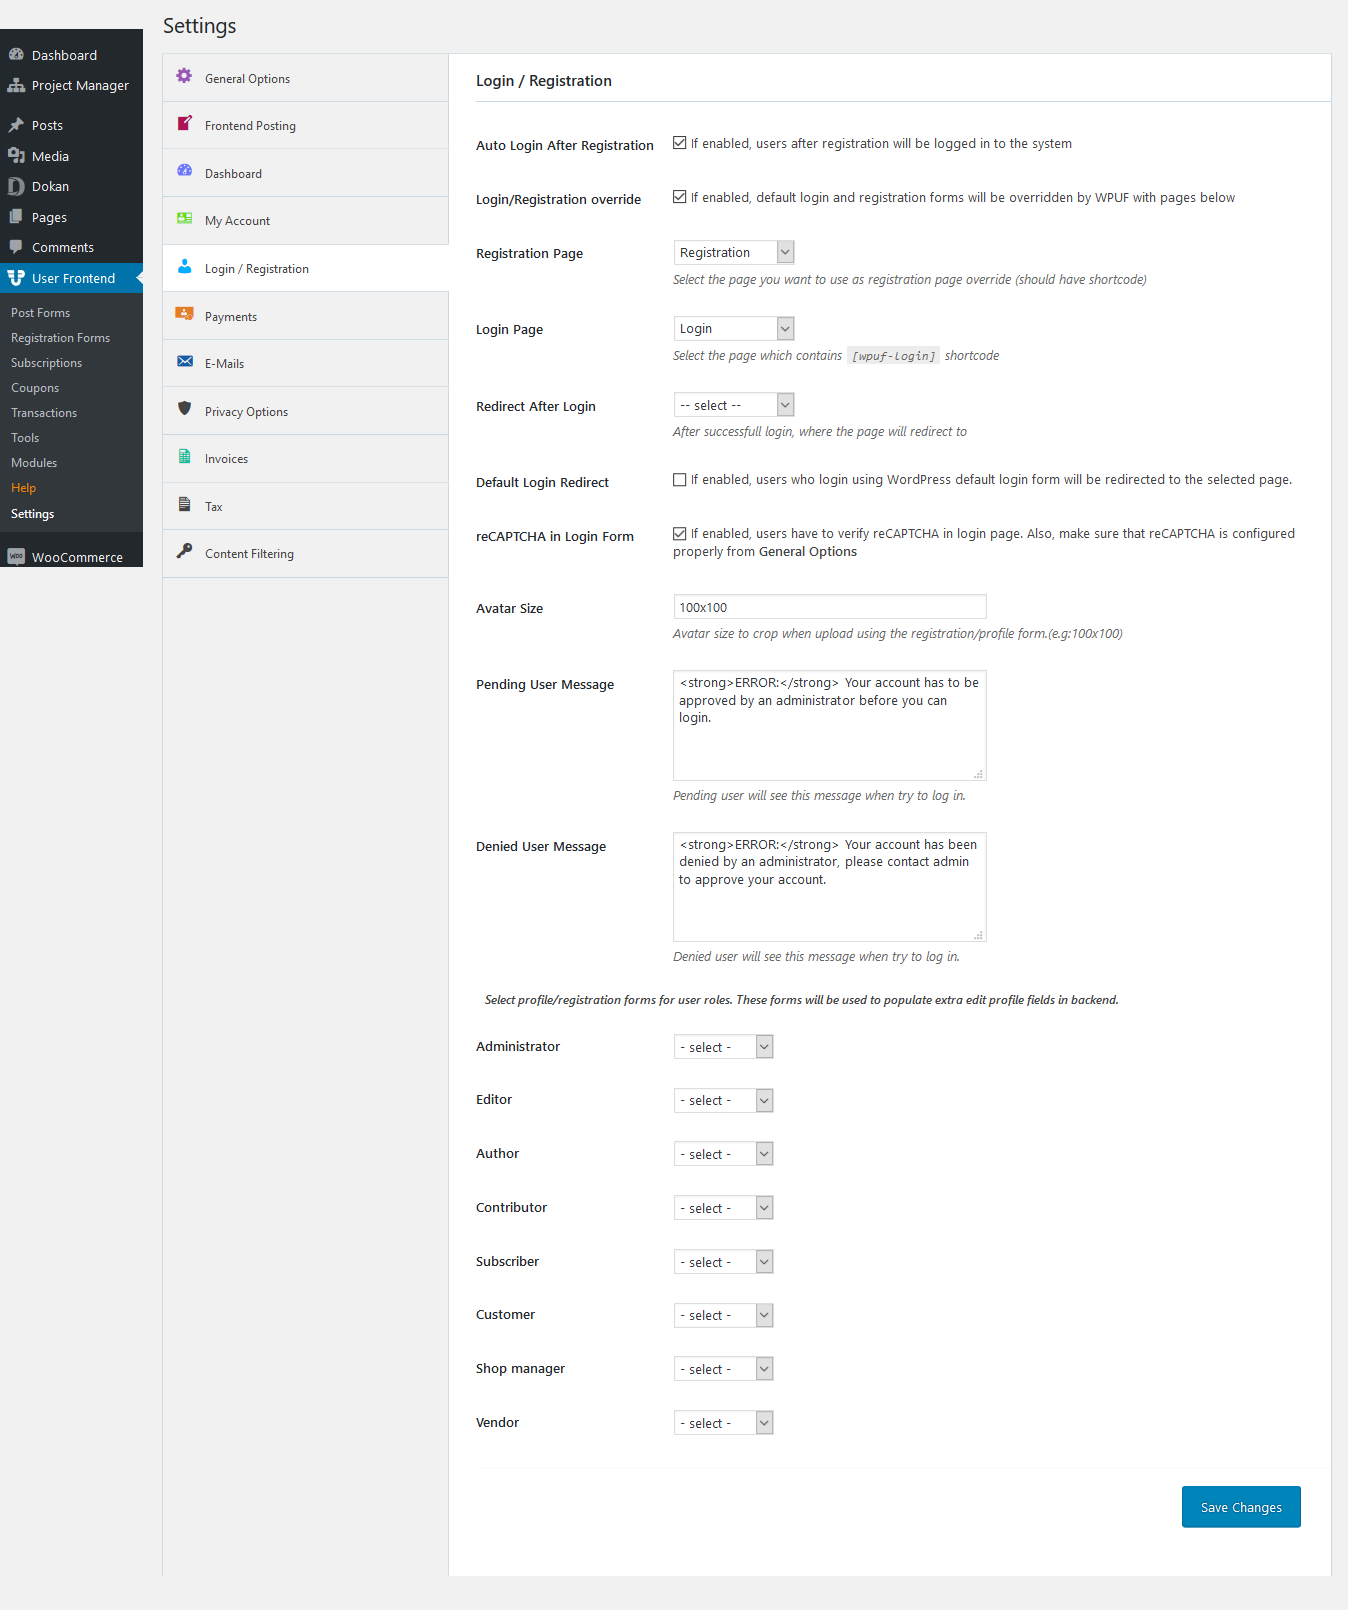
The features for login and registration are controlled from here. You can find this screen from wp-admin → User Frontend → Settings.
Login/Registration Fields
Auto Login After Registration: If you do not want the user to insert his username and password to log in right after signing up, then you can check this option.
Login Registration Override: WP User Frontend has a custom login shortcode which can be used on any page and with any page template. So you can use a custom designed login page with any design you like. If you want to enable this feature, you have to check this field.
Registration page: The page which will be used to signup users. This page will be the default registration page which will replace the registration page of WordPress. If you want to use different registration pages for different roles, then you can place the registration form shortcode to different pages and assign them below. But this field will contain the basic registration form. We recommend setting the registration form that you will offer to the subscribers. So there will be minimal fields to register.
Login Page: This page has to contain the shortcode[wpuf-login]. You should assign the login page even if you are not overriding the default login screen of WordPress. Because sometimes not assigning the page may result in an infinite redirection loop.
Redirect After Login: From this drop-down select the page you want users to be taken to after successful login.
Default Login Redirect: Selecting this option will take users to the selected page for redirect after login if you are using default WordPress form.
reCAPTCHA in Login Form:
This option is available from WPUF 2.8.10 for both free & pro users.
Activate this check-box to allow users to verify reCaptcha in login page.
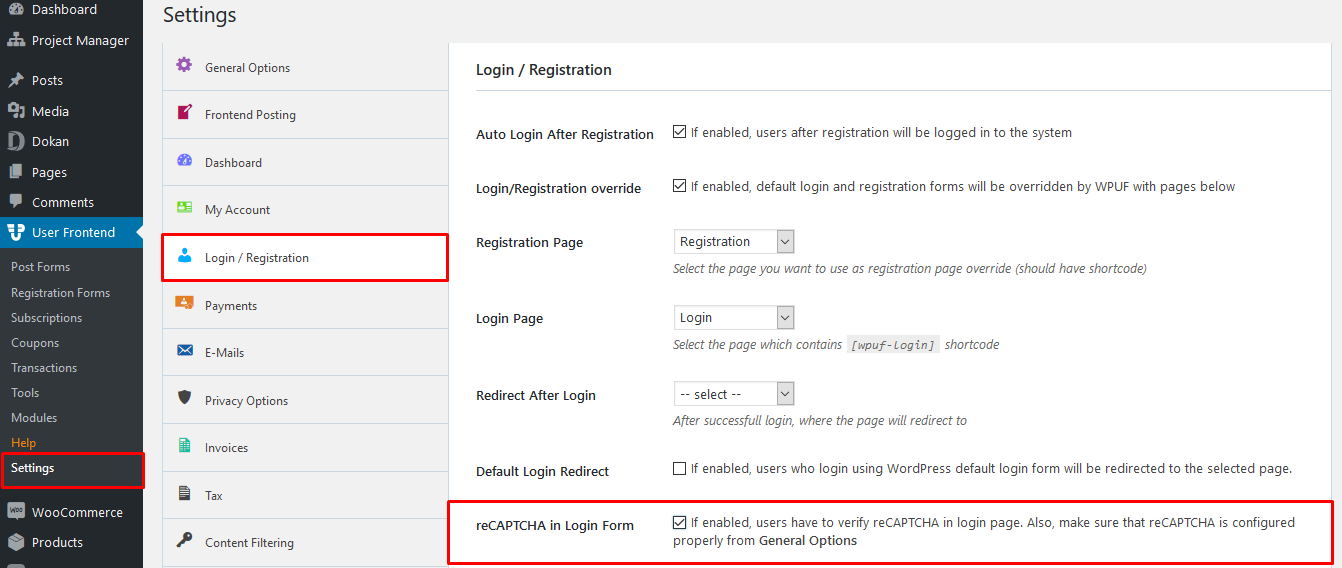
You will need to configure the reCaptcha Site Key and Secret Key from Settings>General Options.
To know how to obtain the keys, checkout this documentation.
Avatar Size: From here select the dimensions of the avatar for cropping out the user profile photo when the user registers.
Pending User Message: From here type the message pending registered users will get. A default message has been given which you can change as appropriate.
Denied User Message: From here type the message denied registered users will get. A default message has been given which you can change as appropriate.
To determine the default New User Status, you need to go to User Frontend>Registration Forms>Settings>General.
To learn how to set up a new user status, check out this documentation.
Form selection for each user role: These fields are not mandatory. If you assign the forms here, then the data on the user profile can be edited from both the front and admin panels. If you leave them unselected, then the user profile details will only be visible from the front end and edited from the front end. So the admin will not be able to see the extra details on their profile.