How to Set Multiple Prices Per Product in WooCommerce and Dokan
Do you own a WooCommerce-powered eCommerce shop? Then there's a good chance that you have wondered at least once how to set multiple prices per single product.
Multiple prices per single product mean setting different prices for a single product based on distinctive attributes. An example of that is to set different pricing for different colors of a single product.
While it may sound like a complex thing to do, it is actually super easy. Moreover, we will present a step-by-step guide for you to avoid any confusion.
Here we go!
Why Would You Want to Set Multiple Prices Per Product

If you run an online business, you might have already known that a single product can come in a lot of variations. And not all of them costs the same. So while offering the customer a lot of options like different sizing and colors, you may also want to charge customers differently for each of the varieties.
For example, you can charge more for the XL size of a product than the S size.
For circumstances like this, WooCommerce's multiple prices per product can come in really handy.
There are also other options like offering bundled products or add-ons to the original products for which you will need WooCommerce multiple prices per product feature.
All in all, it is quite an important feature for both a single-vendor and multi-vendor online shop.
How to Set Multiple Prices per Product in WooCommerce

Setting up multiple prices per product can be done both with and without a plugin. But for us, the default method that is offered by WooCommerce is still the preferred way.
It is very easy and can be done in just 4 steps.
- Setting Up Attributes
- Adding Values Inside the Attributes
- Adding the Global Attributes to a Product
- Adding a Custom Product Attribute
Following are the steps in detail –
Step 1 – Setting Up Attributes
The first step to setting multiple prices per product is to create attributes for the products. You can set attributes for Size, Color, Type, etc.
There are two different attributes available in WooCommerce. They are –
- Global Attribute
- Local Attribute
Global attributes work, as the name suggests, globally. That means you can create the attribute once, and use that on any of your products on the website.
Local attributes, on the other hand, are created and used inside a single product. They are not reusable and can only be used for that certain product.
To create a global attribute, login to your WordPress admin dashboard and navigate to WordPress dashboard > Products > Attributes.
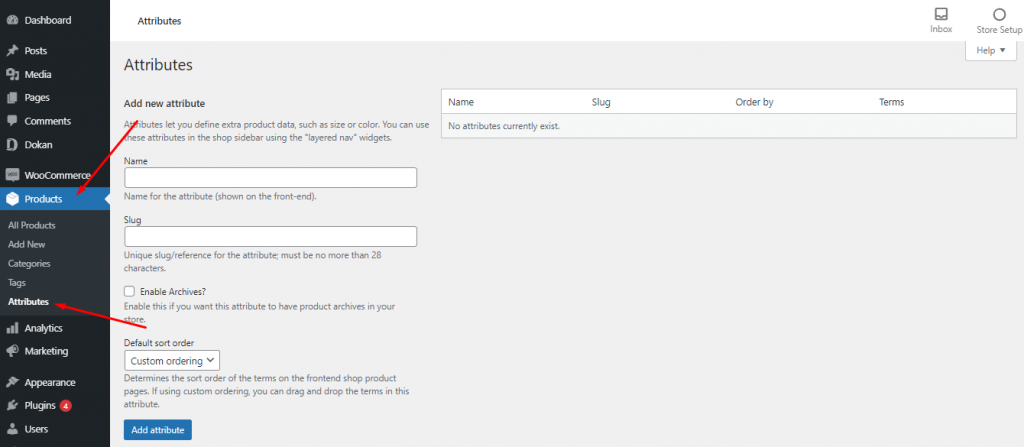
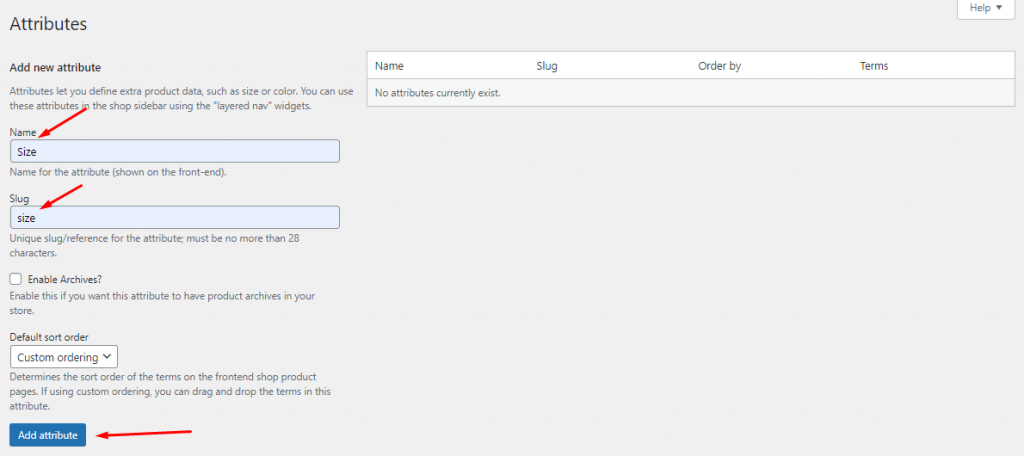
From here you can find the “Add new attribute” option. Just give your attribute a Name and a unique Slug and click on Add attribute.
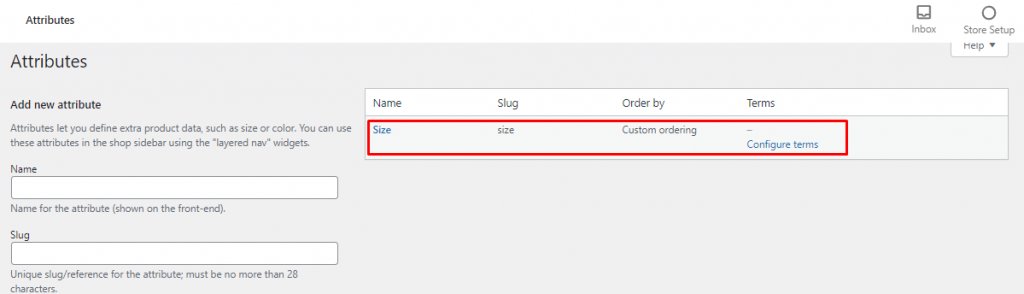
Once you are done, you will find the newly created attribute on the right side of the page.
Step 2 – Adding Values Inside the Attributes
Now that you have created the global attribute, you need to add values inside them. As we have created an attribute named Size, now we will add the different size values, such as S, M, L, XL, XXL.
To do the same, you will have to visit WP Admin Dashboard > Products > Attributes and then click on the attribute that you have created.
On the left side, you can see that there is an option to add value. For that, the Name, Slug, and Description of the value need to be inserted.
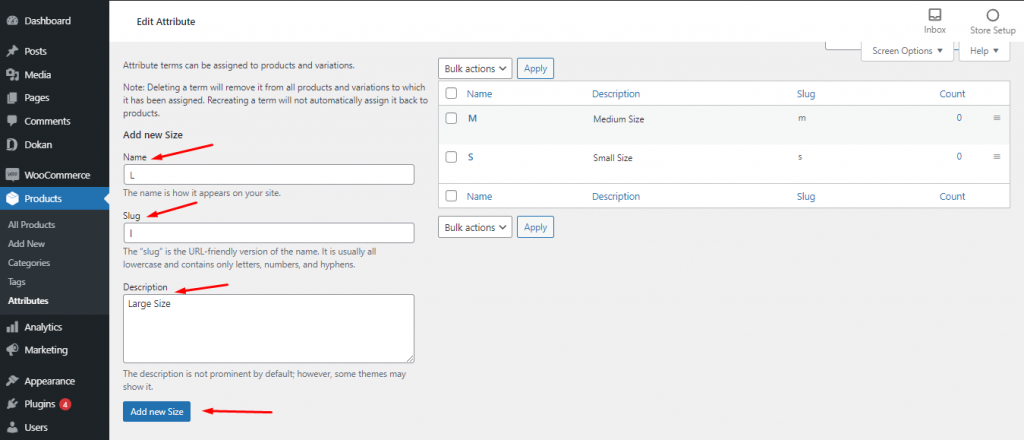
Add all the values for your attribute in the same way.
Step 3 – Adding the Global Attributes to a Product
Once you are done creating the attribute and the values, you will have to add that to a product.
To do that, go to Products > All Products from your Admin Dashboard.
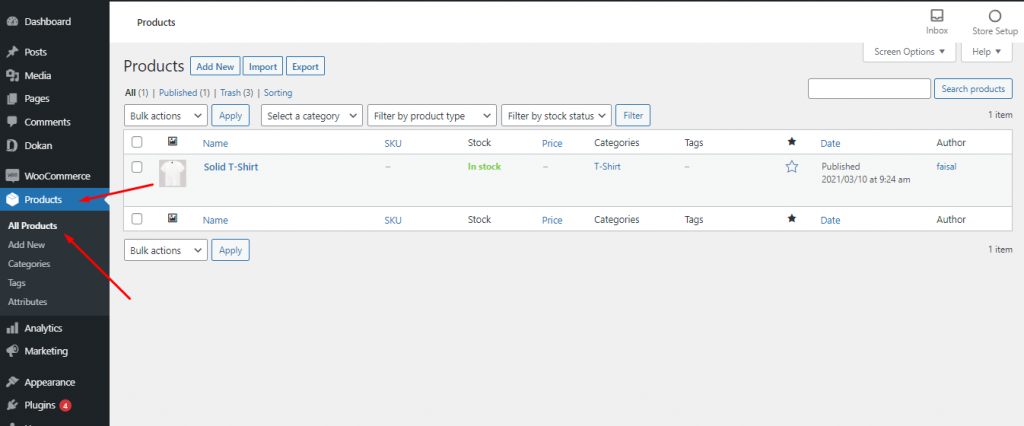
Now click on the product that you need your attribute to be displayed.
Scroll down, and you will find an option called Product data. Product data lets you change the type of your product. To add the attribute to the product, you need to turn it into a Variable Product.

Now expand the Product data section and click on Attribute. From here, you can add the attribute you have created using the dropdown. Now enable the Used for variations checkbox and you are done.
Don't forget to click on Save Attributes after a while.
Now click on Variation, and select Create variations from all attributes. You'll get a pop-up with a warning message, “Are you sure you want to link all variations?“
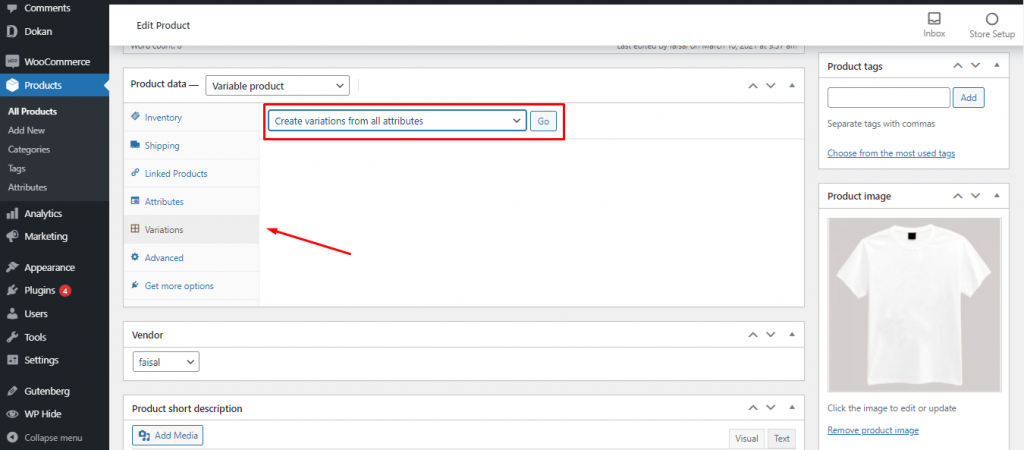
Click Ok, and all the values from the attribute you created will be imported to the product.
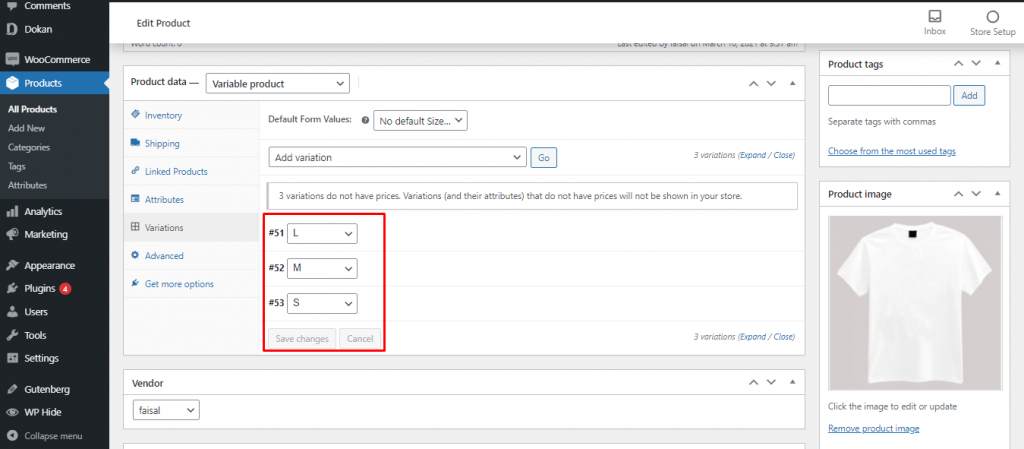
Now you can set the prices for all the individual attribute values, or in our case for all the product sizes. Below is how to do that.
After setting the prices, click on Save Changes and the multiple prices that you have set will be stored.
Step 4 – Adding a Custom Product Attribute
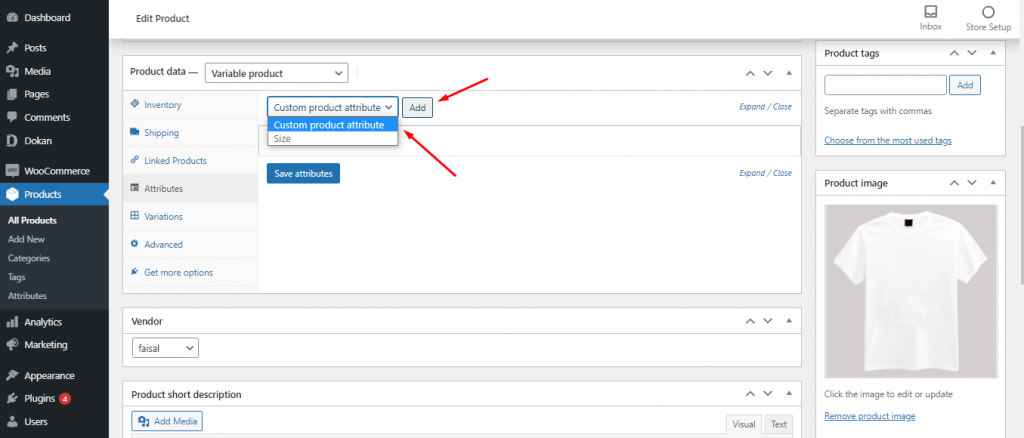
Apart from the global attribute that can be used in any variable product, you can also add a custom product attribute. A custom product can come in handy when you need to create variations that are only valid for a certain product. Let's say we need to add versions of a basic t-shirt for different colors. You can easily do that using a custom product attribute.
To do that, visit Products > All Products once again from your Admin Dashboard. Click on the product you want the custom attribute. Now from the Product data section, add the Custom product attribute from the dropdown.
After that, set the prices from the Variation option in the same way.
Can You Set Multiple Prices per Product in Dokan Multivendor Marketplace? Yes, Here's How. ⤵️
If you are using Dokan for your multivendor marketplace, you might be wondering how your vendors can add multiple prices per product. It is actually very easy to add global or custom attributes right from the vendor's frontend dashboard.
However, to add global or custom attributes, you must have any of the premium versions of the Dokan multivendor plugin.
Once you have Dokan Pro installed on your website, below is how you can add global and custom product attributes to your product as a vendor.
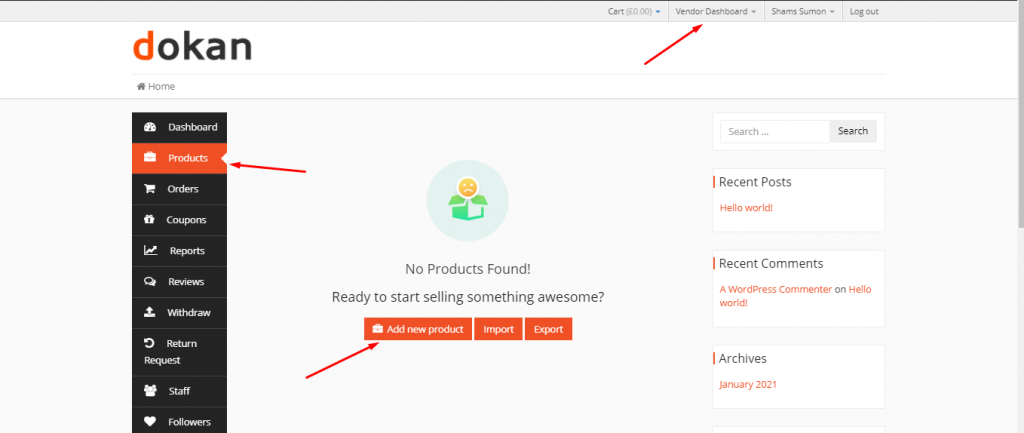
Step 1 – Create a Product from Vendor Dashboard
Once you are logged in as a vendor, navigate to Vendor Dashboard > Products and click on Add New Product.
From here, you can add a product, by filling out the product name, uploading a product image, setting the product pricing, selecting a product category, and finally inserting a product description if applicable.
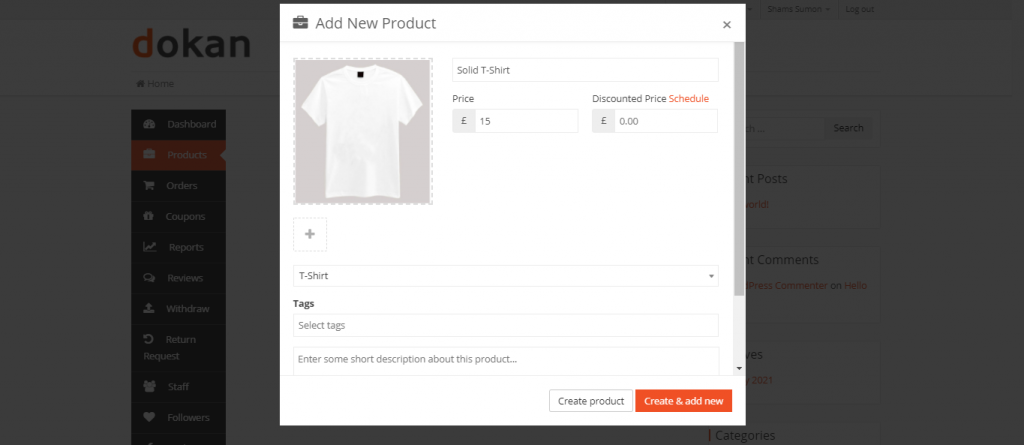
After filling up all the information, clicking on Create Product will complete the creation of the product. However, you can not add multiple prices to this product until you turn this into a variable product. Let's show you how to do that.
Step 2 – Add Global or Custom Attribute to Your Product
Now, you can either the global attribute that you created earlier or add a custom attribute to the product as well.
To do that, go to the Products page from your dashboard once again, and click on the product that you have created. Under the product name, you can find an option for changing the Product Type, which is set to Simple by default.
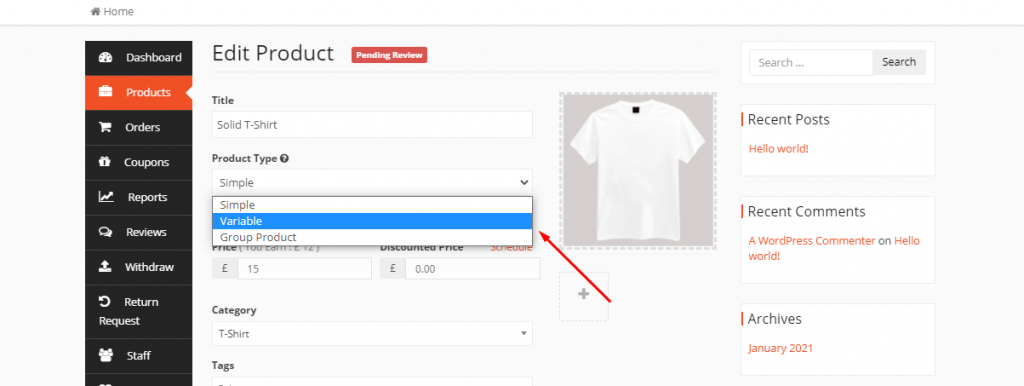
Changing it to Variable will add an option called Attribute and Variation on the same page. From here you can add a Global attribute or Custom attribute, just like you did from the backend.
Yes, it's that simple!

Add Variable Pricing Better to Boost Your Sales
Adding varieties to your product is crucial for your eCommerce as it can help to increase your sales. However, for different varieties like size and color, you might also have to charge differently, even if the product itself is the same.
If you build your online shop using WordPress, it becomes quite easy to add WooCommerce multiple prices per product.
You can multiple prices per product by creating and adding global or custom attributes, which are available in WooCommerce by default. For that, you don't even need any external plugins. You just have to create a variable product and assign the attributes to that.
However, if you use Dokan for your multi-vendor marketplace, you will have to install the pro version of the multivendor plugin to enable the variable product option. After that vendors can add global or custom attributes right from the frontend dashboard.
If you face any problem while setting multiple prices per product in WooCommerce, we are here to listen and help you out. Also, don't forget to subscribe to our newsletter to read many more helpful WordPress tuts, just like this one!