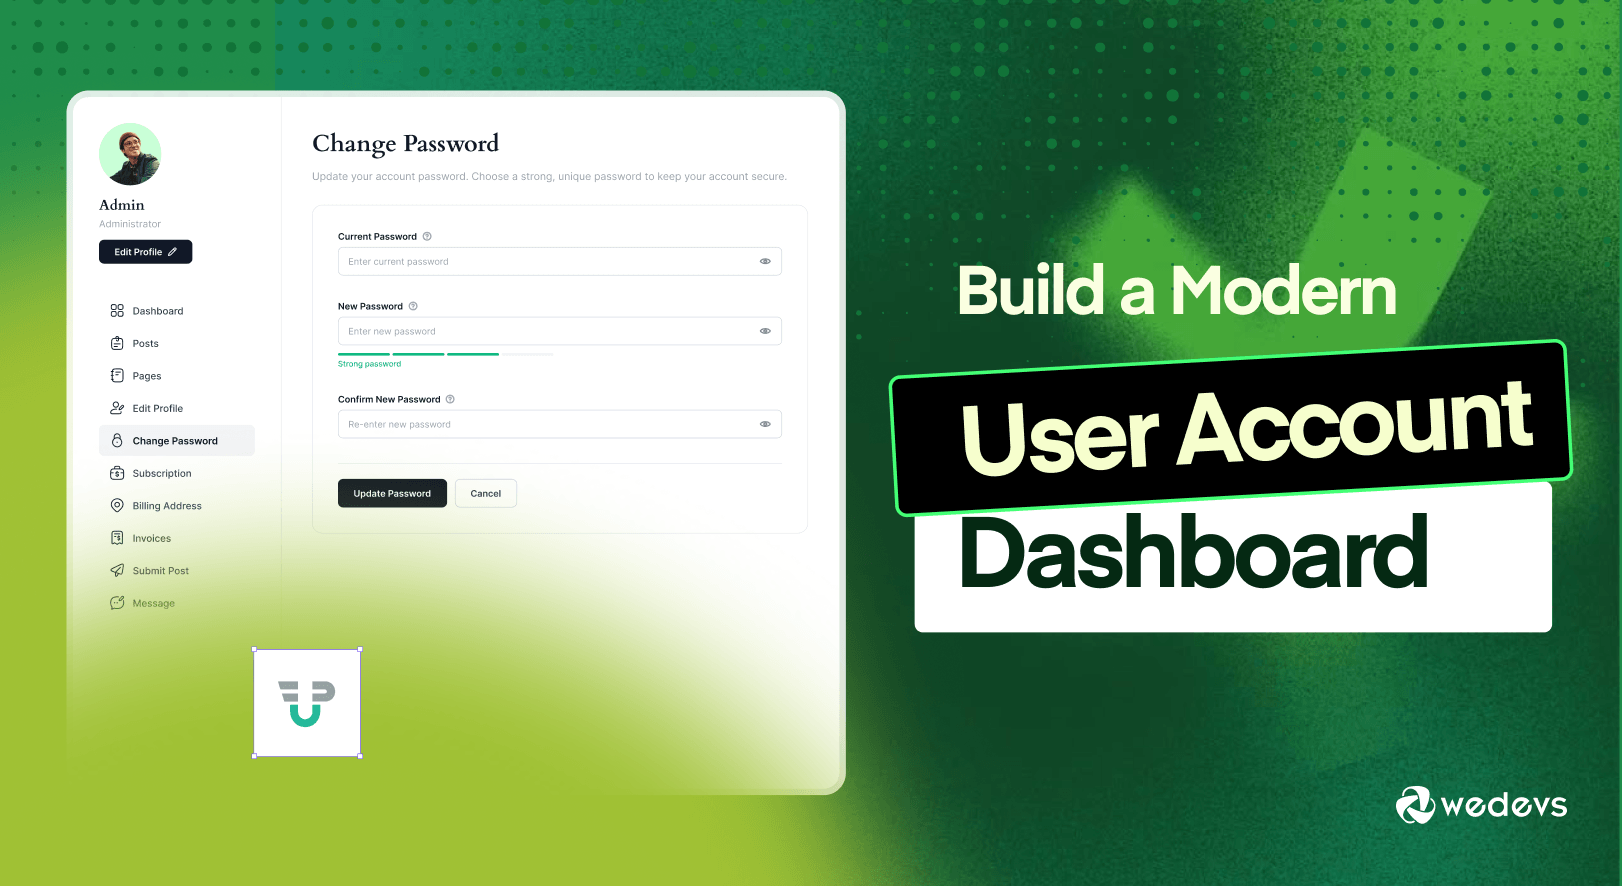
If your users need to visit the WordPress admin area to manage their profiles, posts, subscriptions, or account details, you're creating extra work for them.
For many websites, the WordPress dashboard is confusing. It includes menus and settings that regular users don't need. As a result, it can hurt the user experience and even create security concerns.
A frontend user account dashboard solves that problem.
Instead of sending users to /wp-admin, you can give them a clean, branded dashboard where they can manage everything from one place.
In this guide, you'll learn how to build a modern user account dashboard in WordPress without writing a single line of code using WP User Frontend Pro.
What Is a User Account Dashboard?
A user account dashboard is a personalized area where logged-in users can manage their accounts from your website's frontend. Depending on your site's purpose, users can:
- View and edit their profile
- Submit new posts
- Edit existing posts
- Check subscription details
- View invoices
- Update billing information
- Change passwords
- Send private messages
- Track payments
- Access members-only content
Instead of using the default WordPress dashboard, users interact with a much cleaner and easier interface.
Why Use a Frontend User Dashboard?
A frontend dashboard improves both user experience and website management.
Here are some of the biggest benefits.
1. Better User Experience
Most visitors don't understand the WordPress admin dashboard. A custom user dashboard only shows the tools they actually need. This makes navigation faster and less confusing.
2. Stronger Branding
Your users stay inside your website instead of seeing WordPress branding. You can customize colors, layouts, typography, and styling to match your brand.
3. Better Security
Many websites don't want subscribers or customers accessing the WordPress backend. A frontend dashboard removes unnecessary admin access while still allowing users to perform important tasks.
4. Easier Content Management
For websites that accept user-generated content, users can:
- Submit articles
- Edit posts
- Update drafts
- Track submissions
Everything happens from the frontend.
5. Works for Many Types of Websites
A frontend user dashboard isn't limited to one type of website. Any site where users log in, manage content, or interact with your platform can benefit from one.
| Website Type | How a Frontend Dashboard Helps |
|---|---|
| Membership Websites | Members can manage their profiles, subscriptions, billing details, and exclusive content from one place. |
| Online Communities | Users can update profiles, send messages, manage account settings, and participate without accessing the WordPress admin area. |
| Multi-Author Blogs | Writers can submit, edit, and manage their articles directly from the frontend. |
| Learning Platforms | Students can access courses, manage their accounts, update profiles, and track subscriptions through a personalized dashboard. |
| Job Boards | Employers can post and manage job listings, while applicants can update profiles and track their applications. |
| Business Directories | Business owners can create, edit, and manage their listings without needing backend access. |
| Marketplaces | Vendors can manage products, orders, submissions, and account information from a single dashboard. |
| Customer Portals | Customers can view invoices, billing information, support requests, and account details in one centralized location. |
| Client Dashboards | Agencies and freelancers can give clients a dedicated space to review projects, invoices, documents, and updates. |
How to Build a Modern User Account Dashboard Without Coding
Before you begin, make sure you have a WordPress website, the WP User Frontend plugin installed and activated, and administrator access to your site. If you haven't installed the plugin yet, complete that step first. Once everything is ready, you can start building your frontend user account dashboard.
Step 1: Create the Required Dashboard Pages
WP User Frontend can automatically create all required pages. Simply navigate to:
Tools → Install WPUF Pages. Click the button.
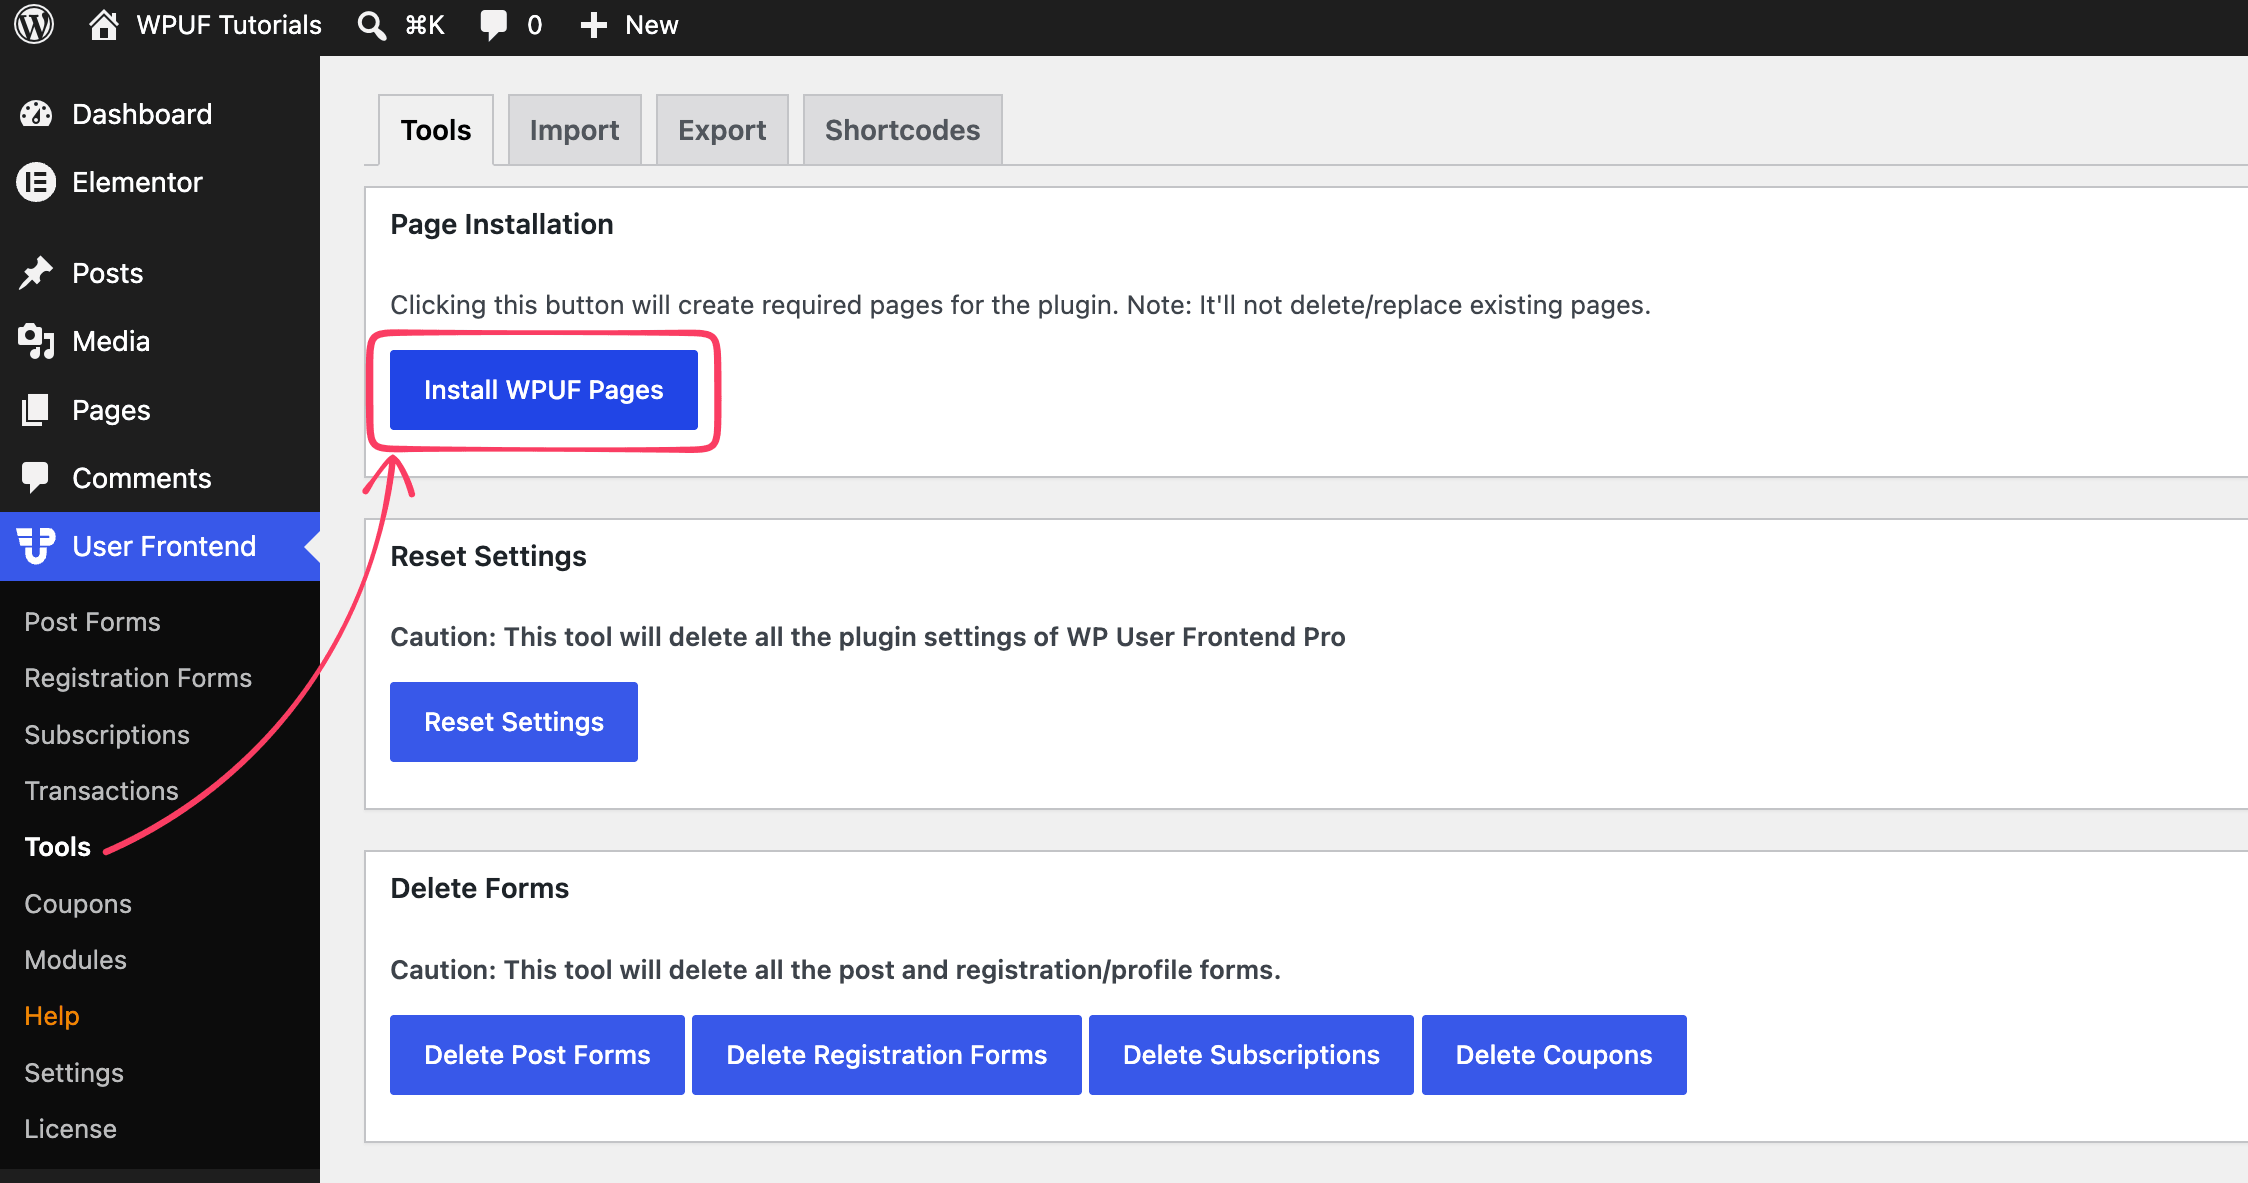
The plugin will automatically create pages like:
- Dashboard
- Account
- Registration
- Login
This saves you from creating each page manually.
Step 2: Configure the Dashboard Settings
Next, open: WP User Frontend → Settings → Dashboard. Here you'll configure what users can do from their dashboard.
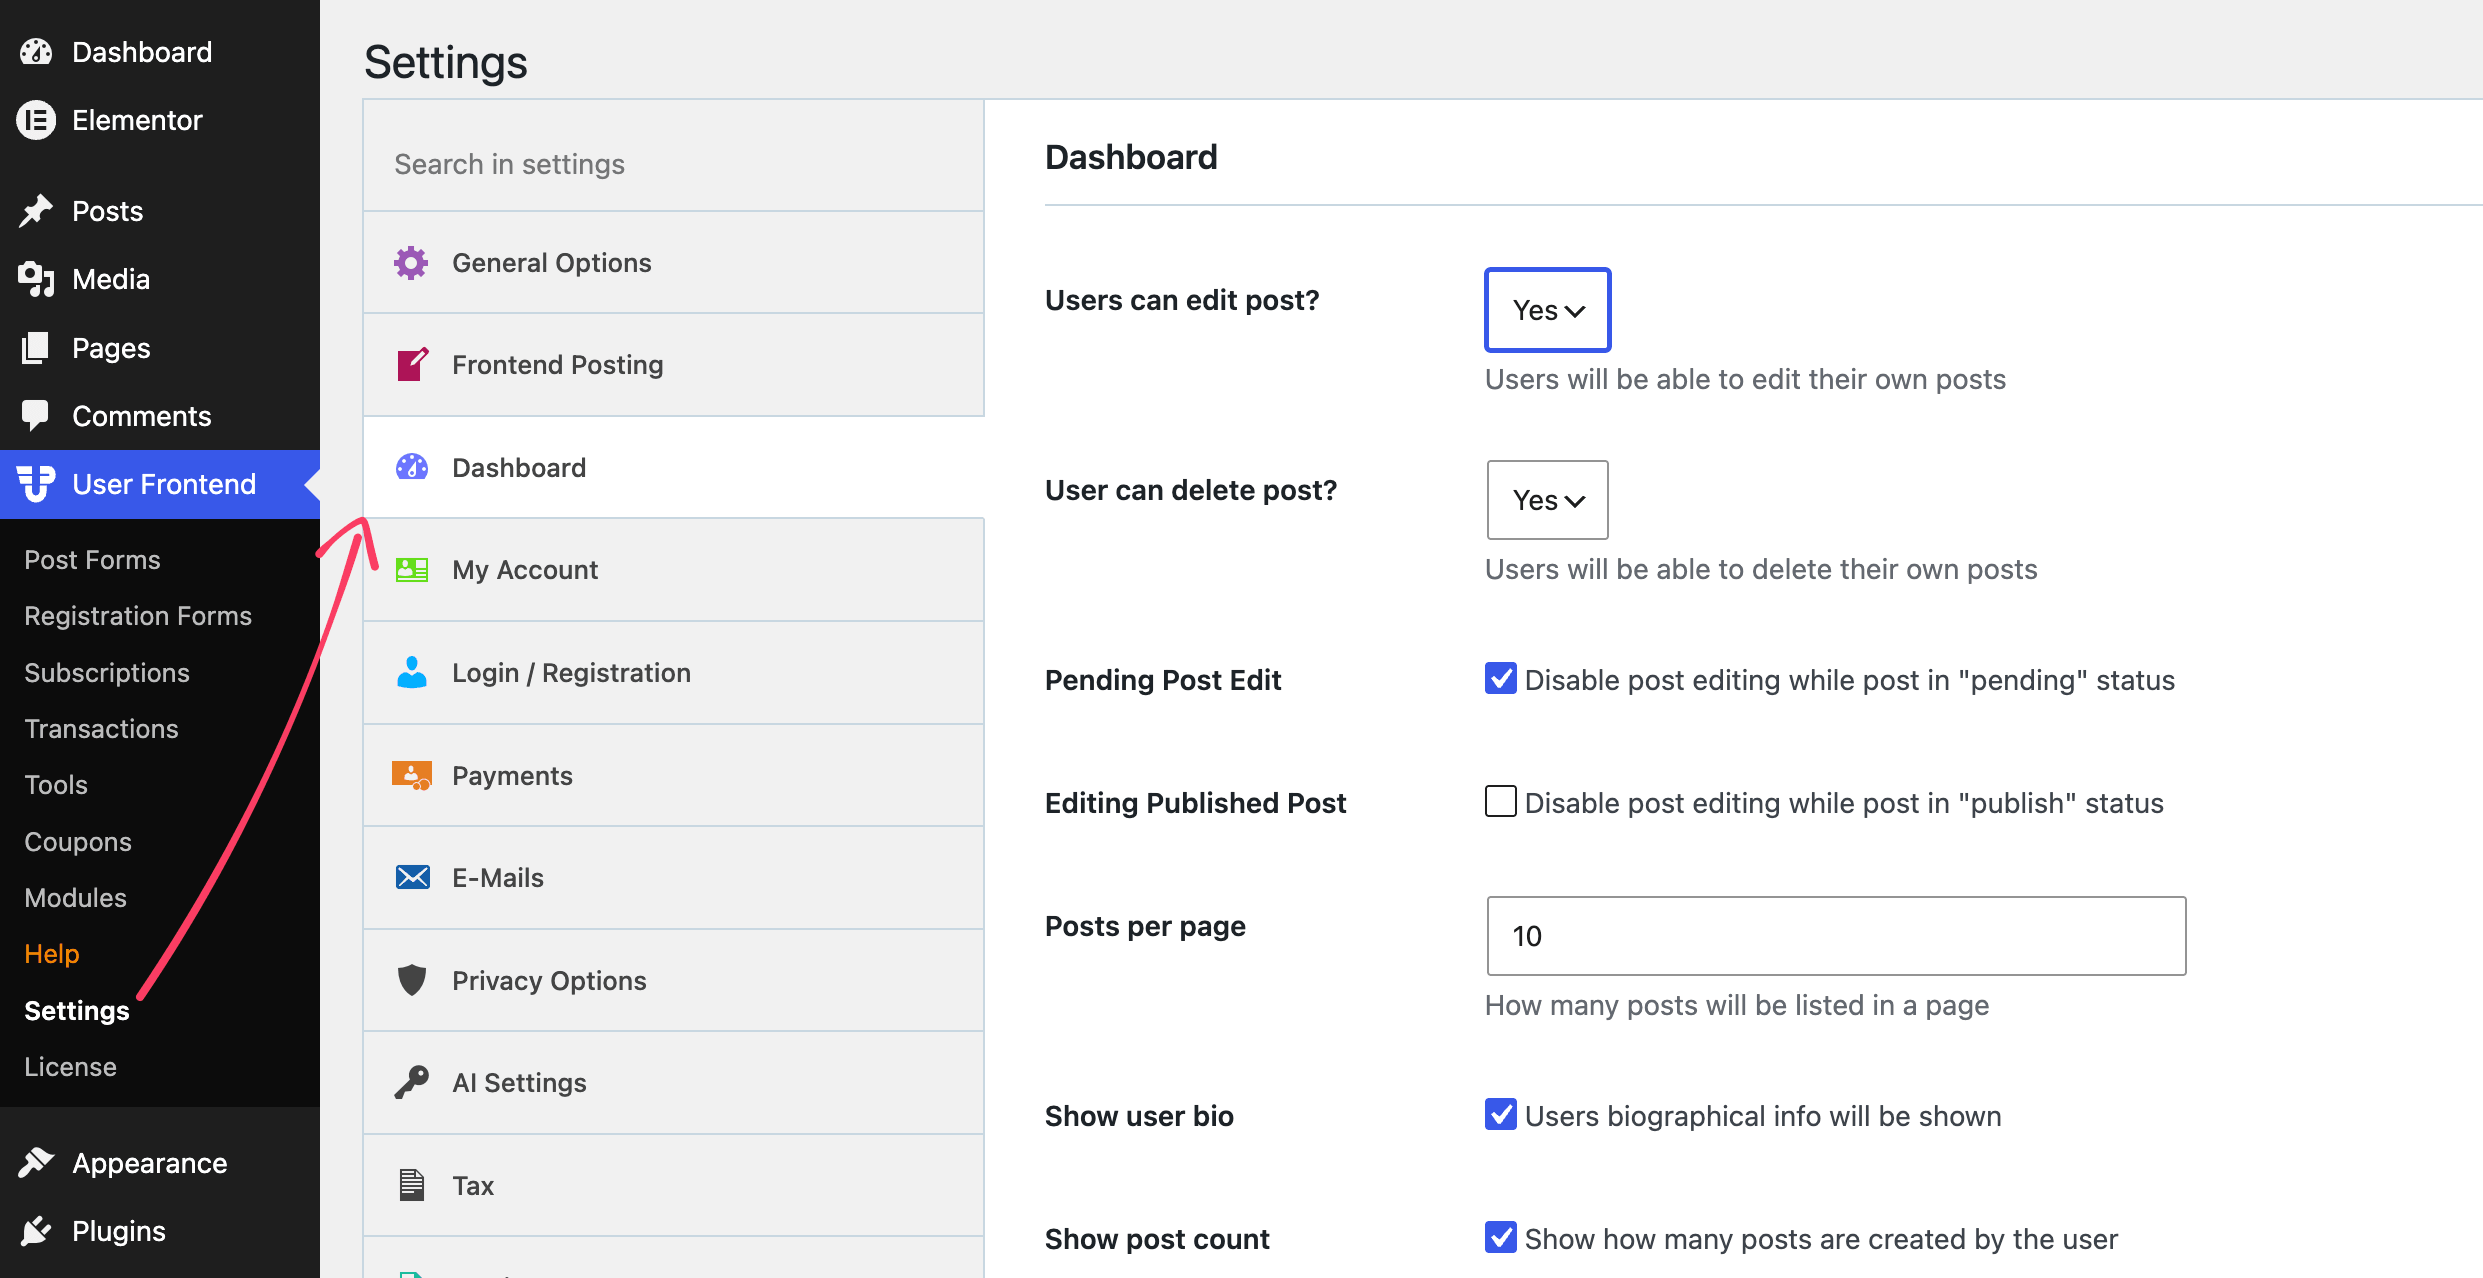
Allow Post Editing: Enable users to edit their own posts directly from the dashboard.
Allow Post Deletion: You can also allow users to delete their own content if needed.
Show User Information: Choose which information appears on the dashboard.
Examples include:
- Biography
- Total posts
- User statistics
- Payment column
Only enable the information that's relevant to your website.
Customize the Unauthorized Message: Visitors who aren't logged in will see this message. Instead of displaying a generic notification, write something like:
Please log in to access your account dashboard.
Once you're finished, click Save Changes.
Step 3: Configure the My Account Page
Now navigate to: WP User Frontend → Settings → My Account. This section controls the overall user dashboard.
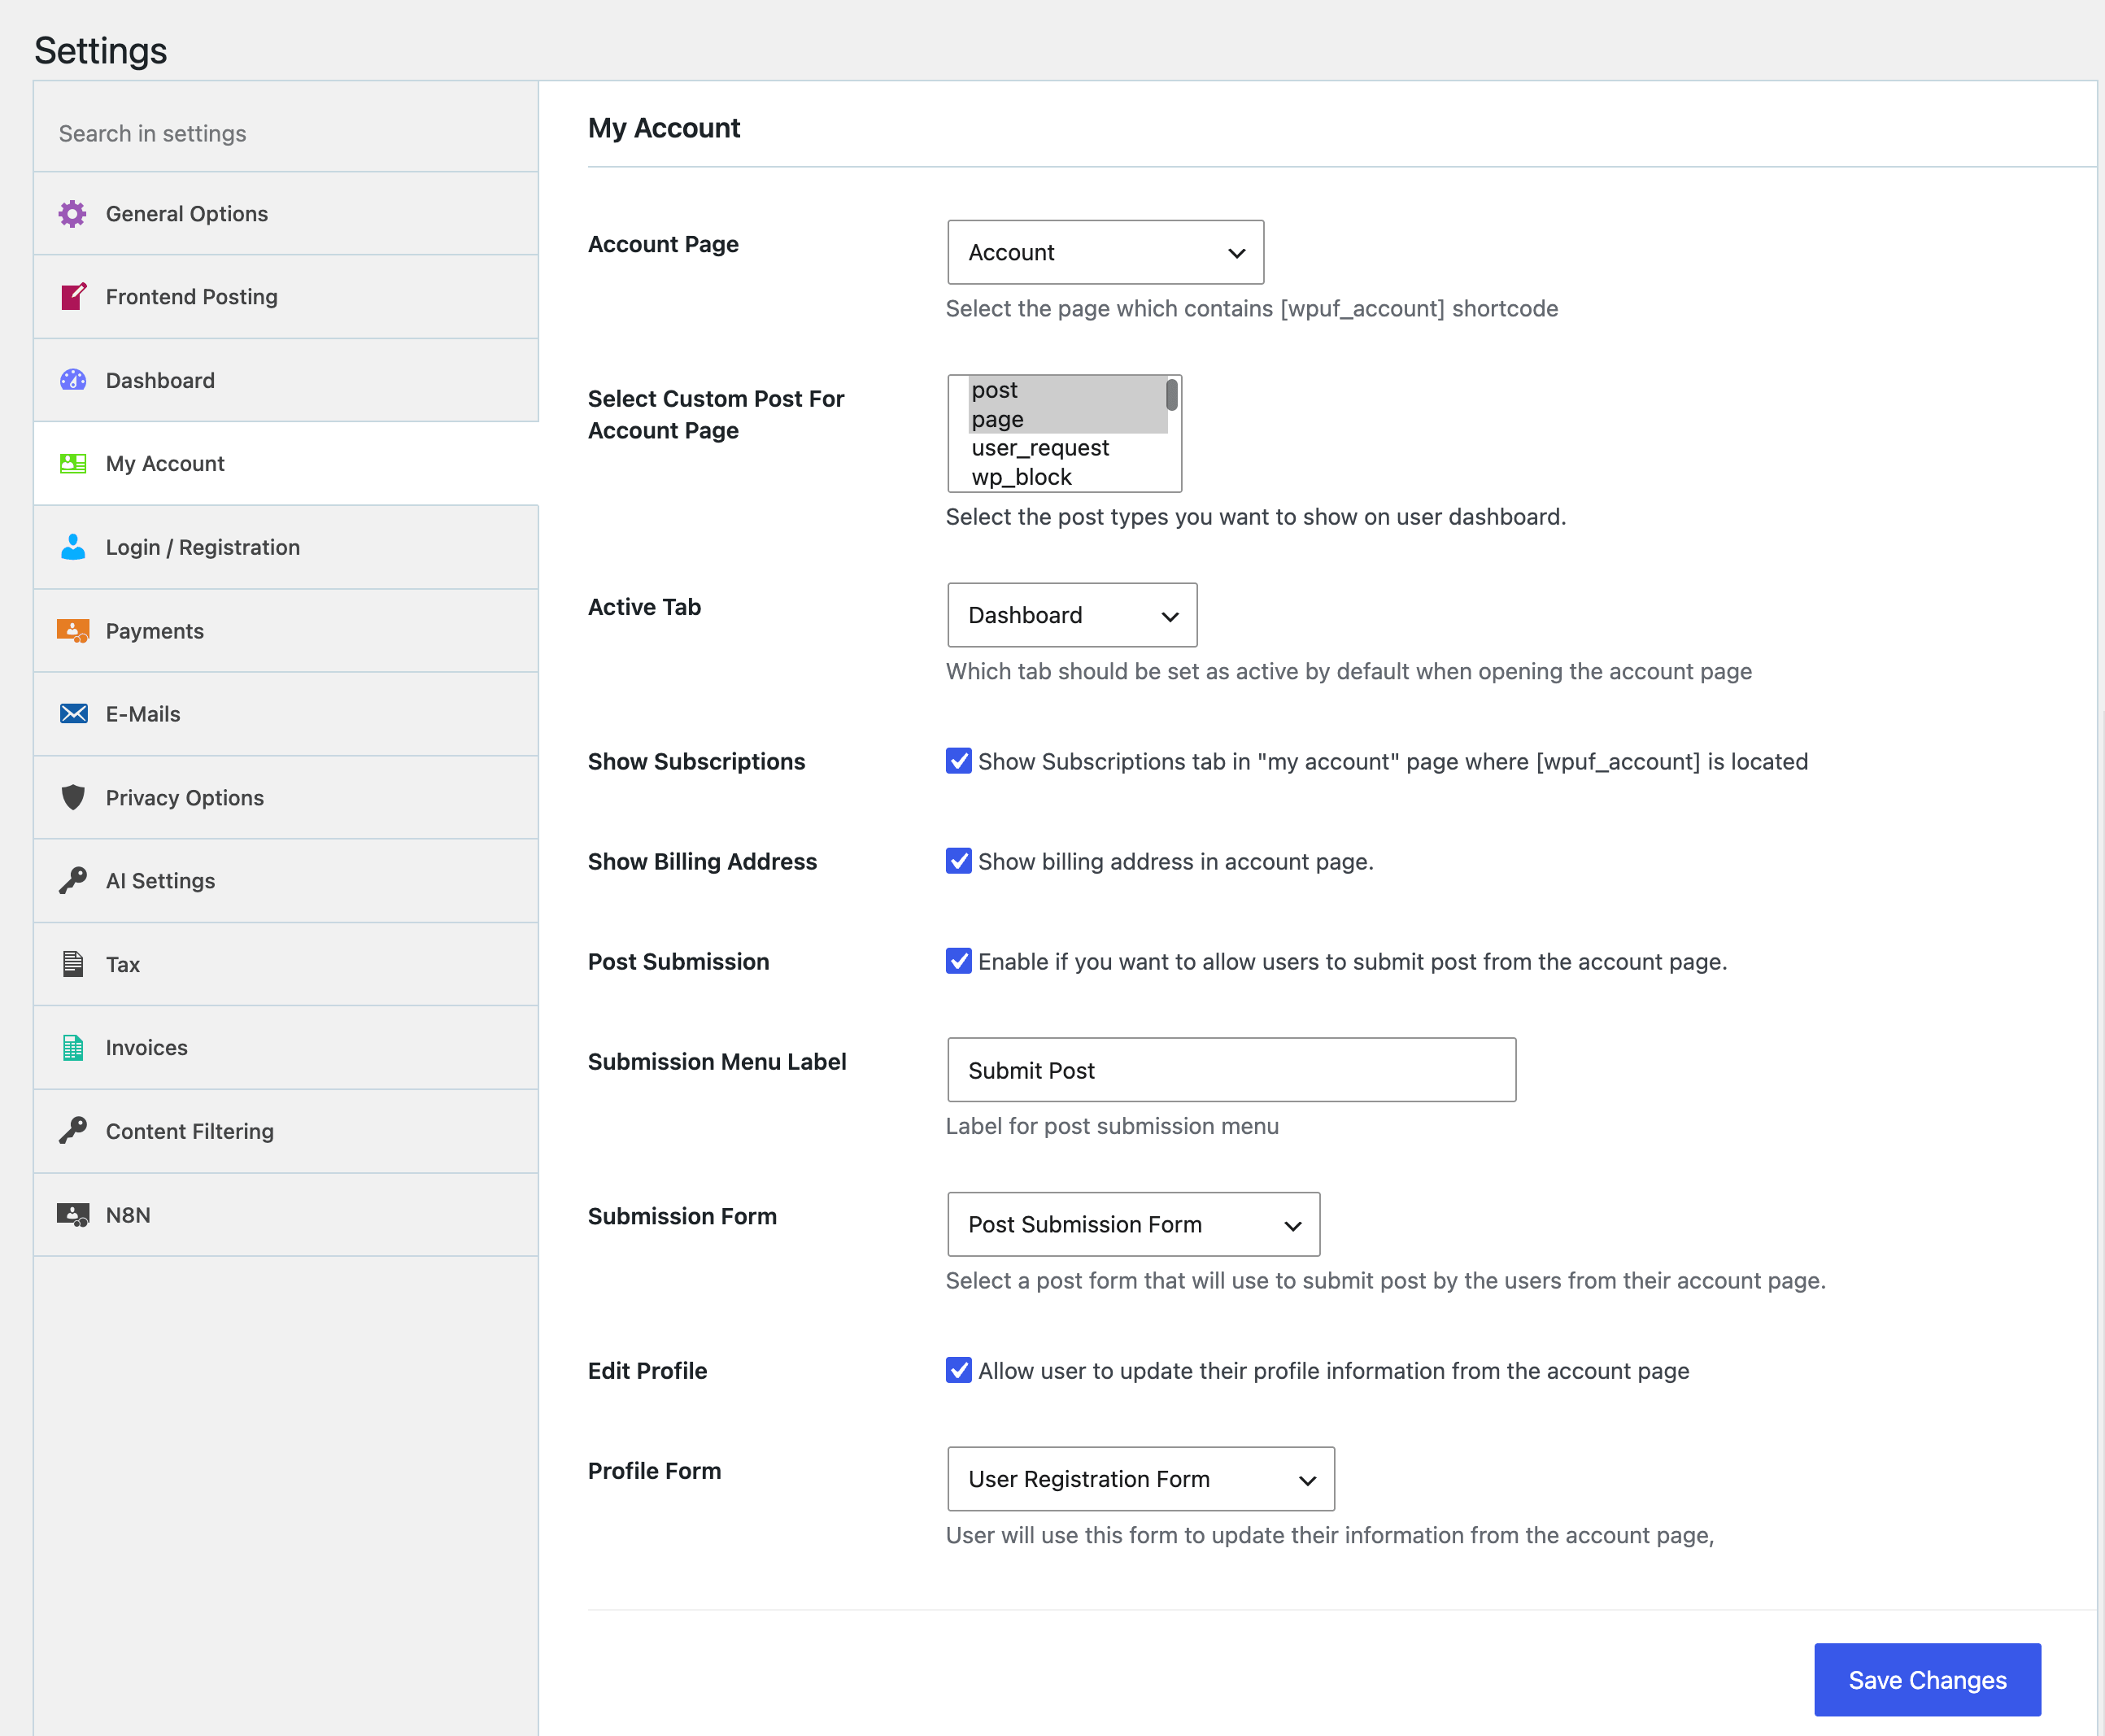
Select the Account Page: Choose the page created earlier as your Account page. This becomes the main dashboard users visit after logging in.
Select Supported Post Types: Choose which content users can manage. For example:
- Posts
- Pages
- Custom Post Types
Choose the Default Active Tab: Select which tab opens first. Most websites use:
- Dashboard
Choose Dashboard Tabs: You can enable or disable different sections. Examples include:
- Dashboard
- Posts
- Pages
- Subscription
- Billing Address
- Invoices
- Transactions
- Edit Profile
- Change Password
Only keep the tabs users actually need. A cleaner dashboard creates a better experience.
Enable Frontend Post Submission: You can also display a Submit Post button directly inside the dashboard. Simply choose which post form should appear.
Enable Profile Editing: Users can update their:
- Name
- Profile picture
- Biography
- Other profile information
All without visiting the WordPress backend.
Select the Registration Form: Finally, choose which registration form users will use when updating their account information. Click Save Changes once everything is configured.
Step 4: Test the Dashboard
Now visit your website as a logged-in user. Open your Account page. You should now see a complete frontend dashboard.
Depending on your settings, users can:
- View their dashboard
- Edit posts
- Submit new content
- Update profiles
- Change passwords
- Review subscriptions
- Check invoices
- View billing details
- Review transactions
Everything is accessible from one location. No WordPress admin dashboard required.
Step 5: Enable Additional Dashboard Features
WP User Frontend Pro includes optional modules that extend the dashboard. For example, you can enable Private Messaging.
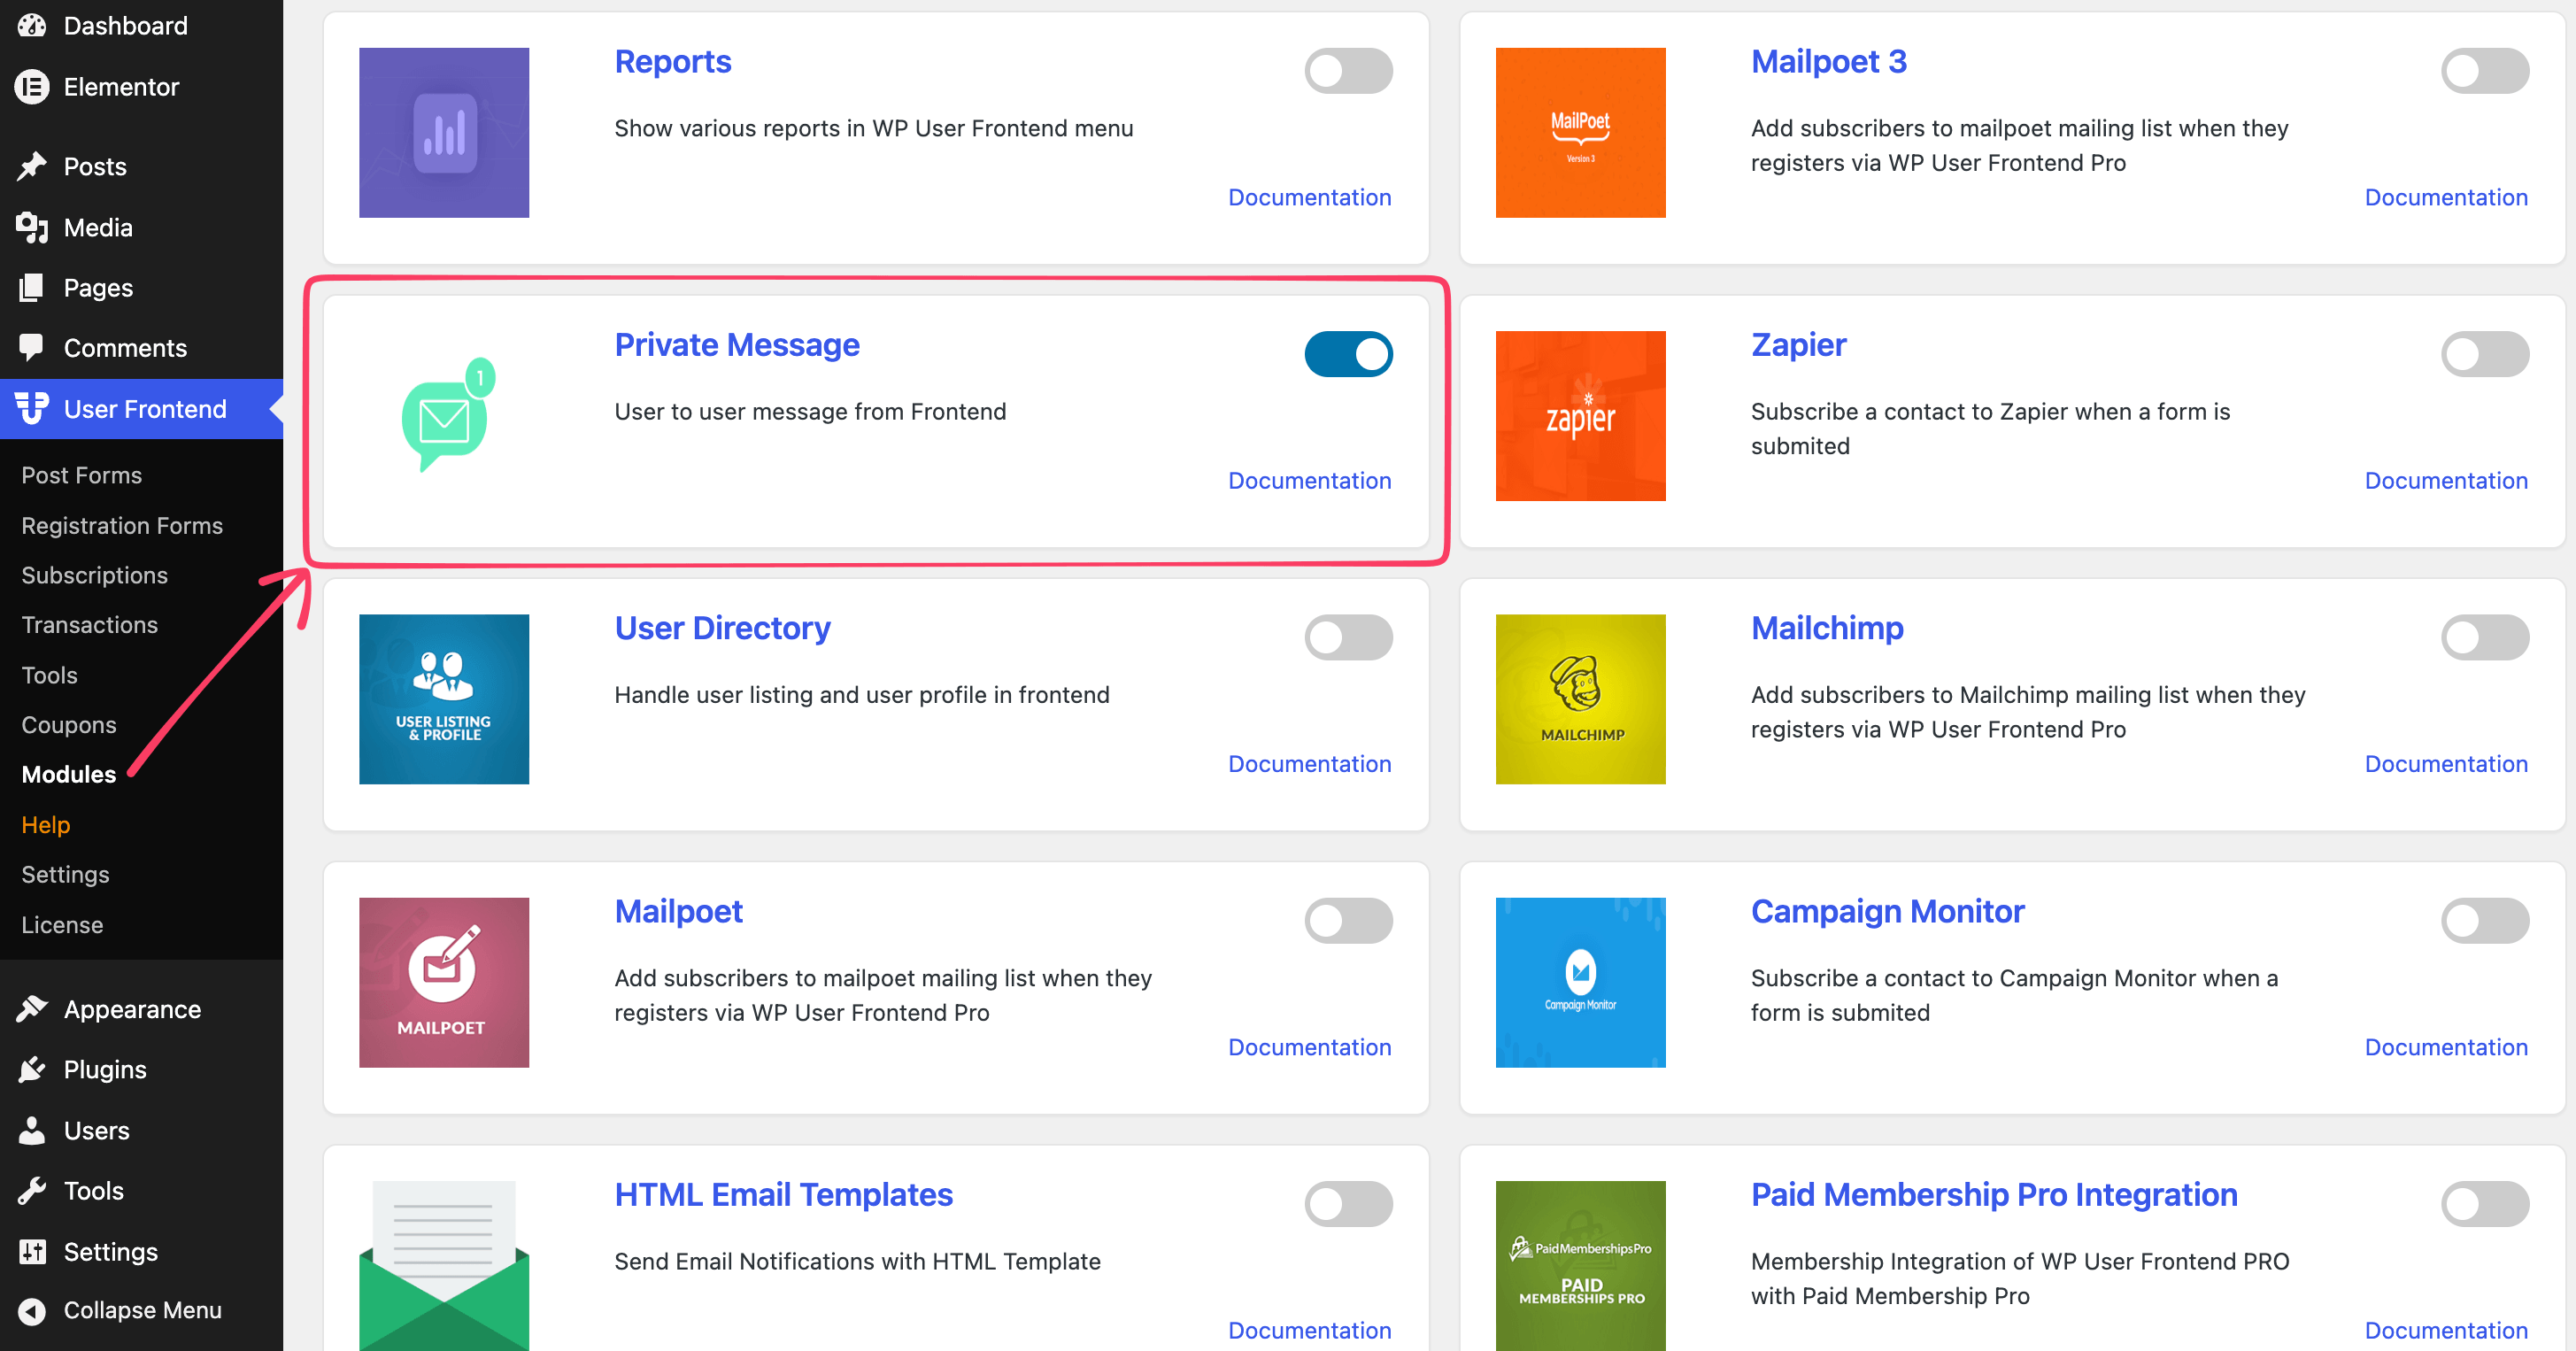
Simply navigate to: User Frontend → Modules. Enable Private Messaging. Now return to the Account page. You'll now see a new Message tab.
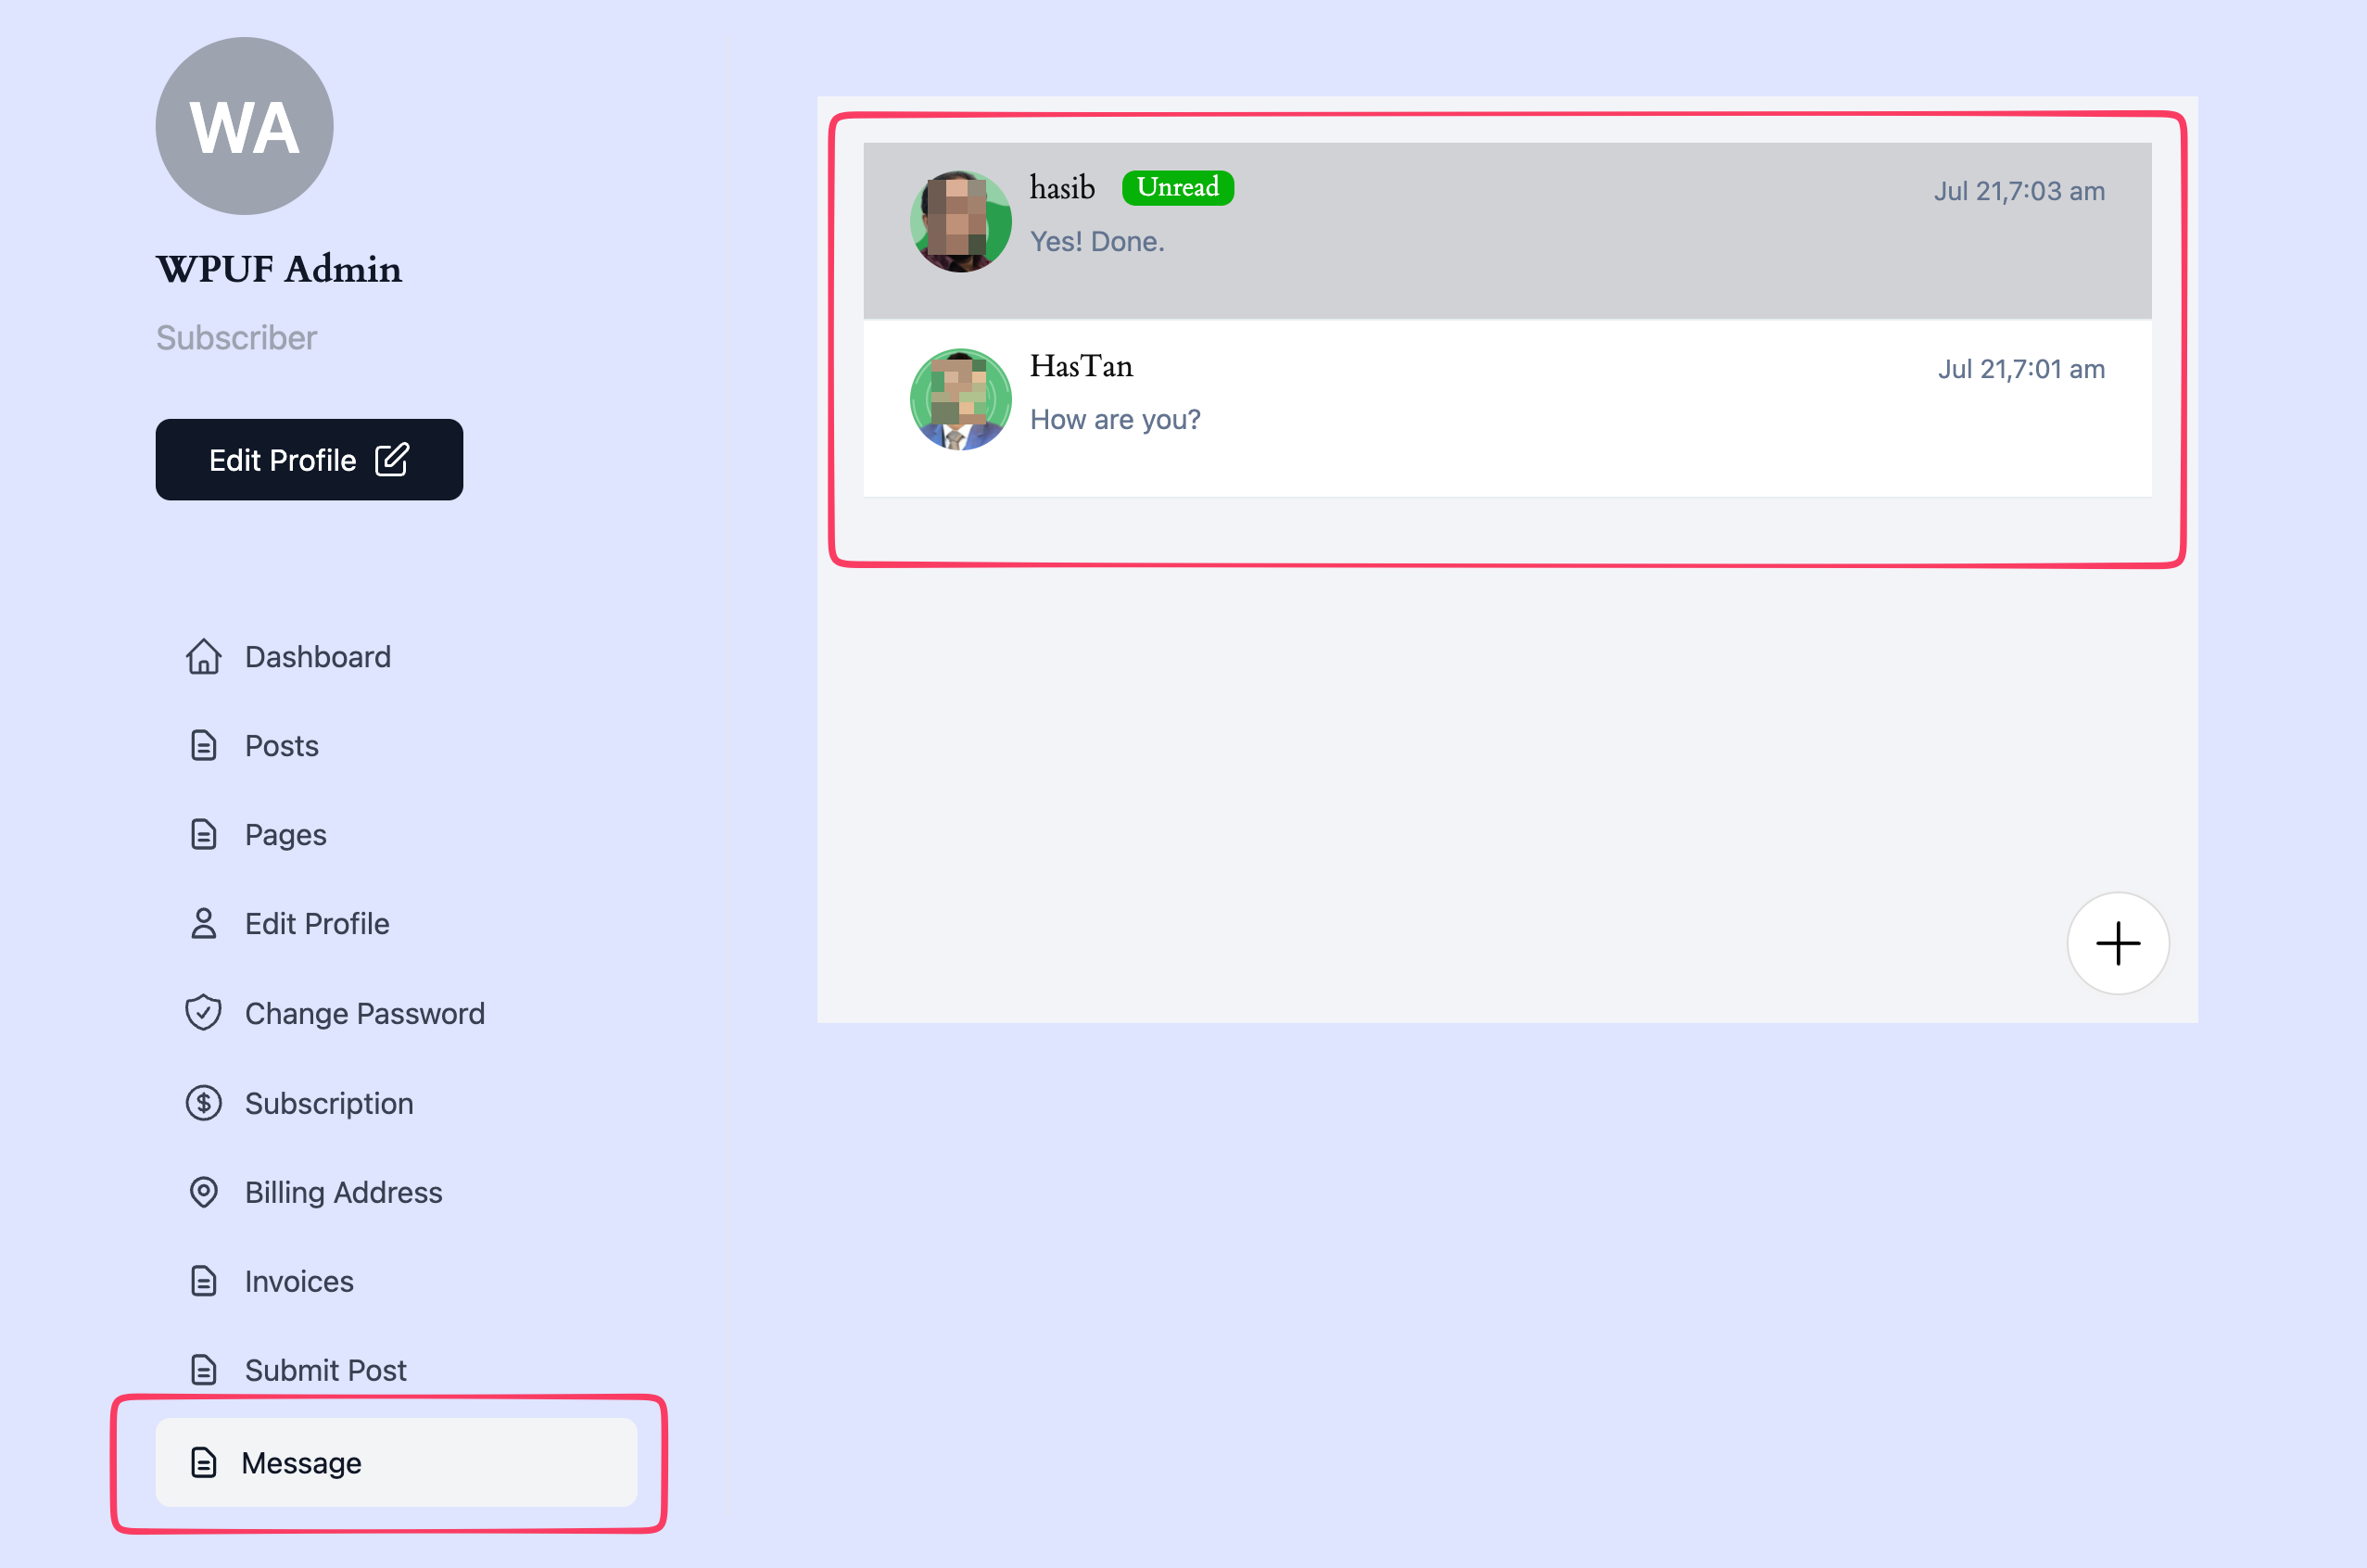
Users can send and receive messages without leaving the frontend dashboard. Depending on your license, additional modules are also available.
Step 7: Customize the Dashboard with Elementor
One of the biggest advantages of WP User Frontend is its Elementor integration. Instead of using the default design, you can build a completely custom dashboard.
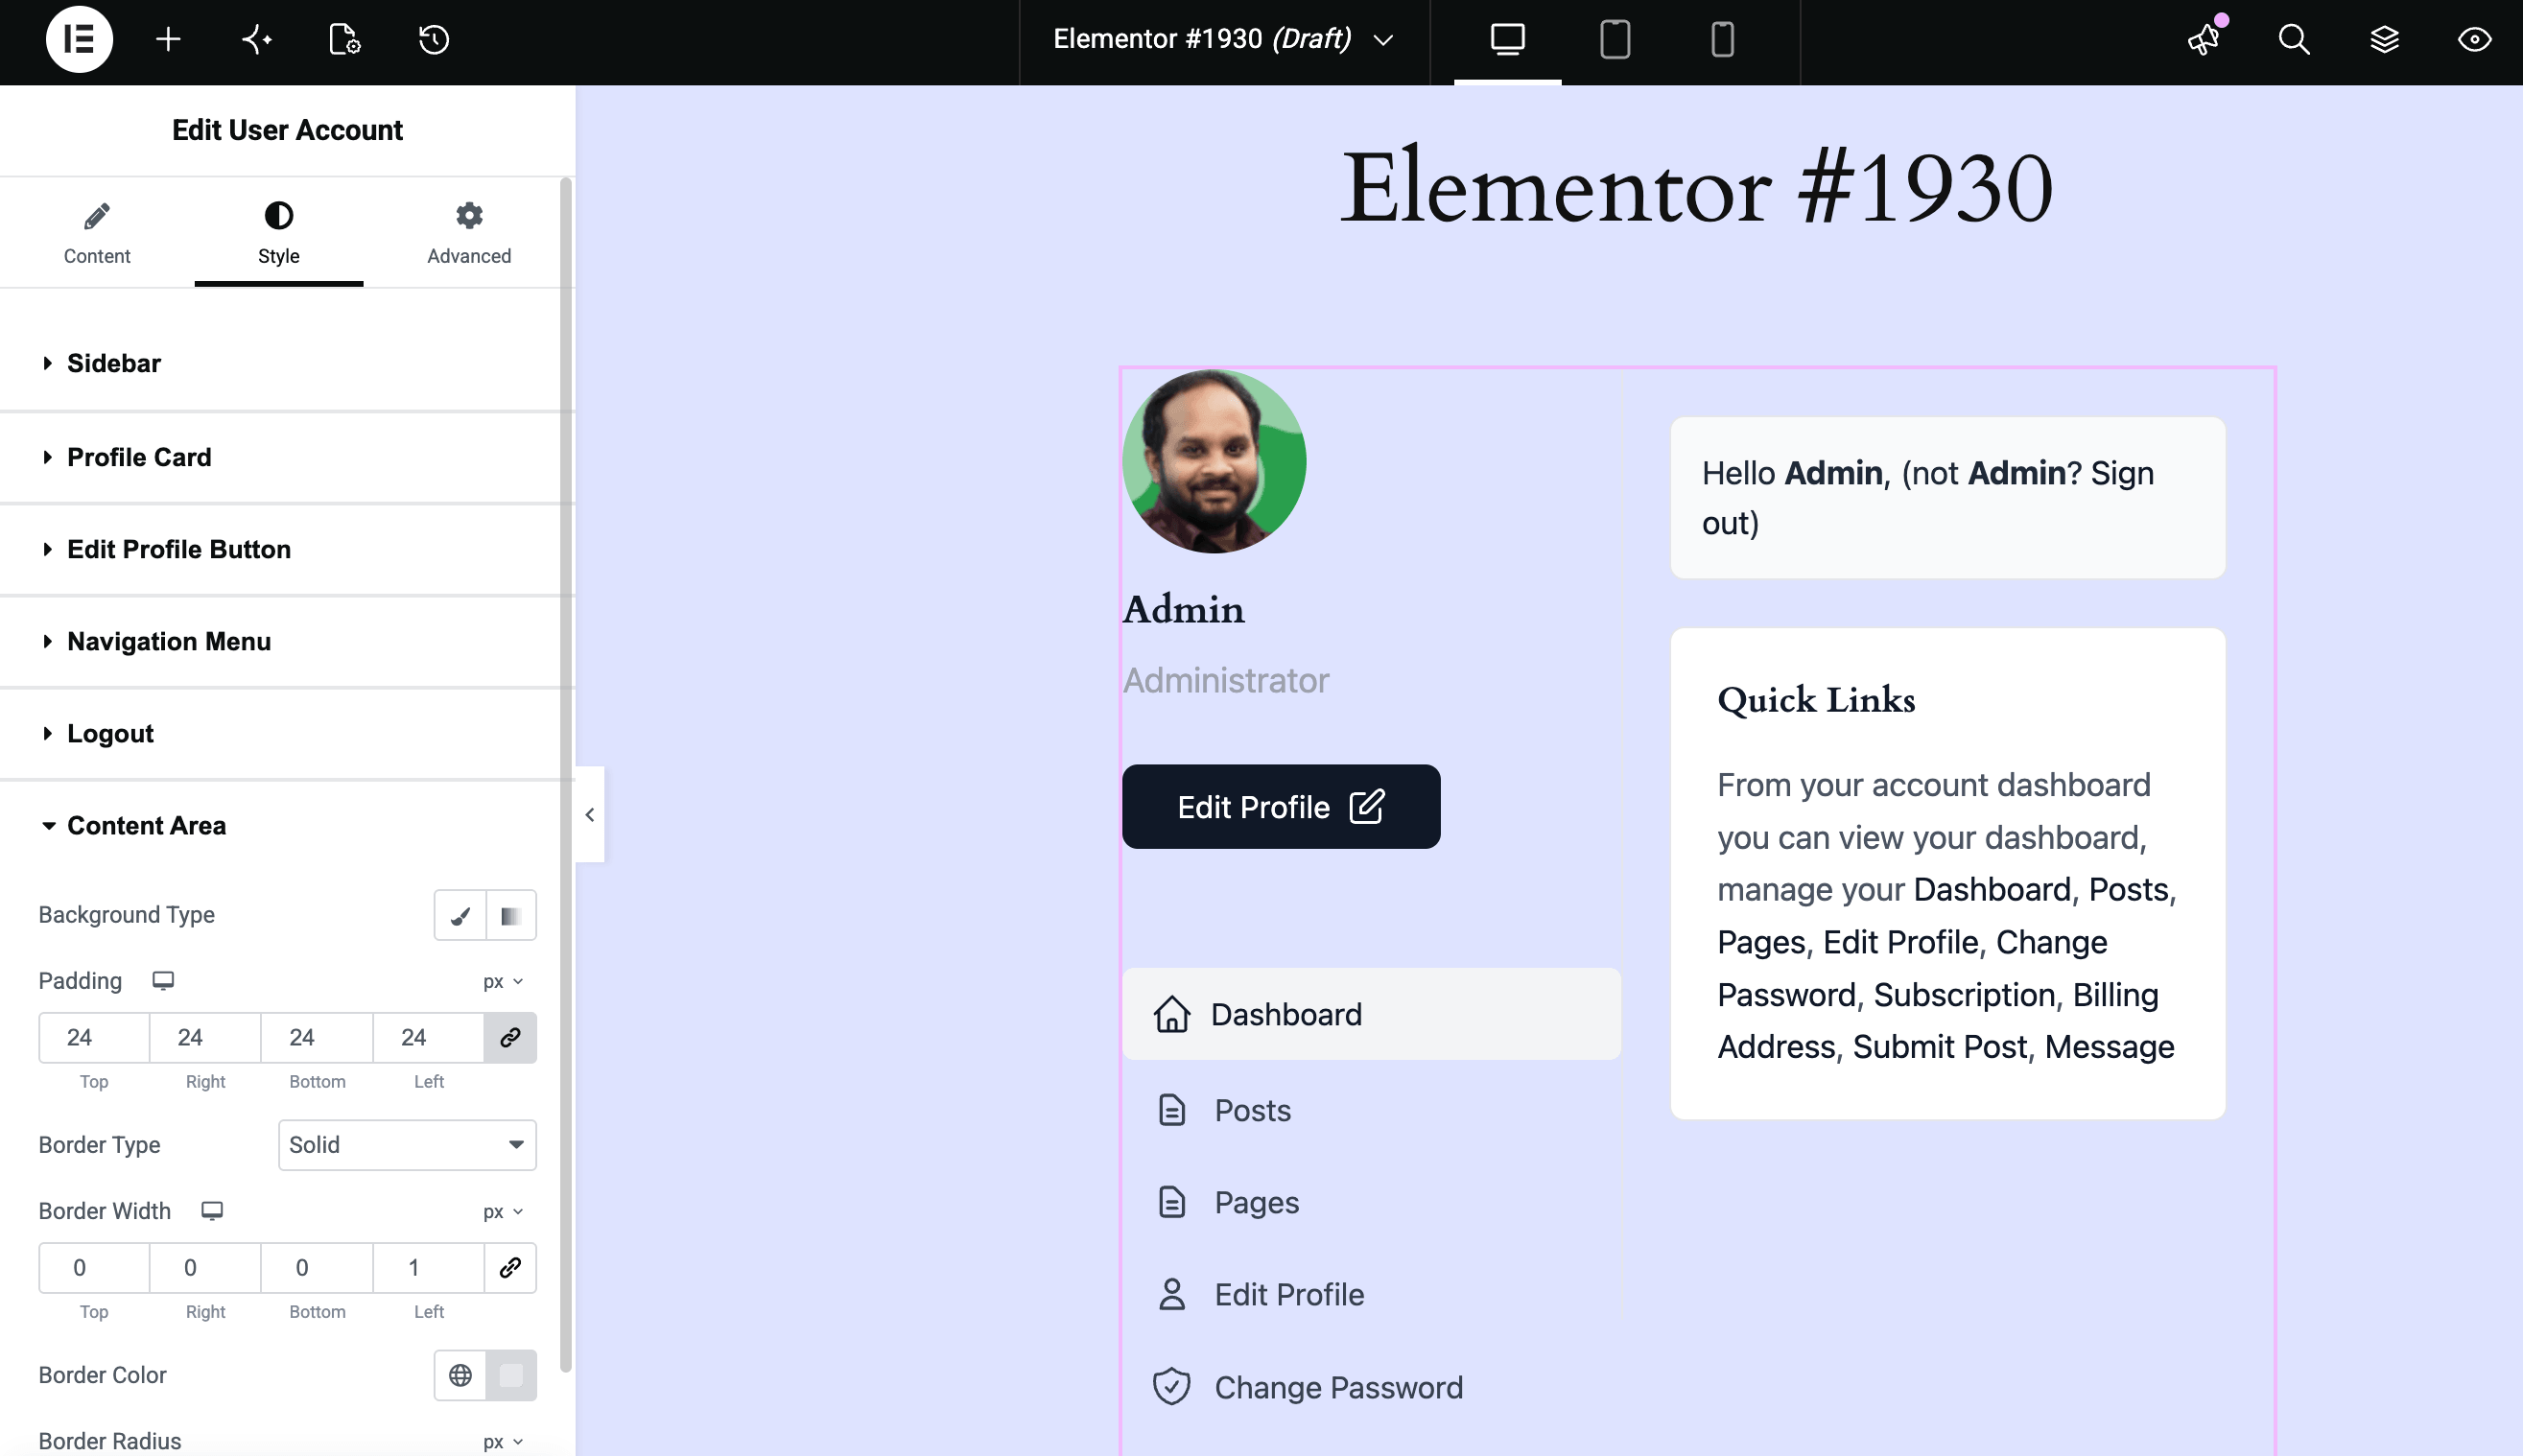
Open a page and click Edit with Elementor. Scroll down to the User Frontend section of the left side panel. You'll find dedicated widgets for your account dashboard. From Elementor, you can customize:
- Profile card
- Navigation
- Colors
- Typography
- Buttons
- Spacing
- Borders
- Background colors
- Content area
- Active tab styles
This allows you to match your dashboard with the rest of your website. No CSS required.
Best Practices for Designing a User Dashboard in WordPress
A beautiful dashboard isn't enough. It should also be easy to use. Here are a few best practices.
Keep Navigation Simple: A clean dashboard is easier to use. Avoid adding unnecessary tabs or features that may overwhelm users. Instead, display only the options they need most. This keeps the interface organized and helps users complete tasks faster.
Maintain Brand Consistency: Your user dashboard should feel like a natural part of your website. Use the same fonts, colors, buttons, and overall design style throughout the dashboard. A consistent visual experience builds trust and makes your site look more professional.
Prioritize Mobile Users: Many users will access their accounts from smartphones or tablets. Make sure your dashboard looks great and functions smoothly on different screen sizes. Always test the layout on mobile devices before making it live.
Reduce Admin Access: Whenever possible, let users manage their accounts from the frontend instead of sending them to the WordPress admin dashboard. This creates a smoother user experience while reducing confusion and limiting access to sensitive backend areas.
Use Clear Labels: Use simple, descriptive labels that users can understand at a glance. Instead of generic names, choose labels like My Posts, My Profile, Billing, and Subscriptions. Clear navigation helps users find what they need without guesswork.
Why Choose WP User Frontend Pro?
There are several plugins for frontend user management. WP User Frontend Pro stands out because it combines multiple features into one solution. With WP User Frontend Pro, you can:
- Build frontend dashboards
- Accept frontend post submissions
- Create custom registration forms
- Manage user profiles
- Restrict content
- Offer memberships
- Display user directories
- Customize dashboards with Elementor
- Extend functionality through modules
Instead of installing several plugins, you can manage everything from a single platform.
Frequently Asked Questions
Can I create a user dashboard without coding?
Yes. WP User Frontend lets you create a fully functional frontend user dashboard without writing any code.
Can users edit their posts from the dashboard?
Yes. You can allow users to create, edit, and delete their own posts directly from the frontend.
Can I customize the dashboard design?
Yes. WP User Frontend integrates with Elementor, allowing you to customize layouts, colors, buttons, and other design elements.
Can I remove WordPress admin access?
Yes. Users can manage their accounts entirely from the frontend, reducing the need to access the WordPress admin dashboard.
Is the dashboard mobile-friendly?
Yes. The dashboard works on modern devices, and you can further customize its appearance with Elementor to improve the mobile experience.
Final Thoughts
A modern frontend user account dashboard makes your WordPress website easier to use, safer, and more professional.
Instead of exposing users to the WordPress admin area, you can give them a clean, branded experience where they can manage everything, from profiles and posts to subscriptions and billing.
With WP User Frontend, you can build that experience in minutes without writing code. Better yet, you can customize every part of the dashboard using Elementor, so it matches the look and feel of your website.
If you're building a membership site, community, marketplace, customer portal, or any website with registered users, adding a frontend account dashboard is one of the best improvements you can make to your user experience.