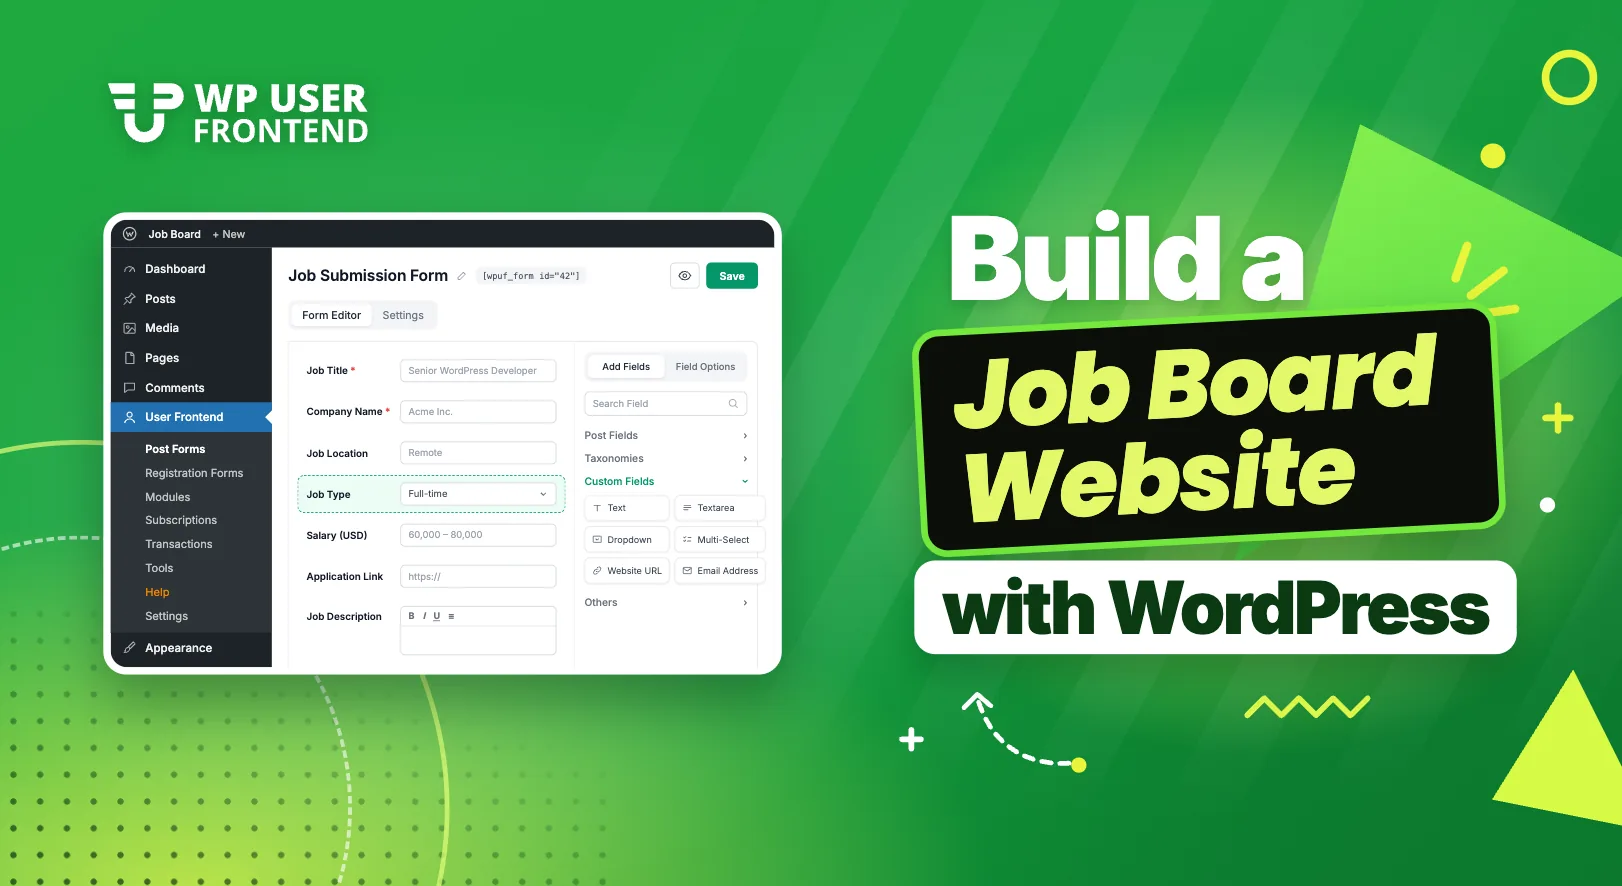
Job boards make money in a simple way. Employers pay to reach your audience, and you keep the fee. The hard part is the setup. You need a form employers can fill in, a checkout that takes their money, and listings that come down on time so the board stays fresh.
WP User Frontend (WPUF) handles all three from the WordPress front end. Employers post a job, pay for it, and manage it from their own dashboard. They never see wp-admin. Each listing expires on the date you choose, so old roles do not pile up.
This guide walks you through a working paid job board, step by step. We built every step on a real site, so each screen below is exactly what you will see.
Plan What Your Paid Job Board Needs
Here is the full build in the order we will do it.
- Create a Job post type and a Job Type category.
- Turn on payments and pick your payment gateways.
- Build the job submission form.
- Point the form at the Job post type.
- Charge employers for each listing.
- Make listings expire on their own.
- Show the job details on each listing.
- Publish the form on a page.
- Approve payments and let employers manage their jobs.
You will need WordPress, the free WP User Frontend plugin, and WP User Frontend Pro. The free plugin handles the form, the checkout and pay per listing. Pro adds two things this build relies on. These are the Job Type category field and automatic listing expiry. Pro runs on top of the free plugin, so keep both active.
Create the Job Post Type and Job Type Category
Jobs should live apart from your blog posts. That needs two things.
- A Job post type, so listings get their own section and their own archive page.
- A Job Type category, so you can sort roles into Full-time, Part-time, Contract and Remote.
A free plugin such as Custom Post Type UI can create both without code. If you prefer code, add this snippet with a code snippets plugin or in your child theme's functions.php file.
add_action( 'init', function () {    register_post_type( 'job', [        'labels'       => [ 'name' => 'Jobs', 'singular_name' => 'Job' ],        'public'       => true,        'has_archive'  => true,        'rewrite'      => [ 'slug' => 'jobs' ],        'supports'     => [ 'title', 'editor', 'author', 'thumbnail', 'custom-fields' ],        'show_in_rest' => true,        'menu_icon'    => 'dashicons-businessman',    ] );
    register_taxonomy( 'job_type', 'job', [        'labels'       => [ 'name' => 'Job Types', 'singular_name' => 'Job Type' ],        'public'       => true,        'hierarchical' => true,        'show_in_rest' => true,        'rewrite'      => [ 'slug' => 'job-type' ],    ] );} );
Next, open Settings → Permalinks in WordPress and click Save Changes once. That refreshes your links, so your listings show up at yoursite.com/jobs/. Then go to Jobs → Job Types and add the types you want, such as Full-time, Part-time, Contract and Remote.
Turn On Payments and Choose Your Gateways
Before you can charge for listings, WPUF needs to know how to take money.
- Go to User Frontend → Settings and open the Payments tab.
- Tick Enable Payments.
- Pick your currency.
- Check that Payment Page and Payment Success Page are set.
- Choose your payment gateways and save.
WPUF's setup wizard creates the Payment, Thank You and Order Received pages for you, so the page fields are usually filled in already. If you skipped the wizard, create those pages and select them here.
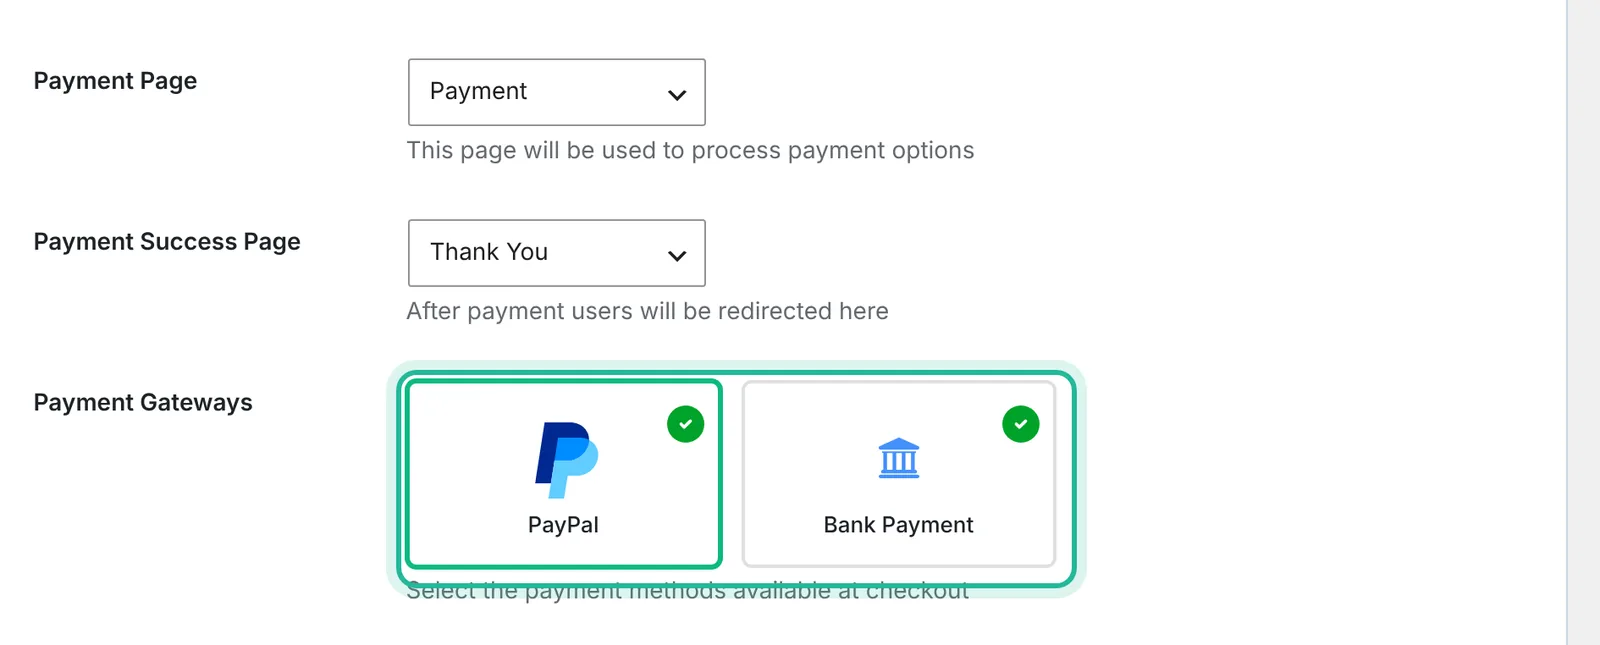
The free plugin includes PayPal and Bank Payment. PayPal confirms payments on its own, so paid listings go live without you. Bank Payment suits employers who pay by invoice or wire transfer, and you approve those payments by hand. If you want card payments, WPUF Pro adds a Stripe gateway, which you switch on under User Frontend → Modules.
If you use PayPal, follow WPUF's PayPal setup guide to connect webhooks. WPUF shows a notice with a link to it in your dashboard. Also, check the Tax tab. Turn tax off there if you do not charge it, or set your rates if you do.
Build the Job Submission Form
Now build the form employers fill in to post a job.
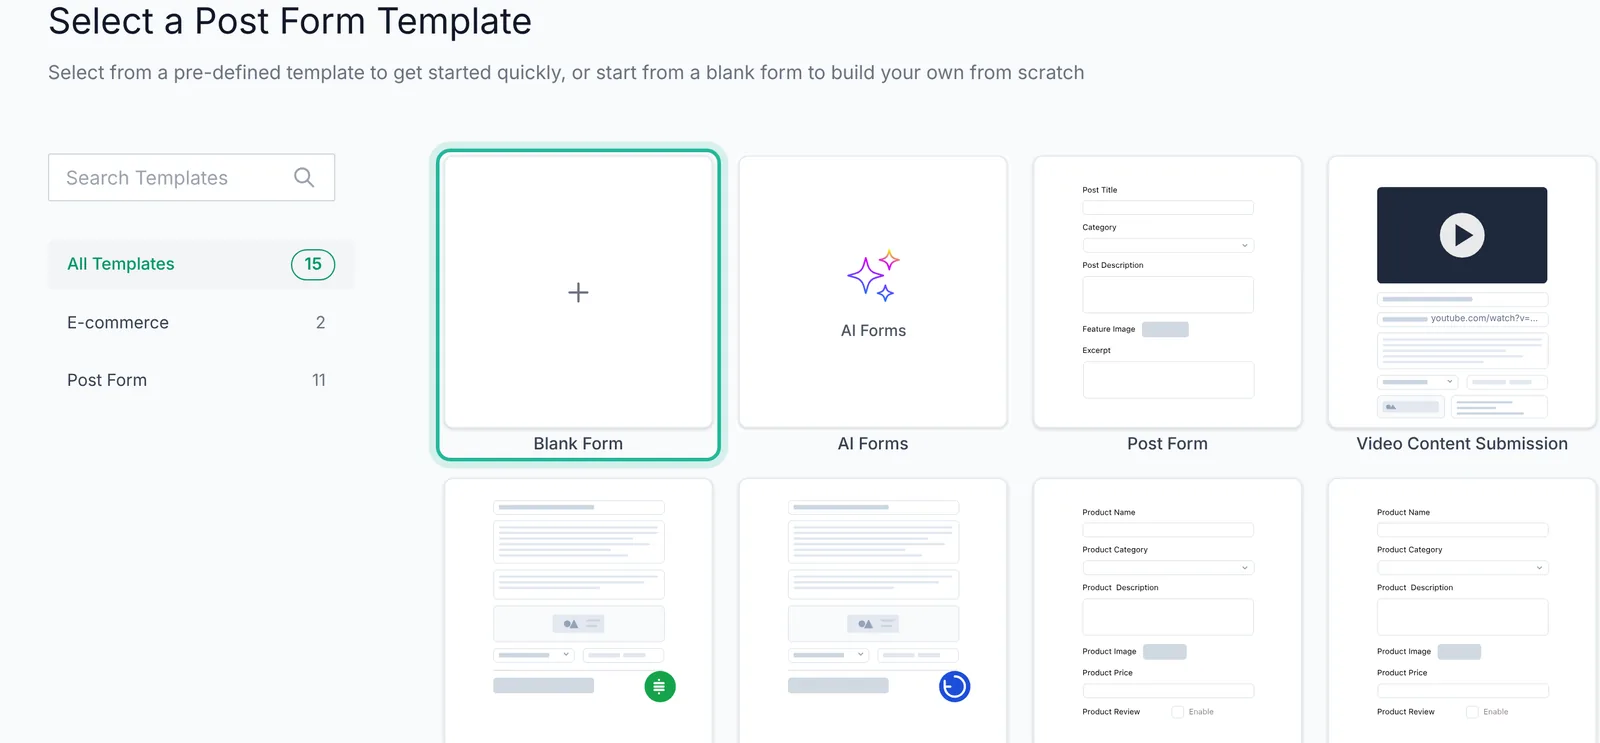
- Go to User Frontend → Post Forms and click Add New.
- Choose Blank Form.
- Rename the form to "Post a Job" with the name at the top left.
- Add the job fields from the panel on the right.
Here are the fields we used. Each one comes from the Add Fields panel.
- Job Title. Add the Post Title field and rename its label.
- Company Name and Location. Add two Text fields.
- Job Type. Add your Job Type category from the Taxonomies section, and set it to show as a dropdown.
- Salary Range. Add another Text field. Leave it optional if some employers will not share pay.
- Job Description. Add the Post Content field and rename its label.
- Application Link. Add a Website URL field, so candidates know where to apply.
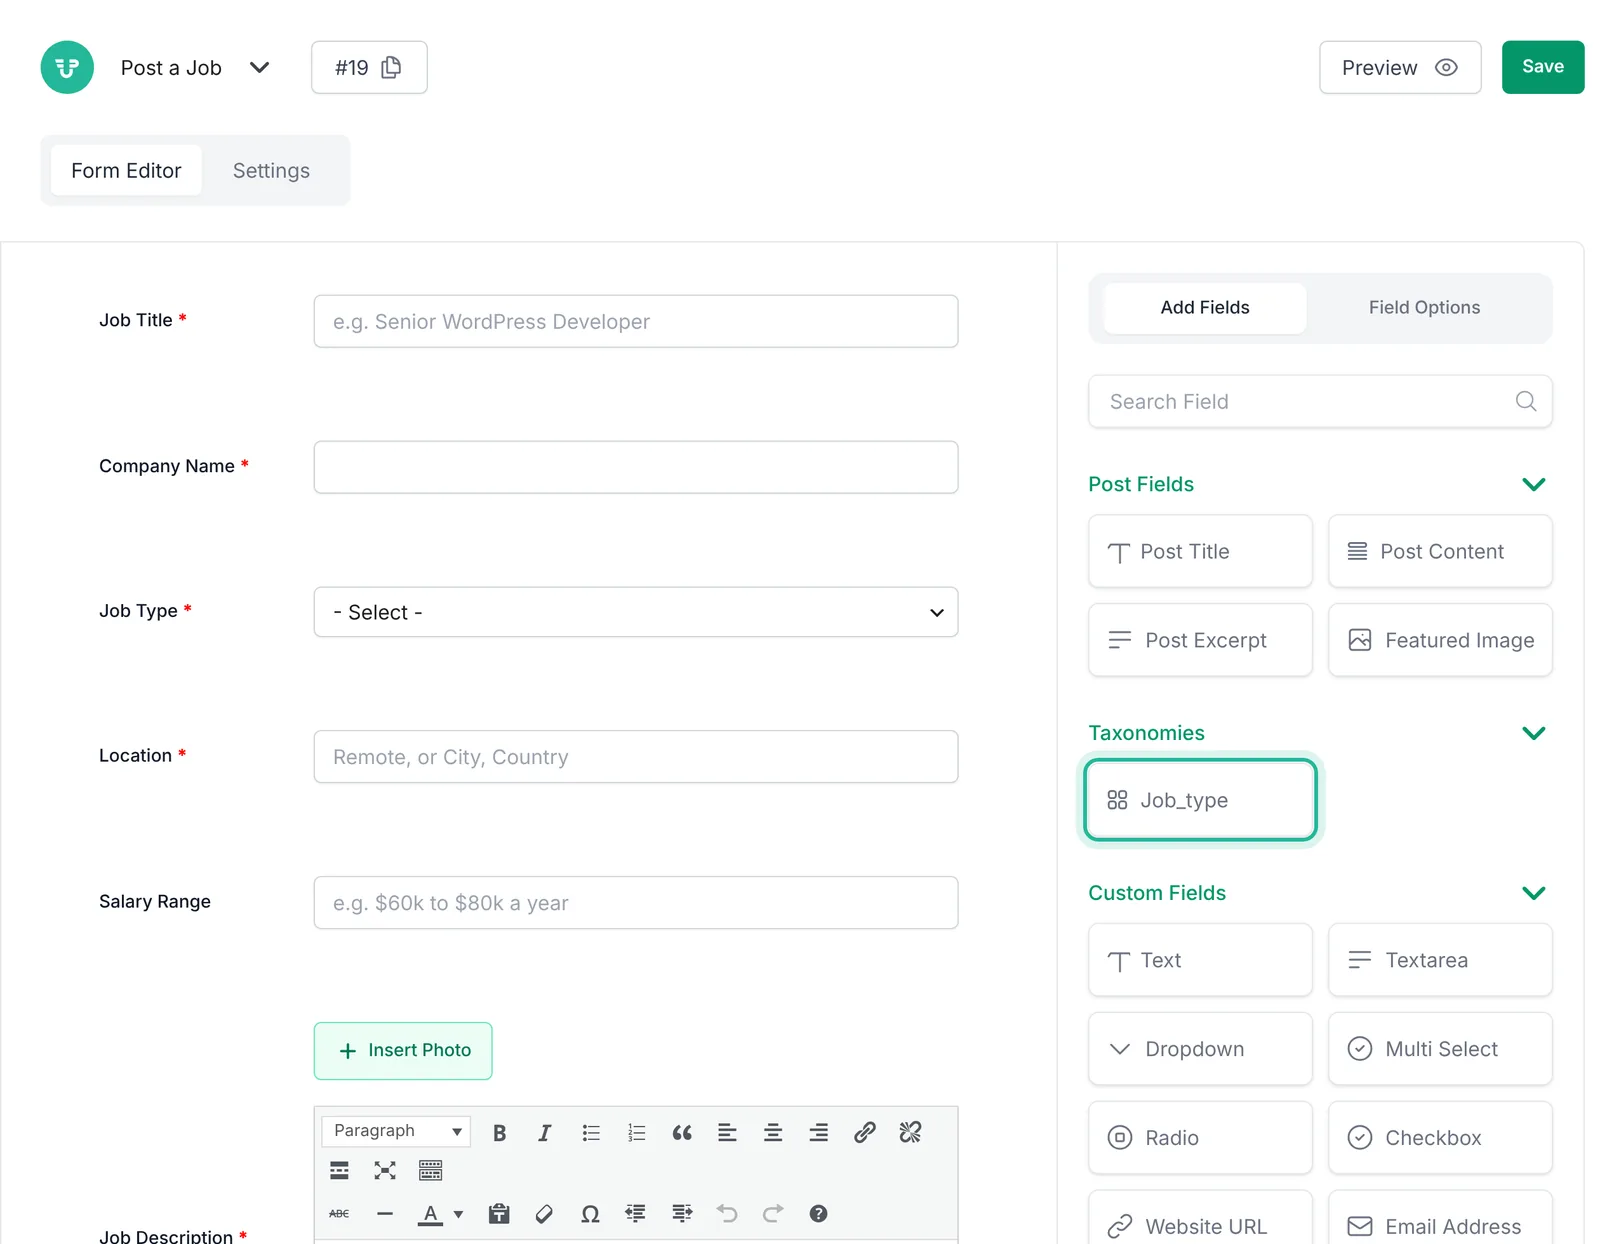
Click a field on the canvas to edit it. In Field Options you can change the label, add placeholder text, add help text and mark the field as required. Placeholders such as "e.g. Senior WordPress Developer" help employers write cleaner listings.
The Job Type field only shows up in the Taxonomies section after you set the form's post type to Job. So if you do not see it yet, do the next step first and come back.
Point the Form at the Job Post Type
By default, WPUF forms create blog posts. Change that so every submission becomes a job.
- Open the Settings tab at the top of the form builder.
- Stay on General and set Post Type to job.
- Change Submit Post Button Text to something like "Continue to Payment".
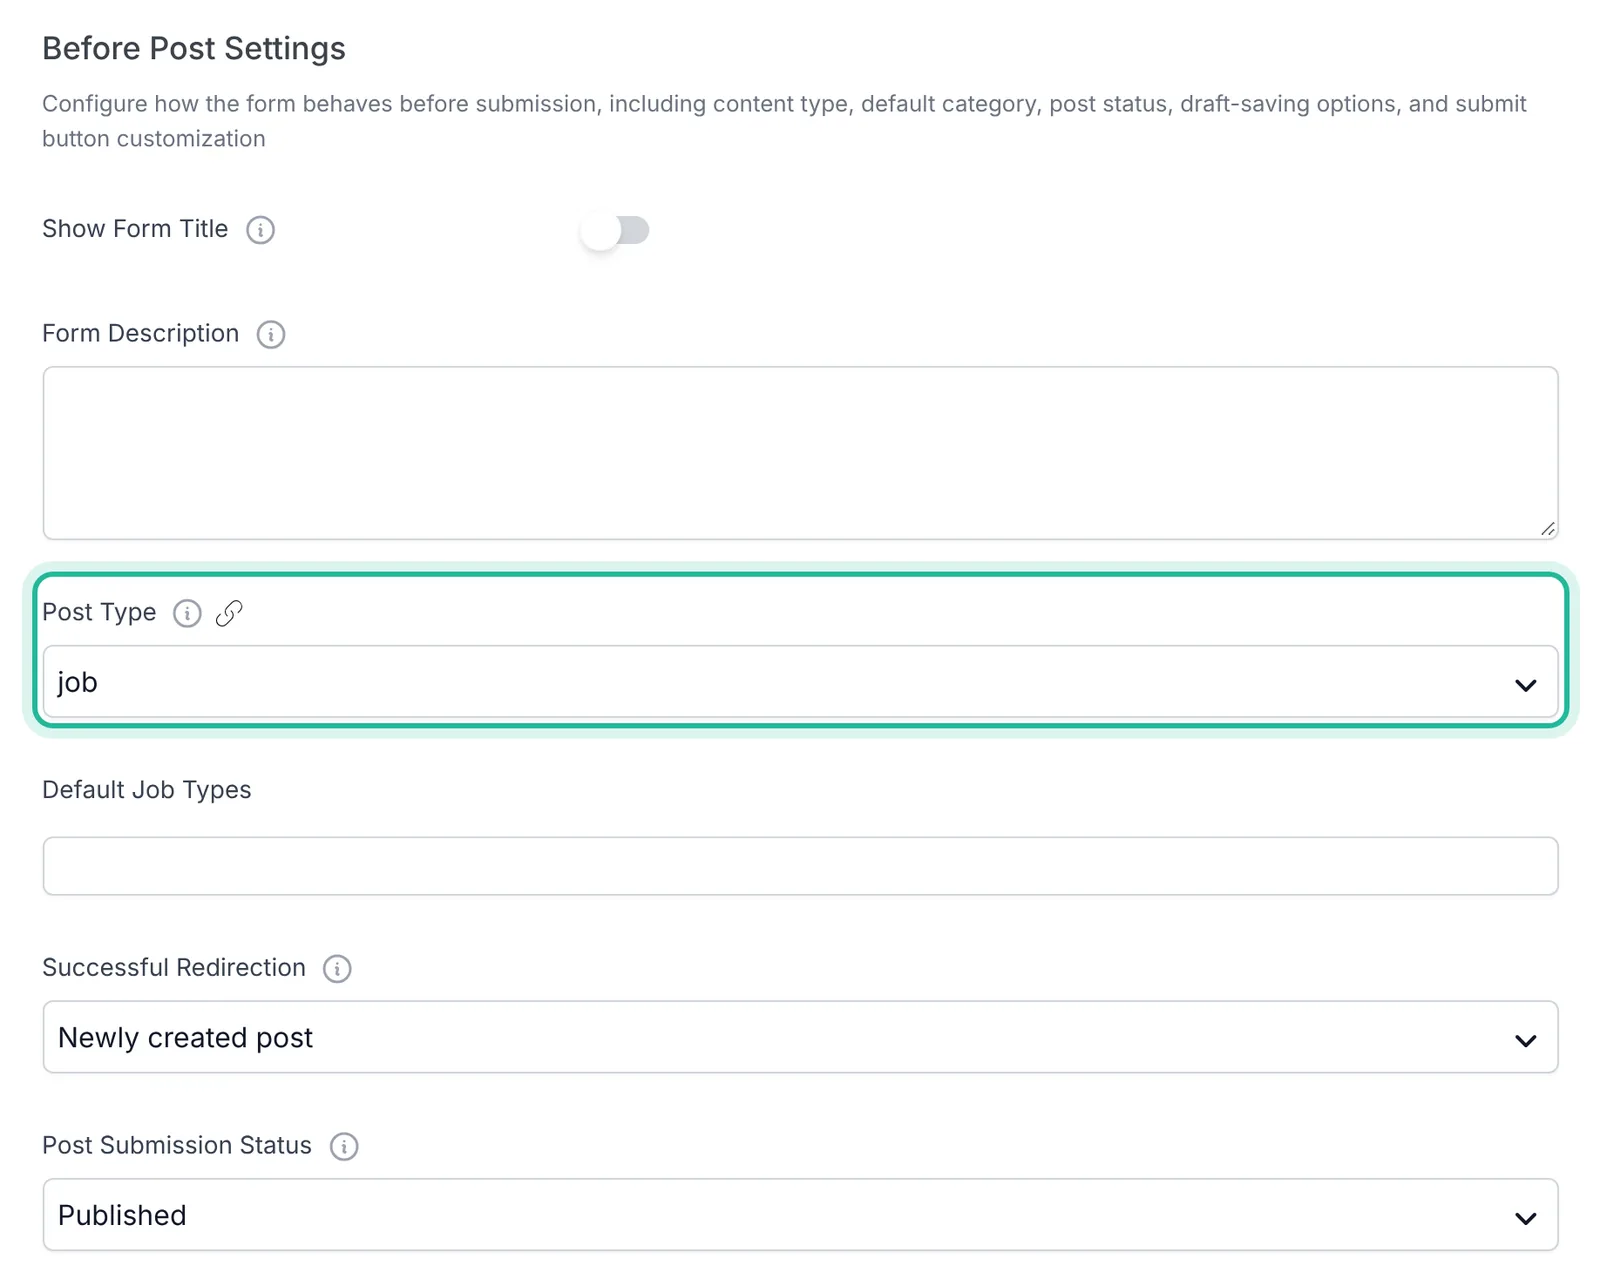
A little lower, under Posting Control, set Post Permission so only logged-in users can post. Employers need an account to pay and to manage their listings later. To let them sign up, turn on registration under Settings → General in WordPress, or send them to the Login page WPUF creates.
Charge Employers for Each Listing
This is where the board starts earning.
- In the form settings, open Payment Settings.
- Switch on Enable Payments.
- Set Choose Payment Option to Pay as you post.
- Enter your price in Charge for each post.
- Click Save Form.
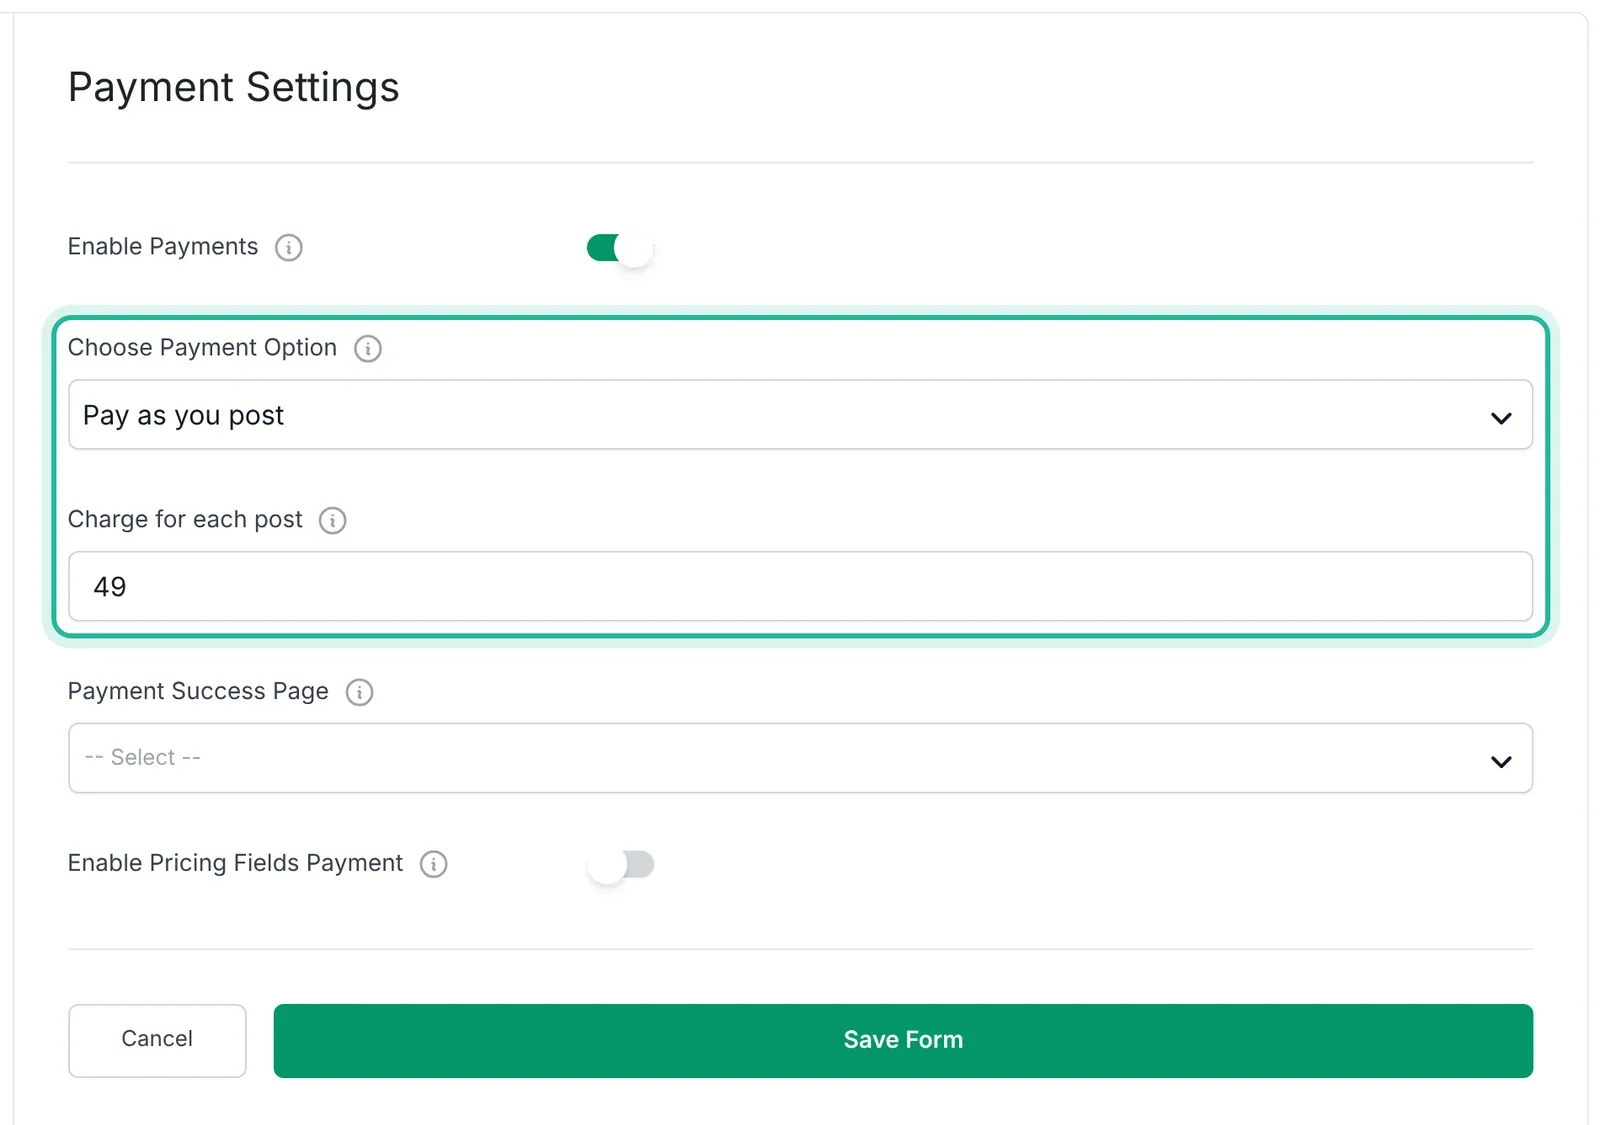
We set the fee to $49 for this demo. Pick a price that fits your audience. A niche board with hard-to-reach candidates can charge more than a general one.
There is a second option in the same dropdown. Mandatory Subscription asks employers to buy a subscription pack before they can post. That suits agencies and companies that hire often. You can even combine the two. Tick Pay-per-post billing when limit exceeds, and employers who use up their pack pay for each extra listing instead of getting blocked. You create packs under User Frontend → Subscriptions, where each pack sets how many posts of each post type it includes.
Make Listings Expire on Their Own
Stale jobs hurt a board. Candidates apply to roles that were filled weeks ago, and employers stop trusting the site. Post expiration fixes this, and it is also what makes per-listing pricing work. Each payment buys a set number of days.
- In the form settings, open Post Expiration.
- Switch on Enable Post Expiration.
- Set Post Expiration Time to 30 and Duration Type to Day(s).
- Set Post Status to Draft, so expired jobs leave the board but stay in your records.
- Tick Send post expiration email to author and write a short Post Expired Message.
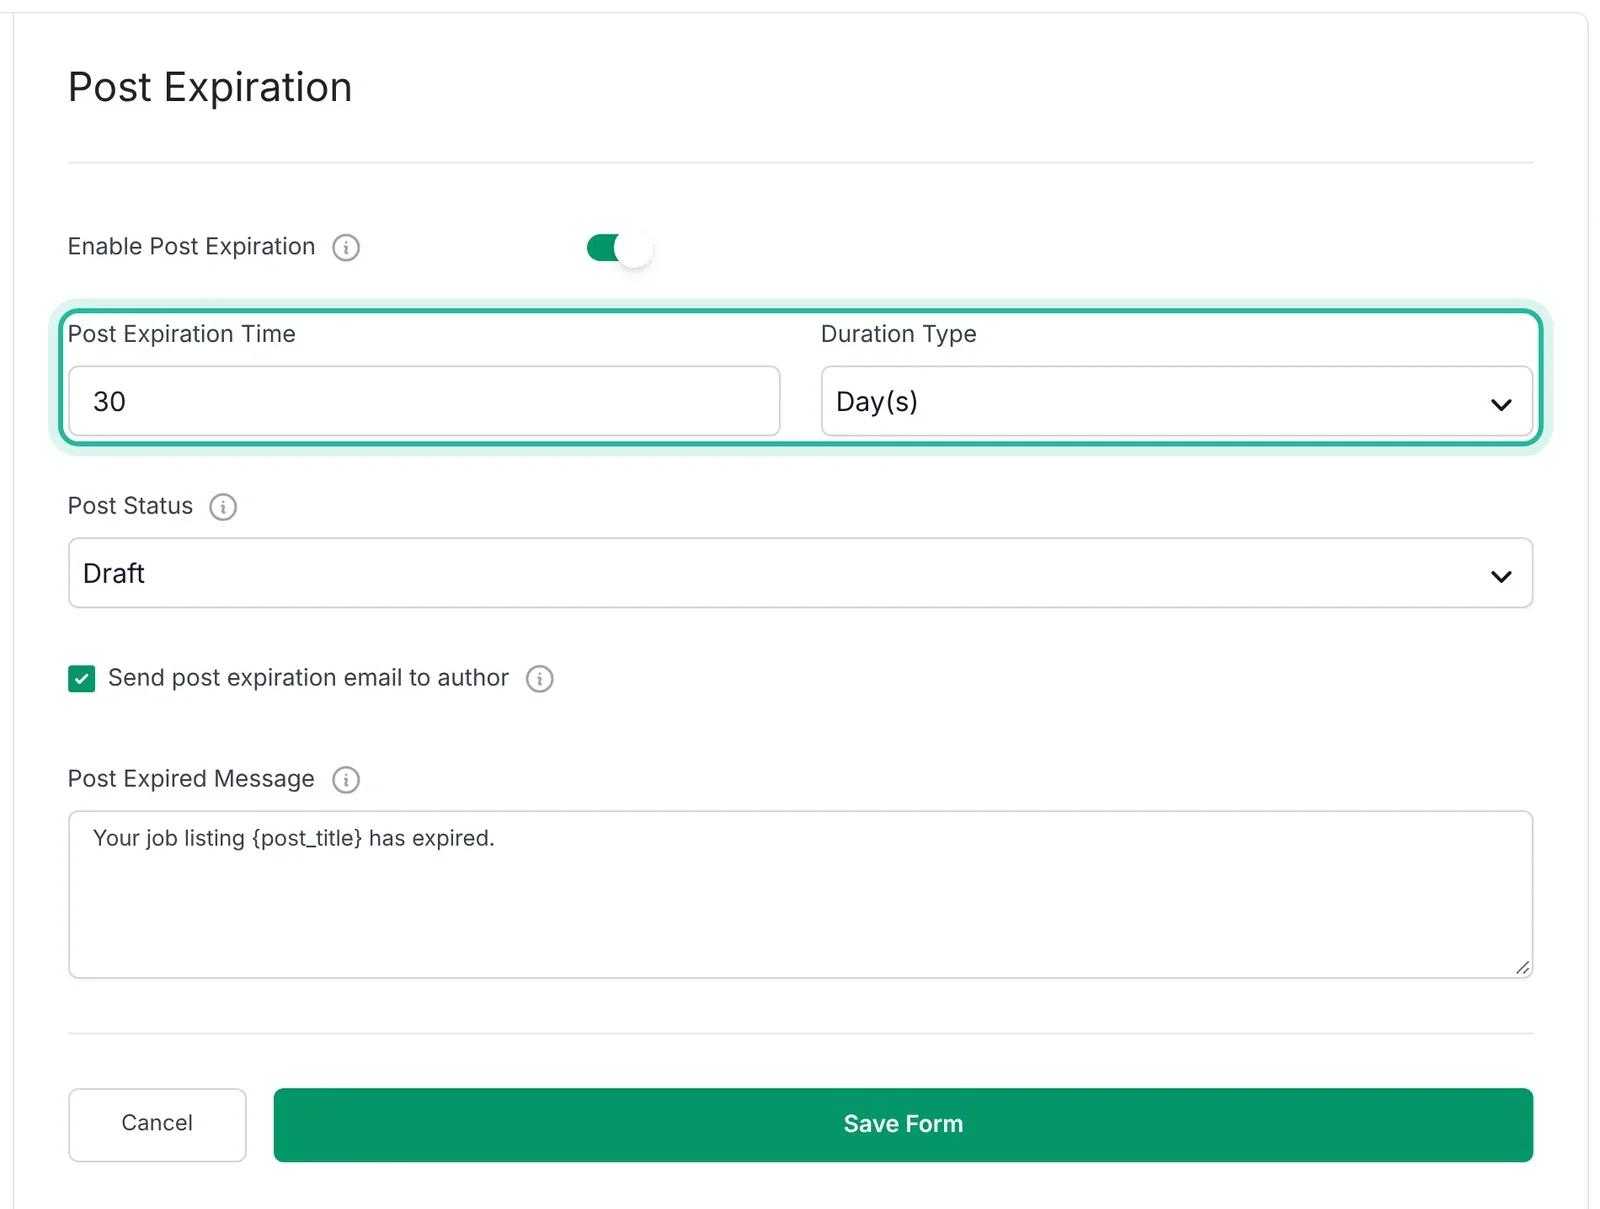
The expiry email is a good chance to win repeat business. Remind the employer that the role is off the board, and invite them to post again if they are still hiring.
WPUF stamps the expiry date on each listing when the employer submits it. It then checks for expired listings once a day through WP-Cron. So if your site gets very little traffic, or your host turns WP-Cron off, set up a real server cron job so expiry runs on time.
Show the Job Details on Each Listing
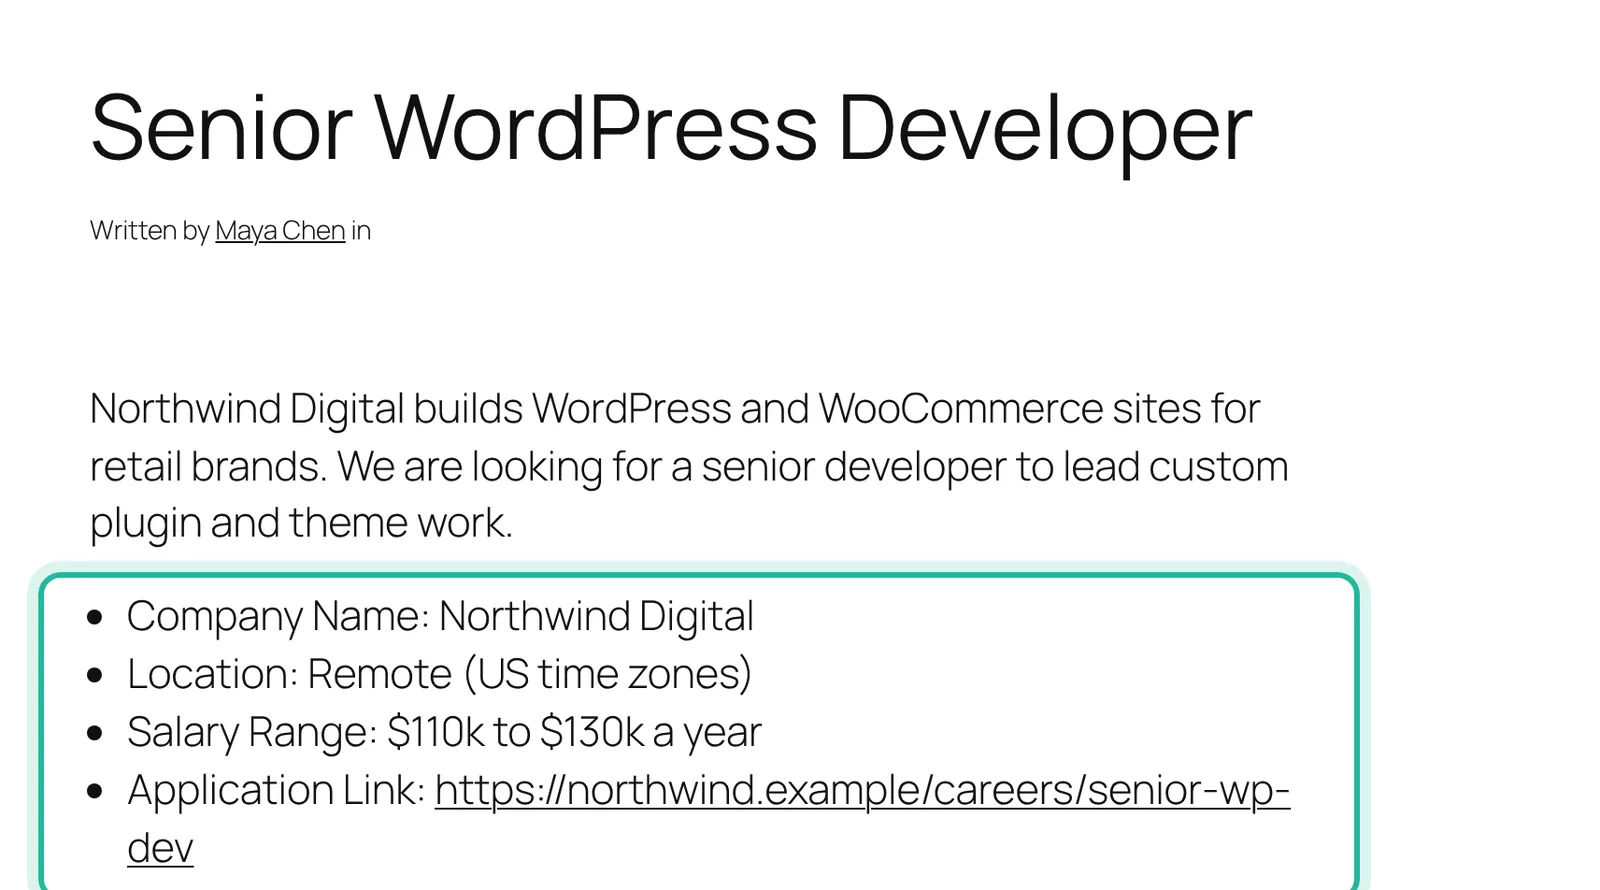
Company, location, salary and the application link are saved as custom fields. WPUF can print them under the job description for you.
- Go to User Frontend → Settings and open Frontend Posting.
- Tick Custom Fields in post and save.

This gives you a clean list of details on every job page with no theme work. You can style it later, or swap it for your own layout with a block theme template.
Publish the Form on a Page
Employers need a place to post. Give them a "Post a Job" page.
- Copy the form's shortcode from the Post Forms list. It looks like
[wpuf_form id="19"], with your own form ID. - Create a new page called "Post a Job" and paste the shortcode into it.
- Publish the page and add it to your menu.
Logged-in employers now see the form with your price at the top. WPUF adds that notice by itself, so nobody is surprised at checkout.
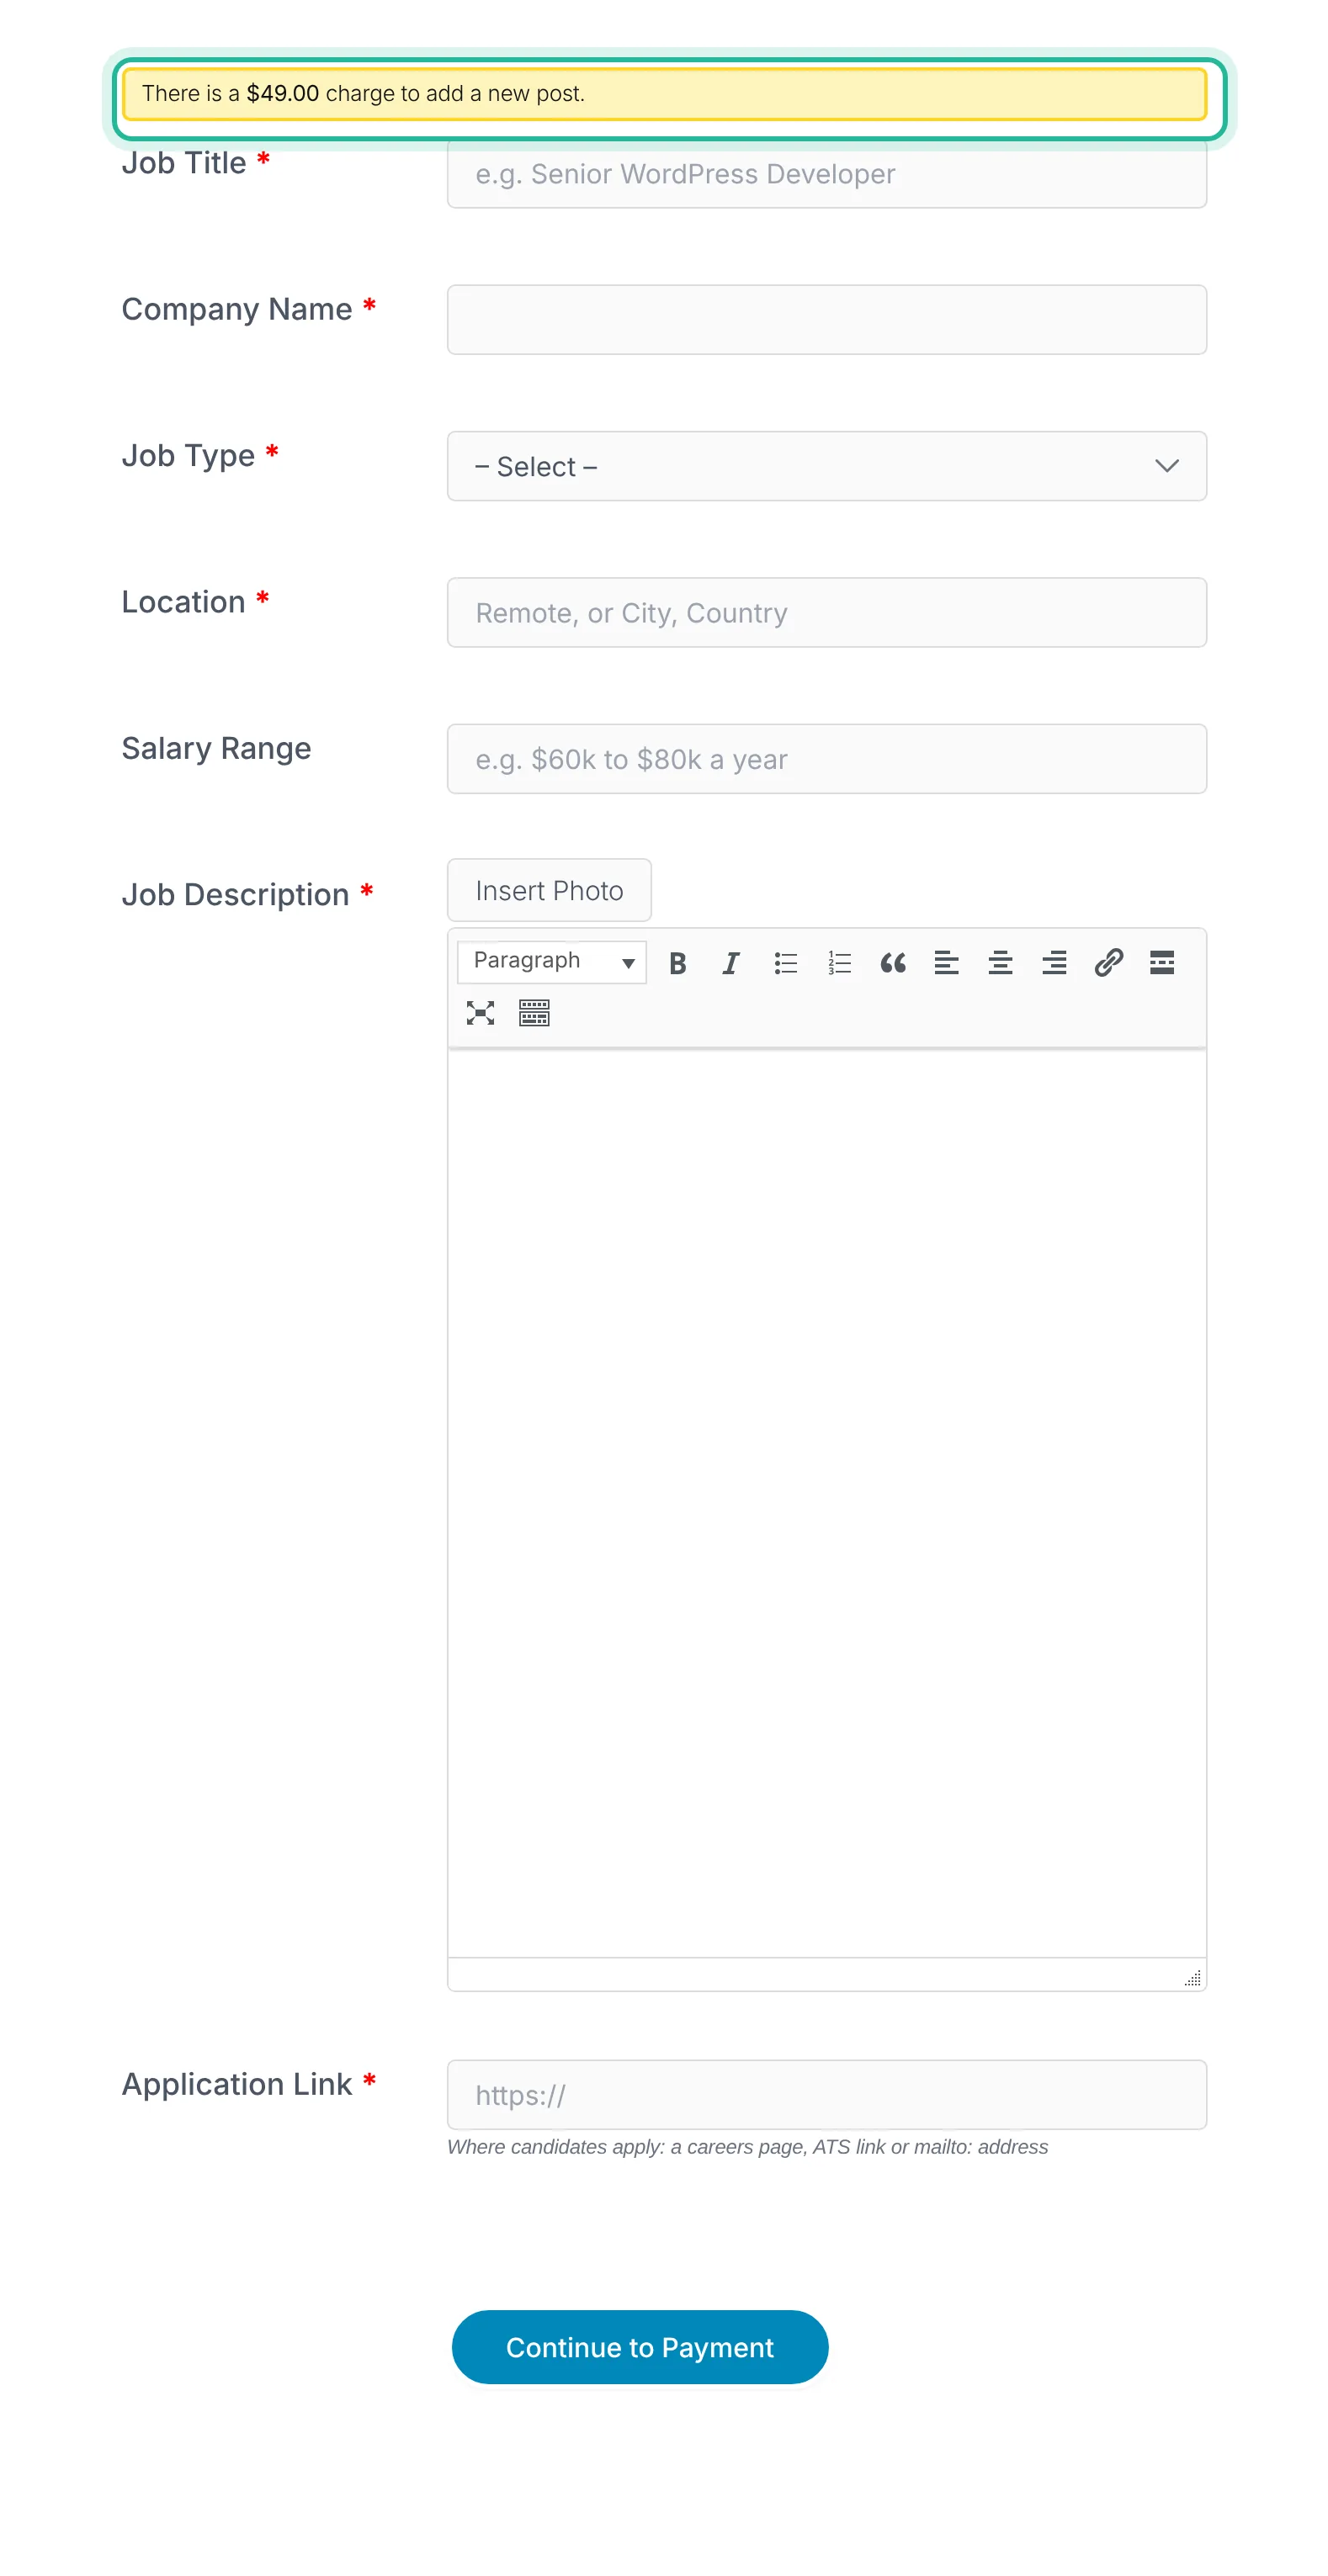
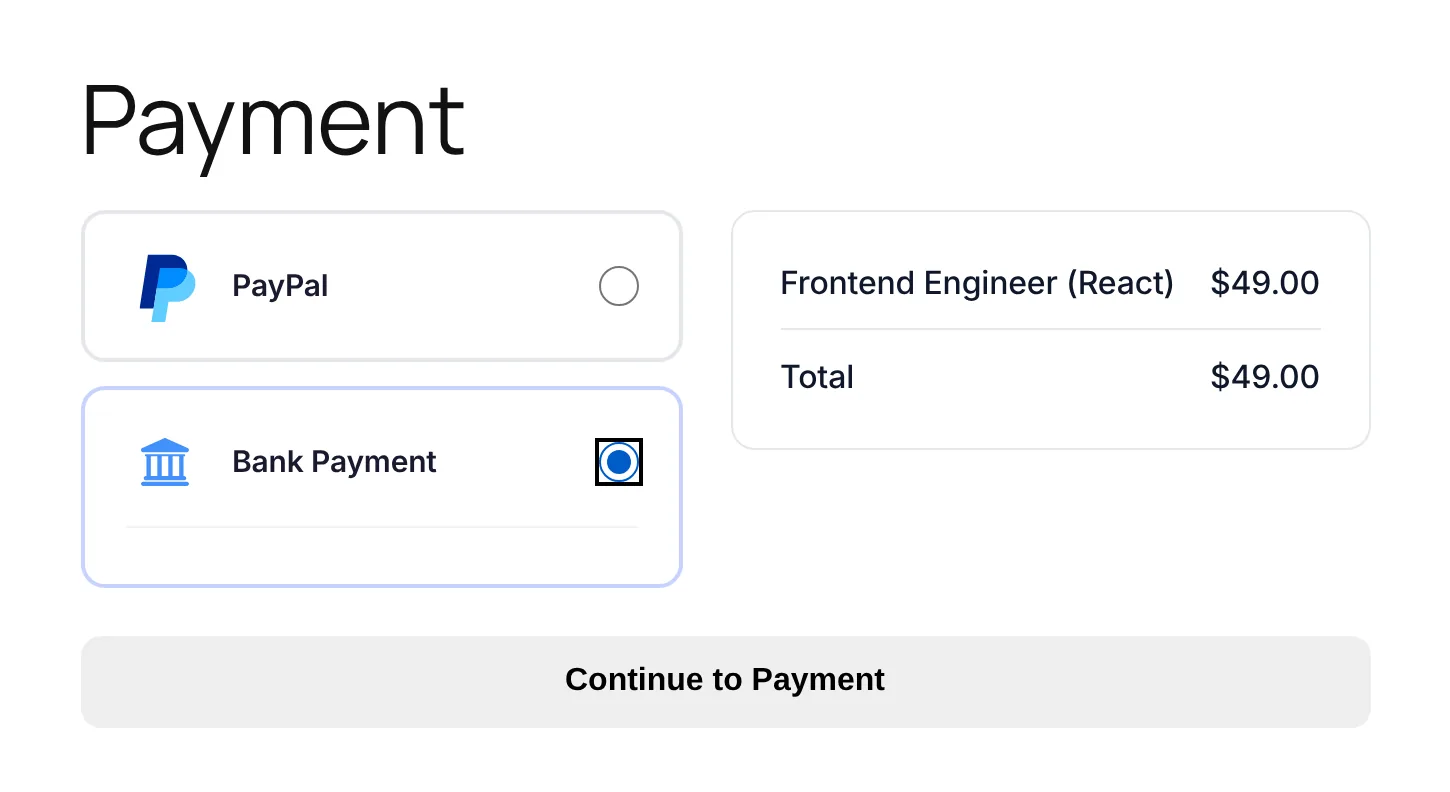
When an employer submits the form, WPUF takes them straight to the Payment page. They choose PayPal or Bank Payment, see the job and the total, and continue.
Approve Payments and Let Employers Manage Their Jobs
The job stays hidden until it is paid for. Here is what happens next.
- PayPal payments complete on their own, and the job goes live.
- Bank payments wait for you. Go to User Frontend → Transactions and open the Pending tab.
- Check that the money arrived, then hover over the transaction and click Accept.
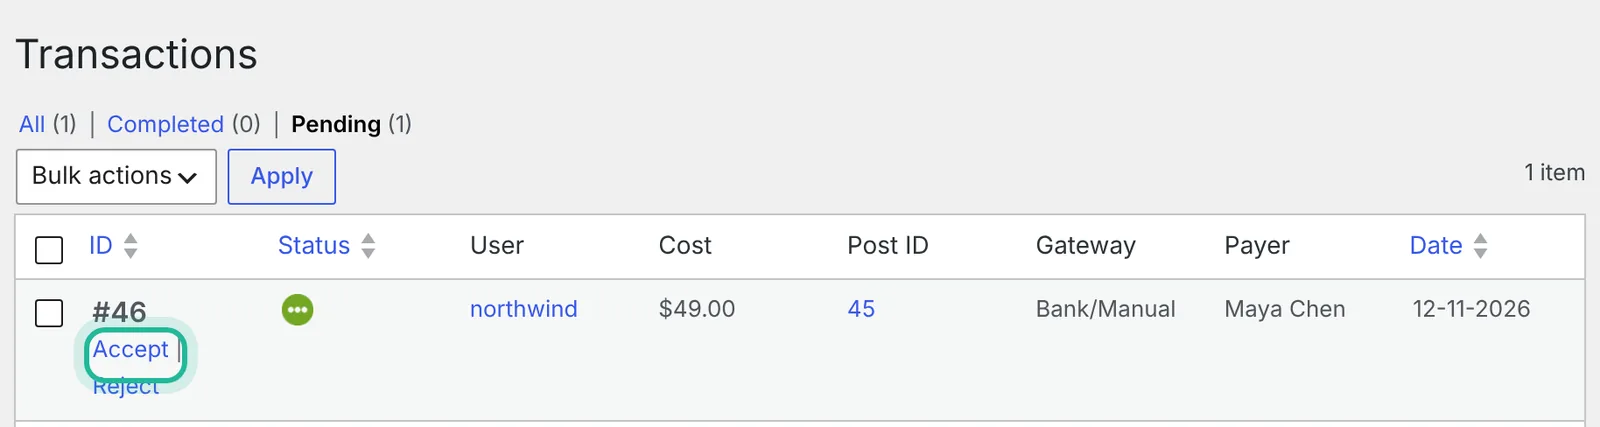
Once you accept the payment, the job publishes right away.
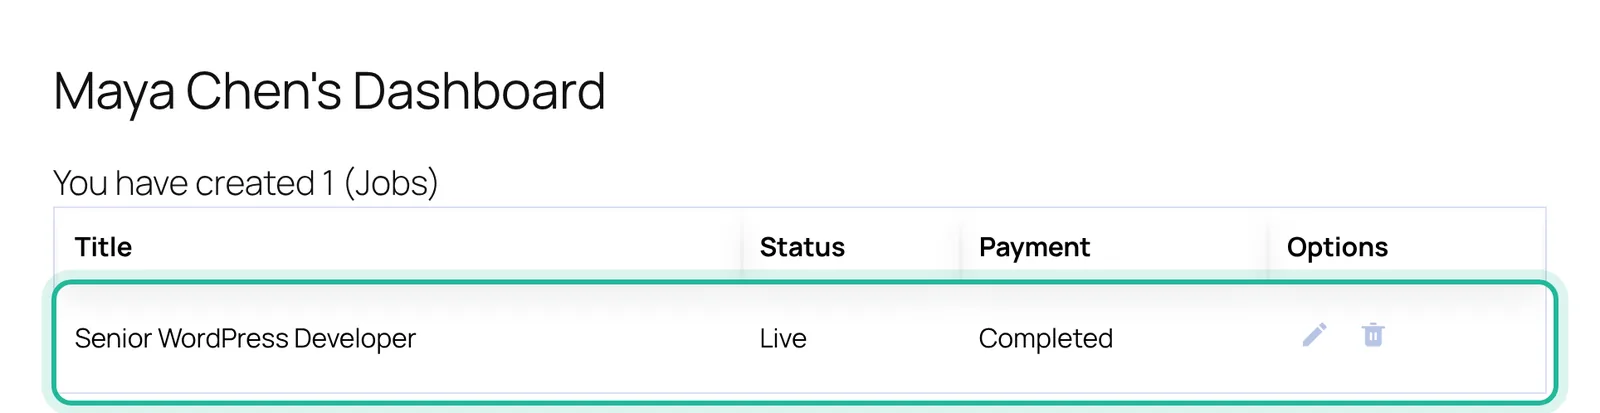
Employers can follow all of this from their own dashboard. The setup wizard creates a Dashboard page with the [wpuf_dashboard] shortcode. Change it to [wpuf_dashboard post_type="job"] so it lists jobs. Each row shows the status and the payment state. Unpaid jobs show Awaiting Approval with a Pay Now link, so employers can finish a checkout they left. Paid jobs show Live and Completed, with edit and delete buttons.
And here is the finished listing, with every detail the employer entered.
Plan for Applications and Search
WPUF runs the employer side of the board. Two candidate features come from elsewhere.
- Applications. WPUF does not track applicants or store résumés. The Application Link field sends candidates to the employer's own careers page or inbox. For most small boards that is enough, and it keeps you out of handling personal data.
- Search and filters. Your jobs archive lists every live role. To let candidates filter by Job Type or location, add a search and filter plugin that supports custom post types.
Get Answers to Common Questions
Do I need WooCommerce to charge for job listings?
No. WPUF has its own checkout. It takes payments through PayPal and Bank Payment in the free plugin, and through Stripe with WPUF Pro.
Can I charge different prices for different kinds of listings?
Yes. Pay as you post is set per form, so you can build a second form with a higher price, such as a featured listing form. Each form keeps its own fee and its own expiry period.
What happens to a job when it expires?
WPUF changes it to the status you chose, such as Draft. It disappears from the board but stays in your database, and the employer gets an email if you turned that on.
Can employers edit a job after they pay?
Yes. They can edit or delete it from their dashboard. You can also limit how long edits stay open with Lock User Editing After in the form's General settings.
Can I sell bundles of listings to companies that hire often?
Yes. Switch the form's payment option to Mandatory Subscription and create packs under User Frontend → Subscriptions. Turn on pay-per-post billing for extra listings so employers are never blocked when a pack runs out.
Launch Your Paid Job Board
You now have a job board that earns from day one. Employers post from the front end, pay before their job goes live, and manage everything from their dashboard. Listings clear themselves after 30 days, so the board always looks current.
Start with one form and one price. Once employers are paying, add a featured listing form at a higher price or a pack for repeat hirers. Get WP User Frontend Pro to add listing expiry and the Job Type field, and start charging for your first listing this week.