


How To Create a Travel Accessories Website Using WordPress in Minutes
According to research, the total revenues of the travel & tourism industry are expected to reach $540bn by this year 2021, an increase of $200bn compared to 2019.
Travel & tourism business is on the rise by producing remarkable profit. Having a well-captivated online travel shop could add more value to your business & generate significant outcomes. If you're an experienced traveler & have been exploring different places for a long time, there is a great opportunity for you.
Revenue in the travel accessories items is projected to reach US$164,841m in 2021.
Statista
You could create a travel accessories website and help people buy their travel materials to make their travel experience smooth & enjoyable.
There are different ways to create your travel accessories website in WordPress. But in today's tutorial post, we're going to use – Dokan, a WooCommerce powered multivendor marketplace plugin with 70000+ active installation. It has some amazing features & functions that will surely add more value to your marketplace. Also, you can earn a good amount of commission after your seller makes a sale.
So let's get started with the tutorial and follow the process step-by-step. Before we move forward, let's know the things that you consider before starting a business with a travel website:
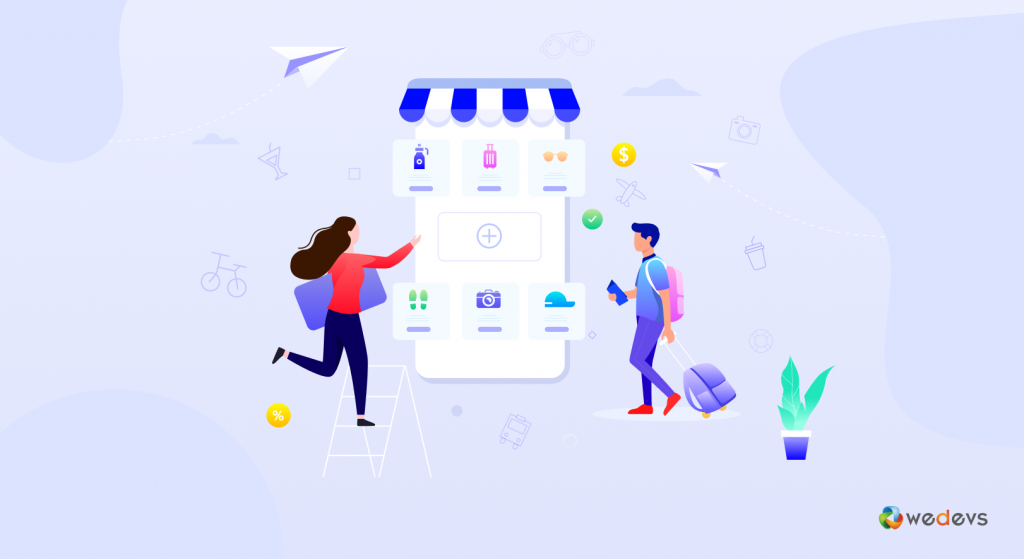
Things To Consider Before Creating a Travel Accessories Website
Starting any business requires effort and patience. Plus, you need to have a proper plan in hand to reduce errors and costly blunders. From proper investment to generate revenues, you have to rely on your business plan to go forward.
As said above, the tours & travel business is growing rapidly. After a difficult period of staying at home due to the pandemic, people are starting to explore different places. It's a win-win decision if you can create a travel accessories shop online and sell items that help people to make their travel experience better, easier, and comfortable.
Let's shortly explore what you should consider before starting your marketplace:
- Determine your target market
- Pick the types of products you want to sell
- Research your products & business needs
- Pick your eCommerce platform
- Create a marketing plan
- Get up-to-date with the latesst travel accessories
- Check market fitness.
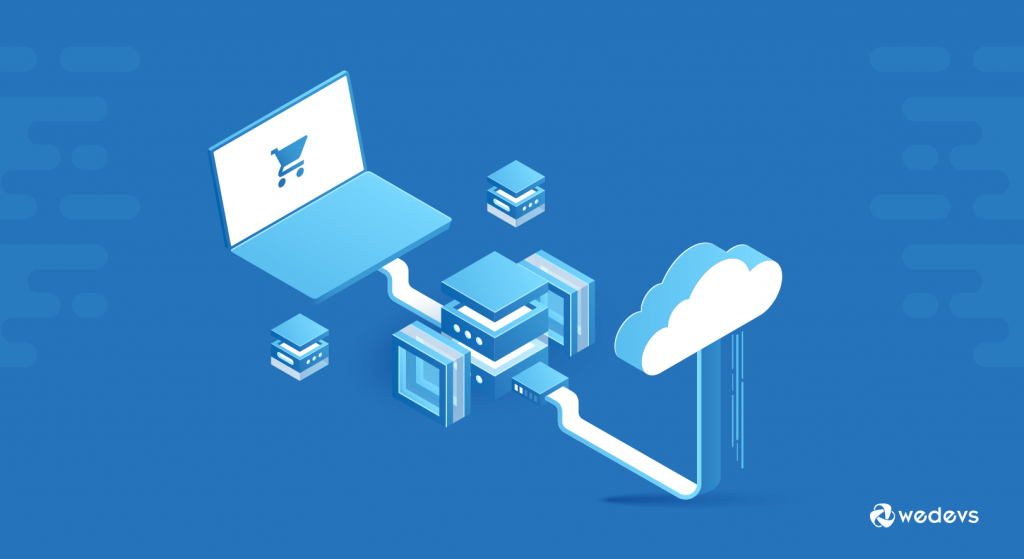
Create a Travel Accessories Website in WordPress Using Dokan
Before you start you need to add some plugins & follow some guidelines in order for a smooth configuration process.
Prerequisites to Build Your Travel Accessories Website
- Reliable hosting, domain, and SSL
- WordPress and WooCommerce
- Dokan free (and Dokan Pro for advanced features and modules)
- Compatible Theme
Step 1: Setup and Configure Domain, Hosting & WordPress
First, you need to choose your site's domain name. After that, you have to buy a hosting plan and then install WordPress on your server. However, if you have already built your WordPress site, these are common terms for you.
But in case you don't know what are the basic configurations, check out below:
- Domain Name: Let's say you want to create a travel accessories, think a unique name for your site. www.example.com. There are number of platforms to choose a domain name from. But try to keep it simple, fresh and readable.
- Hosting: It's a form of a digital store. Here you're allowed to store your site's details, database information and other inportant data here. In other words, it's also known as a server.
- Install WordPress: Once you're done with these configuration, the next step to install WordPress on your server.
After you're done with all these configurations,
Step 2: Install WooCommerce
To create an online shop with WordPress, you need to install the WooCommerce plugin. It supports users to create a single store that adds eCommerce functionalities to your online shop. You don't need any major programming skills or development processes.
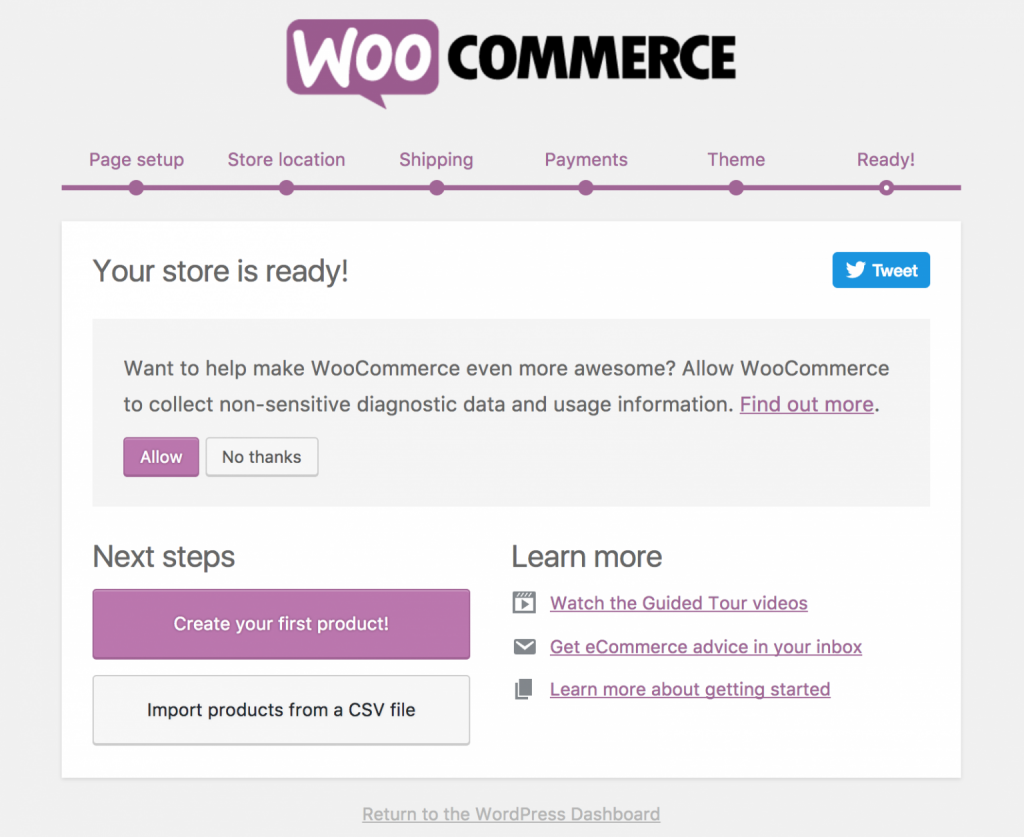
Just install and start configuring your site. To do that navigate Dashboard→ Plugins→ Add New Plugins→ WooCommerce→ Install→ Activate.
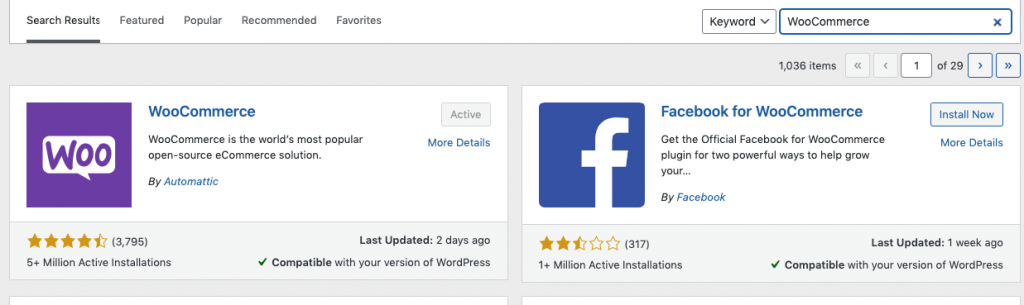
Once you activated the plugin, you'll get a simple setup wizard. Here you just need to add some information. Such as page setup, store location, shipping details, payments, and themes.
Step 3: Install Dokan
Next up, the main part comes in. Here you need to configure Dokan in the right direction to get an overall setup for your marketplace.
To do that, you need to navigate to WP-Admin> Plugins> Add Plugin> Dokan >Install & Activate.
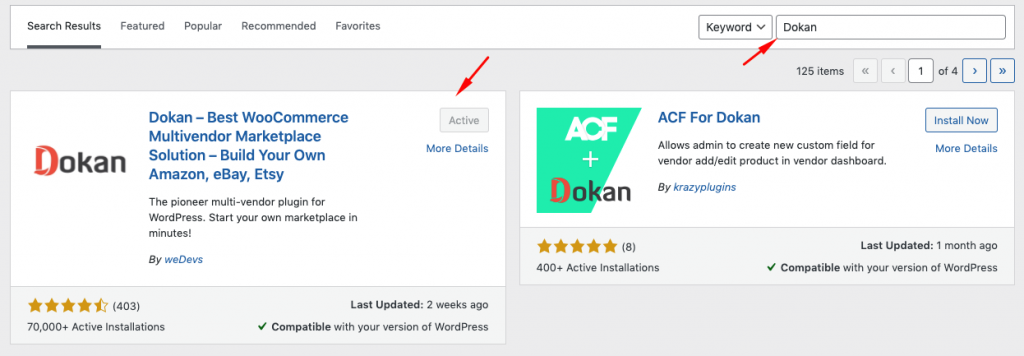
Note: In case you don't install WooCommerce before Dokan, it will give you a reminder within the dashboard.
Step 4: Pick a Compatible Theme
The theme is the backbone of a website. Apart from giving your site a better structure, a website theme can make your website easy navigation, better UX/UI, and improves overall engagement.
Sometimes users don't pay any heed to the site's structure. And this could be a vital reason to lose customers and interaction. That's why you should pick up the right theme that fulfills your requirements & give users a better UI.
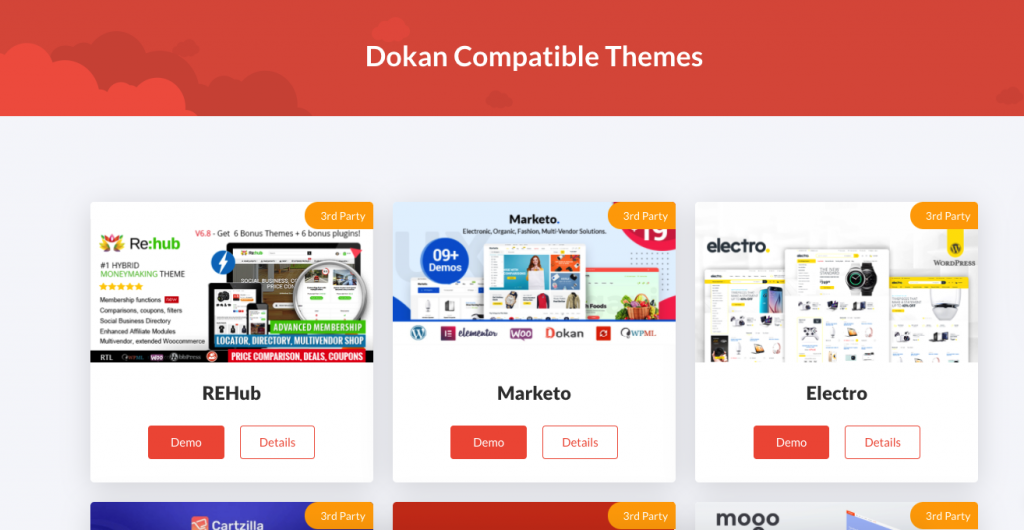
Thankfully, Dokan has its own compatible theme list. And they all are fully compatible with WooCommerce. Choose the most suitable one that fits your requirements and helps you adjust your site's structure in a better way.
However, you can start your marketplace with a FREE theme. But we recommend you go with the PAID one. It will give you more functions & advanced features to enrich your customer experience.
In case you don't how to choose a perfect marketplace theme for a website, you can check out the guide below:
Related read: How to Choose A Perfect WordPress Marketplace Theme
Step 5: Useful Configuration of Dokan
Once you're done with the installation part, now you have to configure Dokan settings. You must be careful while changing these settings. To do that navigate to WP Admin→ Dokan→ Settings→ General.
Here you can configure two options. Site's options and vendor store options.
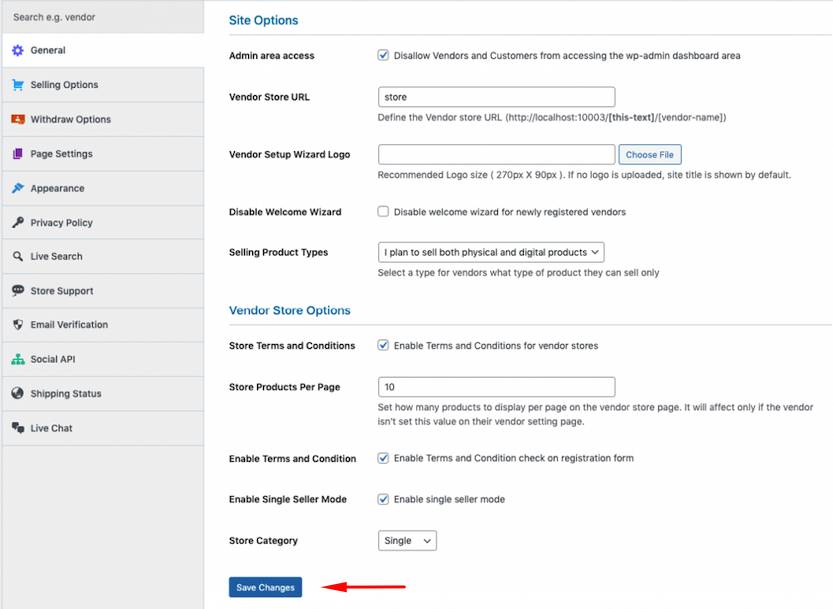
This setting totally depends on you. The more feature you will enable from the backend, the more features vendors will get on their store. For example, product per page, store category, enabling terms & condition page, etc.
Get a detailed guide right from this documentation to learn how to configure Dokan settings step by step.
Step 6: Set Up Vendor's Store
You are almost done. Now you need to launch your marketplace. But before that, you need to configure your settings so that vendors can register on your website.
For that, navigate to Dashboard → Settings → General. After that, turn the ‘Membership Option‘ on. This will enable users to become your vendor easily.

Step 7: Vendor's Registration
Here you have two options. Either you can have your own store, or you can let visitors become your vendor by registering to your site.
After enabling this option, a registration window will appear for visitors. Let's see how vendors can register on your marketplace individually.
There are two options as you can see. ‘I'm a customer and ‘I'm a vendor‘.
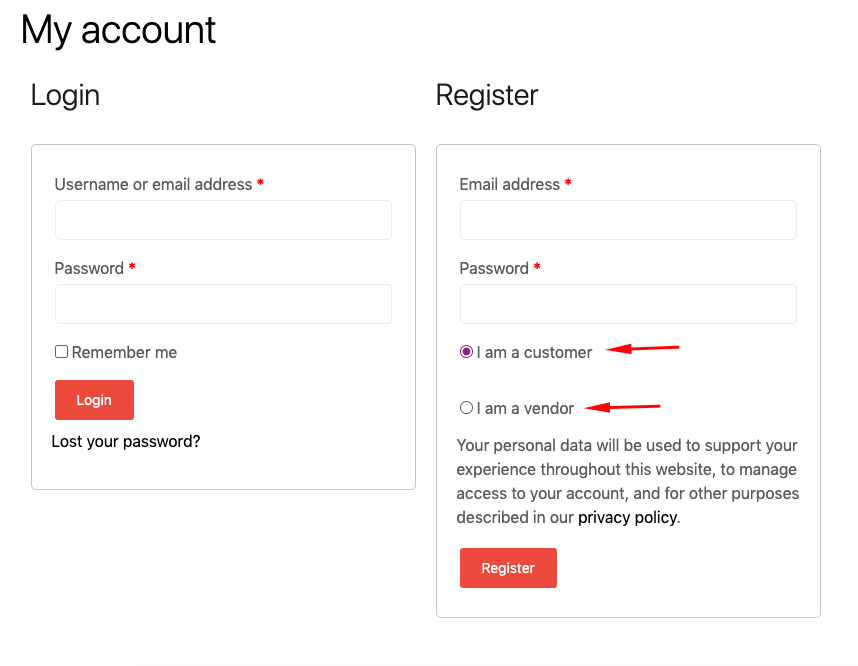
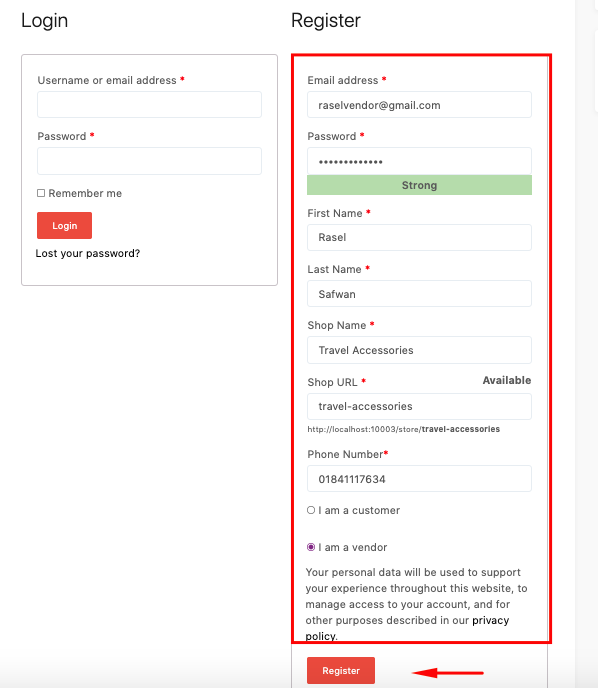
As a vendor, you should choose, the second option. And fill the fields with valid information. Like email address, password, name, shop name, etc.
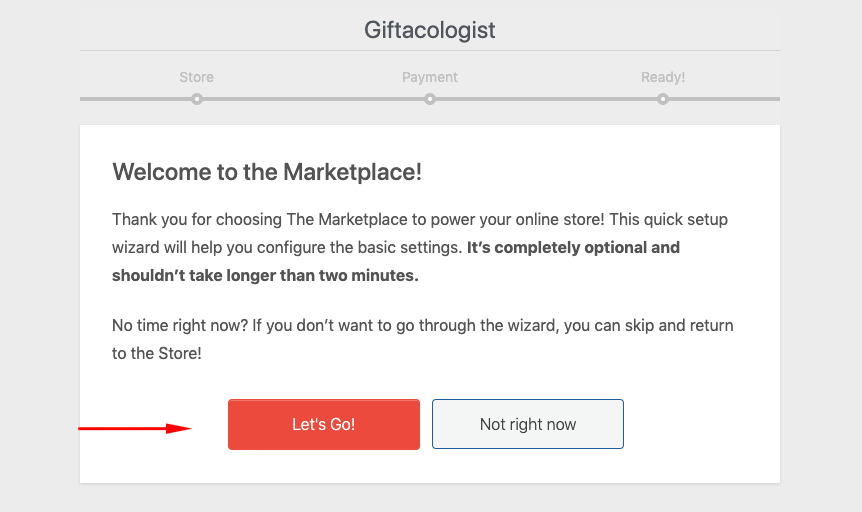
Once you're done with this, vendors will get a setup wizard to move forward. The vendor can escape it or follow the process. To cancel it, they need to click the ‘Not Right Now‘ button.
Coniguring Vendor Dashbaord
After finishing the setup wizard, vendors will be redirected to the Vendor Dashboard page.
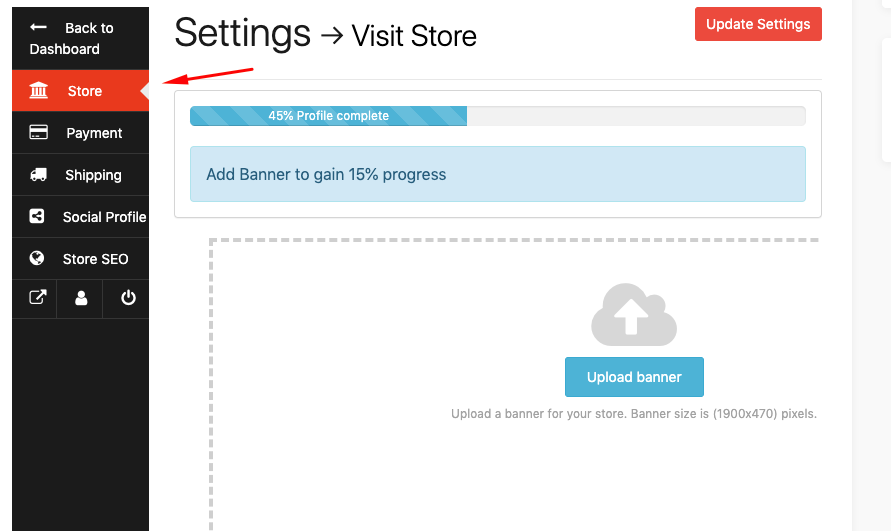
From here they can easily edit their profile. For example, they can upload a profile photo, banner image, address, phone number, store description, etc.
Vendors can go through this article to more about vendor dashboard customization.
Adding a Product
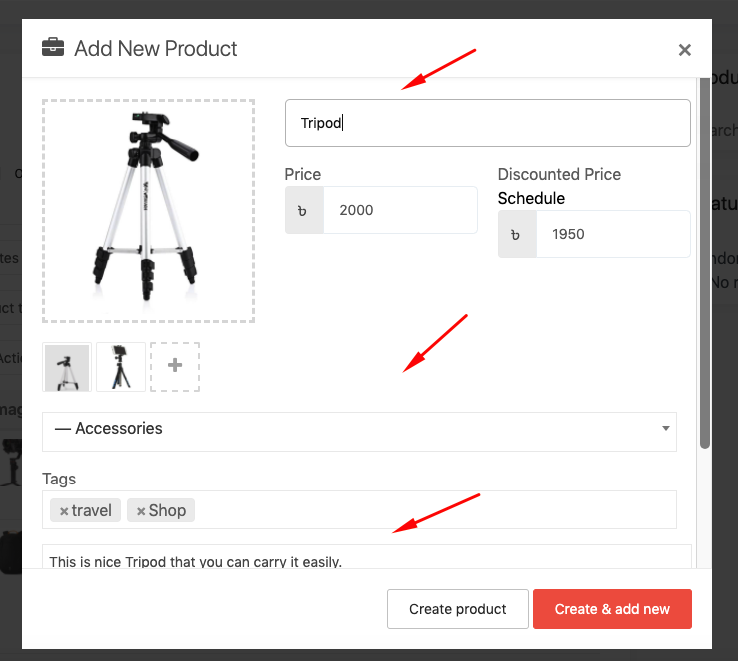
After done with the general settings, now you can upload your first Travel accessory item. To do that, navigate to product→ Add New Product.
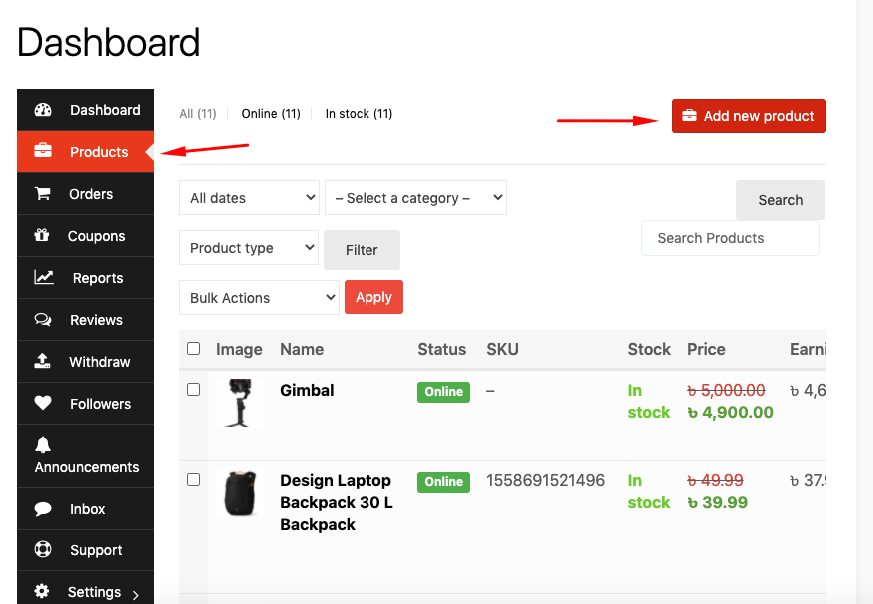
Now after clicking on the Add New Product. The product information window will appear. And it will ask to fill all the requirements. Here vendors need to insert product name, price, photos, tags, and a description.
After adding the products, they can see those products along with all the details.
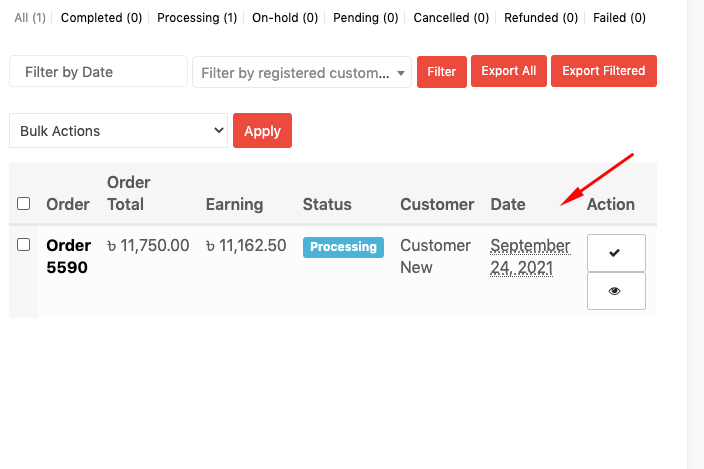
Managing Orders
If a customer buys any product from the store, the order details will appear here. After that, the vendor can also view the orders. They can approve or remove orders whenever they want.
Read our documentation to get a detailed guide on vendor order management.
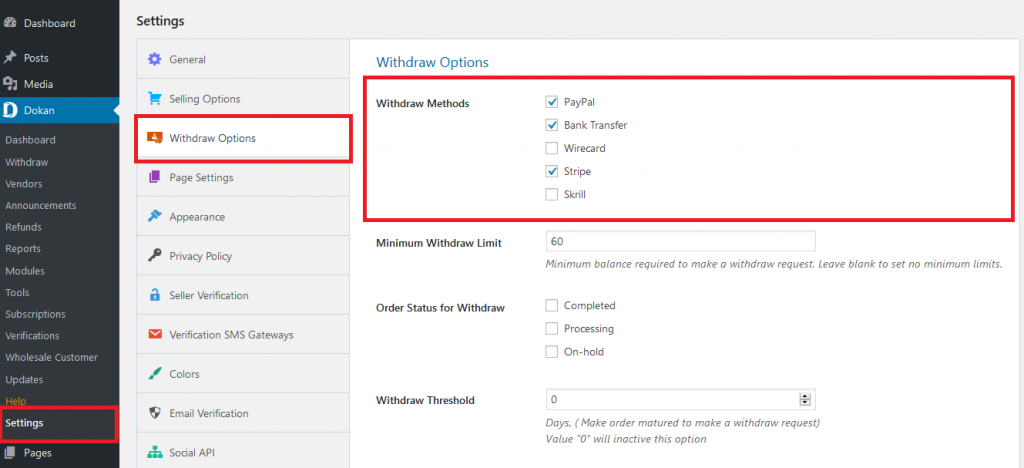
Configuring Withdrawal System
The vendor can withdraw all the payments from this section. In this case, the admin needs to set the payment gateways & controls all the settings from the backend. Such as withdrawal methods, set limits, order status, and withdrawal threshold, etc.
There are 5 types of payment gateways you can use with Dokan.
- Paypal
- Bank Transfer
- Wirecard
- Stripe
- Skrill
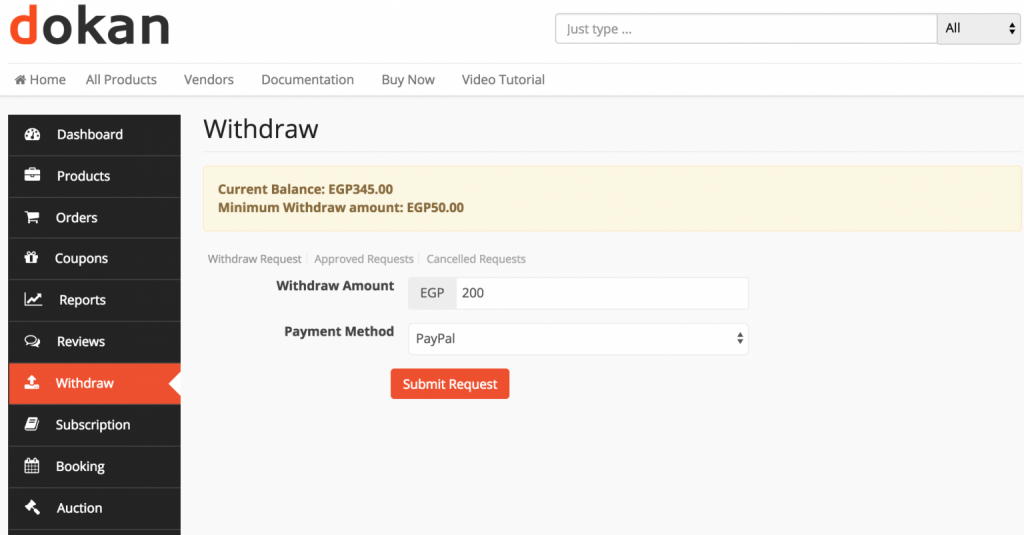
To withdraw earnings, vendors need to navigate Dashboard→ Withdraw. Insert your amount here and then hit the Submit Request button. That's it!
Read our documentation to learn how to manage the vendor's payment withdrawal process.
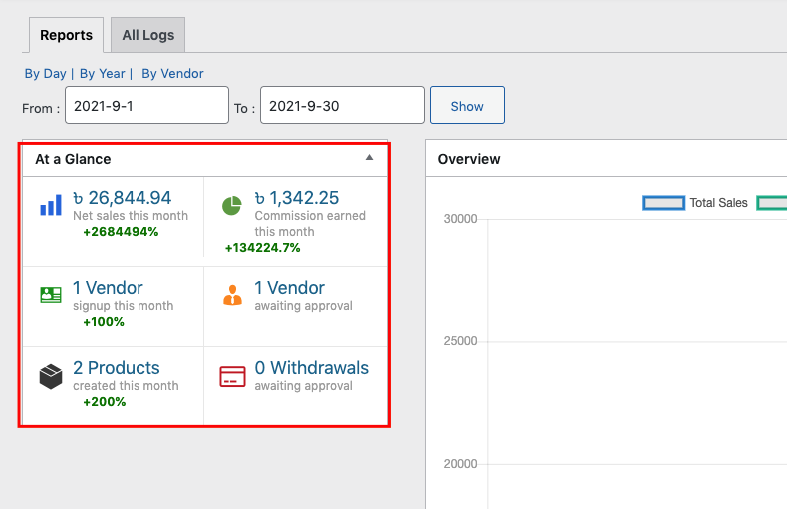
After your vendors sell any products from their store, you as an admin will get the commission. To see your total earnings from the commission, navigate to Dokan→ Reports.
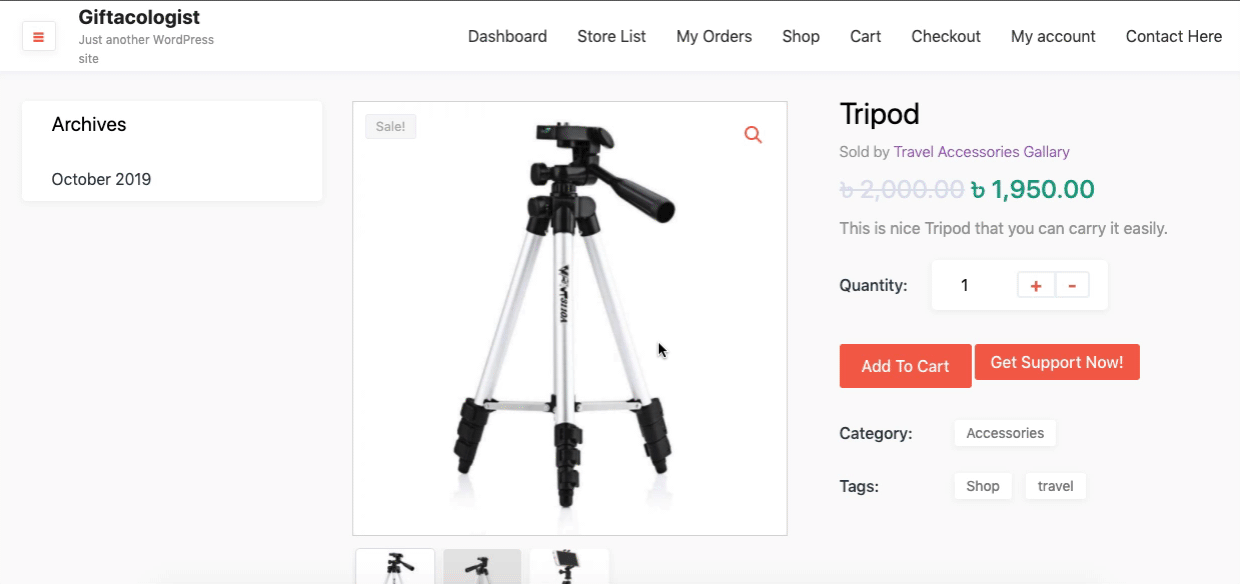
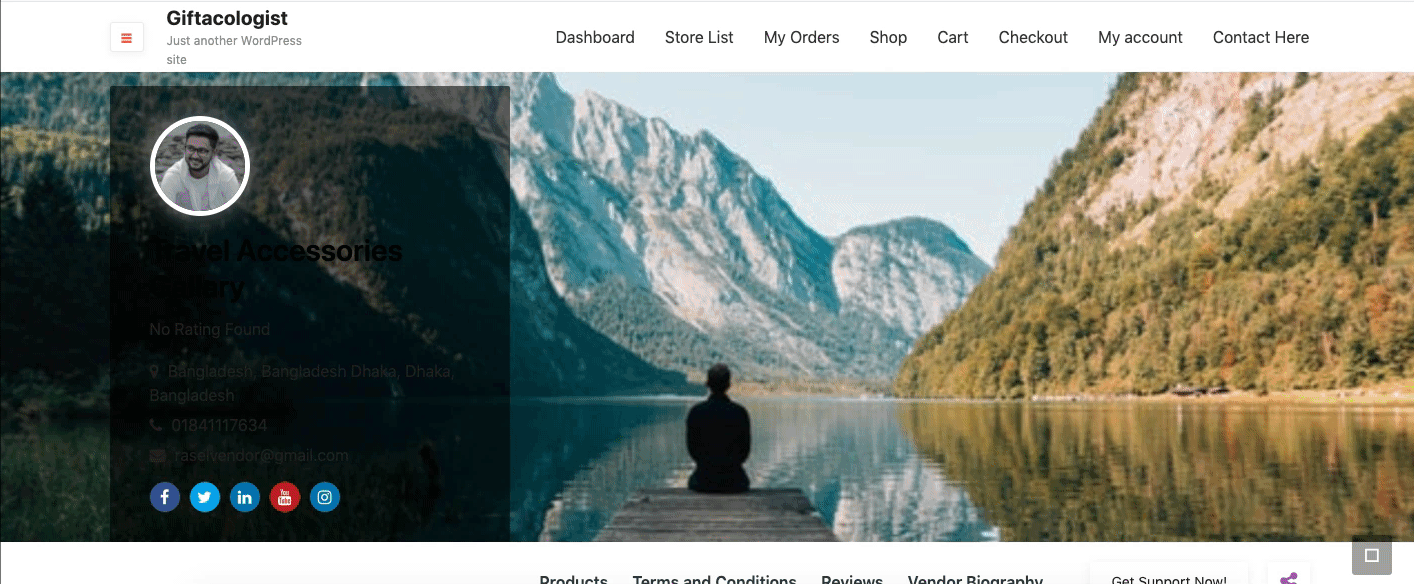
Travel Accessories Website Preview
After finishing all the important tasks on your travel accessories marketplace, you'll be able to see all the registered vendors including their store. Here is the preview of how a store will look alike.
That's it! Following this way, you can easily build your marketplace in WordPress using Dokan multivendor plugin. Now you need to find and convince the vendor to register on your marketplace. Apart from selling products, they will be the representative of your marketplace and advocate your business to the world.
Organizations should work to nurture their vendor relationships in the same manner that they focus on fostering customer loyalty
Nicole, Author of Dynamic Capital
Therefore, you need to be smart and find the right seller. Once you're done with it, profit will generate automatically. In addition, to finding the right seller, you also need to follow some rules to promote your marketplace. This will help your marketplace to get fast recognition in the SERP. For instance, you can:
- Maintain your website regularly
- Update quality web content
- Use SSL certificate
- Do SEO regularly
- Get Dokan Pro to unlock essential features
- Follow some general marketplace tips & tricks
Build Different Marketplaces with Dokan
Besides a travel accessories store, you can use Dokan to create different types of marketplaces. We've already created some marketplaces before. Like,
- Make Your Own WordPress Travel Site Marketplace Using Dokan
- Build an Electronics Marketplace with Dokan
- How to Build an Online Grocery Shop to Survive In This Global Crisis
- Create An Airbnb Alternative Site In WordPress With Dokan
- How to Create Your Own Online Music Store with Dokan
Last Words
The travel and tourism sector is always growing. If you can stay on top of the latest trends, recent updates, and proper channels, definitely, you can make your business from zero to a profitable one.
So why wait around? Let's build your dream marketplace with Dokan right now!
In case you don't want to miss anything important from us, you can subscribe to our blog to get the latest updates and trendy articles like this one.
